Making a Laminated Curved Handrail
With the stairs as a form, gluing up commercially available bending rail is easier than it appears.
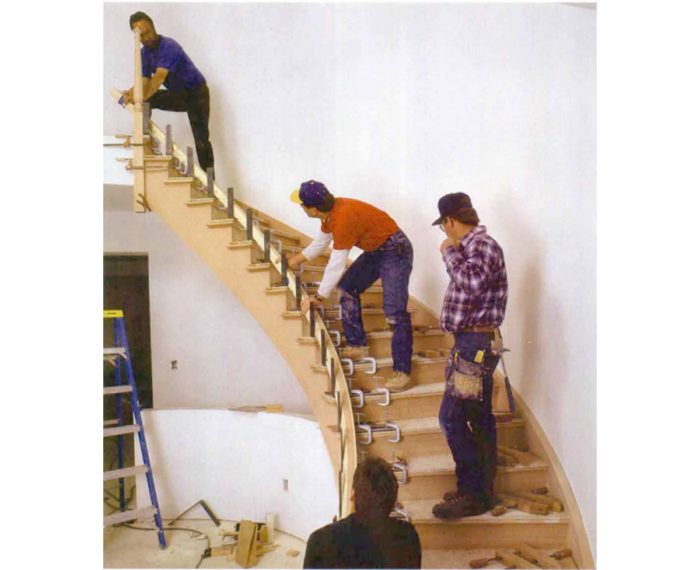
Synopsis: A resourceful finish carpenter explains how he bends thin laminations into an elegantly curved stair rail at the job site. He covers every step of the process, and argues it’s not as difficult as it may look.
As an apprentice carpenter, I admired the grace of curved handrails and marveled at the skill necessary to create them. How the stairbuilder bent oak into a rail of the correct shape and floated it so precisely above the stairs that the balusters and newels were plumb and regularly spaced seemed beyond any skills that I might hope to acquire.
Then came the day when two railing installers showed up at a house I was trimming. The skinny, adolescent helper shuttled tools and materials from the van to the house while the boss strolled around chewing an unlit cigar. Three days later, they were gone, leaving behind a couple of soggy cigar butts and a gorgeous balustrade.
Simply seeing the bending rail stock took much of the awe out of curved stair rails. Imagine a standard handrail ripped into thin, flexible strips. Glued and clamped to forms set on the stair, the strips solidify into a rail that follows the stair’s curve.
Baluster position determines the centerline of the rail
I buy bending rail from a local supplier, R. W. Specialties, but Coffman and L.J. Smith, both nationally distributed stair-parts manufacturers, also make bending rail. The bending rail that I use comes in several profiles that match standard straight railing. Each lamination has a bead milled in one side and a groove milled in the other. Adjacent strips interlock to keep the laminations in line during glue up. Bending rail is available with varying numbers of laminations. The more laminations, the thinner and more flexible each layer is. So the tighter the stair’s radius, the more laminations needed for the rail to bend without breaking. For a 5-ft. radius such as this stair has, I used a 2 1/4-in. wide rail composed of six laminations. For radii down to 30 in., seven laminations will get a 2 1/4-in. wide rail around the bend.
Also included with most bending rails are bending molds. These softwood strips are milled with a negative of the railing’s profile on their inside. Bending molds go outside the rail during glue up to protect the rail and to give the clamps purchase.
The first step in bending a rail is laying out the baluster locations. Traditionally, the face of the first baluster on each tread aligns with the face of the riser below. The sides of all balusters should line up with the face of the finished stringer. This step keeps the holes drilled in the stair to fasten the balusters solidly in the treads. I typically space the balusters on centers equal to half the tread depth at the baluster line.
For more photos, illustrations, and details, click the View PDF button below:


