
Retrofitting a Foundation
Digging and pouring a foundation with the house suspended in the air require patience, great subs, and a little sleight of hand.
Synopsis: Lifting up a house to rebuild or replace its foundation is a job for pros. A builder given the task of rebuilding a lakeside cottage calls in veteran house-movers and offers this explanation of how they managed the seemingly impossible.
It was a cold, snowy day in February when Jack Venning, a second-generation house mover, and I met to check out the project and site conditions. As the cold, wet wind blew off the lake and down the necks of our jackets, it was obvious that winter was not the time to be lifting this house in the air.
The project was the renovation of a cottage that had been sitting on an odd assortment of deteriorating wood and block piers. My clients owned the cottage but leased the land, a common lakeside arrangement here in western New England. Tearing down the cottage initially would have left them with nothing on the land and with no legal claim to the site, and getting new construction authorized would have been nearly impossible. Also, because of local regulations, leaving the cottage in place meant fewer restrictions for installing an urgently needed new septic system. The solution seemed simple. We had to keep the existing cottage and build a new foundation for it. That’s where Jack’s expertise would come in.
No place to put the house
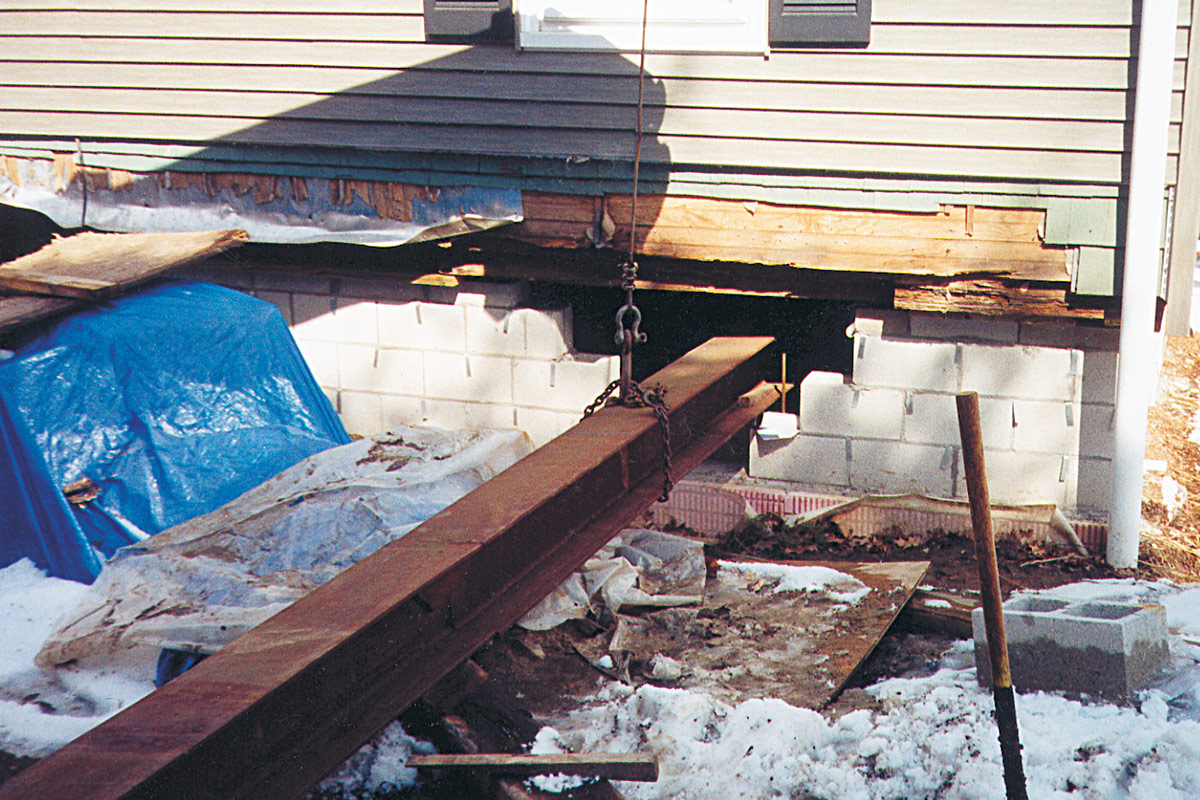
Because the leased lot was so cramped, we had no room to move the cottage away from its footprint. The only way to go was up. The building had to be lifted high enough to excavate for the footings, foundation and crawlspace. But to complicate matters, the cribbing that would support the house during all this work had to be well inside the perimeter of the footprint so that we could dig our frost-wall trenches.
The steel beams that the house was to rest on during its time in midair had to be beefy enough to cantilever from the cribbing piles out beyond the perimeter of the house. The beams and cribs also had to be strategically placed to leave space under the house for the piers and LVL beams that would support the floor of the rebuilt house.
Keeping water away from the site
Before we could start the lift, we had to think about water, both rainwater and the water in the lake that was a mere 20 ft. from the back of the house. Working with an engineer’s approved plan, we staked hay bales and siltation fencing along the water’s edge as an erosion-control barrier.
The fencing, available at most contractor-supply houses, comes with the stakes already attached to hold it upright. The hay bales were staked in place with the cut edge down so that the bales could follow the contours of the ground. We also built a 20-ft. dia. siltation pond of hay bales and fabric fencing. Any water that got into the footing trenches would be pumped into our pond where the silt could settle out before the water seeped back into the lake.
We also added some runoff-control measures of our own. For very little money, we installed gutters and downspouts on the cottage that were then connected to black-plastic flex pipe to channel roof water away from the excavated foundation hole. On the uphill side of the cottage, dirt berms and secondary hay-bale barriers helped to redirect runoff from above the cottage. With erosion-control measures in place and approved, we were ready to begin the lift.
Elevation and levitation
Our little cottage had seen seven distinct construction phases in its history. Like many area cottages, this one probably started as a summer tent platform on concrete blocks. According to some of the locals, the first structures were the remains of trolley cars from an abandoned local line. A curious rectangular kitchen with a curved ceiling suggested that our cottage may have begun as one of those trolley cars.
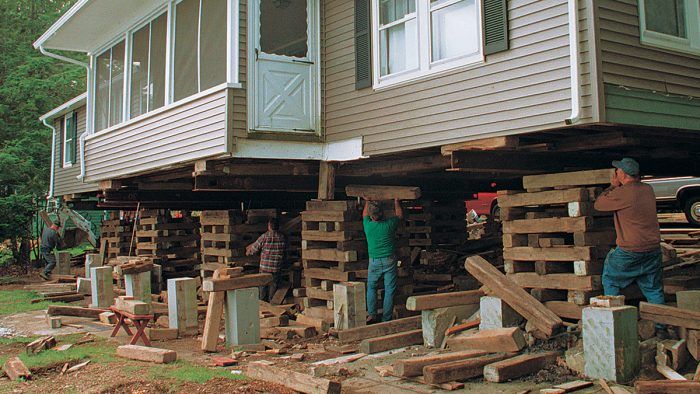
All these additions meant that the house would act like an accordion if not supported evenly during the lift. To counteract this effect, Jack spanned the width of the cottage with five 30-ft. steel I-beams, each rusted and scarred from years of house-lifting. Each beam was supported by cribbing piles set in 5 ft. from the perimeter. The cribbing piles, or cribs, served as the platforms for the beams and for the 30-ton hydraulic jacks that did the lifting.
Limited space on the lake side of the house meant that the steel beams had to be inserted, and eventually removed from, the uphill side. But from years of settling, the cottage had limited access on the uphill side. To make room for the cribbing and beams, Jack first nudged the house up with special ratchet jacks until the crew had room in the crawlspace to shovel out spots for the cribbing piles.
The beams were then slid under the house, and Jack’s crew put solid blocking at each point where the beams contacted the underside of exterior sills. Additional blocking and smaller secondary steel beams under the house picked up the loads of the interior bearing walls.
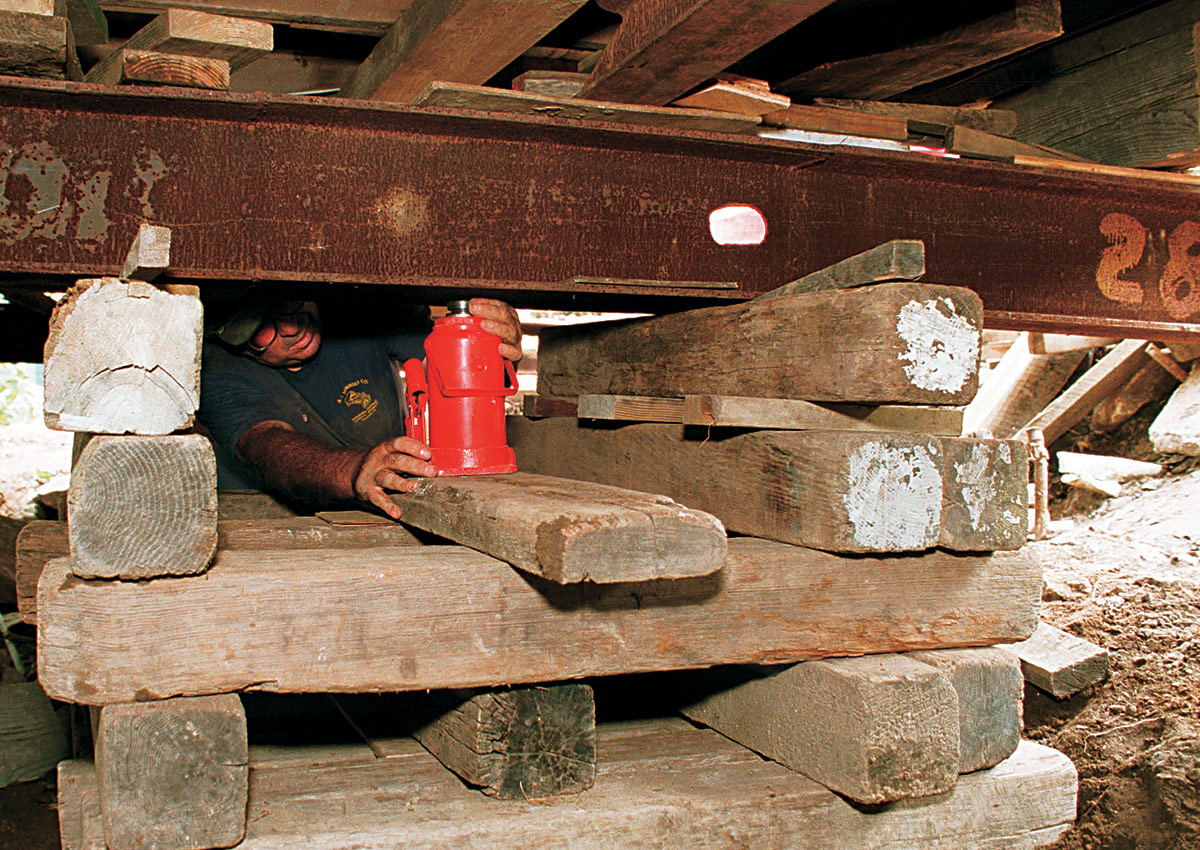
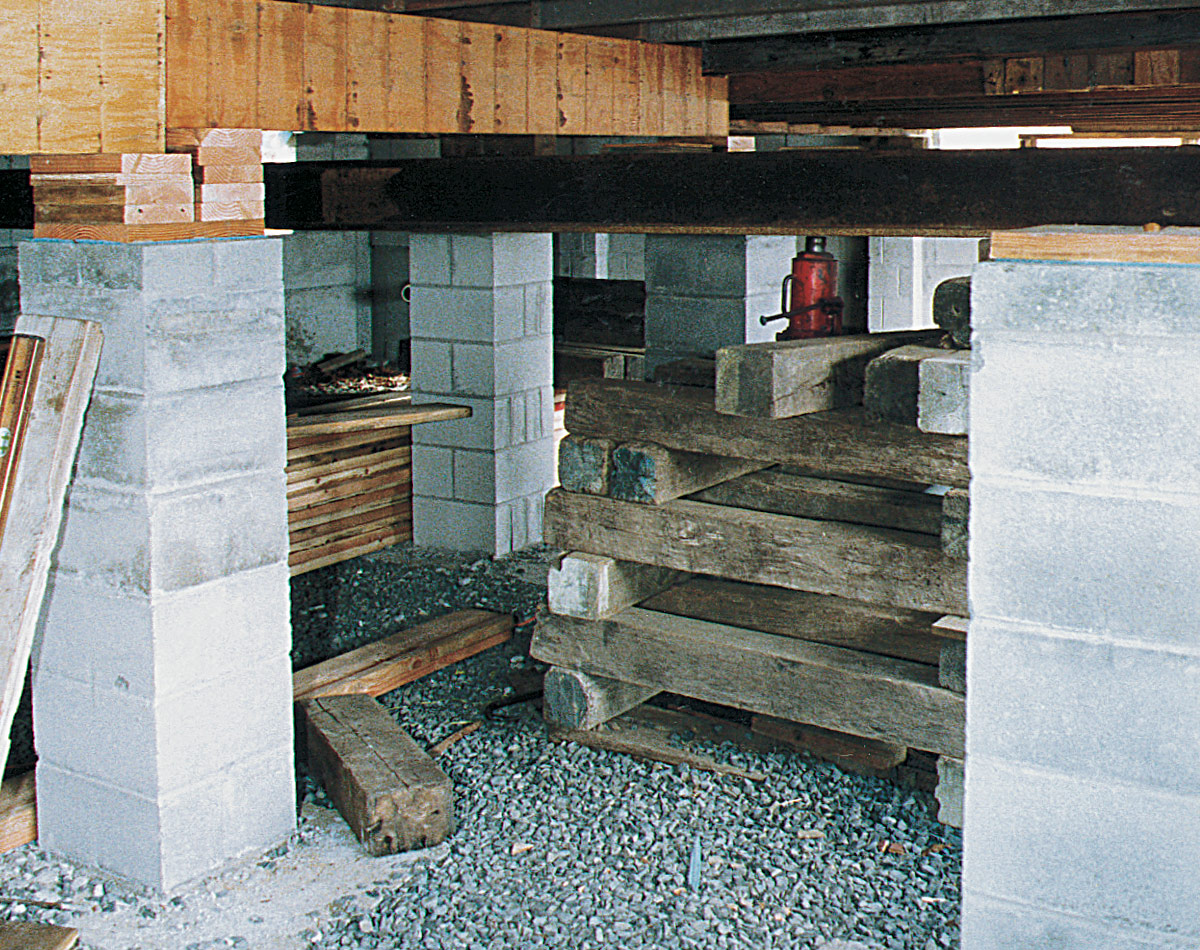
Some projects are lifted with a series of interconnected hydraulic jacks that can be operated all at once by a small crew. But for this project, each beam had its own separate jack. Each crew member was responsible for a beam, alternating between the cribs at one side of the house and the other. The cottage was lifted and blocked about in. at a time until one side was high enough to insert a layer of 6×6 cribbing.
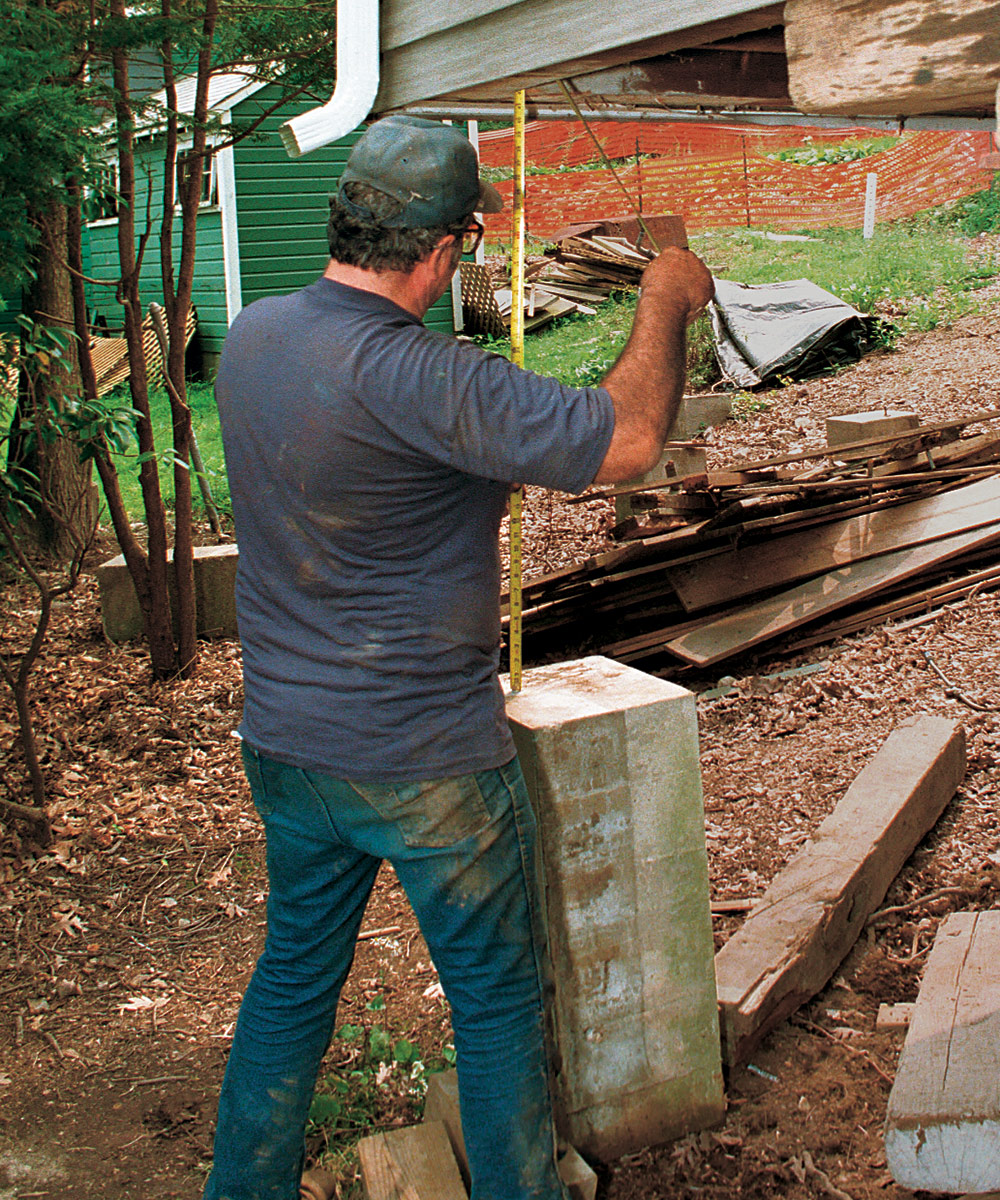
The jacks sat in the center on slightly thinner cribbing pieces inside the crib that could be easily slipped out and reset at the next level as the cribbing piles were increased one layer at a time. The lifting process went on for several days with Jack measuring the height after each increment. We stopped at a height of about 8 ft., which was enough to allow a small excavation machine space to work under the house safely.
Excavating with low overhead
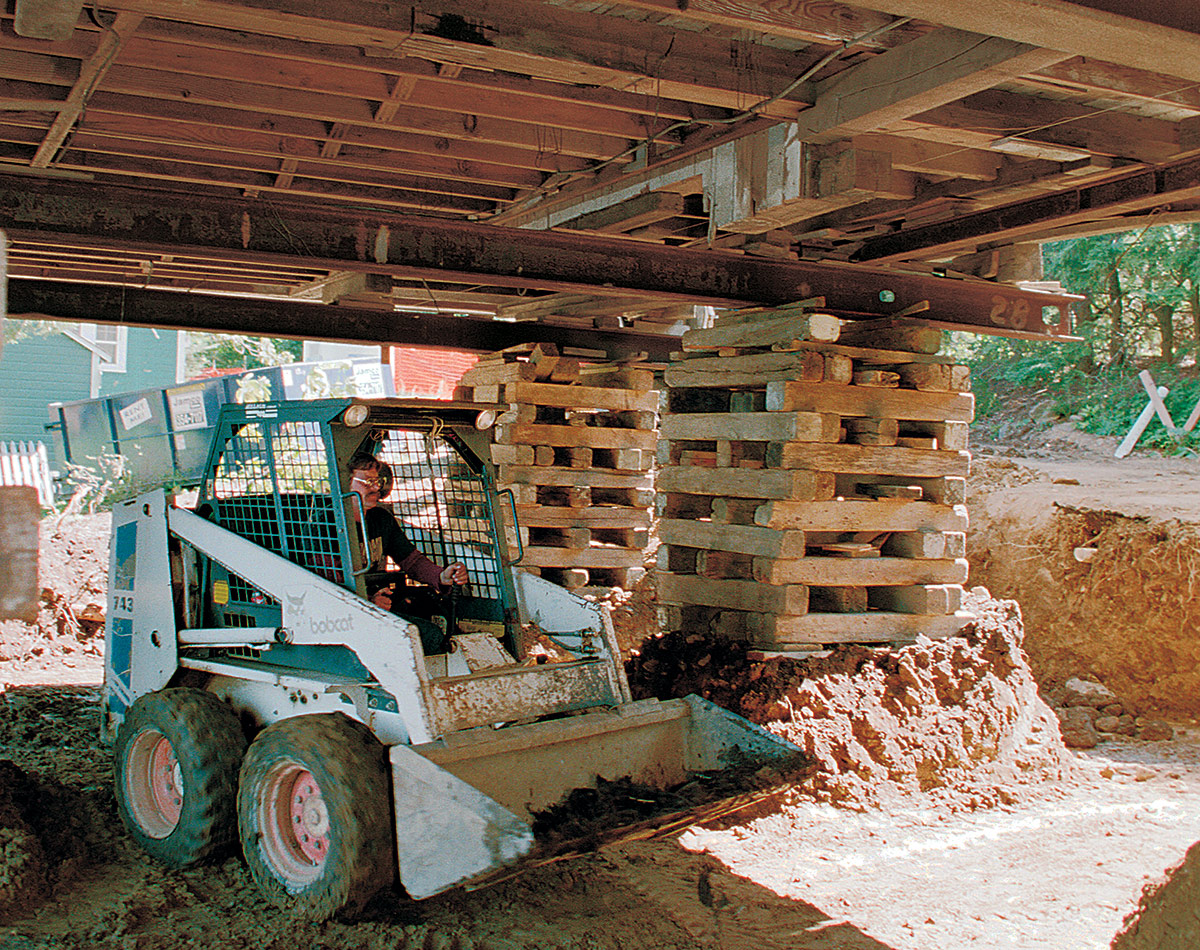
I have to admit that it was more than just a little unsettling watching a Bobcat loader dodging and weaving between the cribs with tons of house hovering above. But my excavator, Bob Smith, and his crew did a masterful job of carefully removing all the material to grade from between the cribs.
The excavation left each crib on an undisturbed mound of earth ranging from 30 in. high on the uphill side to 6 in. on the lake side. Soil tests that had been done earlier had shown that the glacially compacted soil that was under the house could carry the cribs safely with near-vertical excavation.
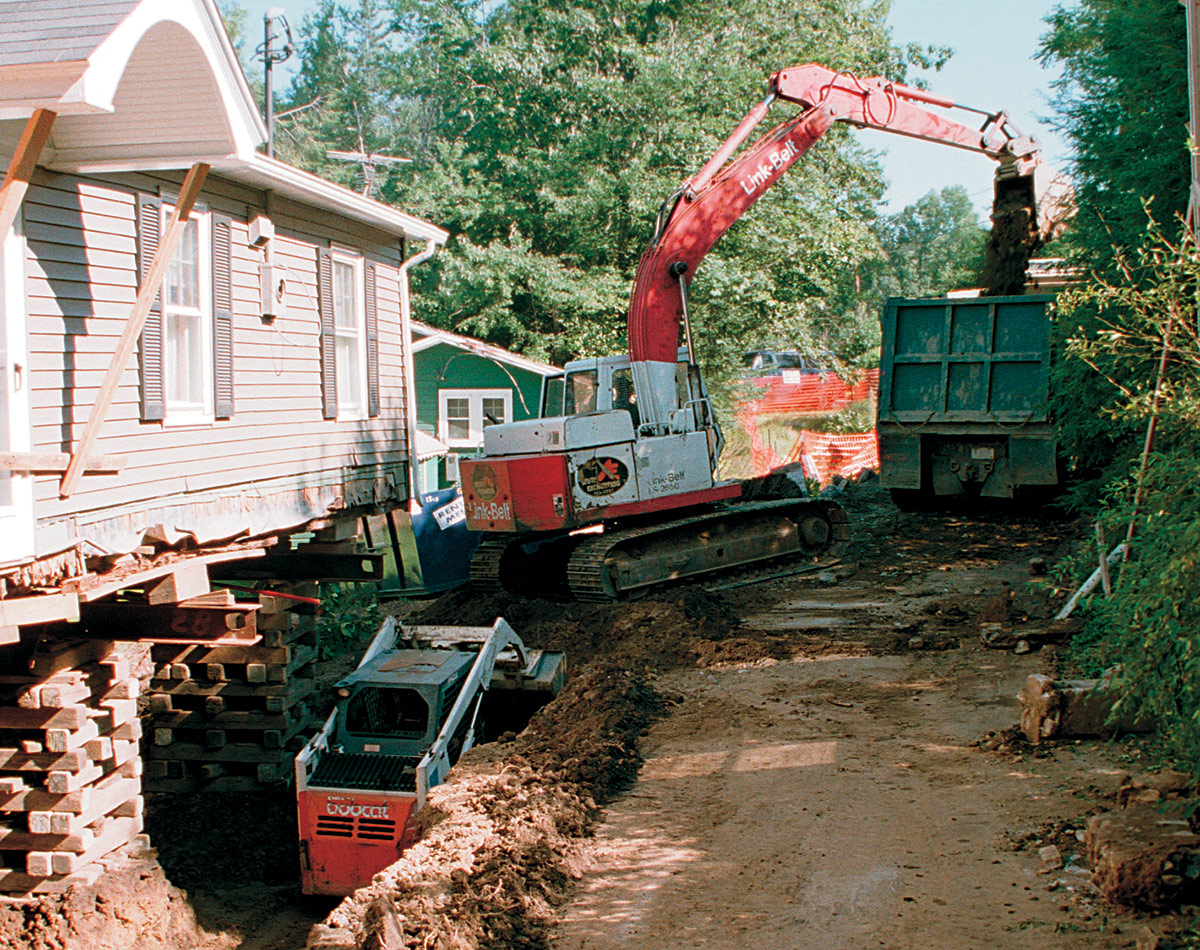
Working on a tiny lot meant that no excess material could be stored on site. Instead, the loader brought all the extra soil over to the corner of the excavation nearest the road. An excavator then scooped the soil out of the hole and onto a waiting truck. Many truckloads of material were carried to the top of the hill behind the cottage and stored until it was needed later for backfilling and grading.
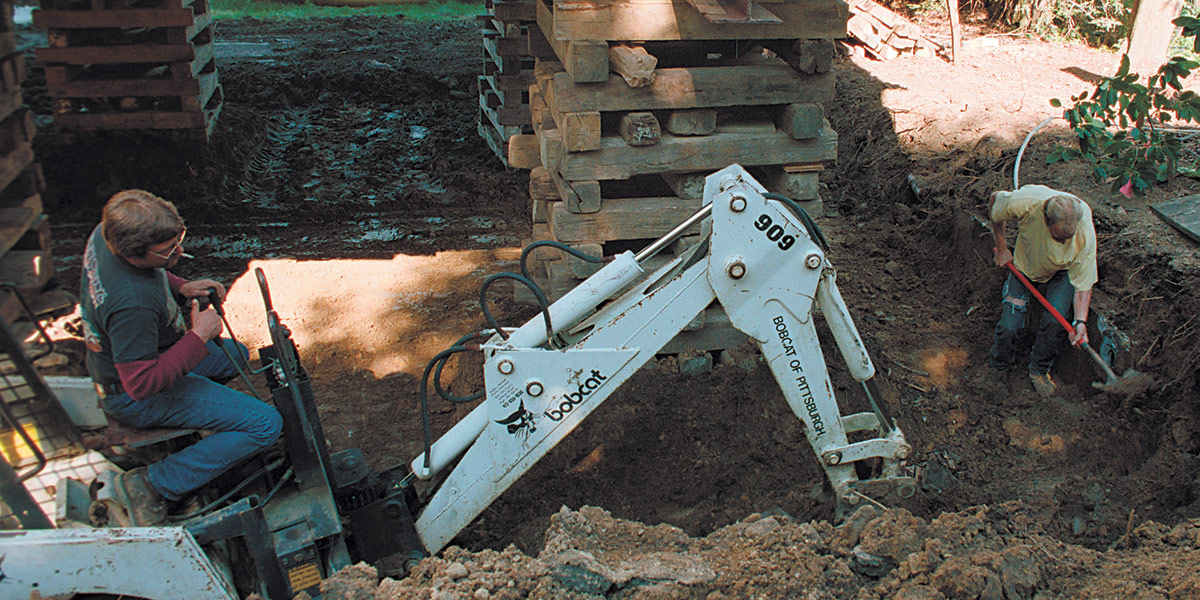
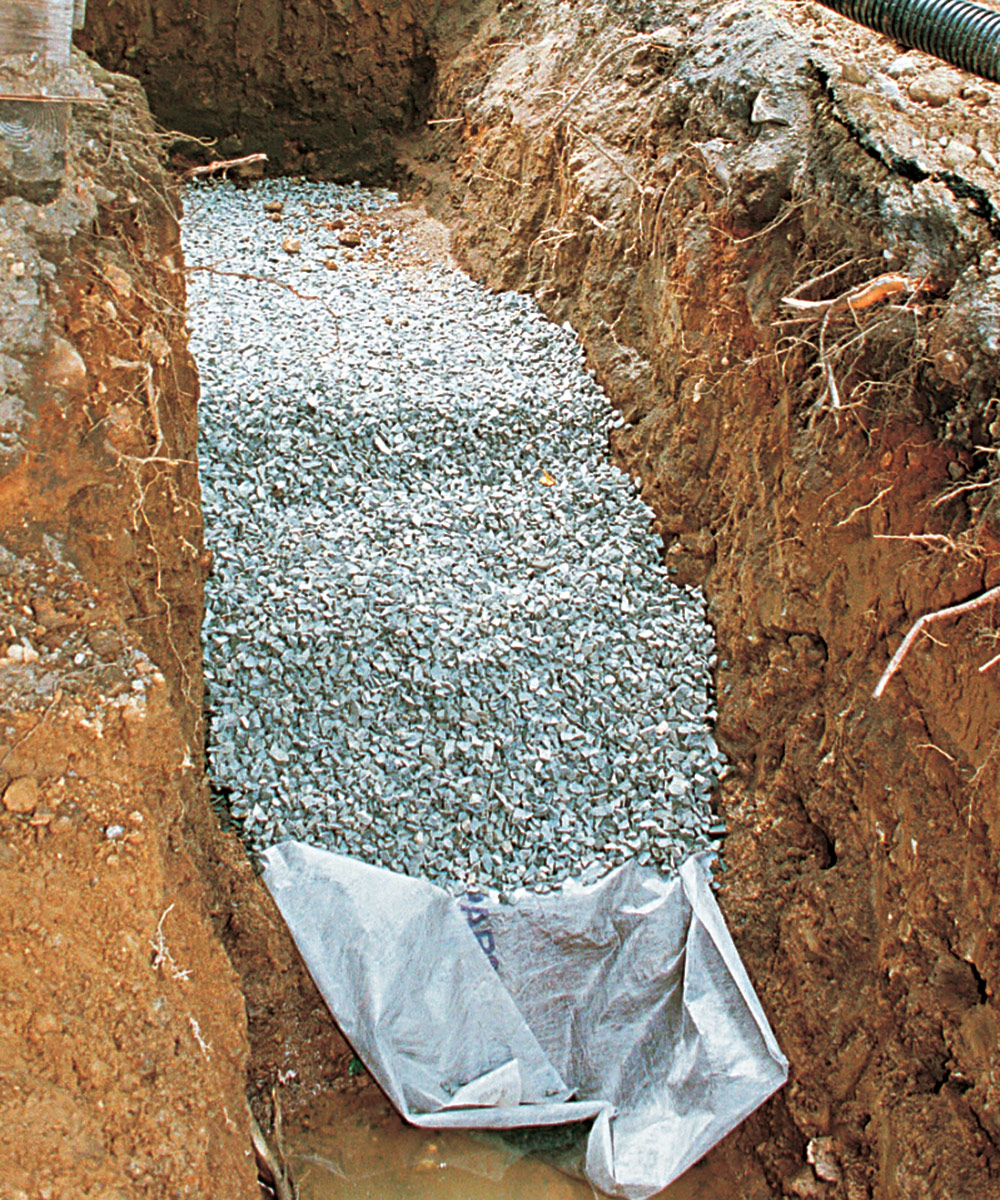
A second Bobcat with a backhoe rig dug the frost-wall trenches. The soil under the cribs was stable enough to let us dig our trenches without undermining the cribs. We were able to keep our footing grades and trenches to the required depth, which included a 12-in. layer of compacted stone on top of geotextile fabric.
The only soil that stayed on site was what we’d need to backfill the trenches after the foundation was poured. These soil piles were kept low to minimize erosion and were tarped. Tarped berm piles along the uphill side acted as a water diverter to keep the excavation sides intact. Due to our antiflood strategies, the small amount of water that seeped into the trenches was handled easily with a small submersible pump.
A little concrete goes a long way
The footings on the front and rear of the cottage were on one level and formed with standard 2x forms. The side footings stepped down grade and needed elaborate formwork.
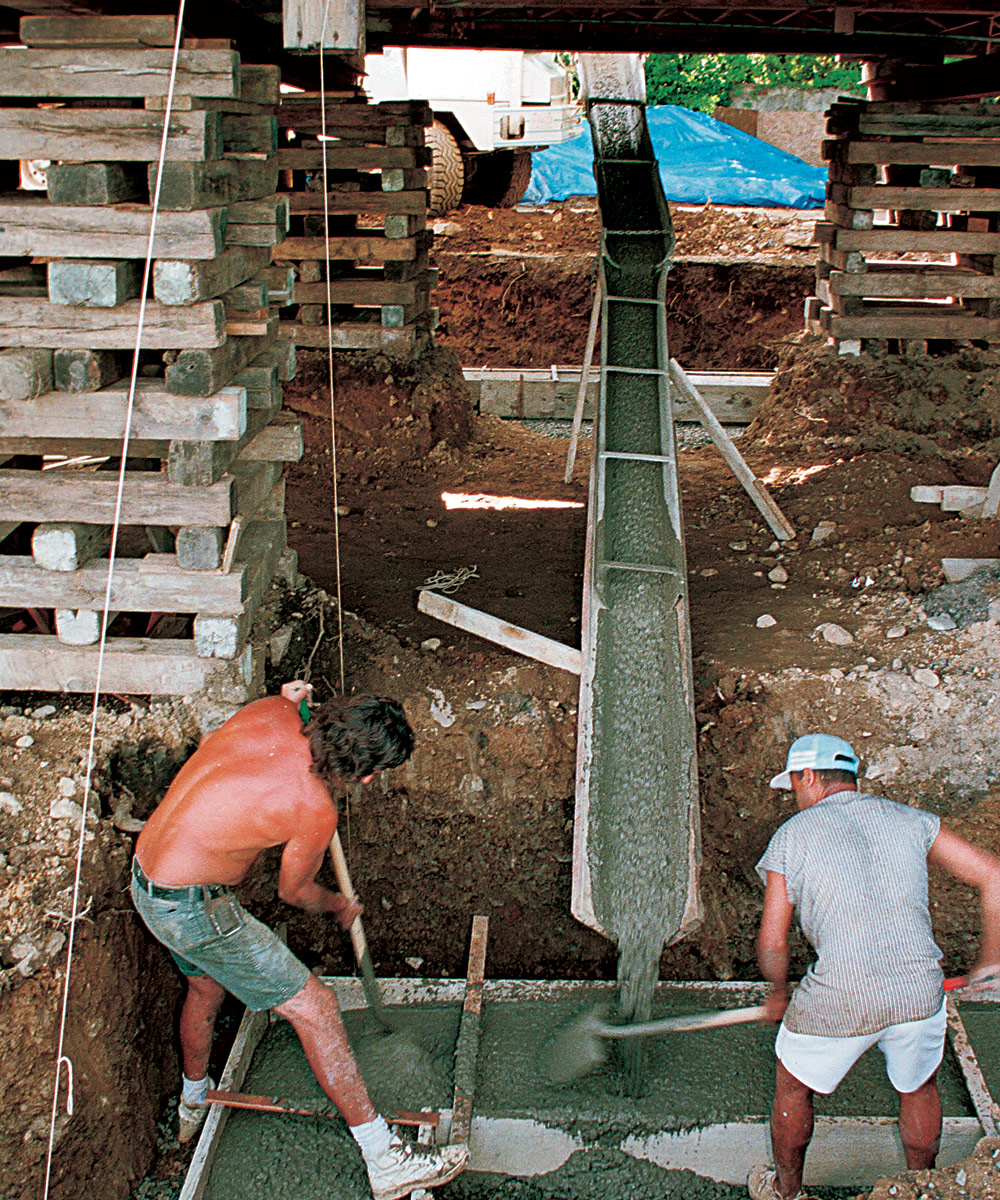
Access for the cement trucks at the site was limited, so my concrete contractor, Bob Kallenbach, rigged up a 30-ft. chute to get the mix to the far side of the house. Next, the concrete sidewalls were formed and poured high enough so that the steel beams could be removed after the house was lowered. We attached small site-built forms inside the main forms to create a 5-in. shelf for stone veneer that would be added later.
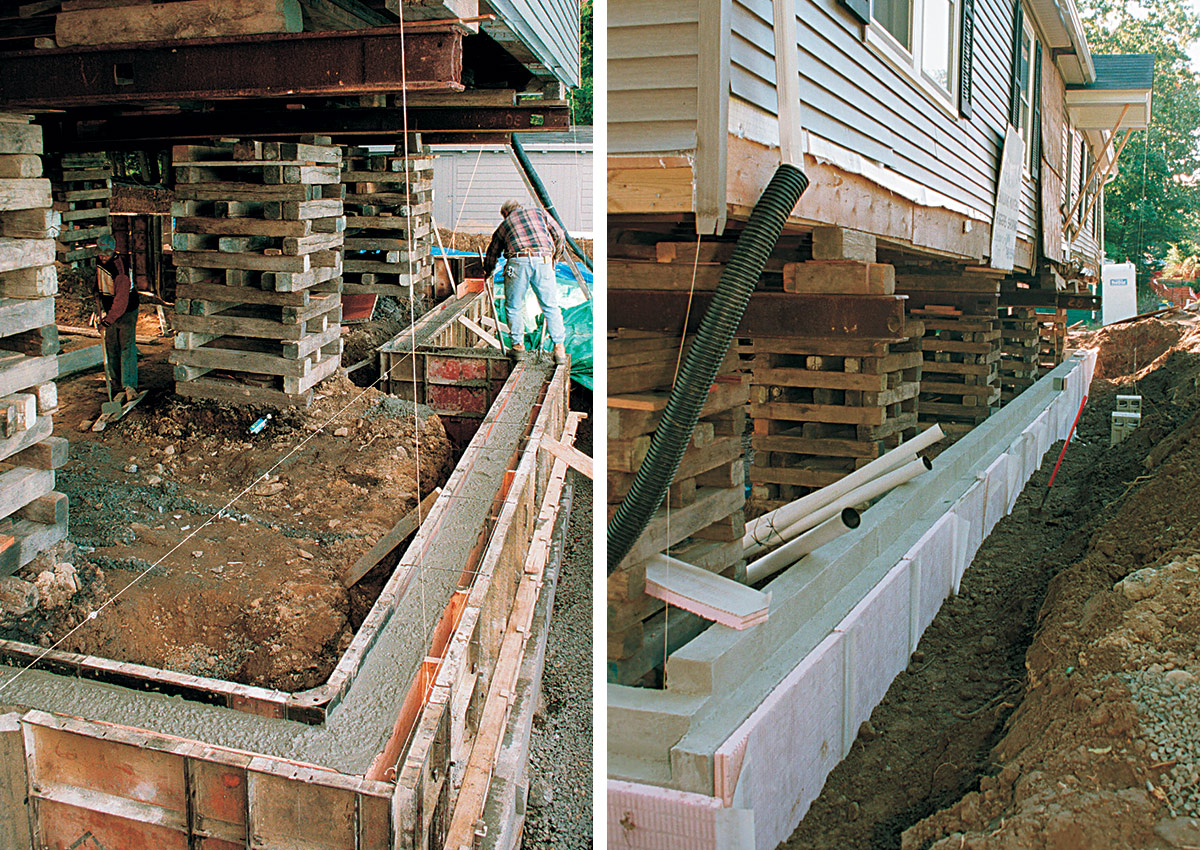
Before the foundation was backfilled, footing drains and gutter drains were installed. The frost walls were waterproofed, and insulation/drainage board was applied to combat the water table. Then concrete block was laid on top of the foundation walls to make up the rest of the crawlspace-wall height with holes for beam removal.
Bringing down the house
The foundation walls on the uphill side of the cottage created a 5-ft. high crawlspace. But where the grade dropped toward the back of the house, we stick-framed the crawlspace walls. Breaks were left in the top plates so that the steelbeams could drop below the top of the wall. The breaks were filled in after the house was lowered.
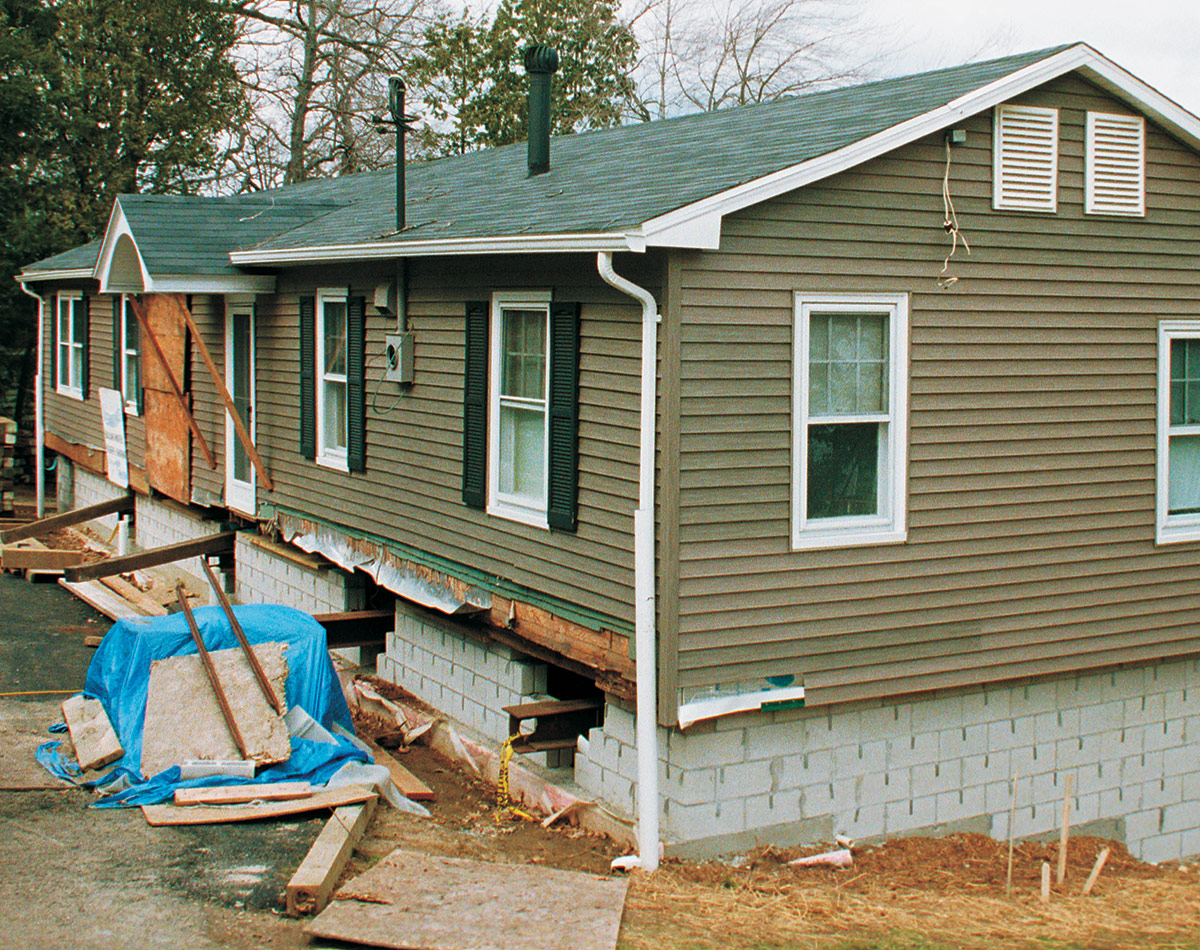
The day came to lower the cottage onto the walls we’d built.The house was lowered in -in. increments, the reverse of the lifting process. It’s strange when all five crew members open the valves on their jacks at the same time and, with a long hiss and lots of creaking, the building slowly settles.
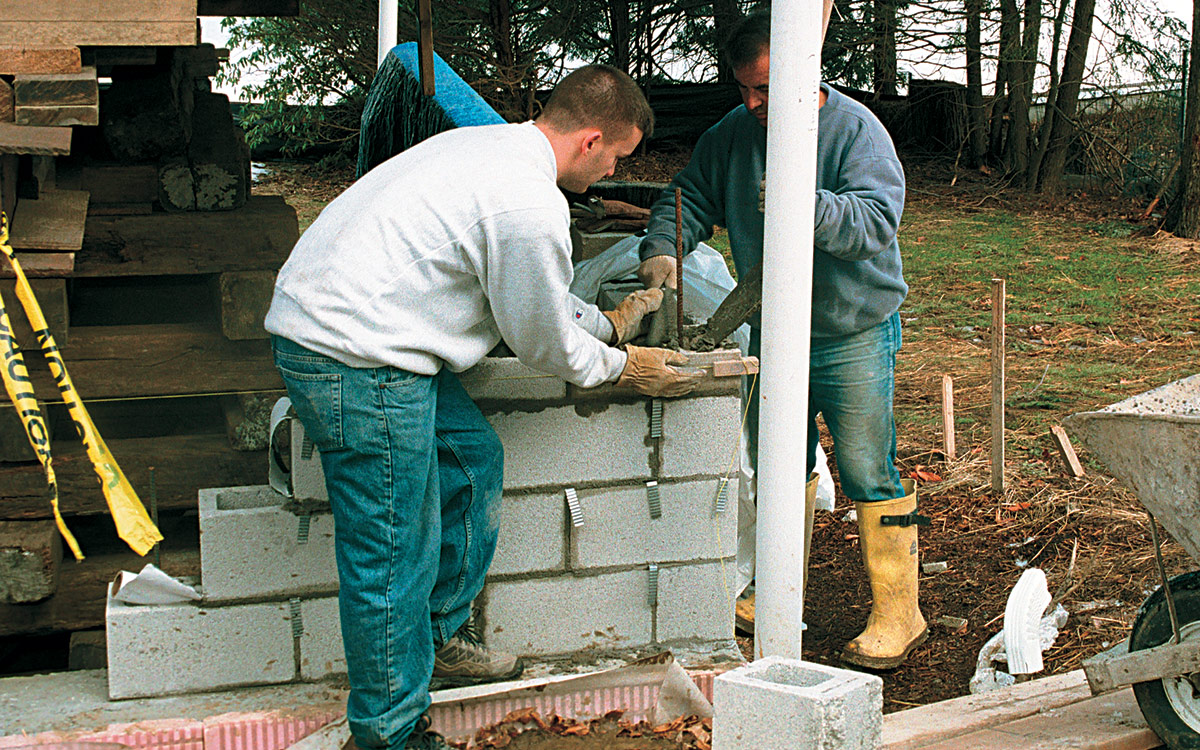
It took about a day and a half to lower the house and level it on the crawlspace walls. My mason, Pat Varrone, then built the block piers inside to accommodate the LVL replacement beams. When the LVLs were positioned and blocked in place, the weight of the house was taken off the steel beams. The beams were then rolled out through the pockets we’d left in the block wall.
With the house supported, we used the soil that had been under the cribs to backfill the inside of the frost wall. Before blocking up the beam holes in the foundation, we made use of the access to pour the slab in the crawlspace. The holes in the block wall and the wood-frame wall were then filled in, and Pat got to work on the stone veneer.
By the end of the next summer, the project was well on its way. Down came our stout cottage that served so well as a template for its successor. We were able to save large portions of the first-floor deck left as a reminder, like the hint of the old trolley in the kitchen, of previous generations that enjoyed this little place by the lake.
William Anthony of Woodbury, Connecticut, owns a building company that specializes in oldhouse renovation. Photos by Roe A. Osborn, except where noted.
