Installing Crown Moldings
Careful layout and accurate miters make installing a two-part trim an easier process.
Synopsis: Crown molding is a classy trim addition, but its installation can be perplexing for the uninitiated. In this illustrated article, a Massachusetts builder shows how to lay out, cut, and install crown molding and offers a few pointers on designing a traditional cornice.
Crown molding has a royally painful reputation. Installation can be difficult: Unlike baseboard or casing, crown molding must sit at a consistent angle to the wall, making cutting and nailing more demanding. When the joints don’t fit properly, when the nails hit nothing but air, and when the design that looked great on paper ends up looking trivial on the ceiling, the process of installing crown molding can become extremely disagreeable. However, crown molding will yield to patience and to a few simple techniques that anticipate its frustrating behavior.
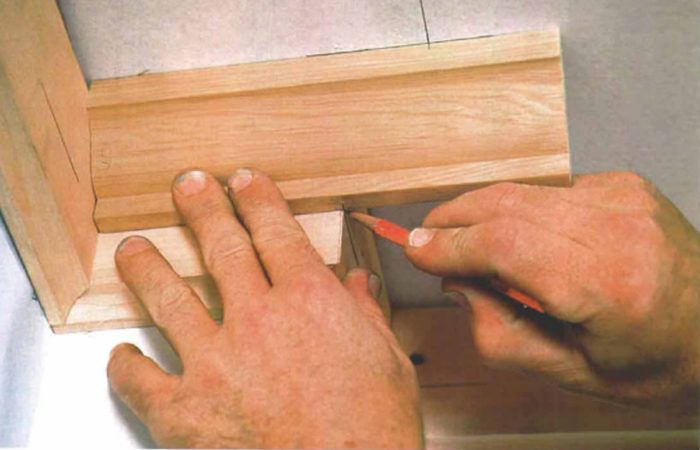
I’ve used some ceiling-trim designs repeatedly because they cover a range of stylistic options and because they’re easy to build. These styles are not formal, but they go beyond the one-molding solution and add a surprising level of interest. The common element here is a piece of flat stock that I call backing trim. I usually shape a simple profile on the exposed edge; a scotia is shown in the photos, but ogees and beads are other possibilities. The backing trim can be as wide or as narrow as preference dictates. A narrow exposure will look like an additional crown-molding element; a wide exposure becomes a design element in its own space. In the following pages, I’ll describe the techniques I use to lay out, cut, and install this simple two-piece molding.
Use chalklines as a reference
After I’ve decided on the design of the crown mold, my next job is layout. For practically any design, I snap chalklines on the wall as a guide. The layout lines should be straight between any two points, typically corner to corner, corner to window, between two windows, and so on. Because an out-of-flat wall is curved with respect to a straight line on the ceiling and vice versa, the layout lines will make this flaw visible, and the inevitable adjustment won’t be unexpected. Snapped lines are also important for more formal designs that require blocking.
If the room is really distorted, I like a big reveal in the design. The backing trim should follow the layout lines as much as possible, but the molding that comes after may be adjusted up or down a bit to conform to irregularities in the wall and on the ceiling. Remember that the trim serves the room, not a spirit level, so plan to make some compromises. A big reveal allows this to happen without appearing conspicuous.
Screws hold the backing
I like backing trim for its looks, but it also can solve serious nailing problems. Studding in old houses is often widely spaced, loose, or missing, usually where nailing is crucial. On the ceiling, strapping, lath, or joists can be hard to find, or spongy. (During layout, I use a stud finder or drive a 6d finish nail into plaster to find solid nailing, and then mark the location with a pencil.)
I screw flat sections of backing trim in place because the holding power of a screw is huge, and there’s no impact to distress old plaster. Also, a screw can get a solid bite in old wooden lath or a loose stud where nailing is useless. I like to hide the screws behind the molding, but if I can’t do that, I counterbore first and glue in wooden plugs afterward. Even for painted work, the plugs will hide holes better than any other method of filling holes.
For more drawings, photos, and details, click the View PDF button below:
Fine Homebuilding Recommended Products
Fine Homebuilding receives a commission for items purchased through links on this site, including Amazon Associates and other affiliate advertising programs.
Anchor Bolt Marker
Plate Level

Smart String Line


