Re-creating an Arts and Crafts Bathroom
Sometimes you just have to tear it all back to bare studs and joists to get it right.
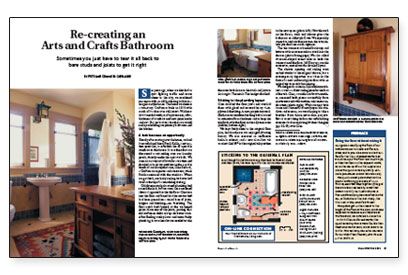
Synopsis: An architect and ceramic artist renovate the bathroom of their 1919 Craftsman home, keeping the room’s basic layout intact while adding a clawfoot tub, a separate shower, and custom Craftsman-style cabinetry. Included is information on how they repaired and tiled the floors and walls.
Six years ago, when we decided to quit fighting traffic and move closer to the city, we combined our move with an old hankering to live in a bungalow-style house. The home we chose is a two-story Craftsman built in 1919 with much of its character still intact. We knew that it needed work, roof replacement, refurbishment of windows and new paint inside and out. But we had no idea that we would end up rebuilding our primary bathroom and the kitchen.
A leak becomes an opportunity
Shortly after moving into the house, we had it reroofed and hired Rurik Kallis, a restoration specialist, to refurbish the 45 operable windows in the house. It was then that we discovered a wet ceiling over our laundry porch, directly under the upstairs bath. We were on our way out of town for a vacation and decided to leave the problem in the capable hands of an old acquaintance, Glen Stewart, a Craftsman carpenter and contractor, while Rurik continued with the windows. When we got back, our leaky ceiling had revealed itself as the tip of a remodeling iceberg.
Old deteriorated galvanized plumbing had caused the leak, but we were also concerned about a large crack in the tile floor. Glen tore into the floor and found that the mortar bed had been poured on a weird base of joists, ledgers and blocking — no sheathing. The floor crack had formed at the weakened point above one of the joists, proving that old craftsmen didn’t always do better work. After finding weak plaster and more funky plumbing, it was clear that we needed to take the room back down to the studs and joists to do it right. The result: The budget doubled.
Sticking to the plumbing layout
Glen doubled the floor joists and overlaid them with glued and screwed heavy 3⁄4-in. plywood sheathing. A new, proprietary modified-mortar reinforced setting bed was used to minimize floor thickness and to keep the tile flush with the floor in the adjacent room.
We kept fairly close to the original floor plan, but the shower was enlarged. We also removed an ineffective built-in cabinet, and a new claw-foot tub was installed 90° to the original tub position in the new space. New tilework on the floors, walls and shower gives the bathroom an old-style flavor. We especially wanted to include those corner-tile trim details you don’t see much anymore.
The tile wainscot is banded both top and bottom with an accent color carried into the shower. We also added diamond-shaped accent tiles in both the wainscot and the floor. Jeff Stewart, our tile contractor, carried out our detailed layout.
The shower opening and ceiling we re-arched similar to the original shower, but a contemporary departure was taken in the form of a new unframed glass door with an arched top to match the opening.
We designed a mission-style medicine cabinet as well as a freestanding piece for the foot of the tub. Glen, a world-class furniture maker, executed both pieces masterfully from quartersawn oak with mortise-and-tenon construction. With our new bath in use and a houseful of newly operable windows and screens, we were hoping to take a breather from home-restoration projects. But it wasn’t long before our refurbishing successes had us exploring kitchen thoughts with Glen.
For more photos and details, click the View PDF button below:


