An Easy Textured Ceiling
Not just a cover-up for lousy drywall work, this approach creates the appearance of hand-troweled plaster using ordinary joint compound.
Here in California, you don’t see many smooth ceilings, and that’s okay with me. In my experience, no matter how carefully the ceiling is finished, today’s lighting can make even the slightest flaw painfully obvious. I guess that’s why sprayed-on “popcorn” texture is so common. Although I have no problem with popcorn in new construction, the older houses I work on deserve a more traditional texture. I’m not a skilled plasterer, but a few years ago — after a bit of trial and error — I came up with a way to create this effect using ready-mix joint compound. Whereas sprayed-on textures require dedicated equipment and experience, all I need is a rolling scaffold and modest facility with ordinary drywall tools.
One section at a time
If I’m working with new drywall, all I need to do is tape and mud the seams with a first coat; then I’m ready to go. I prepare existing drywall or plaster the same as I would for a paint job. Texturing a ceiling is a messy process, so before I start slinging mud, I wrap the top of the wall where it meets the ceiling with masking tape. Then I cover the floors with heavy drop cloths.
Unless I’m doing a very small room, I always apply this texture in sections. To make sure the finished ceiling doesn’t look like a checkerboard, I lay out each section as a radius rather than a square.
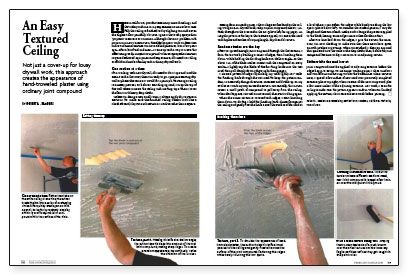
Starting from an inside corner, I draw a large arc freehand on the ceiling. Using an 8-in. drywall knife, I slap on joint compound, about 1/8 in. thick, throughout the area within the arc. An irregular pattern is the key to this texture’s appeal, so I smear the mud with haphazard strokes of varying length, depth and direction.
Random strokes are the key
After I’ve spread enough joint compound through the first section, I form the texture by building a series of ridges, then knocking them down. While holding the finishing knife at a shallow angle — so that about 1 in. of the blade makes contact with the compound on every stroke — I lightly tap the blade of the finishing knife into the wet mud, then pull sharply down.
I create a pattern of ridges by flicking my wrist lightly as I “walk” the finishing knife through the wet mud. To keep the pattern random, I consciously change directions, crisscross and double up on my strokes as I work my way across the section. Occasionally, this motion causes a small patch of compound to pull away from the ceiling. When that happens, I trowel on more mud, then start walking again.
For more photos and details, click the View PDF button below:
