Learning Curves for Decks
Thin stock, waterproof glue and a big 1x4 compass simplify deck curves.
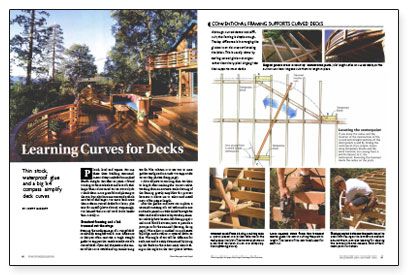
Synopsis: This article details techniques for making curved deck components, including railings and framework, by gluing thin pieces of wood together with waterproof glue. The author also shows how to steam pieces to create very tight bends.
Plumb, level and square. For me, these three building commandments always included an implied fourth: straight. But after 20 years, I found working to these rules less and less of a challenge. Then I discovered curves. Not only do I think them more graceful and pleasing to the eye, but I also have encountered a whole new set of challenges. I’ve since built more than a dozen curved decks for clients, plus one for myself. Surprisingly, I’ve learned that curved work looks harder than it really is.
Standard framing and a 1×4 trammel set the stage
Framing the undercarriage of a curved deck is relatively straightforward. One difference is that you often can’t use a single straight girder to support the cantilevered joists of a curved deck. If you did, the joists in the center of the curve would end up cantilevering too far. The solution is to use two or more girders configured in a wide V to support the curves.
I allow all joists to run long, then cut them to length after marking the correct radius. Working from an accurate scale drawing of the framing greatly simplifies this process because it allows me to select and install joists of the proper length.
After the girders and joists are in place, a trammel consisting of a 1×4 with a nail in one end and a pencil in a hole drilled through the other end is all it takes to lay out the perimeter radius. I nail a 2×6 block between joists to provide a pivot point for the trammel. The radius is marked on each joist’s top edge, and a cutline is squared down its face. The angle of cut will be different for each joist and is easily determined by lining up the blade on the radius mark, then locking in the angle on the saw. When all joists have been trimmed, I install blocking between their ends to provide solid bearing for the railing posts.
Select good wood, and rip it into narrow strips for bending
I use air-dried redwood for curved elements. Kiln-drying makes wood more brittle and less resilient, so I don’t recommend using kiln-dried wood for curves. Unless I’m steam-bending, when the initial moisture content of the wood makes little difference, I avoid green lumber because of the shrinkage potential. For this deck, I used air-dried 2×6 B-grade redwood as deck boards. I picked out the best boards to rip into strips to be laminated into curved rails and fascias. I chose only wood with growth rings that were 1/8 in. or less apart. Wood with more widely spaced growth rings can split apart at the growth rings while it’s being bent.
For more photos, drawings, and details, click the View PDF button below:
Fine Homebuilding Recommended Products
Fine Homebuilding receives a commission for items purchased through links on this site, including Amazon Associates and other affiliate advertising programs.
Metal Connector Nailer

MicroFoam Nitrile Coated Work Gloves
FastenMaster Screw Bolt Fastening System
