Rejuvenating an Old Porch
PVC rails and fiberglass columns keep the look classic and the maintenance minimal.
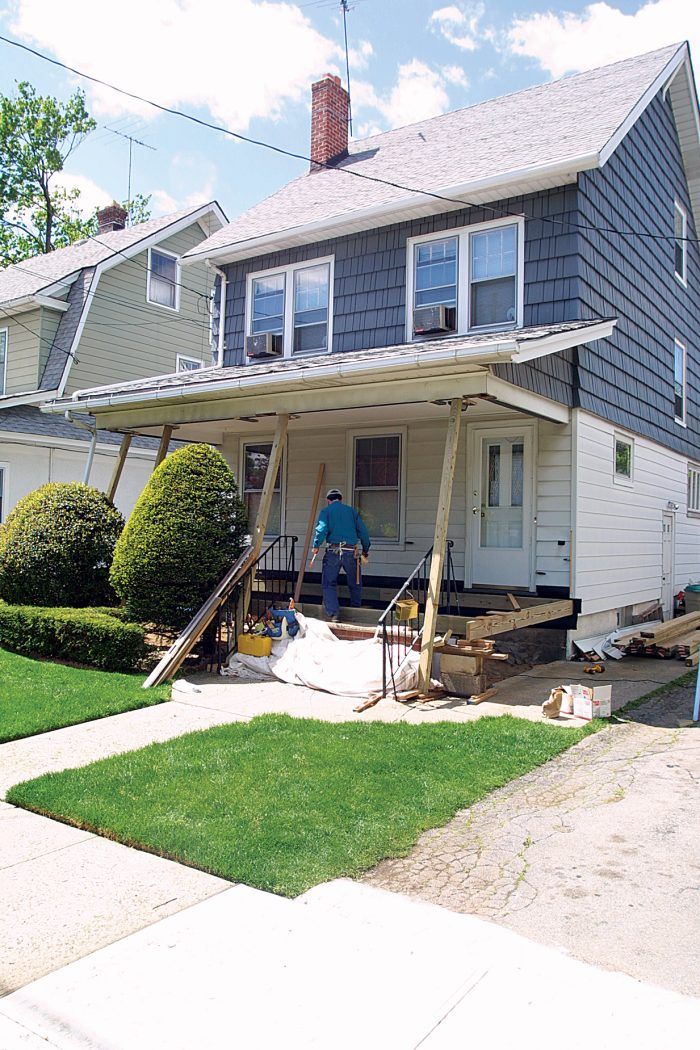
Synopsis: A carpenter explains why and how he used modern, maintenance-free PVC railings and fiberglass columns in combination with traditional wood framing and flooring to repair an old porch.
When my long time friends Vito and Stella called to tell me their daughter Lena was getting married, I knew they wanted more than my RSVP. They were looking at their house, and before the wedding celebration could begin, they would have to rebuild their 75-year-old front porch. It was a prime gathering spot; but the old posts were rotting, the 3⁄4-in. decking was lifting, and the railing was teetering. The architrave, the finished horizontal beam that spans from column to column resting directly on their capitals, and roof were sound, but everything else had to go.
Raising the roof before the party started
I needed to disassemble the old porch but leave the architrave and roof in place. So I positioned three pipe jacks between 2×8 plates on the decking and architrave to distribute the weight, and I lifted the roof with ease. I then supported the architrave with four 4×4 posts. These posts were snugged into place with a small sledge and affixed so that they would not shift. Where possible, I braced the posts against stationary items like the wrought-iron railing. Now I could remove the old columns and the pipe jacks safely, and dismantle the rest of the porch.
The existing architrave determined the construction of the new porch. The capitals, columns and bases that I would install needed to align with the front and side architrave. So I drew a full-scale sketch showing the measurements of the base, framing, trim, face and deck overhang in relation to this centerline to determine the layout.
All the framing was done with CCA-treated lumber. The ledger was attached to the house first. The two end joists were attached to the ledger but left long, resting on some temporary blocking, so I could transfer the centerline to them using a long straightedge and level. Once I did this, I installed the remaining double end joist and triple front rim joist in accordance with my layout measurements. I now had the complete perimeter of the framing and could locate the foundation piers. So I plumbed down from the architrave to determine where each column would stand and dug the 36-in. deep footings directly under this point. At each footing, a 2-in. galvanized pipe was attached to the frame with a galvanized flange and screws, and extends to about 8 in. from the footing bottom. Concrete was poured into the hole, and once it cured, I removed the temporary blocking, cut the long joist tails and finished framing.
Preserving a traditional look with modern materials
I used a traditional porch flooring, 5/4 tongue-and-groove vertical-grain Douglas fir. To prevent decay, all the undersides, tongues and grooves of the decking were primed with an exterior oil-based primer before installation. This step is time-consuming. But I have installed decks where the clients did not want to pay for back-priming, and the resulting deterioration cost them more in the long run. After installation, the surface of the decking was sanded clean and finished with two coats of exterior primer and solid stain.
For more photos, drawings, and details, click the View PDF button below:
Fine Homebuilding Recommended Products
Fine Homebuilding receives a commission for items purchased through links on this site, including Amazon Associates and other affiliate advertising programs.

N95 Respirator

MicroFoam Nitrile Coated Work Gloves

Metal Connector Nailer


