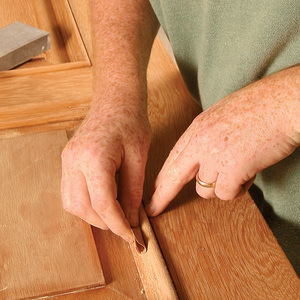
Synopsis: Everything from determining whether your floor needs refinishing (or can it just be touched up) to picking the best floor finish is covered here. You’ll also learn how to patch a damaged floor board.
Quite honestly, I hate refinishing old floors. It’s ten times the work of finishing a new one, but I can’t charge a premium price. And aside from the potentially hazardous materials involved, I don’t like refinishing because of the hand-scraping — sometimes the whole perimeter — to remove the old finish. The saving grace is seeing my customer’s glee when I transform an old, destroyed floor into one in pristine condition.
Much like finishing a new floor, refinishing an old one involves sanding and applying an appropriate finish. However, before you start, you must determine whether the old floor can in fact be refinished.
Should the floor be refinished?
After establishing what the existing finish is, I look over the floor to see if it really needs to be refinished. If it does, I check whether the floor is solid wood or a veneer. Veneered floors can be sanded once or twice, but you should consult the manufacturer for advice on the wear-layer thickness. (The wear layer is the amount of stock above the tongue.) You can get a peek at the wear layer by removing floor registers, if present; otherwise, remove a threshold or trim piece and drill a hole.
A solid floor should have at least 1⁄8 in. of wear layer, or the flooring may splinter when you sand it. The wear-layer thickness should be measured in a few different spots. Many times, an existing floor will have separations between some of the strips, allowing an easy measuring spot.
It may be tempting to strip a thin floor with a chemical stripper, but I caution against it. It is difficult to neutralize the stripper and clean it from the cracks between the flooring strips. Stripper trapped in these cracks most likely will cause problems with the finish.
If the wear layer will support another sanding, I sweep the floor clean, countersink any nails, remove all staples and inspect thoroughly for damaged or loose boards.
The moisture content of a floor can be an issue when it’s time to apply a finish, but unless the floor has been flooded recently or there’s excess moisture in the basement or crawlspace, the moisture content is probably okay. Relative humidity should be between 30% and 50%. For wetter or drier conditions, consult the finish manufacturer.
Before sanding, I protect heating, ventilation and air-conditioning openings. If the systems can’t be shut down, I use protective filters over the ducts. I also protect smoke alarms and carbon-monoxide detectors from dust and seal the doorways with plastic. If possible when sanding, I remove dust from the room with a fan.
Sanding: Grit sequence is crucial to a smooth floor
I use three or four sanders for a refinishing job: a 220v drum sander, an edger, an orbital palm sander and sometimes a right-angle orbital sander. Make sure there’s sufficient power to handle the sanding equipment. A professional 220v sander generally requires no less than a 30-amp breaker; 110v rental units require at least a 20-amp circuit.
For more photos and details, click the View PDF button below:


