Mudsills: Where the Framing Meets the Foundation
Even if the foundation is not square or level, getting the mudsills right will get you back on track.
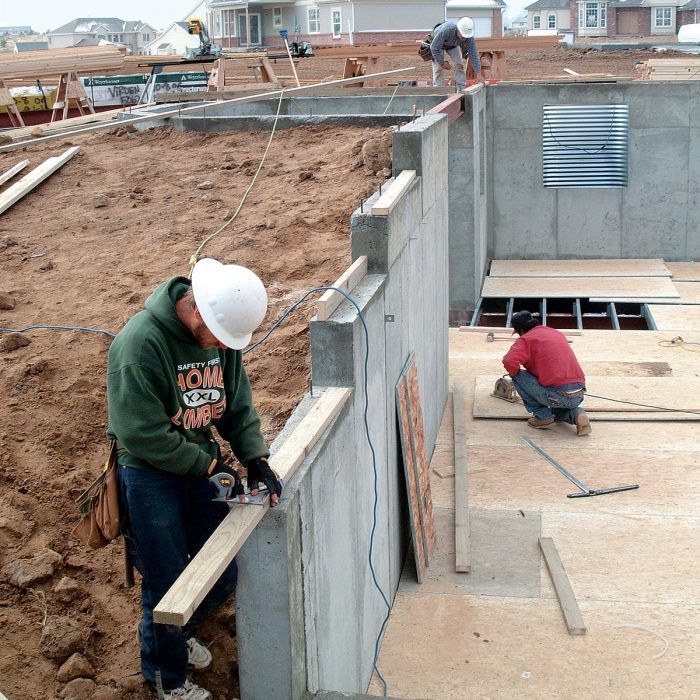
Synopsis: Installing mudsills is the first step in framing a new house or addition. In this article, a professional framing contractor takes you thought the process, stressing the importance of correcting any mistakes that may have been made by the foundation contractor.
Framing a traditional house begins at the mudsill; it’s the first piece of lumber that is attached to the foundation. If you build on a foundation that’s out of square or level (and they’re common), correcting the problem at the mudsill stage will make for a lot less trouble later. The first step in installing mudsills is determining if the foundation is square.
Checking for a square foundation
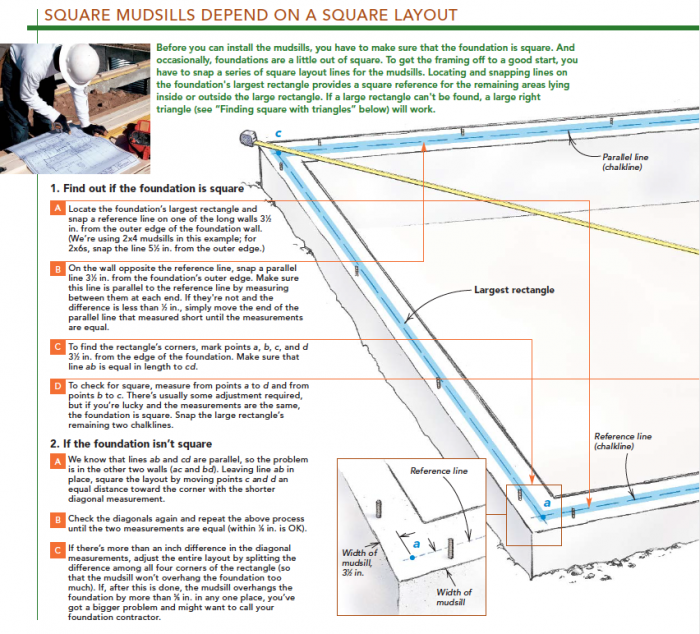
While my helper sweeps off the foundation and checks to make sure the anchor bolts are plumb, I look over the plans for the foundation’s largest rectangle. It will provide an ongoing reference for establishing bump-outs (areas outside the large rectangle) and recesses (areas within the large rectangle) that are square to the house and to each other. The drawing in this article shows how to square the large rectangle or to create a large 3-4-5 triangle if a rectangle can’t be found.
After squaring and marking its corners, two of us snap chalklines for the large rectangle and any bump-outs or recesses, while a third person spreads pressure-treated 2x4s (or 2x6s if requested) around the foundation to serve as mudsills. Working as a team with a systematic approach is really important on these projects. We begin at the front corner and run the material along the chalkline from end to end, and then do the same in the rear. We fill in the sidewalls last.
As we work our way around the foundation, we mark the bolt locations by standing the plates on edge and outlining the bolts on the sill plate.
When we have to join two mudsills, we cut the first plate within 12 in. of a bolt and add an expansion bolt for the adjacent plate. Local code requires an anchor bolt within 12 in. of the end of mudsills or of any joints.
Marking the bolt centers on the mudsills for drilling is next. It’s as simple as laying the mudsill alongside the chalkline on top of the foundation, measuring from the chalkline to the center of the bolt, and transferring the measurement to the top of the mudsills. At this point, we add insulation (or sill seal if requested) between the foundation and the mudsill.
Shims level the mudsill; bolts hold it down
After drilling the bolt holes, two of us place the mudsills over the anchor bolts, and another follows behind, adding nuts and washers, tightening them only enough to check for obvious high or low spots. Then we add the necessary expansion bolts at the mudsill joints and nail a second 2×4 on the mudsill. This adds an extra 1 1⁄2-in. ceiling height in the basement.
Next, we use a builder’s level to measure the height of the corners and to look for any high spots. After comparing the measurements, we shim the corners to within 1⁄16 in. of the highest point on the foundation. Then we run a string from corner to corner and level the mudsills between.
For more photos, drawings, and details, click the “View PDF” button below:
Fine Homebuilding Recommended Products
Fine Homebuilding receives a commission for items purchased through links on this site, including Amazon Associates and other affiliate advertising programs.
Stabila Classic Level Set

Magoog Tall Stair Gauges
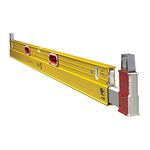
Plate Level
