Enhance a Room With a Window Seat
A simple design, jazzed up with molding, creates a cozy nook for less than $200.
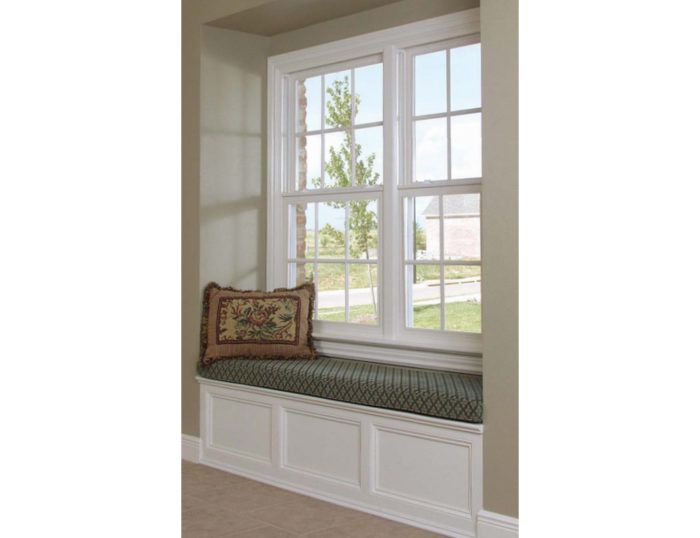
Synopsis: Made of plywood, poplar, and pine moldings, this built-in window seat has a hinged lid for access to storage underneath. Arkansas builder Gary Striegler offers step-by-step instructions, with detailed photos and drawings.
Like a hammock strung between two trees or a porch swing hanging from chains, a window seat is appealing well beyond its usefulness. More than just a place to sit, it represents the promise of leisure. If you have a window seat, you also might have the time to sit there and read.
I include a window seat in most of the homes that I build. It adds a cozy focal point to a room, plus useful storage beneath the hinged lid. Of course, you can forgo the operable lid for cabinet-style doors or even drawers built into the face frame to gain access to the inside of the seat. That’s a much more involved process. I prefer the traditional lid because it’s faster and easier, and because it satisfies people’s expectations.
The simple design shown here took me an afternoon to build and used less than $200 worth of materials.
Build the box in place
Because the window seat is built in place and attaches to the walls, the construction is fast without any special joinery. The plywood panels are far more resilient than drywall, and they give the interior a finished look while acting as support for the top. A plywood floor hides any gaps under the side panels.
Getting the lid just right
If the alcove is square, making the top and its hinged lid from one piece of plywood is the most efficient approach but requires a plunge cut along the hinged edge, which is tricky to do. A plunge cut can be made with a tablesaw or with a circular saw, which takes a little more time and skill. If the alcove is out of square, it will be tough to fit a one-piece top without scarring the drywall. In that case, a four-piece top is the best bet.
Molding becomes a handle for the lid
In most cases, biscuits aren’t necessary to attach a bullnose molding. But because this bullnose is acting as a handle for lifting the window seat’s lid, it needs some reinforcement. Using biscuits here makes a clean, strong joint without visible fasteners.
For photos and step-by-step instructions for building a window seat, click the View PDF button below.
