Is This Basement Worth Remodeling?
Contractor Roger German shows how to gauge the price and potential of renovating your basement
That new basement rec room, bedroom, and office you’ve dreamed of is about to take shape. If you’re like me, once you decide to tackle a project, you can’t wait to get going. But before you start to clear out the old stuff, or pound a single nail, you need to spend some time looking closely at the basement as it is now.
It makes no sense to spend time, effort, and not a little cash installing beautiful new rooms in an unsound structure. Do your walls lean? Is the floor cracked? Are your electrical service and furnace capable of handling new demands? And, most important of all, does your basement leak?
Identifying and fixing, or mitigating, these basic problems is essential to a successful remodel. In this chapter, we’ll take a look at this detective work. The information you uncover will help you determine the scope and cost of your project—its limits, perhaps, as well as its potential.
Old and New
For prospective remodelers, there are really only two types of basements—those built with no thought that the space might one day be finished, and those built with an eye toward habitable rooms. Older homes more often have the first type, and newer homes the second. In the Midwest, where I live, contractors working as early as the 1930s gave thought to basements as possible living space. In general, though, the idea of building homes with basements to live in didn’t start taking hold until the 1950s and 1960s. By the 1970s, it had become the norm.
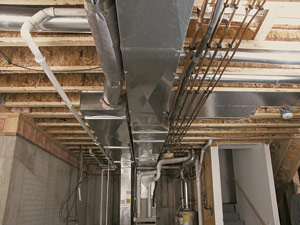
If you have a newer home, you’re going to have an easier time remodeling the basement. Plumbing is usually in place for a bathroom; pipes, wires, and ducts are tucked in tight to the ceiling or consolidated in a few areas; and the stairs are more accessible and built with better headroom.
In older homes, basements were built as places to put the furnace and to store things that the next owner of the home would throw away. Many older basements have dirt floors or floors of thin concrete. Some have a furnace pit with a crawl space around the exterior and a room for coal and a coal chute. Old convection furnaces were inverted octopuses of huge ducts; with the advent of the forced-air furnace, most of those leviathans were replaced with much smaller units.
New furnaces free up space in older homes. But to make the space practical and in compliance with codes, you often need either to lower the floor or to raise the house, jobs requiring skid loaders, dumptrucks, house jacks, jackhammers, and considerable contractor liability insurance. If your basement requires either measure, have a professional builder do the work. Then you can embark on finishing the basement yourself. Fortunately, many older basements, like most newer ones, pose less daunting, more ownerfriendly remodeling problems.
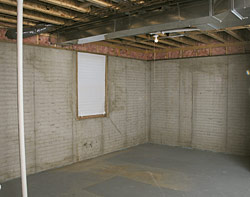 Adequate headroom makes a basement easier to remodel as well as more comfortable to use.
 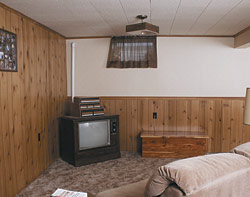 If your home is older, you may want to redo an existing live-in basement.
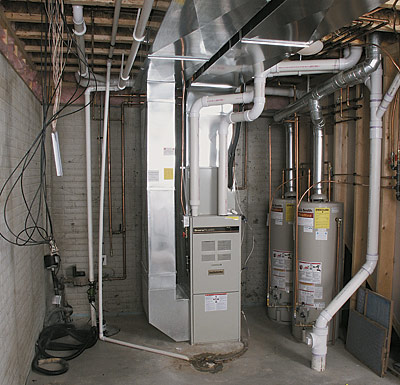
 The mechanical systems in newer homes are often installed with an eye to future basement remodeling.
 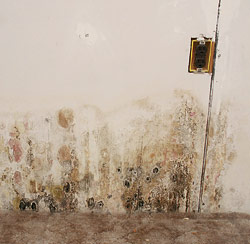 Mold and mildew, the result of a damp basement, can ruin drywall.They make a basement musty and unpleasant, particularly for allergy sufferers.
Water: The Bane of Basements
There is simply no point in finishing your basement if it leaks water. Covering up a water problem will only defer the damage from mold, mildew, and rot. The time to fix water-incursion problems is before they’re covered up with insulation and drywall.
Almost all the basement-water problems I’ve encountered in 30 years of remodeling and house construction are the result of surface water (rainfall and runoff) and bad drainage. These problems can almost always be fixed by making sure water drains away from the house foundation.You can often do this work yourself.
If the surface-water drainage is fine, but you still have leaks, ground water may be the reason.Ground water is subterranean, moving through the soil from areas of high to low water pressure. Leaks caused by ground water require removing or redirecting the water from around the foundation with drain tile and a sump pit and pump. In my area, these are often installed in new houses at the time they’re built because it’s easy to do then.
New and old houses can be retrofitted with drain tile and sump, too. Drain tile (which today is usually perforated plastic pipe rather than clay tile) can be laid inside or outside. The sump pit and pump are usually installed inside. An inside installation involves cutting out the floor around the perimeter of the basement about 1 ft. to 1-1/2 ft. in from the wall, excavating enough dirt to drop in some gravel, the drain tile, and a sump pit, and then pouring a new floor over the gravel.Water seeping around or under the foundation and floor flows to the lowest point (the gravel and drain tile), drains to the sump pit, and is pumped away.
Installing drain tile and sump systems is an arduous task and requires some special skills and tools, so I recommend you hire it done. If you suspect ground-water problems, start by consulting a specialist or a knowledgeable builder.
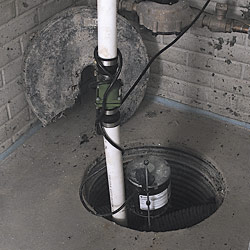 A sump pump removes ground water that would otherwise seep into a basement.The pump is designed to turn on automatically.
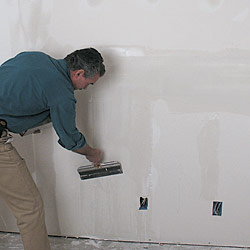
 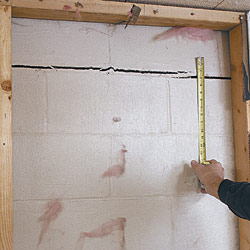 Cracked walls often indicate current or past drainage problems. Fix the problem before remodeling.
Unwanted Critters
As you’re examining your basement, be sure to look for evidence of homewreckers like termites and carpenter ants. Termites leave telltale tunnels when they travel over nonwood surfaces. Carpenter ants leave little piles of sawdust under their exit and entry holes. Both pests will hollow out boards right up to the surface, so that what looks like a solid board is actually just a shell. I’ve done demolition work in which I’ve grabbed a 2×4 to give it a whack, and it crumbled in my hand. Nothing inside but a bit of dust and maybe a critter or two.
If you have the faintest suspicion that your basement might harbor either of these villains, call a professional pest expert.
Red Flags
Given enough money and time, any basement can be remodeled in accordance with local building codes. But there are several requirements that can be project stoppers unless you’ve got very deep pockets. Most codes require a height of 7 ft. or more from the basement floor to the bottom of the joists of the floor above. (Ductwork and resultant soffits can project below 7 ft. ) Less clearance than that and you won’t get a building permit. That’s a project stopper unless you can afford to lower the basement floor or raise the house above it.
Codes also require that basement bedrooms contain an egress window. Though not as expensive as lowering and pouring a new floor, installing an egress window can be a budget buster.
Evaluating Walls and Floors
There are two things to know about concrete; it gets hard and it cracks. All but the newest basement walls and floors will show some cracks.
Cracked walls
In block walls, cracks tend to follow the mortar joints. In poured walls, they can be anywhere. Cracks are usually of little concern if they’ve stopped moving. The National Association of Home Builders (NAHB) has established criteria for acceptable cracking in order to lessen the friction that can arise between homeowners and builders. In block walls, cracks up to 1/4-in. wide are acceptable; larger cracks must be addressed by the builder. Cracks in concrete walls must not allow water to leak into the basement.
Observe cracks over time to see if they’re active or stable. If a crack is still moving, look for the cause. Perhaps a tree growing too close to the foundation is putting pressure on the wall. Or, more commonly, there is water pressure against the wall, and either the water pressure alone, or a cycle of freezing and thawing, or both, is moving the wall. Fix the problem before doing anything else. Simply clean and caulk stable cracks. This will eliminate some seepage and keep out bugs.
Bowed walls
Basement walls usually bow for the same reason that they crack—water pressure. As a rule of thumb, if the wall is bowed in less than an inch and is no longer moving, it won’t be a problem. You could straighten it out, but this is costly and time consuming, and really not necessary. Just hide it behind the framed walls of your remodel. Of course, if the bow is still moving, the first thing to do is find out why and fix the cause. Professional advice is worth seeking out here.
If a wall is bowed in more than an inch, you probably need to straighten it. I say probably, because I’ve been in basements with the walls bowed in more than a foot. (I didn’t stay long, but I’ve been in them.) They’ve been that way for dozens of years, inching their way in, and at some point, they’ll cave. When you’re investing time and money in a basement remodel, I don’t think it makes sense to gamble that a questionable wall will hold up for years to come.
Cracked floors
Because of the expansion and contraction of large concrete slabs, cracks in basement floors are inevitable. Concrete floors and similar surfaces are constructed to direct the cracks along predetermined lines called control joints. These are visible as troweled joints on driveways, sidewalks, and some floors. Basement floors often have hidden control joints instead of troweled joints. Before the concrete cures, the finishers slice through the thickness of the concrete along a grid pattern and trowel lightly over the top of these joints to make a smooth surface. When the cured slab moves, it cracks along these fault lines.
The NAHB guidelines allow a 3/16-in. separation and/or vertical displacement for cracks in basement floors. There are a number of ways to deal with floor cracks that fall within acceptable guidelines. One is to do nothing. If you’re stretching a carpet and pad over the floor, most of the differences and separations will disappear. If you’re laying a thinner covering, such as low-pile carpet or linoleum, cracks and heaves will telegraph through.You’ll need to smooth out the differences with a grinder or a floor leveling compound.
Serious cracks or large vertical displacements in floors are harder to ascribe to a cause and more work to fix. Fortunately, they’re also less common, especially in newer homes. Here in the Midwest, bad floor problems are most often caused by a substrate of clay. The clay expands as it absorbs water and can exert enough pressure to bust up a concrete floor. The only solutions to this problem involve eliminating the source of water or removing the clay. Both are difficult tasks. If you have badly cracked, separated, or heaved floors, consult a professional to see what’s going on and what can be done.
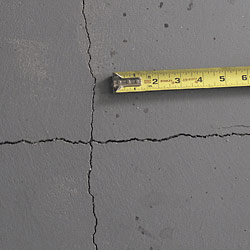 This floor has cracked along hidden control joints. The cracks are narrow and the floor remains flat.
 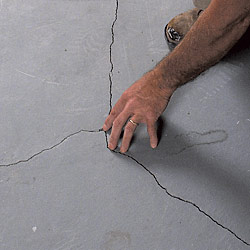 Cracks here diverge from hidden control joints. They’re about 1/4 in. wide and offset about 1/8 in. and will require repair if the floor is to be tiled.
Checking the Mechanical Systems
The heating, ventilation, and air-conditioning system (HVAC) and the electrical system play a part in every basement remodel, and plumbing (for a bathroom or laundry room) almost always does. So, before you go any further with a remodel, check out each of these systems.
HVAC
In most newer homes, the furnace and air conditioner are sized to include a finished basement. Those in older homes are generally up to the task, too, although you may need some supplemental heat. Codes require that certain amounts of air be provided for each room and for the safe operation of the furnace.You can figure out for yourself what is needed.
While the contractor is there, ask for suggestions on the best way to lay out the supply ducts and return air required by code.You may also want to ask the contractor for a bid to do the work, which isn’t always the most enjoyable task in a project.
Electrical system
The electrical-service panel in newer homes is usually adequate for a basement remodel. An older home may need a new higher-amperage panel to service the additional demands of a remodel. In general, if your panel has fuses, you’ll need to upgrade your service and replace the panel with a circuit-breaker panel.
If yours is already a circuit-breaker panel, see if there are enough blank knockouts below the installed circuit breakers to accommodate the new circuits you plan. Call in an electrician if you are unsure of what your panel will accommodate.
Plumbing
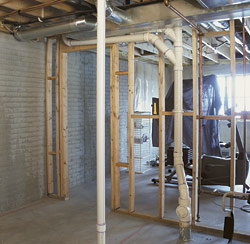
Newer homes are often plumbed to allow easy installation of a basement bathroom. These bathroom “rough-ins” usually include drains for a toilet, a tub or shower, and a sink. A 4-in.-round PVC sewer line, capped at floor level or a bit above, accomodates a toilet. A drain and vent stack (usually 2 in.) running from the floor to the ceiling serves the sink. Nearby should be a roughly 12-in. square plastic cover set in the floor. It protects a drain line set below the concrete for a bathtub or shower. Some tub rough-ins are thinly covered with concrete.You can find these by tapping on the surface of the concrete with a hammer. Solid concrete has a flat, dull sound. As you tap, you’ll hear the recess where the rough-in hides as a change in pitch. Older rough-ins may simply be boxed by 2x4s, exposing a small square area of sand covering the capped drain line.
If you lack these rough-ins, or want them in a different spot than at present, call in a professional plumber. Jackhammering concrete to install or move drains is hard work, and you’ll want to make sure it is done right. Once the basics are in place, there’s plenty of installation you can do.
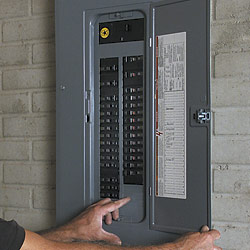 Check your electrical service box for unused circuit-breaker knockouts.
 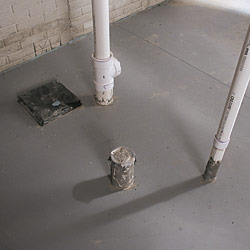 This basement has been preplumbed for a bathroom, with a toilet drain (center), a vent stack for a sink (right), and a black plastic knockout (left) covering the tub-shower drain.
Roger German has been a general contractor working in homebuilding a remodeling for more than 20 years. He has remodeled over 100 basements. Photos by: Roger Bruhn






View Comments
A major shortcoming of this article is that there is no mention of fire blocking basement walls and ceilings?--a very often overlooked code violation.
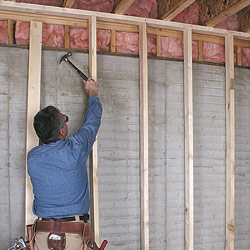
I hope that the framed and cracked basement wall in the seventh picture and the 2x4 wall being erected in the eighth picture are going to have fire blocking installed.
With the inclusion of those photos, the author should have specifically brought the future necessary step to the attention of the reader.