FHB Logo Facebook LinkedIn Email Pinterest Twitter X Instagram Tiktok YouTube Plus Icon Close Icon Navigation Search Icon Navigation Search Icon Arrow Down Icon Video Guide Icon Article Guide Icon Modal Close Icon Guide Search Icon Skip to content
Subscribe
Log In
  • How-To
  • Design
  • Tools & Materials
  • Restoration
  • Videos
  • Blogs
  • Forum
  • Magazine
  • Members
  • FHB House
  • Podcast
Log In

Fine Homebuilding Project Guides

Windows & Doors

Guide Home
  • Choosing Windows
  • Installing Windows In New Walls
  • Retrofitting Windows
  • Window Repairs
  • Door Basics
  • Interior Doors
  • Exterior Doors
How-To

A New Door Fits an Old Jamb

Are your doors looking tired? Replace them quickly and easily with a technique that works every time.

By Gary M. Katz Issue 165
  • X
  • facebook
  • linkedin
  • pinterest
  • email
  • add to favorites Log in or Sign up to save your favorite articles

Synopsis: Gary M. Katz, author of Installing and Hanging Doors, shares his foolproof process which will make hanging your door fun and easy whether its your first time or your thousandth. Katz guides you through each step with detailed instructions as well as clear pictures and diagrams to go along them. Learn how to scribe the door to the opening, bevel and mortise the hinge edges, and trim the door to fit. Finally, read the authors final tweaks for achieving a perfect fit.


I used to hate hanging doors. It’s way too easy to make a mistake, like hinging the door backward or upside down, or planing the bevel in the wrong direction. And I always had a tough time making a 1 ⁄8-in.- to-zero cut across the top of a door, especially if the door cost more than all my tools combined, and especially if someone was watching me work.

But years of hanging doors and learning from professional door hangers have tempered my views. In fact, the techniques that I outline here can make door hanging foolproof and fun, even if you’re hanging your first door. Using just a few simple tools and following the steps in order, you’ll no longer need to be afraid of doors, or of people watching you work on them.


6 steps for fitting a new door to an old opening:

Shims Position The Door In The Opening

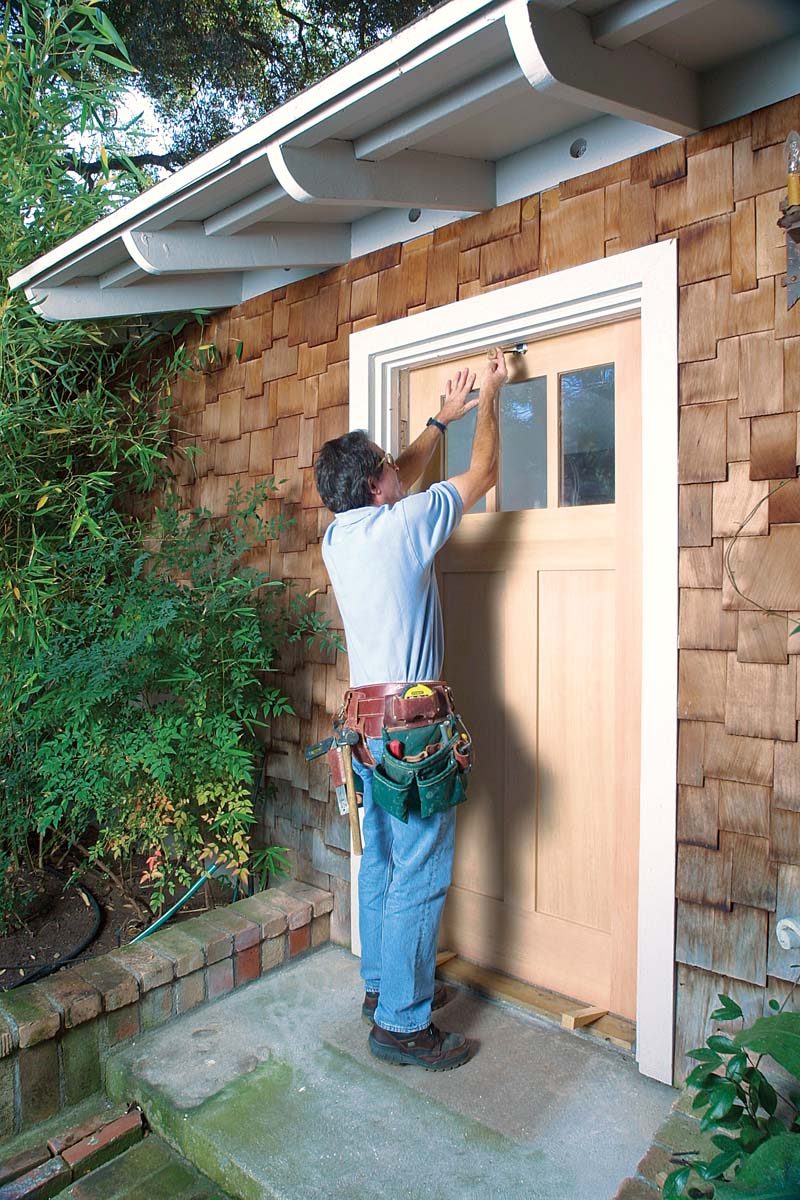
1) Shims Position The Door In The Opening

Scribing the door to the opening is an important first step. Start by setting the door on a couple of shims, then hooking it against the top of the jamb. A homemade door hook holds the door against the jamb. Adjusting the shims raises or lowers the door to the right position. If the head of the jamb is out of level, raise or lower one side of the door until the top rail is parallel to the jamb head. A small pry bar moves the door until it’s centered in the opening, but I leave at least 3 7⁄8 in. on the lock stile after planing; otherwise, some dead bolts might not fit. If the head is out of level and the jamb can’t be fixed easily, cheat the door a little out of plumb to make the head look better.

Mark The Door Edges

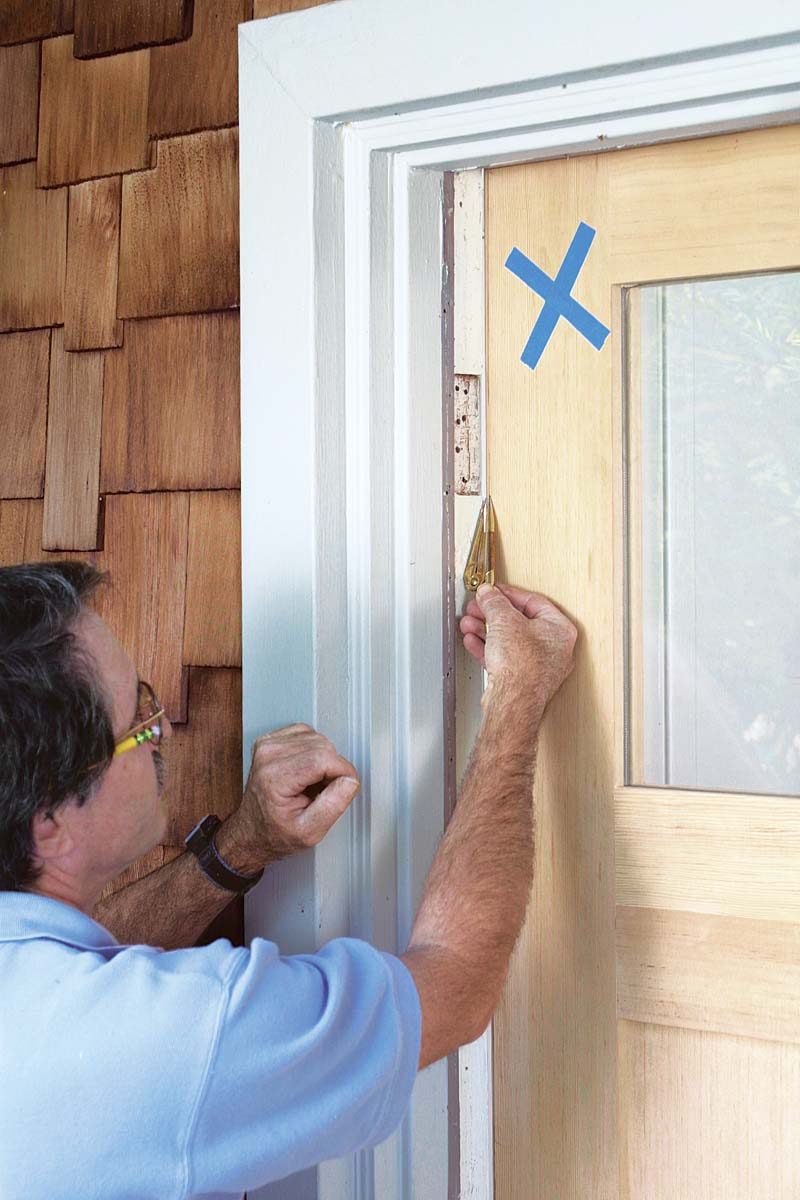
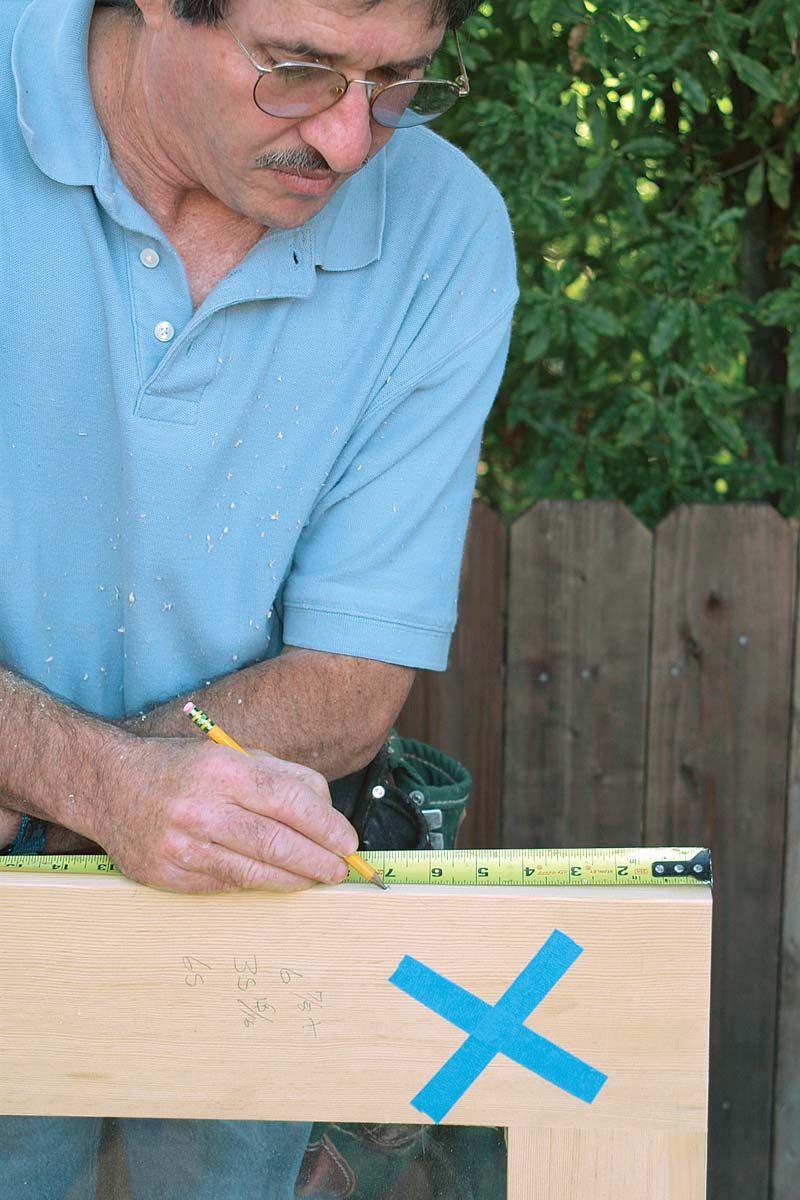
2) Mark The Door Edges

Use a simple set of dividers to scribe the edges of the door. Because I’m on the stop side, I spread the dividers to 3⁄16 in. (for a 1 3⁄4-in. door) to account for the hinge gap as well as bevels on both edges. If I’m fitting an interior door, I scribe the bottom of the door for the floor it swings over. For standard carpet, I spread the scribes to 1 3⁄8 in. An exterior door is scribed for the threshold and door shoe. Before taking down the door, make a large X out of tape on the hinge-side top of the door to orient it once you’ve carried it to the door bench. Also measure for each hinge location. I used to transfer hinge locations from the jamb to the door by eye, but because the trim often keeps the door 1⁄2 in. away from the jamb, it’s hard to keep the marks perfectly level. Careful measurements eliminate guesswork.

Trim The Top And Bottom First

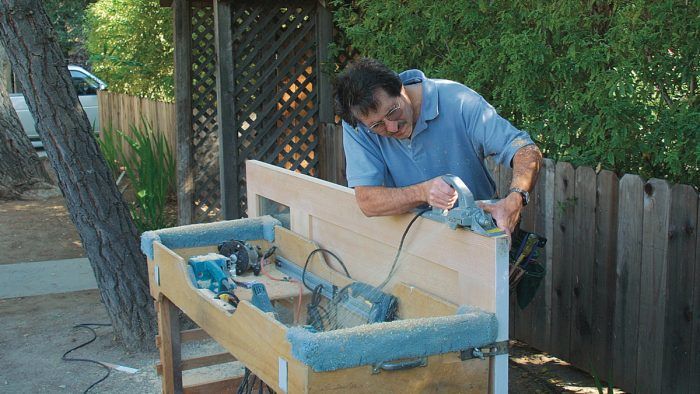
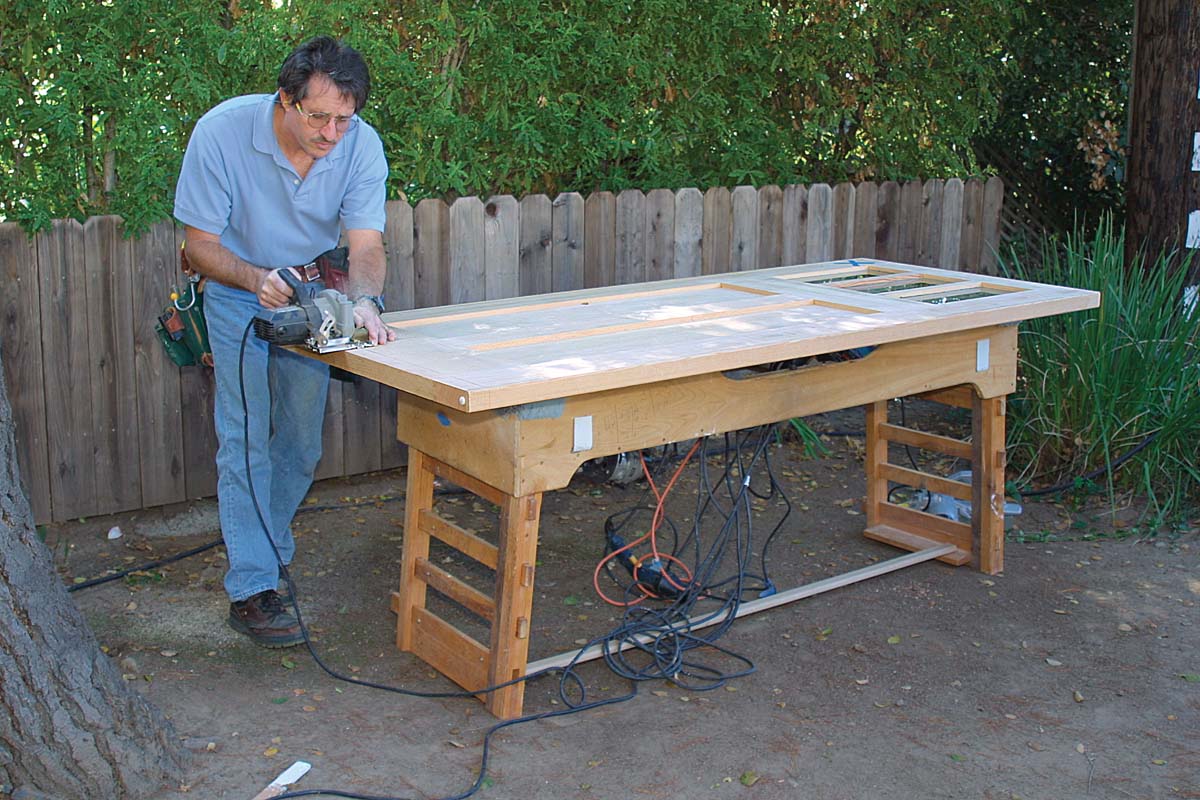
3) Trim The Top And Bottom First

A door bench is helpful when working on a door, but sawhorses also can be used. After placing the door flat with the X facing up, score the cutline across the stiles with a razor knife to prevent tearout. Cut about 1⁄16 in. wide of the line, using a sharp blade in your circular saw. Then plane right to the line. I start with the plane upside down, stopping within a foot of the opposite end so that I don’t blow out the back edge of the stiles. After planing to the line, turn the plane right side up and finish the other end with no blowout. While the door is lying flat on the bench, seal the top and bottom.

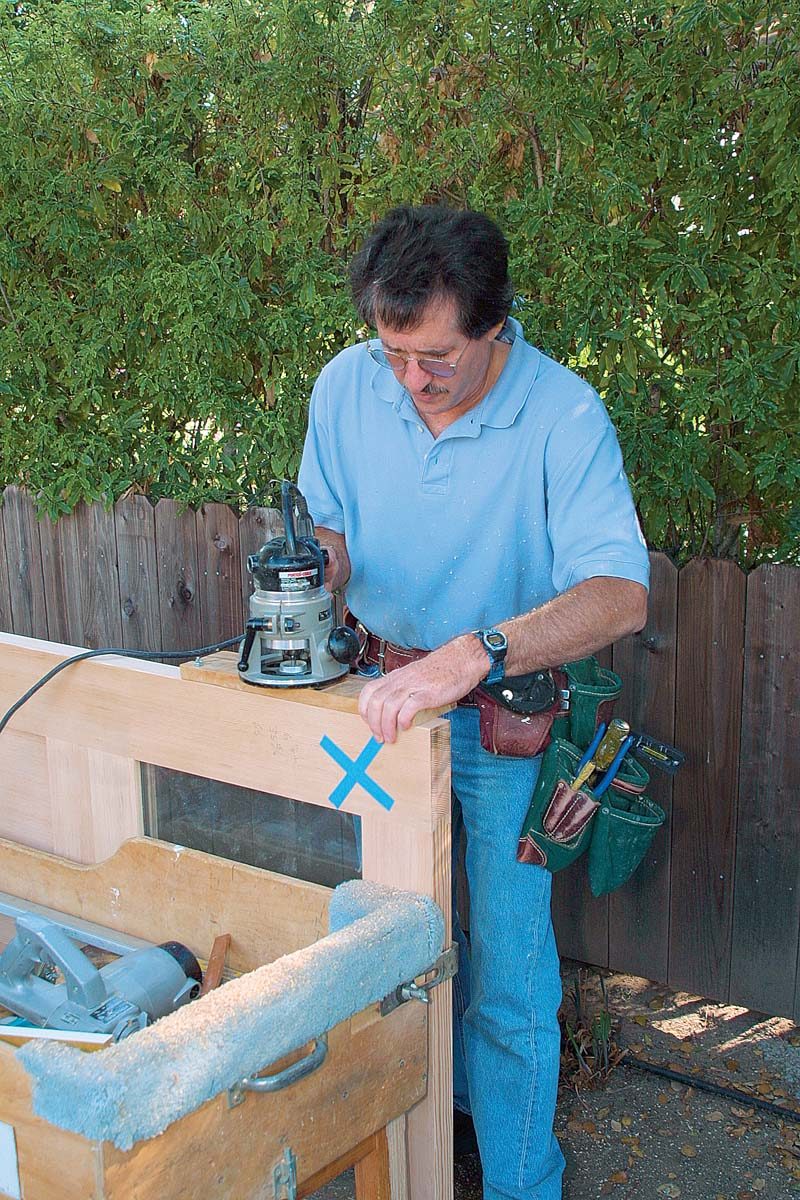
4) Bevel And Mortise The Hinge Edge

Set the door on edge with the X facing the bench to plane the hinge stile. Plane to the scribe line with the plane set to about a 3° bevel. The bevel prevents hinge binding. I also ease the edges with the plane at a 45° angle.

Lay out the hinges with a tape measure and look for the X to make sure you lay out the mortises from the top. The hinge barrels should point away from the X. 

Bevel And Mortise The Hinge Edge

For speed and accuracy, I use router templates for all hinge and hardware mortises.

Bevel And Mortise The Hinge Edge

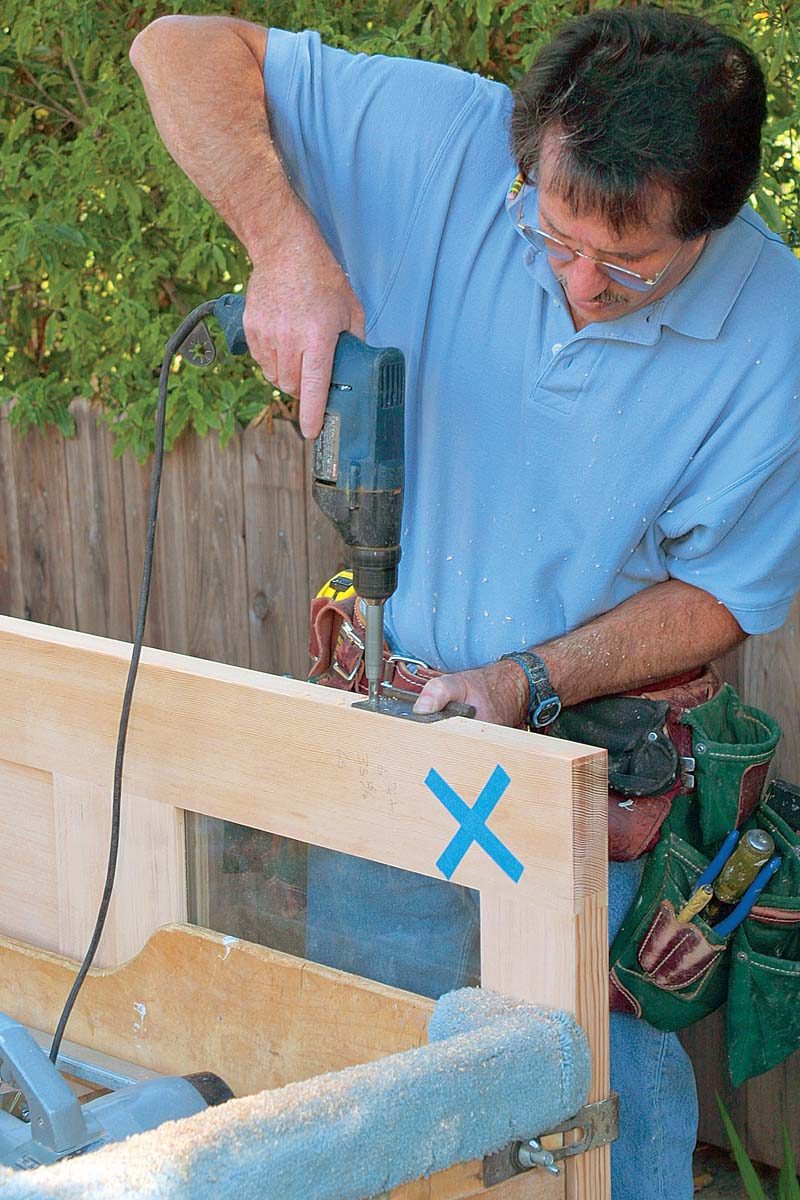
To keep the hinge screws from splitting the stile, drill pilot holes with a centering bit before attaching the hinges.

One Flip Is All You Need

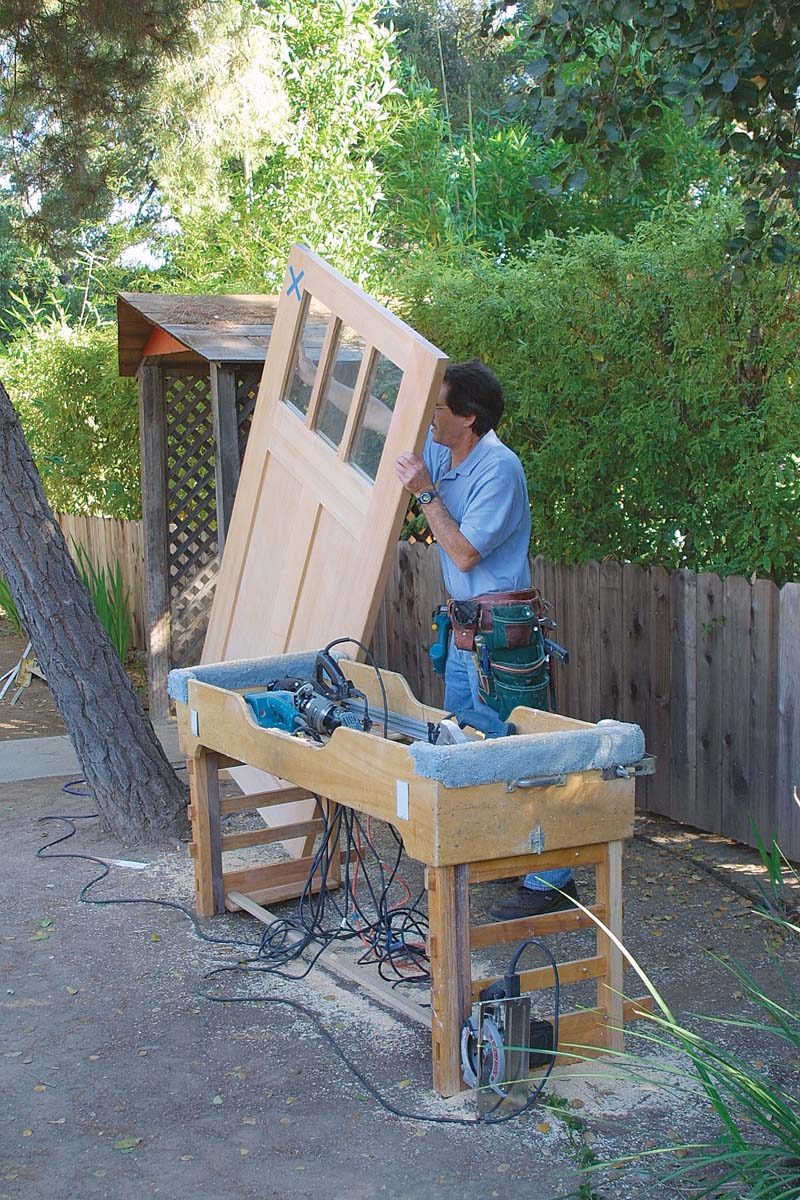
5) One Flip Is All You Need

Because I keep the scribe lines and the X facing the door bench at all times, I flip the door vertically, not horizontally, to work on the opposite edge, the lock stile. Bevel the lock stile with the plane at the same 3° bevel. Then measure for the lock bore, again remembering to look for the X so that you measure from the top instead of the bottom. Because I install lots of doors, I’ve invested in a lock-boring jig, although a paddle bit and a hole saw also can work well. Drill and mortise for the lockset, then carry the door back to the opening. About 95% of the time, the door fits the first time I swing it.

Final Tweak For A Perfect Fit

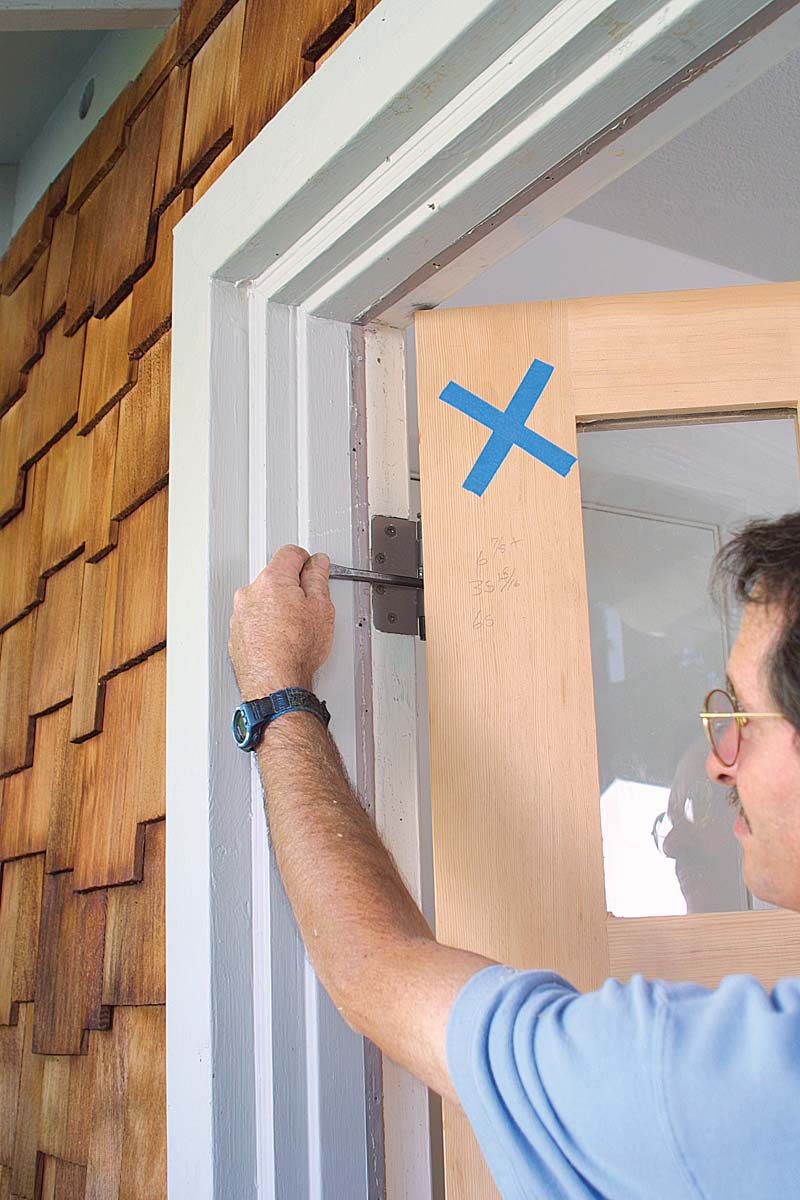
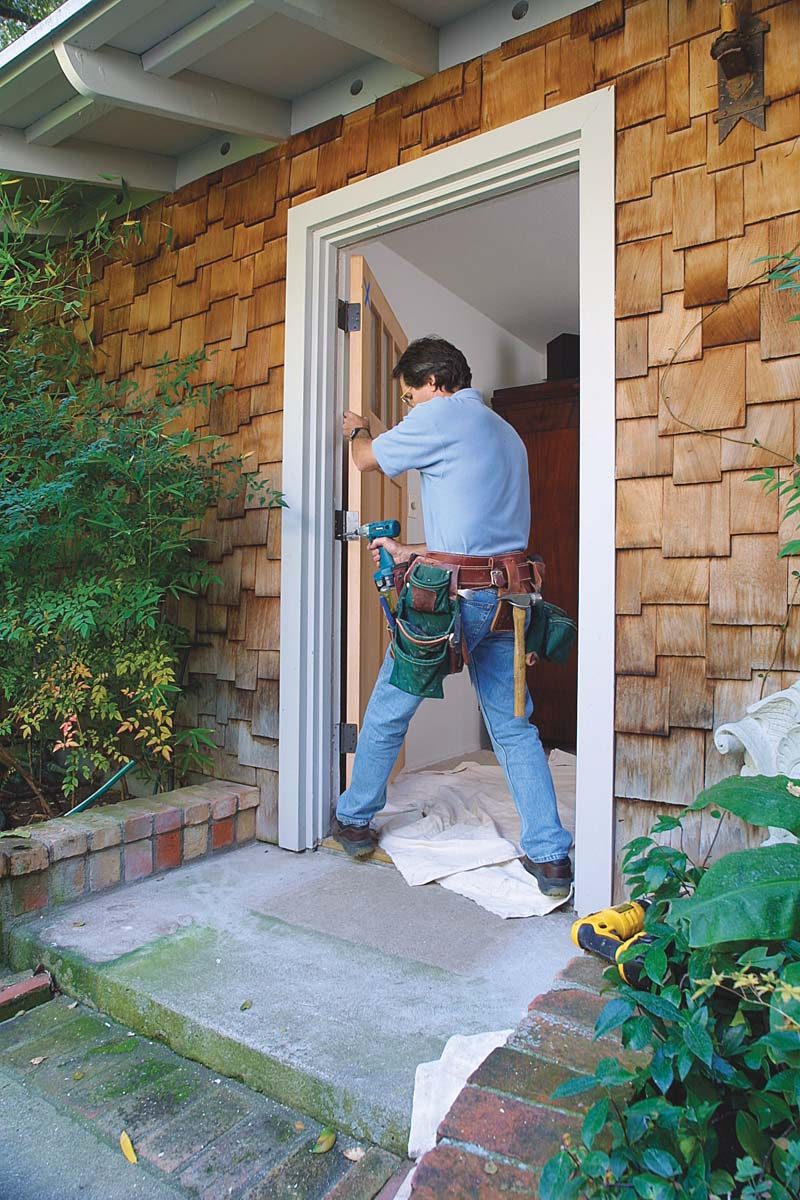
6) Final Tweak For A Perfect Fit

To hang the door, tip it until the top screw hole in the top hinge lines up with the screw hole in the jamb, and drive that screw. Align the door by pushing with your foot, and drive the rest of the screws in the hinges.

​

o move the door toward the strike jamb, place a nail set between the hinge leaves and against the hinge barrel, then close the door gently. The nail set spreads the hinge slightly.

When the door is swinging from the jamb, check the fit. Doors often need tweaking because hinges aren’t all the same. To move the door toward the strike jamb, place a nail set between the hinge leaves and against the hinge barrel, then close the door gently. The nail set spreads the hinge slightly.

to move the door toward the hinge jamb, first pop up the hinge pin until it’s just engaging the top barrel.

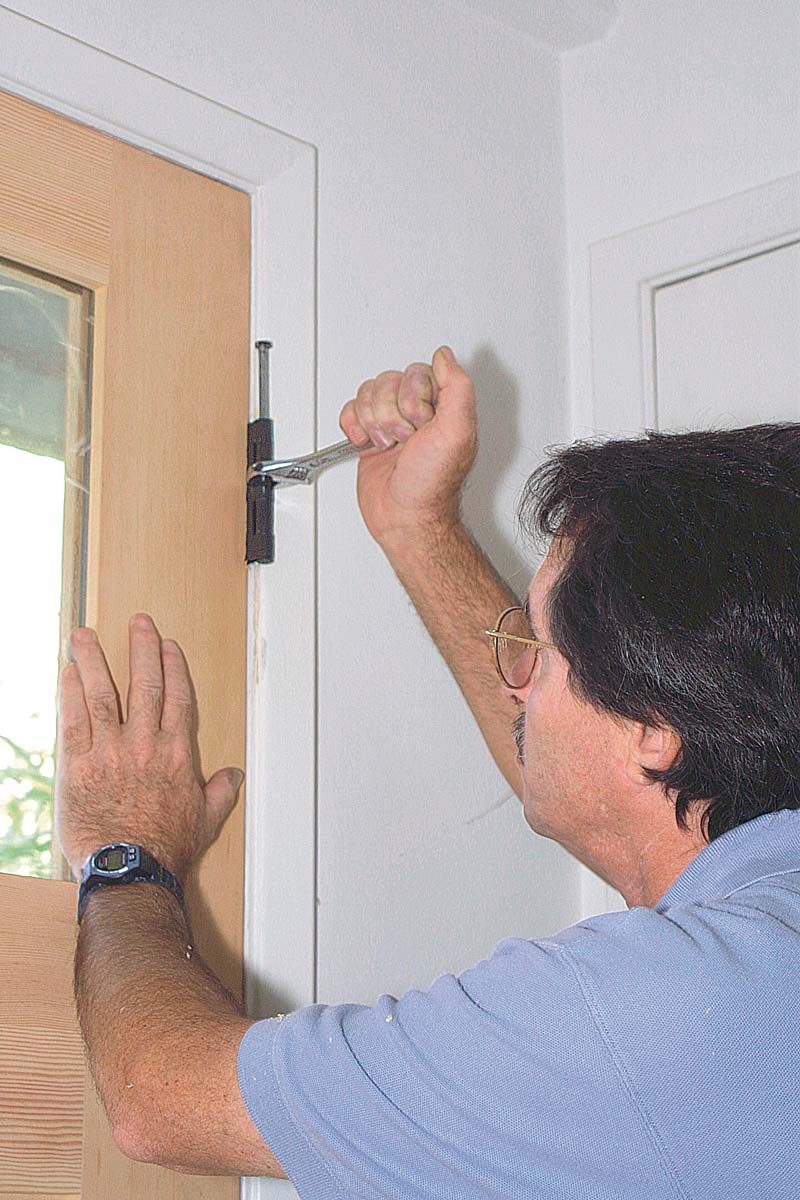
To move the door toward the hinge jamb, first pop up the hinge pin until it’s just engaging the top barrel. Then tighten a crescent wrench around each of the barrels on the hinge leaf attached to the door. Use the wrench to bend the hinge toward the strike side. This will close the gap on the hinge side.

To see additional photos and drawings and the original article, click the View PDF button below:


View PDF
Previous: Installing Exterior French Doors: Hang Screen Doors Next: How to Install a New Door Jamb in an Old Doorway

Guide

Windows & Doors

Chapter

Exterior Doors

Sign up for eletters today and get the latest how-to from Fine Homebuilding, plus special offers.

Signing you up...

This site is protected by reCAPTCHA and the Google Privacy Policy and Terms of Service apply.
See all newsletters
See all newsletters

Log in or create an account to post a comment.

Sign up Log in

Become a member and get full access to FineHomebuilding.com

Windows & Doors

Windows & Doors

Trusted, comprehensive guidance from the pros for choosing, installing, replacing, and repairing windows and doors on any house

View Project Guide

View All Project Guides »

Become a member and get unlimited site access, including the Windows & Doors Project Guide.

Start Free Trial

Choosing Windows
  • Window Types
  • Design and Materials
  • Energy-Efficient Windows
Installing Windows In New Walls
  • Installation, Start to Finish
  • Head Flashing for Windows
  • Video Series: Nail-Fin Window over Zip System Sheathing
  • Video Series: Nail-Fin Window over Exterior Rigid-Foam Insulation
  • Video Series: Nail-Fin Window over Housewrap
  • Video Series: Nail-Fin Window over Peel-and-Stick Housewrap
  • Video Series: Nail-Fin Window over a Fluid-Applied WRB
  • Video Series: Weatherproof Window Installation
Retrofitting Windows
  • Removing the Old, Installing the New
  • Video Series: How to Replace a Window
  • Video Series: Install a Full-Frame Replacement Window in a Brick Wall
  • Video Series: Install an Insert Replacement Window in a Brick Wall
  • Video Series: Retrofit a Flanged Window
Window Repairs
  • Restoring Old Windows
  • Repairs and Upgrades
Door Basics
  • Tools & Jigs for Door Hanging
  • How to Install Doors
  • Hinges
  • Handles, Knobs, and Locksets
  • Fixing Door Problems
Interior Doors
  • Prehung Doors
  • Pocket Doors
  • Other Types of Doors
  • Custom-Built Doors
Exterior Doors
  • Door Choices and Design
  • Installing Entry Doors
  • Building Exterior Doors
  • Installing French Doors
  • Replacing a Door
  • Adding Weatherstripping and Sweeps

Fine Home Building

Newsletter Sign-up

  • Fine Homebuilding

    Home building tips, offers, and expert advice in your inbox.

  • Green Building Advisor

    Building science and energy efficiency advice, plus special offers, in your inbox.

  • Old House Journal

    Repair, renovation, and restoration tips, plus special offers, in your inbox.

Signing you up...

This site is protected by reCAPTCHA and the Google Privacy Policy and Terms of Service apply.
See all newsletters

Follow

  • Fine Homebuilding

    Dig into cutting-edge approaches and decades of proven solutions with total access to our experts and tradespeople.

    Start Free Trial Now
    • Facebook
    • Instagram
    • X
    • LinkedIn
  • GBA Prime

    Get instant access to the latest developments in green building, research, and reports from the field.

    Start Free Trial Now
    • Facebook
    • YouTube
  • Old House Journal

    Learn how to restore, repair, update, and decorate your home.

    Subscribe Now
    • Facebook
    • Instagram
    • X

Membership & Magazine

  • Online Archive
  • Start Free Trial
  • Magazine Subscription
  • Magazine Renewal
  • Gift a Subscription
  • Customer Support
  • Privacy Preferences
  • About
  • Contact
  • Advertise
  • Careers
  • Terms of Use
  • Site Map
  • Do not sell or share my information
  • Privacy Policy
  • Accessibility
  • California Privacy Rights

© 2025 Active Interest Media. All rights reserved.

Fine Homebuilding receives a commission for items purchased through links on this site, including Amazon Associates and other affiliate advertising programs.

  • Home Group
  • Antique Trader
  • Arts & Crafts Homes
  • Bank Note Reporter
  • Cabin Life
  • Cuisine at Home
  • Fine Gardening
  • Fine Woodworking
  • Green Building Advisor
  • Garden Gate
  • Horticulture
  • Keep Craft Alive
  • Log Home Living
  • Military Trader/Vehicles
  • Numismatic News
  • Numismaster
  • Old Cars Weekly
  • Old House Journal
  • Period Homes
  • Popular Woodworking
  • Script
  • ShopNotes
  • Sports Collectors Digest
  • Threads
  • Timber Home Living
  • Traditional Building
  • Woodsmith
  • World Coin News
  • Writer's Digest
Active Interest Media logo
X
X
This is a dialog window which overlays the main content of the page. The modal window is a 'site map' of the most critical areas of the site. Pressing the Escape (ESC) button will close the modal and bring you back to where you were on the page.

Main Menu

  • How-To
  • Design
  • Tools & Materials
  • Video
  • Blogs
  • Forum
  • Project Guides
  • Reader Projects
  • Magazine
  • Members
  • FHB House

Podcasts

  • FHB Podcast
  • ProTalk

Webinars

  • Upcoming and On-Demand

Podcasts

  • FHB Podcast
  • ProTalk

Webinars

  • Upcoming and On-Demand

Popular Topics

  • Kitchens
  • Business
  • Bedrooms
  • Roofs
  • Architecture and Design
  • Green Building
  • Decks
  • Framing
  • Safety
  • Remodeling
  • Bathrooms
  • Windows
  • Tilework
  • Ceilings
  • HVAC

Magazine

  • Current Issue
  • Past Issues
  • Magazine Index
  • Subscribe
  • Online Archive
  • Author Guidelines

All Access

  • Member Home
  • Start Free Trial
  • Gift Membership

Online Learning

  • Courses
  • Project Guides
  • Reader Projects
  • Podcast

More

  • FHB Ambassadors
  • FHB House
  • Customer Support

Account

  • Log In
  • Join

Newsletter

Get home building tips, offers, and expert advice in your inbox

Signing you up...

This site is protected by reCAPTCHA and the Google Privacy Policy and Terms of Service apply.
See all newsletters
See all newsletters

Follow

  • X
  • YouTube
  • instagram
  • facebook
  • pinterest
  • Tiktok

Join All Access

Become a member and get instant access to thousands of videos, how-tos, tool reviews, and design features.

Start Your Free Trial

Subscribe

FHB Magazine

Start your subscription today and save up to 81%

Subscribe

This is your last free article.

Don't miss another expert tip or technique from building pros. Start your free trial today.

Start your FREE trial

Already a member? Log in

We hope you’ve enjoyed your free articles. To keep reading, become a member today.

Get complete site access to expert advice, how-to videos, Code Check, and more, plus the print magazine.

Start your FREE trial

Already a member? Log in

Privacy Policy Update

We use cookies, pixels, script and other tracking technologies to analyze and improve our service, to improve and personalize content, and for advertising to you. We also share information about your use of our site with third-party social media, advertising and analytics partners. You can view our Privacy Policy here and our Terms of Use here.

Cookies

Analytics

These cookies help us track site metrics to improve our sites and provide a better user experience.

Advertising/Social Media

These cookies are used to serve advertisements aligned with your interests.

Essential

These cookies are required to provide basic functions like page navigation and access to secure areas of the website.

Delete My Data

Delete all cookies and associated data