
Footing and Foundation in One Pour
For small projects, you can save time and money if you form and pour all the concrete at once.

Synopsis: Why pay the upcharges and spend the extra time on a small job when you can convert two short loads of concrete into one regular load? We explain how to do this, while also giving you better ways to strip forms, lash together vertical and horizontal rebar, and keep the concrete where it belongs: in the forms. This article details the entire process of filling the footing and foundation in one pour, from building the forms, to smoothing and strengthening the concrete through vibration without putting too much pressure on the forms. Jim Blodgett also shares a great tip for bending rebar quickly and easily without an expensive rebar bender.
We have been pouring foundations pretty much the same way that our grandfathers taught us: Build the forms for the footings; pour the concrete; strip the forms. Build the forms for the foundation; pour the concrete; strip the forms again.
This time-tested approach to footing and foundation construction works fine for big jobs, but it’s not the best way to tackle a small job. You pay a pretty stiff upcharge when you order a short load of concrete (less than 4 cu. yd.), and small projects usually call for short loads. Pouring the footing and foundation at the same time can convert two short loads into one regular load.
Batterboards and strings align the forms
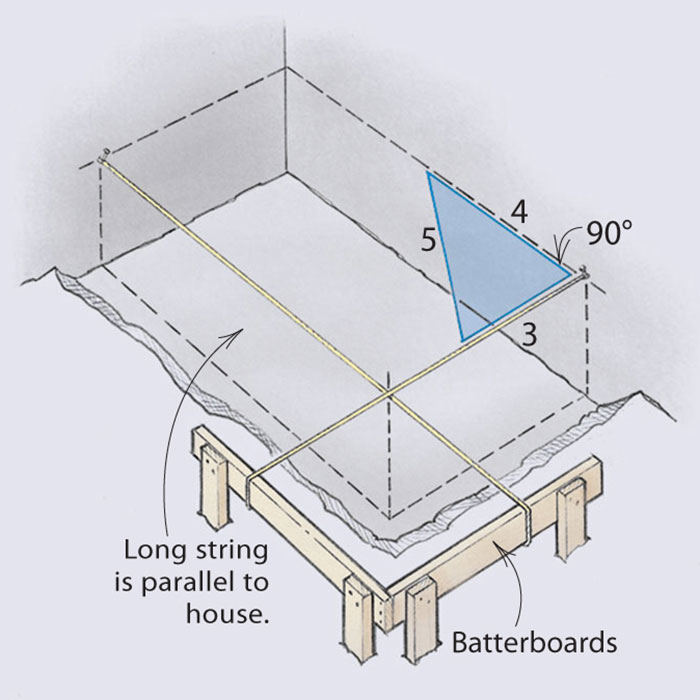 Locating the forms for this L-shaped foundation wall can be done by stringing lines between batterboards and the walls of the house. Set the long string by measuring equally off the house at two points. Then set the shorter string square to the house by applying the 3-4-5 triangle rule. A triangle with these side lengths contains a 90° corner. Because the strings are for reference, they don’t have to be at any particular height, but they should be level. Some people establish a level grade line inside the foundation forms and pour to the line, but setting the top of the form to the finished height of the wall makes the whole process easier. |
When pouring footings and foundation walls separately, there’s a built-in safety net: If the footings aren’t perfectly square, you can correct mistakes when you form the walls. Not so with a monolithic pour; you need to be more careful when laying out and setting up the forms.
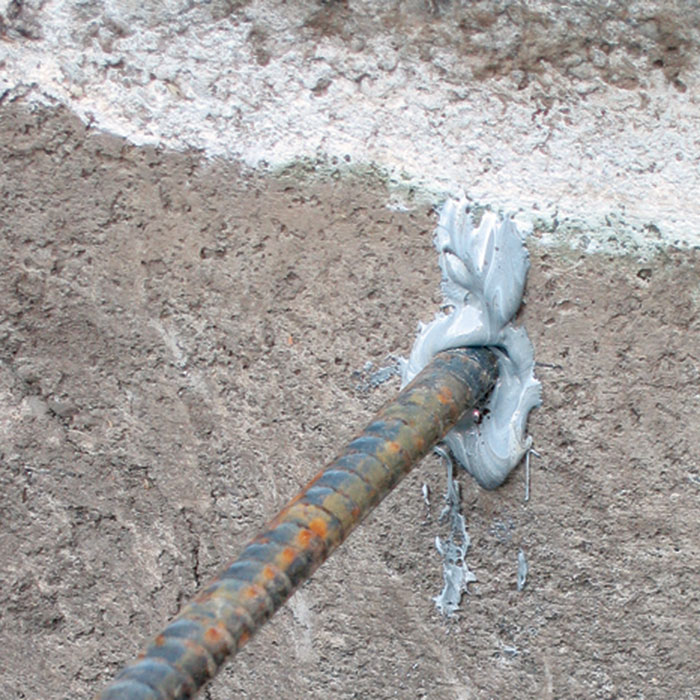
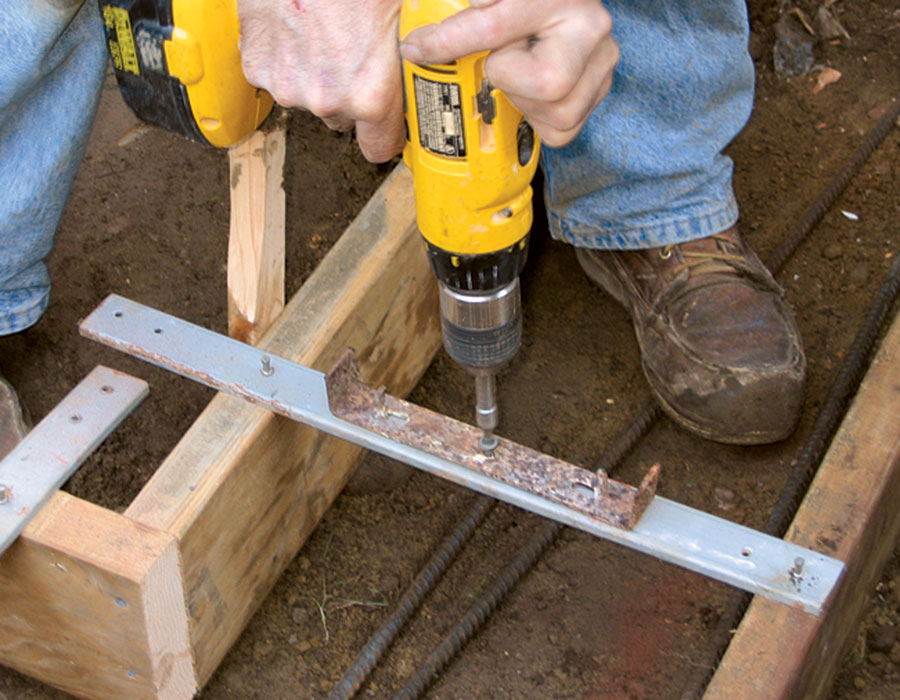
Batterboards guide stringlines, which in turn guide the placement of the footings. Specialized metal straps and brackets position the wall forms on the footings.
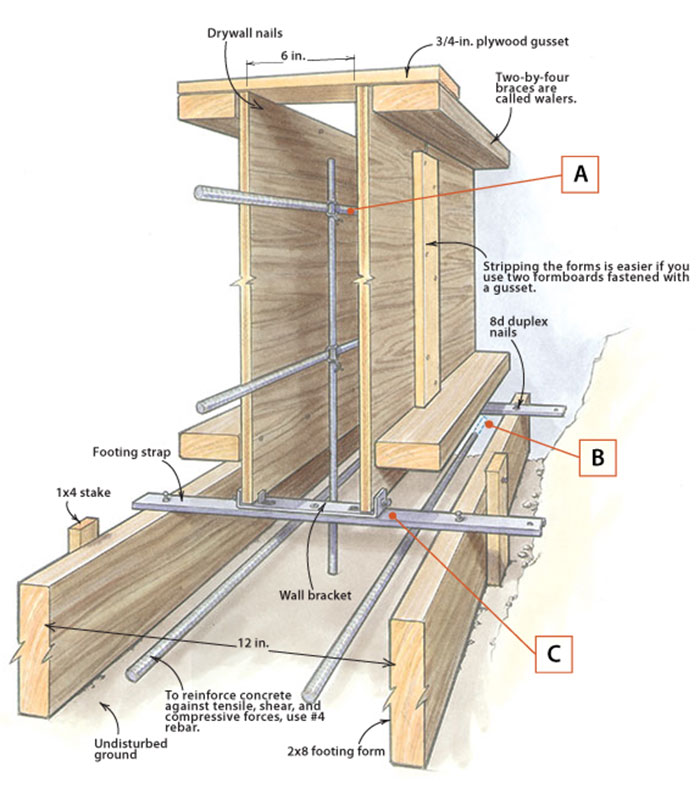
Straps and brackets support the wall forms
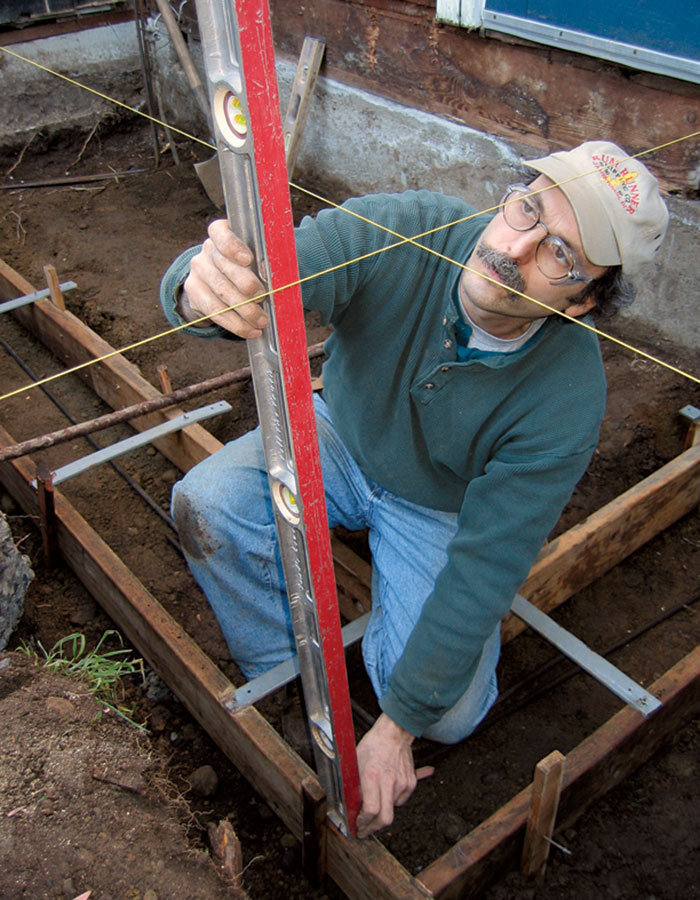
The metal straps are nailed across the footings, and then the bracket locations are set by plumbing down from the stringlines. Don’t cap off the footing because pressure from the concrete will lift it out of the ground. Instead, pour the wall in lifts.
 |
 |
 |
Build forms to disassemble easily
Another important thing to remember when building forms is that you will have to strip them. Poorly thought-out joints can make stripping forms a nightmare.
Forms with outside corners generally are easy to strip because pressure from the concrete tends to push the joints apart. Inside corners, however, are pushed together. When building forms, I follow a couple of simple rules for inside corners. If a formboard butts existing concrete (the house’s foundation), I butt the opposite end into wood by reversing the lap of the corner; and I use two short boards joined with a plywood bracket instead of one long board.
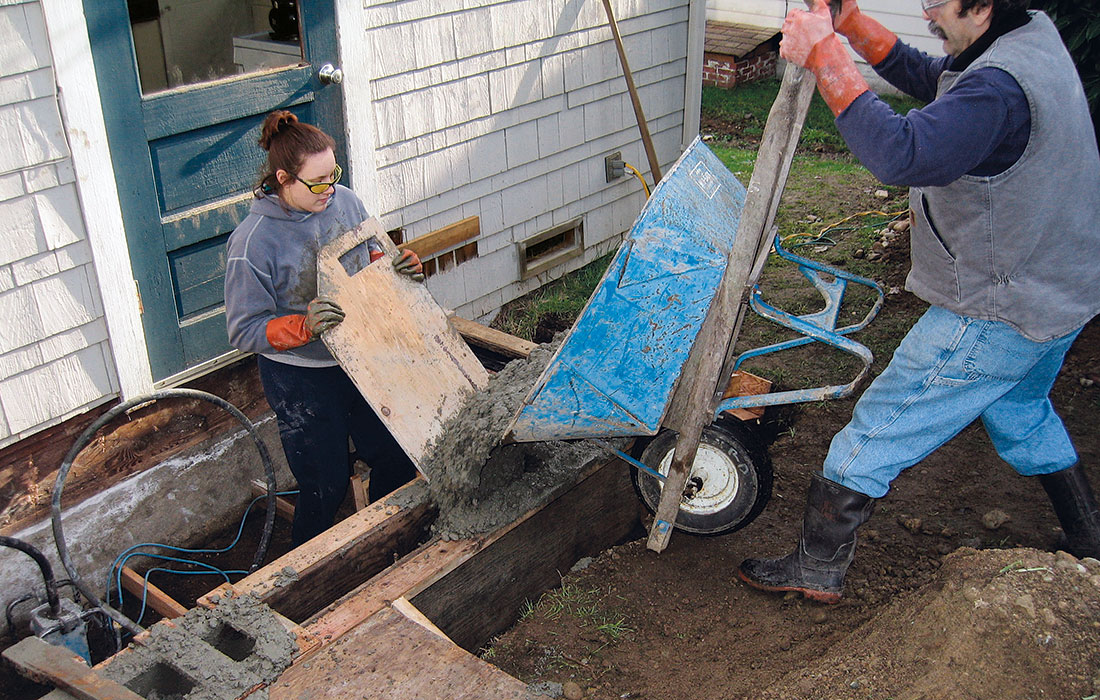
Keep concrete where it belongs: in the forms
If placing forms accurately is one difficulty encountered in a monolithic pour, keeping the concrete in the forms is another.
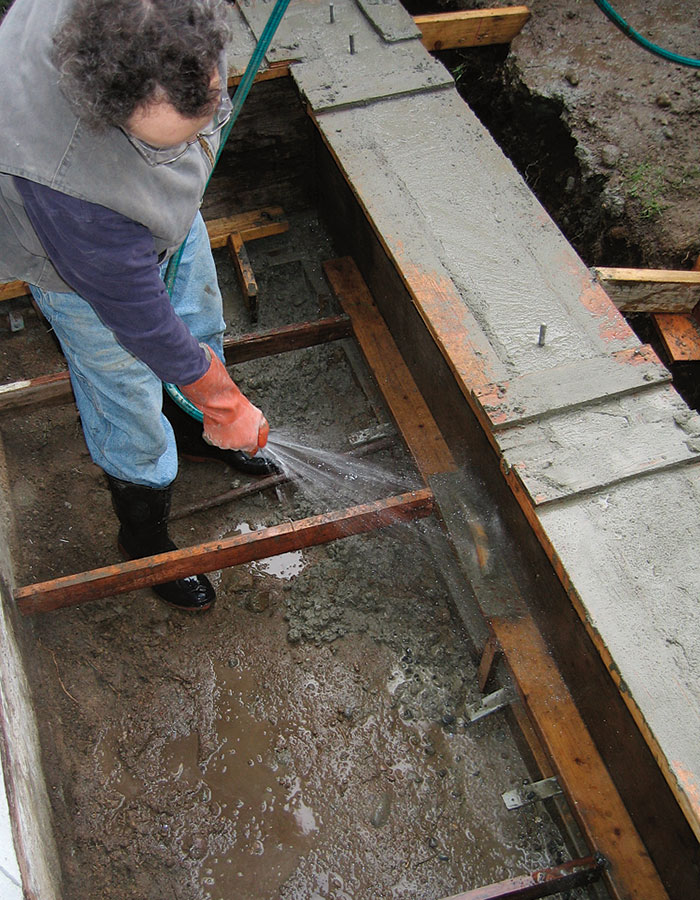
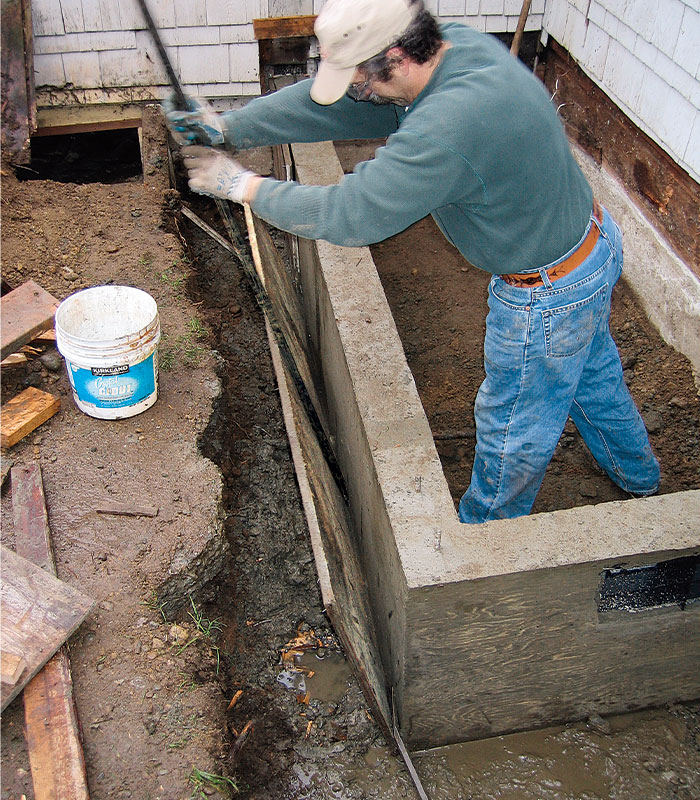
On small jobs, space is usually tight. Getting concrete to the forms may require a pumper or a wheelbarrow. But even distributing concrete within the forms can be tricky on a tight lot. If you don’t have room to dump the wheelbarrow every couple of feet along the forms, an electric vibrator can be helpful. I rent an electric vibrator to move concrete within the forms and to reduce air and rock pockets (honeycombing). The vibrator is a wonderful tool, but it has drawbacks; specifically, vibration adds pressure to the forms, notably at the bottom and on corners, which can cause the forms to break. Anyone who has poured concrete has learned about this hydrostatic pressure the hard way.
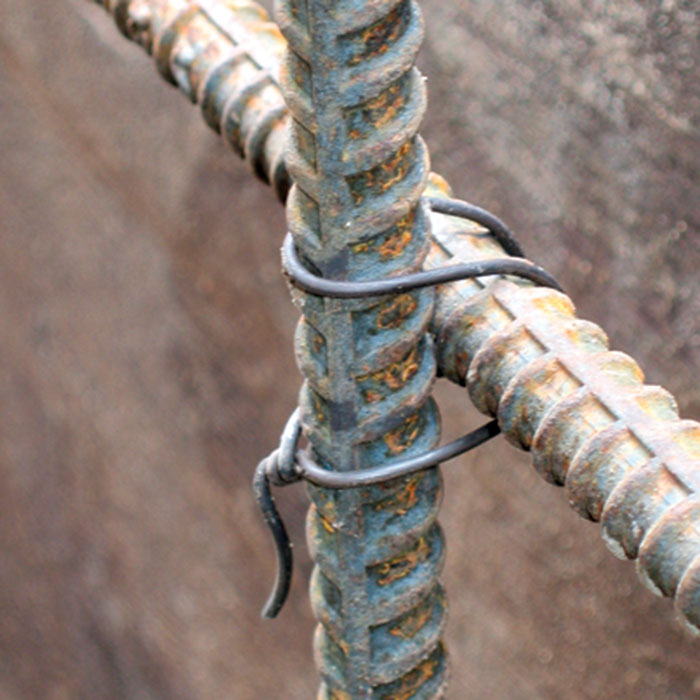
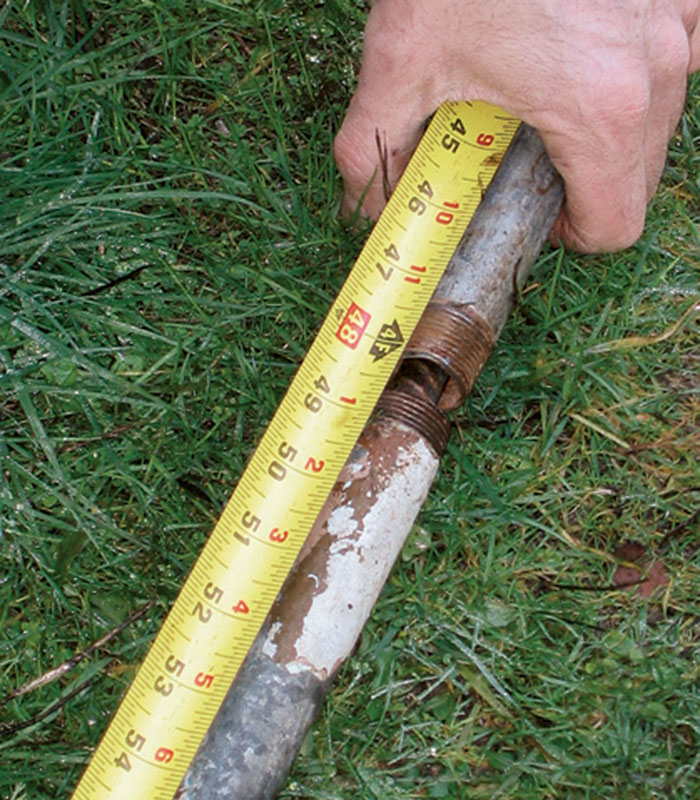
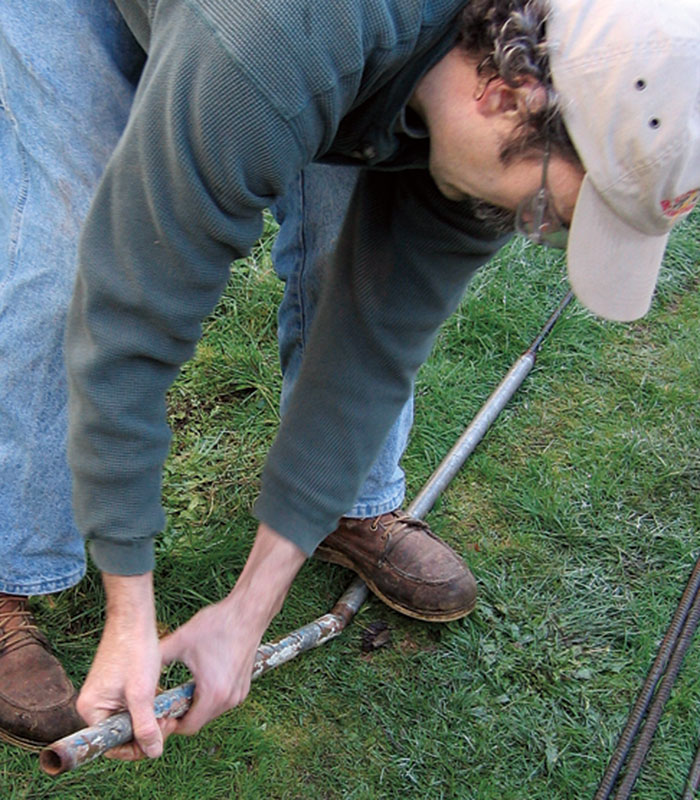
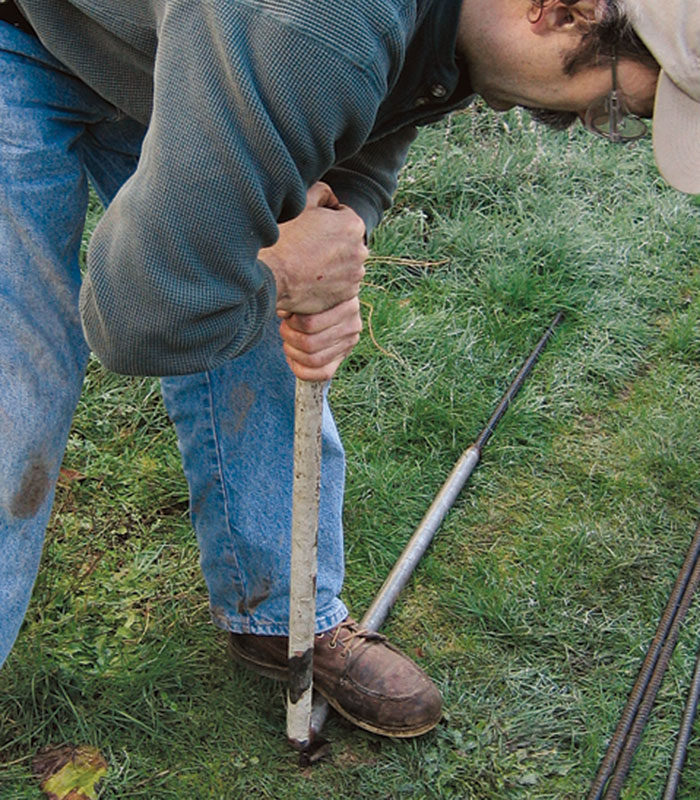
Tight corners are easy to bend
Using two lengths of black pipe, the author gets excellent results without an expensive rebar bender.
 |
 |
 |
 |
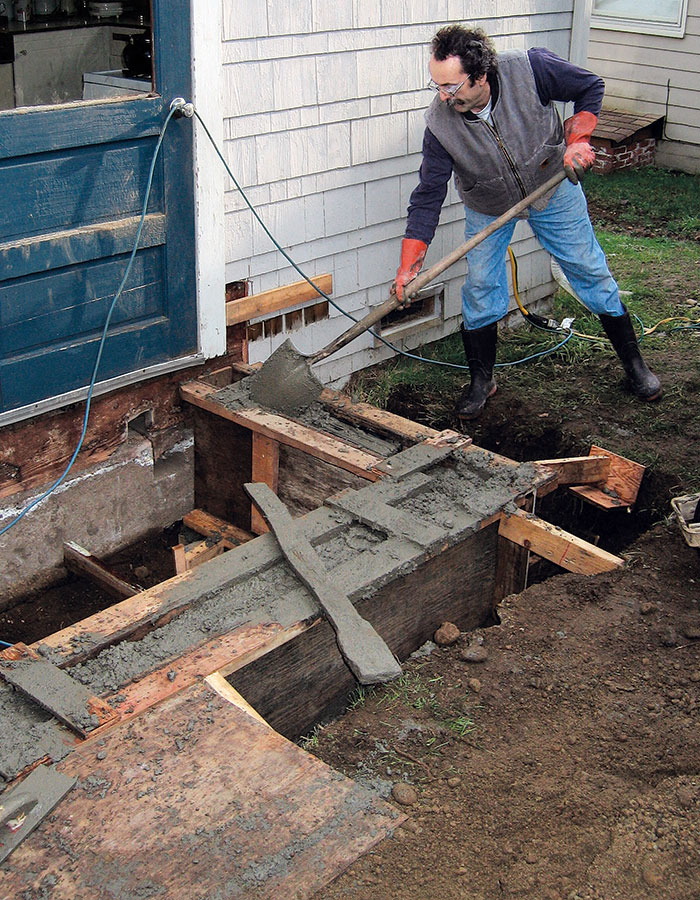
In monolithic pours, you have the additional challenge of controlling a lavalike mudflow from the open top of the footing. You can’t contain the concrete by sealing this opening, so don’t try. The same hydraulic pressure that lifts concrete over the top of the form can lift sealed forms out of the ground—stakes and all—leaving you with a monolithic mess.
A vibrator strengthens and smooths concrete
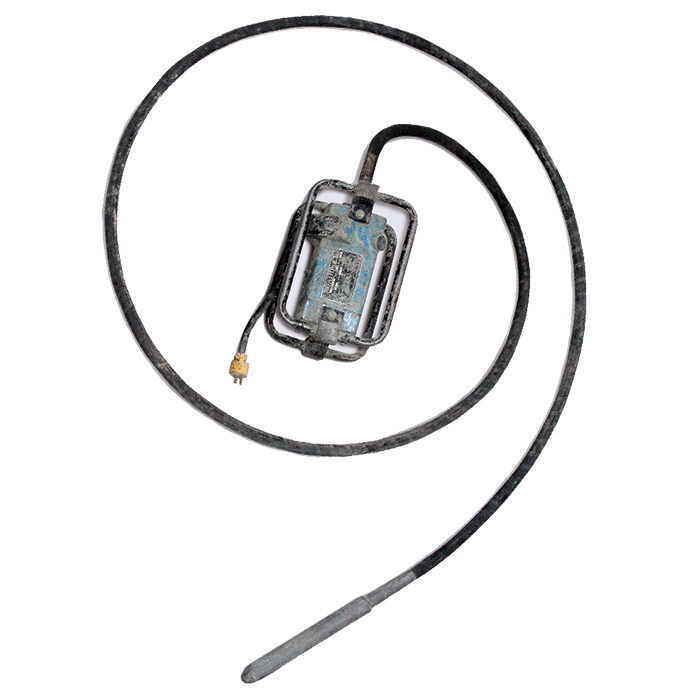 To get a smooth finish on a concrete wall, I vibrate the concrete as I pour it. Vibration also adds strength because it removes air pockets and eliminates the cold joints between successive pours. I use a series of plunges into the concrete instead of constant vibration, which would create too much pressure on the forms and make the concrete soupy. At $40 a day, a 3 ⁄ 4-in.-dia. vibrator is worth renting. |
The key step is keeping an eye on the opening while you pour and vibrate. If concrete starts to ooze over the top of the footing, move to another spot and let the concrete stiffen before you add more weight on top of it. When you come back to it, vibrate the two pours together enough to ensure a good joint, but not enough to lift the forms.
—Jim Blodgett (www.asmallwoodworkingcompany.com) lives in Roy, Wash.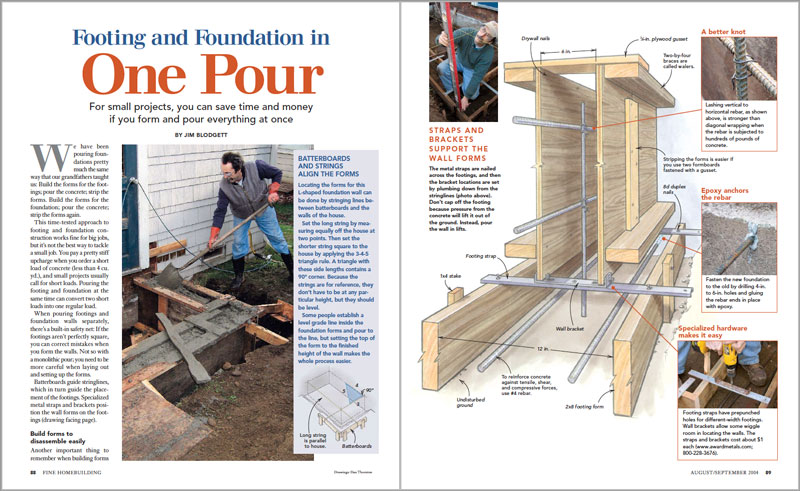
Photos by Hugh Lentz.
Drawings by Dan Thornton.
For more photos and information on straps and brackets, click the View PDF button below.
From Fine Homebuilding #165

