
Laying Out a Common Rafter
For simple gable or shed roofs, you need to learn this basic building block of roof framing.
Laying out hip, valley, and jack rafters takes experience and skill, but if you’re building a simple gable or shed roof, all you need is the common rafter, the basic building block of roof framing.
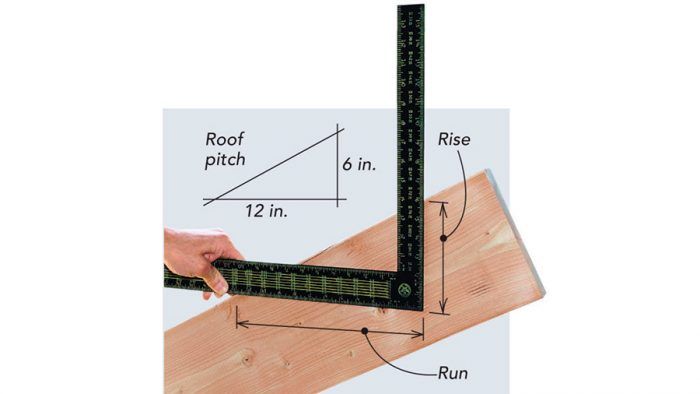
To lay out a common rafter, you need the pitch of the roof, expressed in units of rise per foot of run. In the gable-roof example shown here, a rafter with 6-in-12 pitch rises 6 in. for every foot of run. Run is the horizontal distance that the rafter covers. For a gable roof, the run is measured from the centerline of the ridge board to the outside edge of the top of the wall.
Once you know the pitch and the total run, you can lay out the cuts of the rafter in a number of ways. The simplest method is to “step off” the layout in 1-ft. increments using a framing square.
Stepping off the rafter
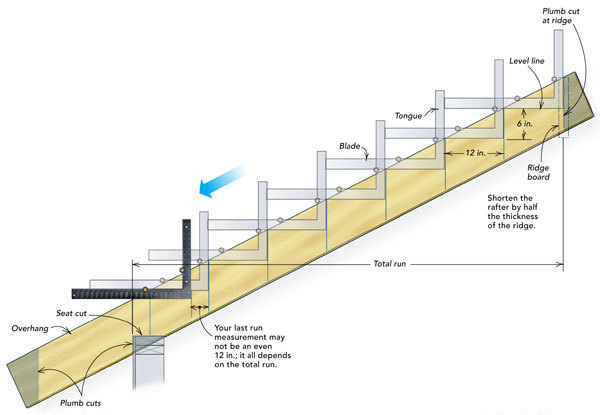
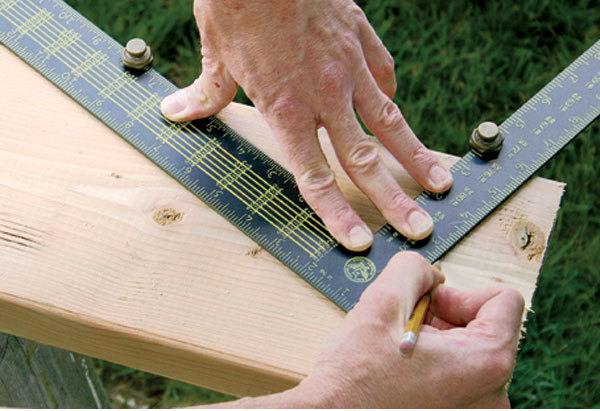
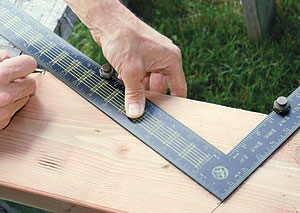
Step 1: Start at the ridge. Clamp stair gauges to the framing square to align rise and run measurements with the rafter’s top edge. Mark the first plumb line near the end of the rafter to locate the ridge cut. Then mark the first 1-ft. increment of run. Now you can “step down” the rafter to complete the total run.
 |
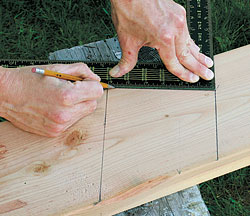 |
Step 2: Plumb and seat cuts complete the bird’s mouth. The right-angled notch that fits over the top of the wall is called a bird’s mouth. Measuring from the plumb cut, make the level seat cut equal to the thickness of the wall assembly.
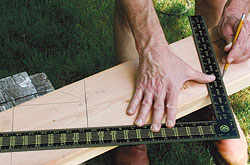
Step 3: Flip the square to mark the overhang. Many framers prefer to leave the tails long, then snap a line and cut them in place. But a simple plumb-cut rafter tail is a snap to lay out in advance: Flip the square 180° (tongue pointing downward) and step off the desired measurement from the bird’s-mouth plumb line to the end of the rafter tail.
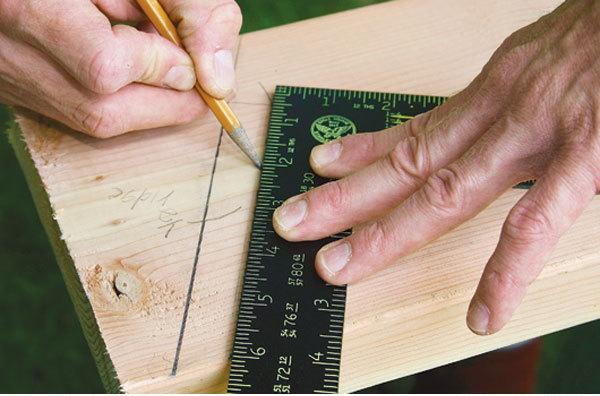
Step 4: Trim the plumb cut to account for the ridge board. If the rafter is to be secured to a ridge board, half of the ridge board’s thickness must be removed from the top end of the rafter. Measure the difference on the body of the rafter, then mark the cutline.
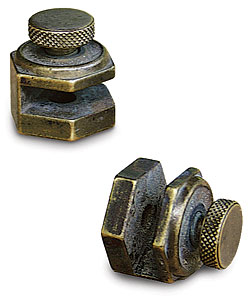
Stair gauges lessen the chances for error
The most useful accessories for laying out rafters are a pair of tiny clamplike devices called stair gauges (General Tools; 212-431-6100; www.generaltools.com). Each gauge is a small hexagonal nut with a slot through the middle and a thumbscrew for securing it to the square. Clamped to the legs of a framing square at rise and run points, stair gauges act as stops to ensure that the rise and run settings remain consistent throughout the layout process. As the name implies, these little gadgets also are handy for laying out stair stringers.
The first rafter is a pattern for the rest
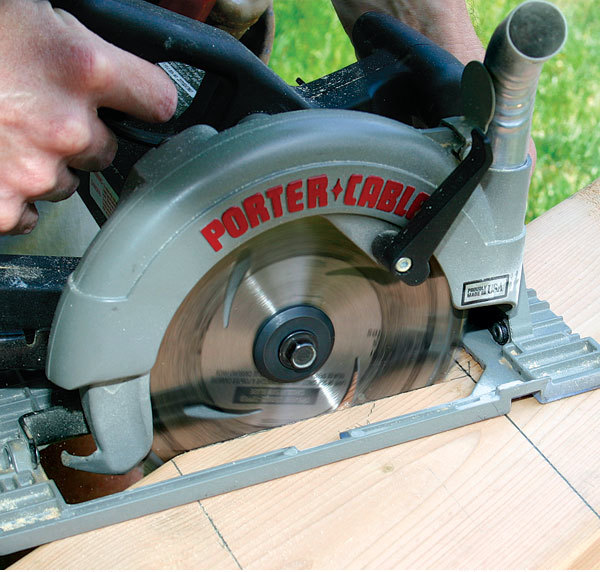
Step 5: Cut the first one with extra care. This rafter will serve as a pattern for all the others, so it’s important to make precise cuts. Make sure that the blade is sharp and set square with the base of the circular saw.
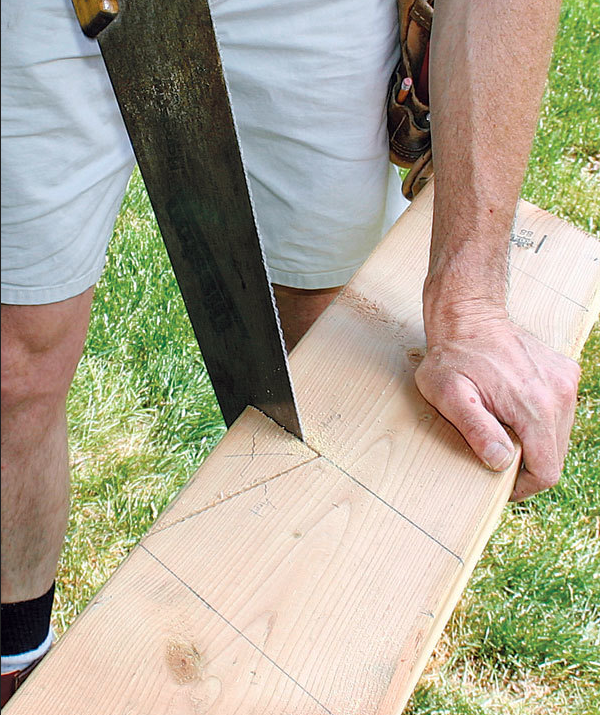
Step 6: Complete the bird’s mouth with a handsaw. You’ll need the saw to cut into the corner from both sides.

Step 7: Keep crowns up when tracing the pattern. Framing lumber won’t be uniformly straight and true, so it’s good practice to orient rafters so that their crowns will face upward when they’re installed. Place the pattern over the top of each new piece of rafter stock, then mark the cuts. If you don’t have a helper, use a Quik-Grip clamp to hold the pattern rafter in place.
Photos by: Tom O’Brien; drawing by: Dan Thornton
More on Roof Rafters:
Perfect Roof Rafters – Focus your efforts on the pattern rafter, and the rest of the roof falls into place easily.
Fine Homebuilding Recommended Products
Fine Homebuilding receives a commission for items purchased through links on this site, including Amazon Associates and other affiliate advertising programs.

Hook Blade Roofing Knife

Shingle Ripper

Tajima Chalk Rite Chalk Line

View Comments
You can cut any roof with the use of a Framing square and a ruler, oh and a pencil ! There are much simpler methods than what is shown here. I learned from old school from old timers. Simpler people using simpler ways getting the same results.
If using the top picture (roof pitch showing 12" and 6" [6/12 pitch]. lets say that building width is 24' (feet) and half of that is 12', this would be the 12" in that picture, the 6 is the rise, Measure the Hypotenuse and that will give you the length of the common. in this picture for a 24' building the common would be 13' 6" minus half the ridge width.
I get a hair under 13' 5" minus half the ridge width. That rafter isn't going to sit flush with the top of the ridge beam.