A Curved Face for a Corner Cabinet
Here's a quick and easy way to make a curved cabinet door.
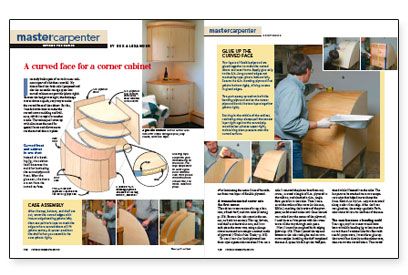
I recently built a pair of curved corner cabinets as part of a kitchen remodel. My clients liked the sleek style I proposed and also the accessible storage space that curved cabinets can provide. Because the budget was tight, the challenge was to devise a quick, easy way to make the curved faces of the cabinet. Besides, I needed extra time to make the curved crown molding and bullnose. The technique I came up with eliminates the need for special forms and allows me to cut the curved doors in place after laminating the entire front of the cabinet from two layers of flexible plywood.
A trammel-mounted router cuts the first curves
The cabinet’s case consists of a top, a bottom, a fixed shelf, and two sides. Because the sides meet in the corner, no back is necessary. The top, bottom, and shelf are identical in size, and I cut each piece the same way, using a plunge router mounted on a simple trammel made of plywood.
To start, I cut 3⁄4-in. birch plywood into three square pieces that measure 30 in. on a side. I removed the plastic base from my router, screwed a length of 1⁄4-in. plywood to the subbase, and chucked a 3⁄8-in., single-flute spiral bit in the collet. Then I measured the radius of the curve (in this case, 29 1⁄4 in.), marking the location of the pivot point, an 8d coated sinker nail. Once the nail was tacked into the corner of the plywood, I used three or four passes with the router to cut all the way through each piece.
Next, I ironed on preglued birch edging. Then I joined the top and bottom to the sides with glue and narrow-crown staples. Installing the shelf completed the case. A spacer block kept the shelf positioned while I fastened it to the sides. The last parts to be attached were two temporary strips that helped me to clamp the front. Each 5⁄16-in. by 1-in. strip was screwed along a side’s front edge. After the front was glued on, these strips guided a flush-trim router bit to trim the front of the case.
The case becomes a bending mold
Years ago, my first instinct would have been to build a bending jig to laminate the curved face of a cabinet like this. But with careful preparation, I was able to glue up the curved face directly on the cabinet case, then cut out the curved doors. The curved face consists of two plywood layers: a substrate of 3⁄8-in. bending plywood and a finished layer of 1⁄8-in. Finnish-birch plywood.
To prep for gluing on the curved front, I used painter’s masking tape to cover the front edges of the case top, bottom, and shelf where the cabinet’s doors open. I also masked off the temporary strips so that they wouldn’t bond to the face, allowing me to remove them easily. I applied yellow glue to the exposed 6-in. edges on the top, bottom, and shelf pieces. C-clamps held the bending plywood to the edge strips while I aligned the plywood and drove drywall screws to hold it along one edge. After pulling the opposite edge tight, I glued and screwed it in place.
For more photos and details, click the View PDF button below:
