Building a Craftsman-Style Hutch
Behind the pleasing proportions lies a simple assembly of boxes, frames, and mail-order components.
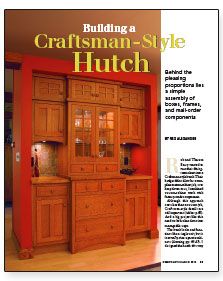
Synopsis: Cabinetmaker Rex Alexander replaces a dining-room closet with a beautiful built-in made from plywood boxes and manufactured doors and drawer fronts. A sidebar offers a look at hallmark details of the Craftsman style, and an exploded drawing illustrates how a big project was divided into manageable parts.
Rob and Theresa Barry wanted to turn their dining-room closet into a Craftsman-style hutch. Their budget didn’t allow for a complete custom-cabinet job, so to keep down costs, I combined custom-cabinet work with factory-made components.
Although this approach costs less than a custom job, Craftsman-style details are still important. And a big project like this needs to be broken down into manageable steps.
The hutch looks and functions like a single unit, but it is actually nine separate cabinets. I designed the hutch this way so that I could handle and install the cabinets easily myself.
Draw the cabinets before you build them
Before setting foot in the shop, I drew the entire project to scale on 1⁄4-in. graph paper. I began with a front elevation, which helped me to arrive at the most pleasing arrangement of drawers, doors, face frames, and trim.
Next, on separate sheets, I drew and dimensioned each cabinet box and its face frame. At this time, each cabinet was color-coded to organize the cutlists for sheet goods and face frames.
Nearly all the case construction was done with 3⁄4-in. melamine-coated particleboard. MCP is inexpensive, and its durable white coating is an ideal finished surface for the inside of a cabinet. The only two cabinets that required more expensive oak-veneered plywood were the center base cabinet and the glass-door cabinet. The glass-door cabinet has sides made of two layers of 3⁄4-in. oak plywood. These double-layer sides bring the cabinet’s interior surface flush with the inner edge of the face frame, as on the side cabinets. On the center base cabinet, only a strip of oak plywood was used to cover the sides of this deeper cabinet.
Cases and face frames use basic joinery
As shown in the drawings, I assembled the MCP cases by rabbeting the sides to hold the top and bottom. Before assembling each case, I drilled holes in the sides for shelf supports. Cabinet backs simply can be glued and nailed in place. For wall-hung cabinets, I generally use heavier 1⁄2-in. plywood or MCP backs to provide extra support when fastening the cabinet through the back. Base cabinets get 1⁄4-in. backs.
I used regular Titebond glue on the cabinet joinery, except where the slippery surfaces of MCP join each other. Here, Titebond melamine glue has a stronger bond.
The last step in cabinet assembly is to build and attach the oak face frames. I used a biscuit joiner and inserted two small (FF) biscuits at each face-frame joint; then I attached the face frames to the cases with larger (#20) biscuits.
For more photos, drawings, and details, click the View PDF button below:
