Adding Detail with Built-Up Molding
The final result looks like custom window (or door) trim, but it's painless and affordable to make by combining stock profiles.
Synopsis: A professional trim carpenter explains how to install window and door trim step by step. At the same time, he offers a half-dozen design ideas for changing the look of the trim by combining different moldings.
When I’m asked for ideas to upgrade the interior of a house, the first thing I say is “Change the trim.” The dramatic difference that built-up trim makes easily justifies the extra cost. As a carpenter, installing an interesting three-piece casing is always more fun than working with boring old clamshell or colonial casing. Because it consists of multiple pieces, built-up trim is actually much more forgiving than single piece trim. One piece follows the window or door jamb, and a second follows the wall. Then a third piece joins the two, concealing any gaps. As my kids would say, sweet.
A few companies offer architecturally correct built-up trim arrangements. But much the same effect can be achieved with a little imagination and some stock trim from a lumberyard or building supply store. To test trim combinations, make up small sections with all the details, as I’ve done.
Window trim starts with the stool
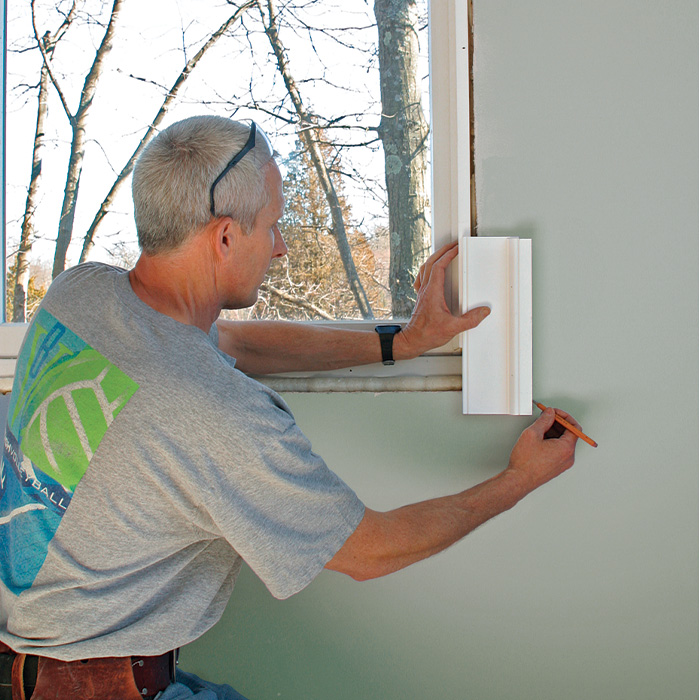
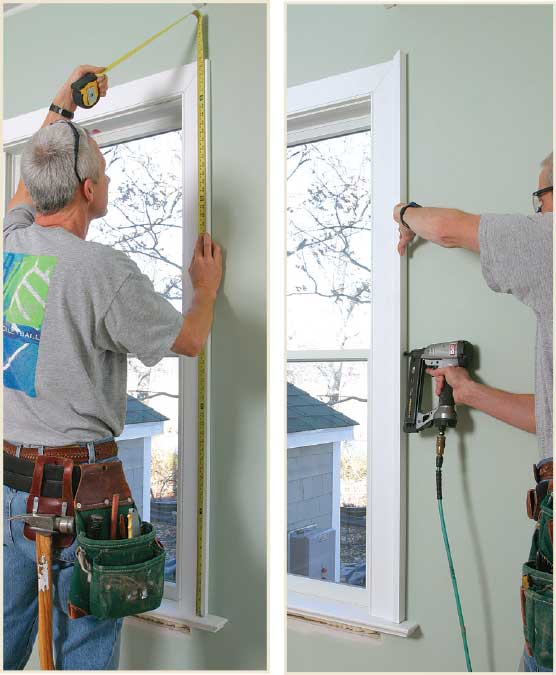
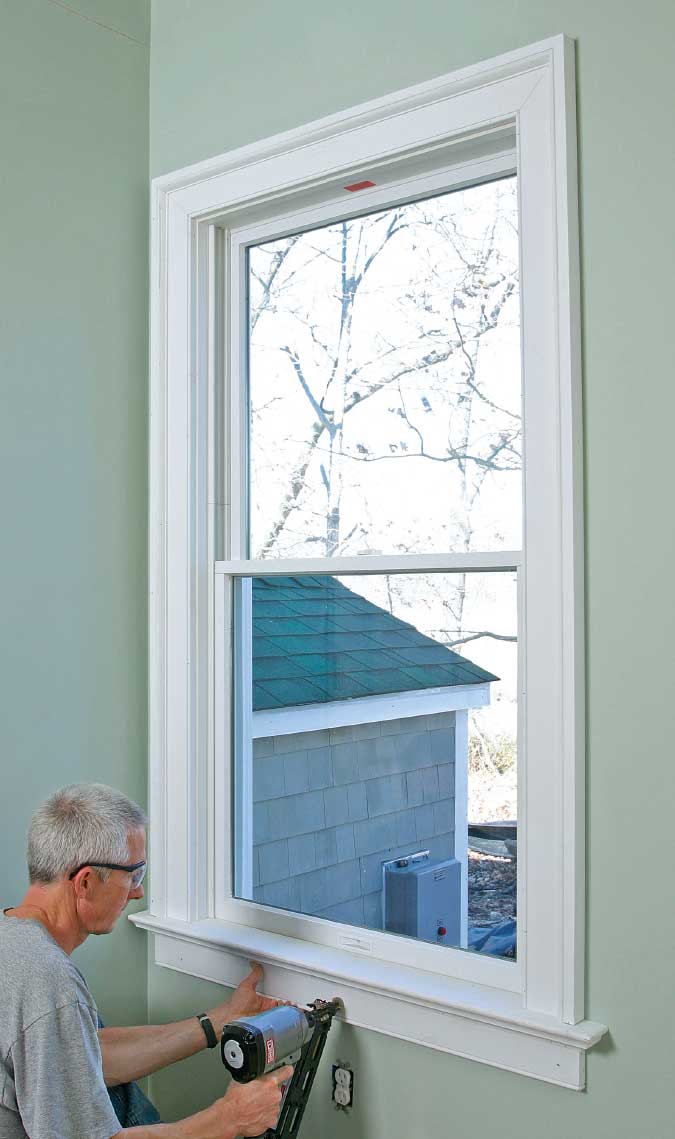
For built-up trim, I prefer a thicker stool with bullnose edges. To find the length of the stool, I assemble a short section of the built-up side casing. Then I set it in place near the bottom of the window, making sure to leave a 3⁄16-in. reveal on the inside of the window jamb. I make a light pencil mark on the wall along the outside edge of the trim section (see photo), then I repeat the process on the other side. I make the marks low enough to use as a reference later when installing the apron.
Next, I measure the distance between the pencil lines and add 3 in. The extra length allows the ends or “ears” of the stool to extend 1 1⁄2 in. past the edge of the trim, rather than the 3⁄4 in. typically used with conventional molding. The extra length also accommodates the decorative trim that will be applied to the apron.
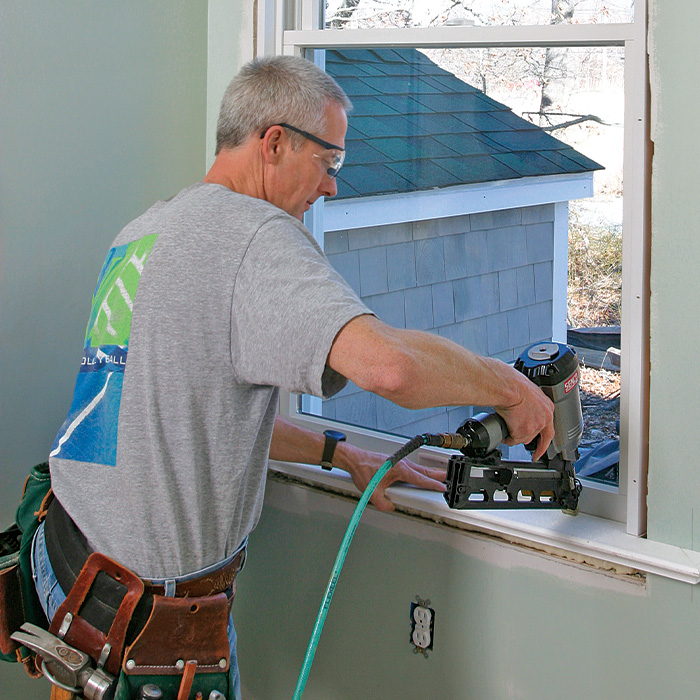
I make sure the finished stool is deep enough for the built-up trim to land without overhanging. Ideally, the stool should extend 3⁄4 in. to 1 in. beyond the outermost edge of the trim. To maintain the profile of the stool on all three faces, I cut 45° miters on the ends and install small return pieces that fit between the miters and the wall. I glue and nail the return pieces to the stool before nailing the stool into place.
Flat casing first
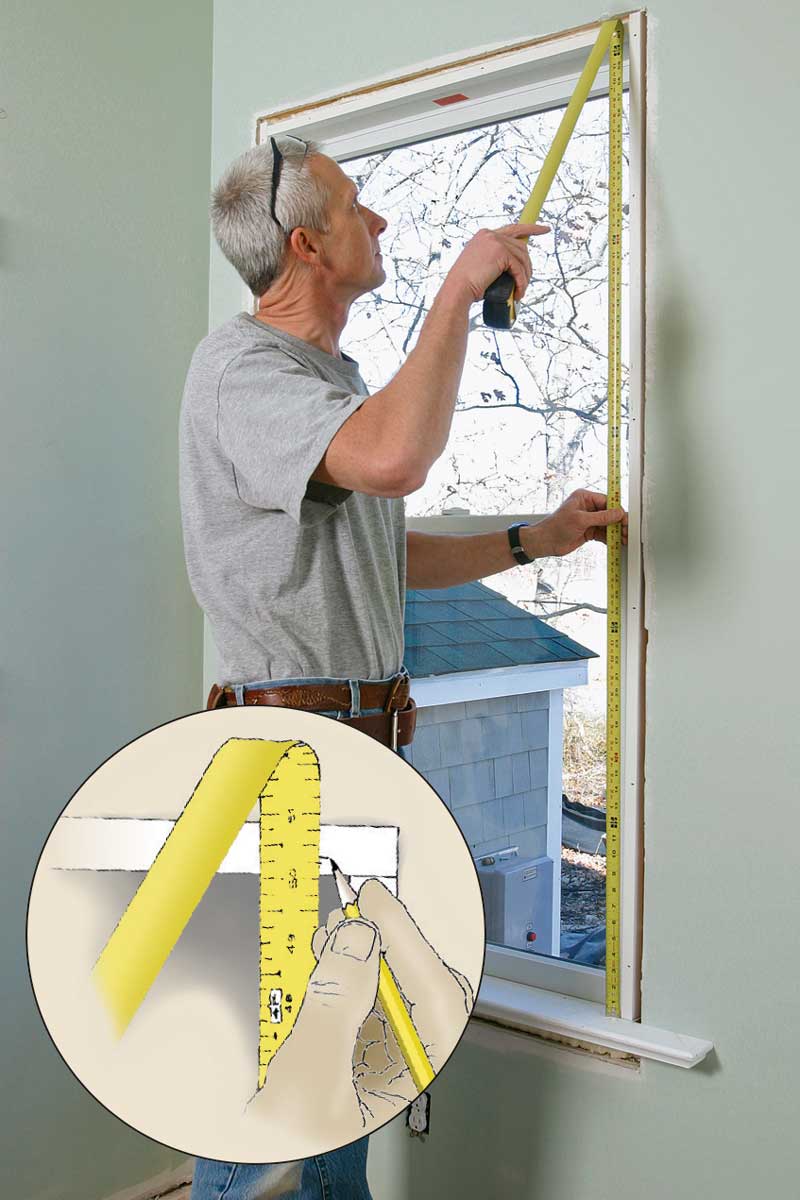
The first part of the built-up molding that I install is the flat casing. I measure from the top of the stool to the inside edge of the top jamb of the window, then add 3⁄16 in. for the reveal. After squaring one end of a piece of stock, I mark the length along the inside edge (in this case, the beaded edge). I cut a 45° angle using the mark as the target for the short point of the angle.
I repeat the same step for the opposite side of the window, making sure to reverse the direction of the cut. If I’m trimming a lot of windows that are the same height, I check a few to make sure they are exactly the same, then cut all the pieces at once rather than completing one window at a time.
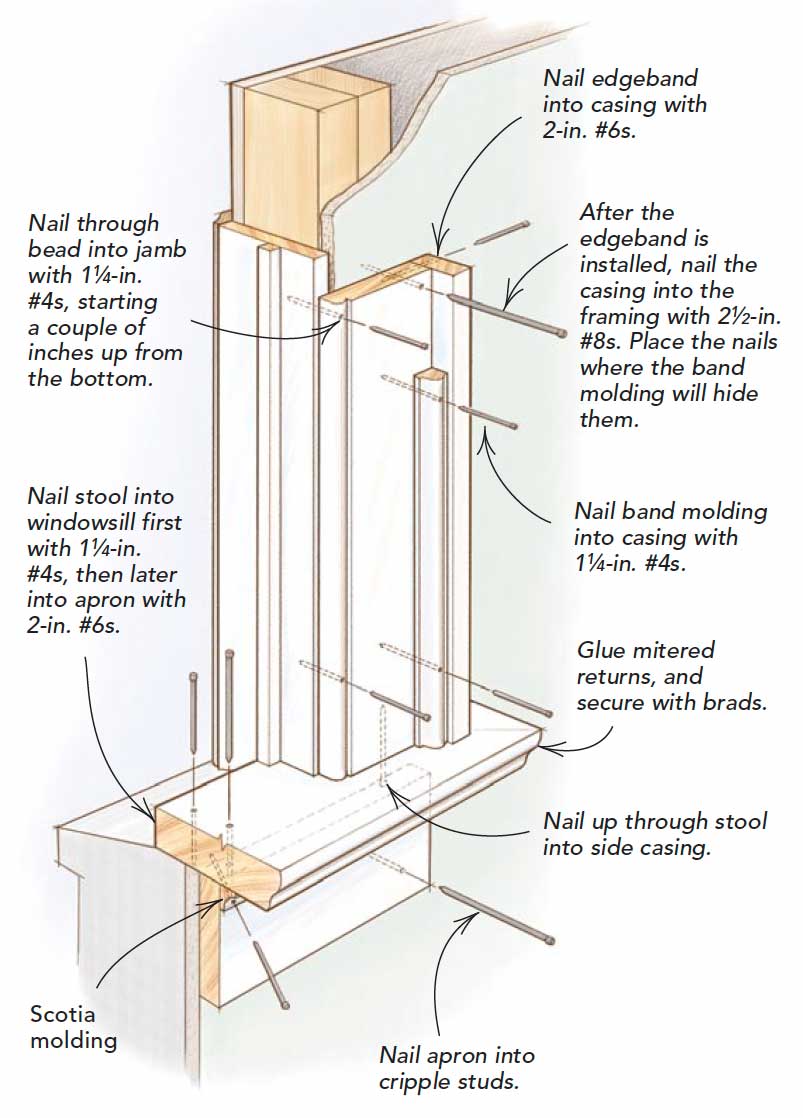
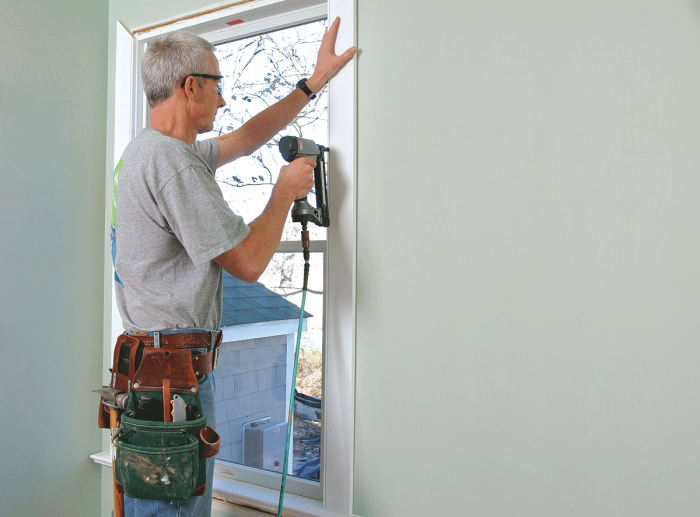
Before nailing in the pieces, I use a biscuit joiner to cut a slot into the mitered ends. Miter joints that are reinforced with biscuits are less likely to come apart over time. Taking care to keep an even reveal, I nail the side pieces into the edge of the window jamb using 11⁄4-in. nails.
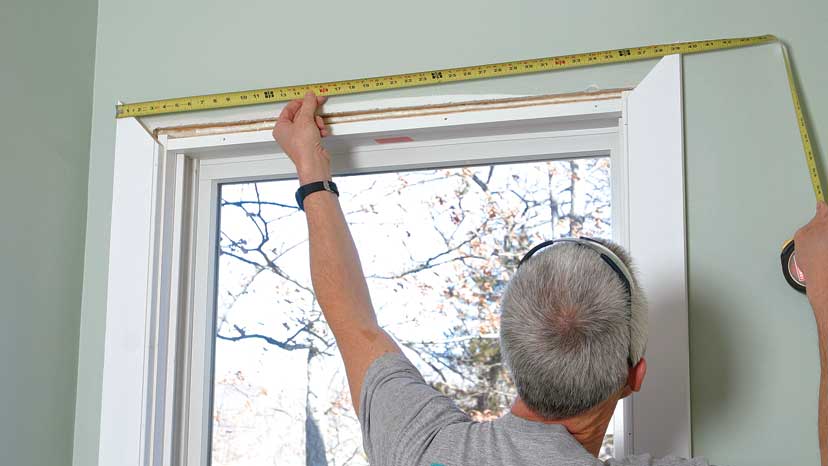
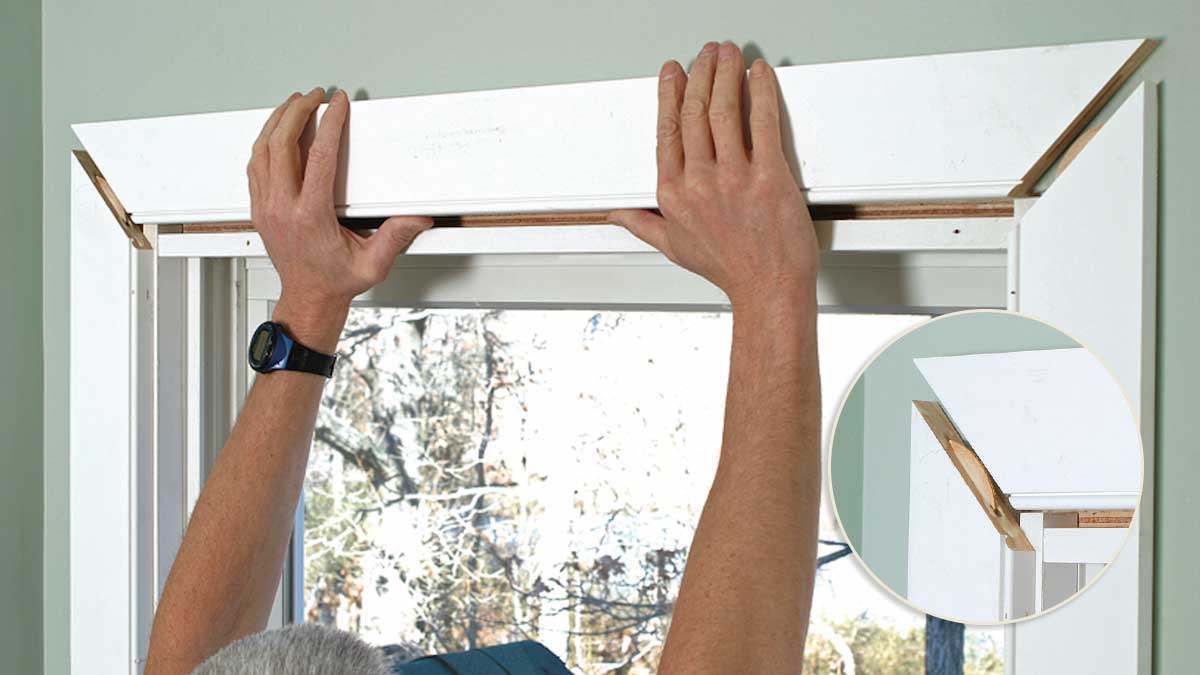
I find the length for the top piece of casing by measuring from long point to long point on the two side pieces. After marking the top piece, I cut it just a bit long, usually by the thickness of my marks. Then I test-fit the piece, shave it if necessary, and cut the biscuit slots. To shave a hair off the miter, I place it tight against the chopsaw blade, raise the blade, turn on the saw, and bring the blade back down. By the way, I start with the wider windows first so that if I cut a top piece too short, it still can be used on a narrower window.
I glue and insert the biscuits into the side pieces with a little more glue on the mitered edges of both top and sides. I wipe the glue with my finger to ensure a thin, even coat. Next, I push the top piece into place and rock the side pieces back and forth until the miters align. If I had nailed the outside edges of the side pieces, I wouldn’t be able to adjust the fit so easily. Finally, I nail the top piece into the edge of the jamb and drive a nail through the edge into the side pieces near the long points.
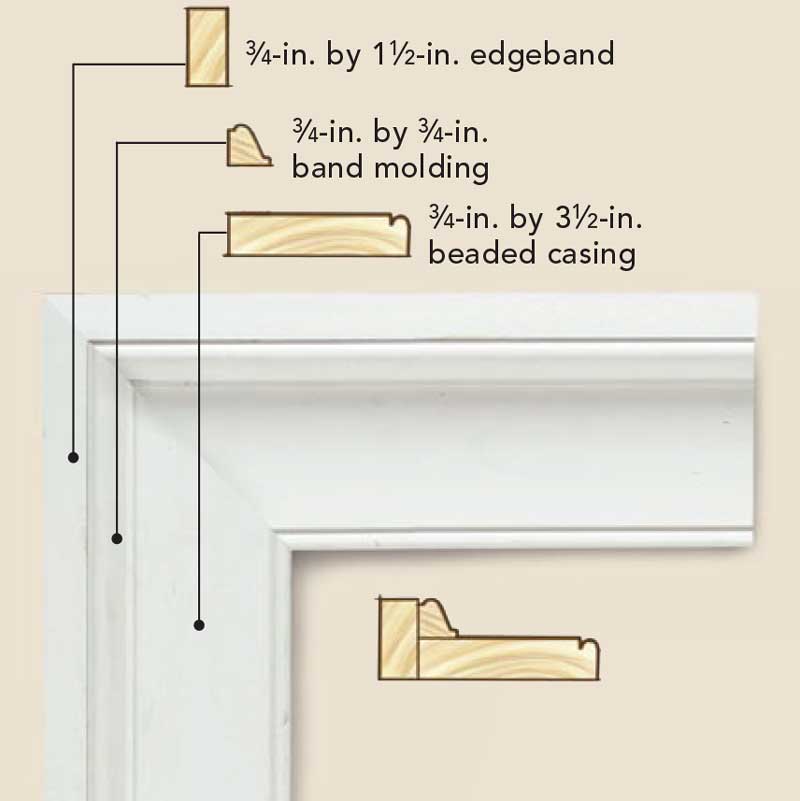
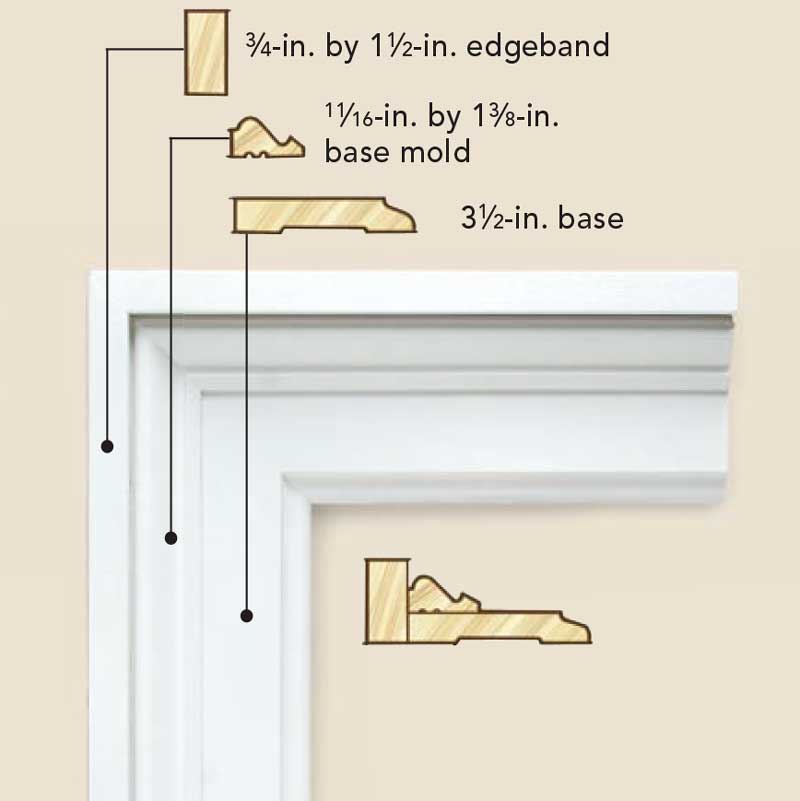
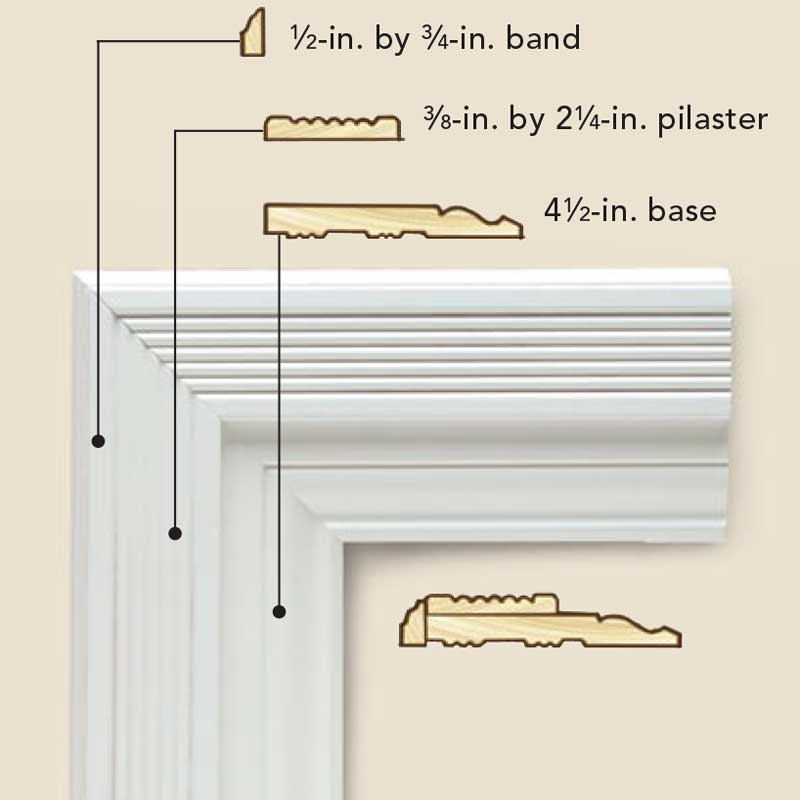
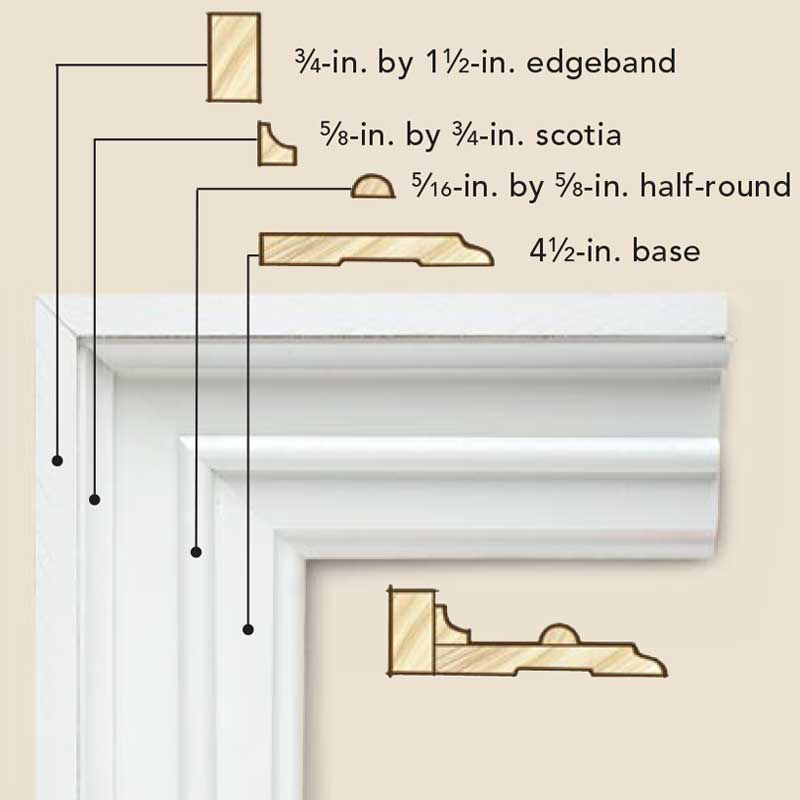
Three-piece casing
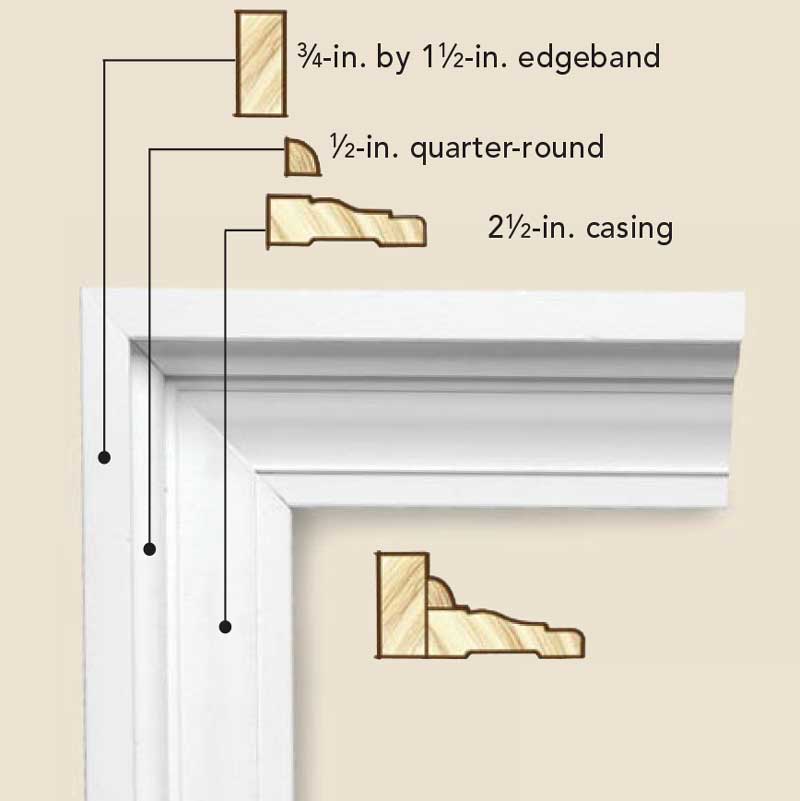
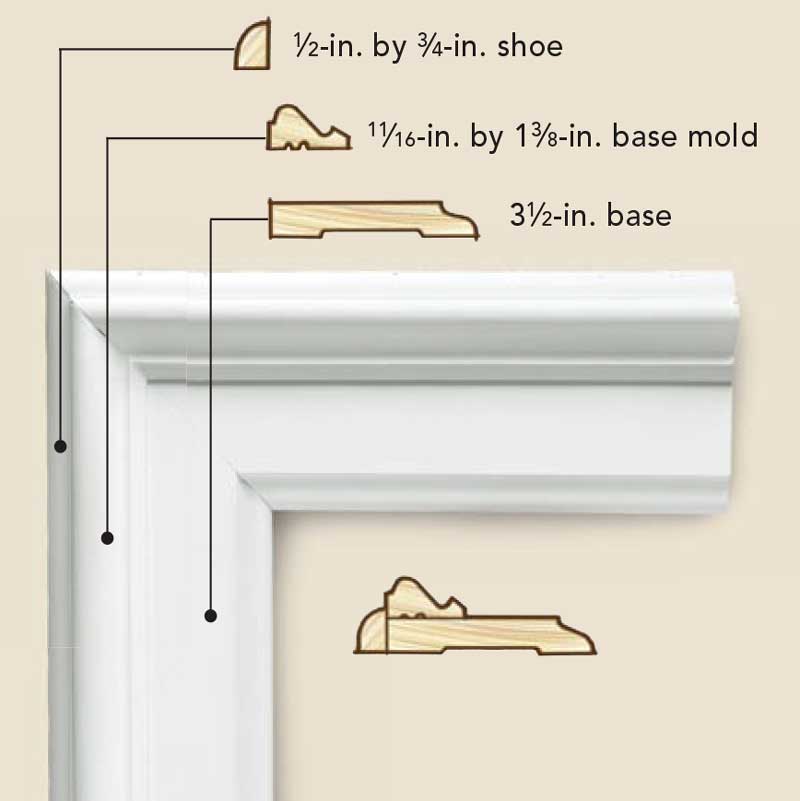
More casing options
|
Add decorative layers
Trim pieces are added to build up the molding, beginning with the edgeband. I determine the length of the outside edgeband by measuring the outside edge of each flat side piece, from the stool to the long point. After marking that length on a piece of the edgeband, I cut the 45° angle, using the mark as the target of the short point.
The edgeband is flexible enough that it can follow all but the most severe irregularities in the wall. So as I install each piece, I press it hard against the wall. I nail the edgeband into the edge of the flat stock only. Just as with the flat casing, I measure for the top piece of edgeband between the long points, cut it a touch long, fit it, and then glue and nail it into place.
Next, I go back and nail the flat casing into the stud framing. If the framing allows, I nail as close to the outside edge of the casing as possible so that the nail holes will be covered by the final filler trim. It’s a good idea to find the edge of the framing beneath the wallboard before running any trim. At this point, I also nail up through the stool into the bottom edge of the flat casing.
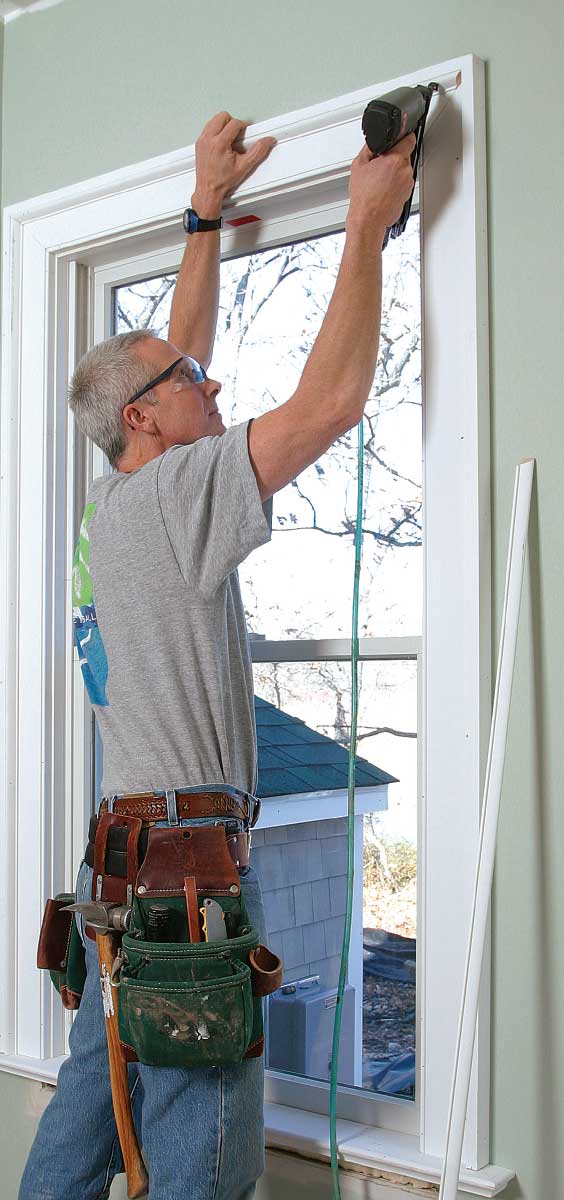
To complete the built-up molding, I mark and cut the filler trim that sits just inside the outside edgeband. I use the same measurements that I took for the edgeband, only this time the measurement is to the long point of the 45° miters on the filler trim. Instead of installing the sides first and then the top, I work my way around each window (see photo). I make the pieces slightly long so that they spring tightly into place. I secure them to both the flat casing and the edgeband using 1-1⁄4-in. nails.
Trim the apron before it goes on
For the look I prefer, the length of the apron is the same as the distance between the first pencil marks that I made on the wall. The apron is constructed out of the same flat stock as the window casing. Just as I did with the stool, I bevel both ends of the apron and then cut, glue, and pin the small return pieces in place. Next, I cut and install the decorative trim that runs along the top of the apron. If
I have a lot of windows to trim, I can work more efficiently by making all of the aprons at one time.
Finally, I hold the assembled apron hard against the underside of the stool and then fasten the apron to the stud framing . Also, I carefully shoot a few nails down into the apron through the top of the stool.
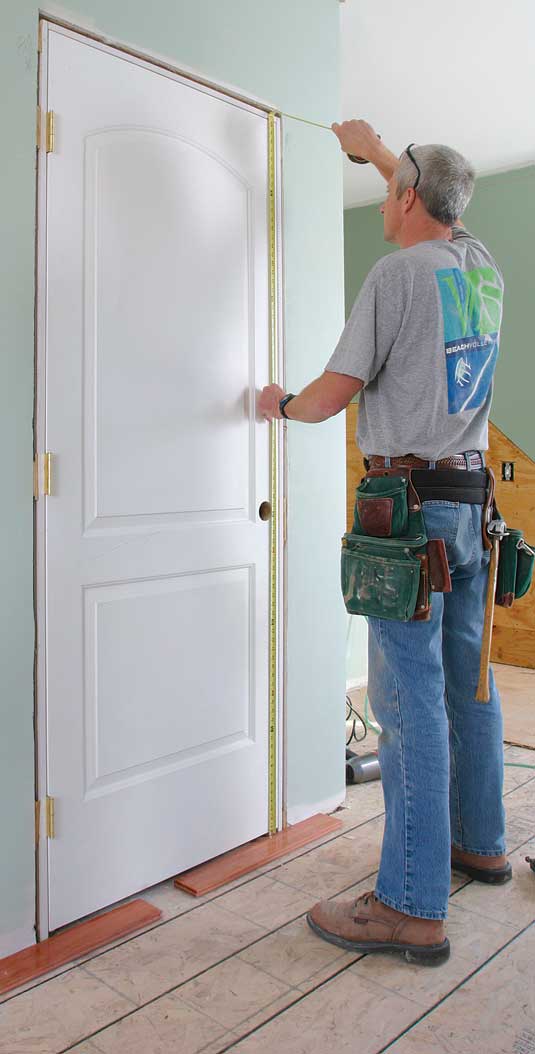
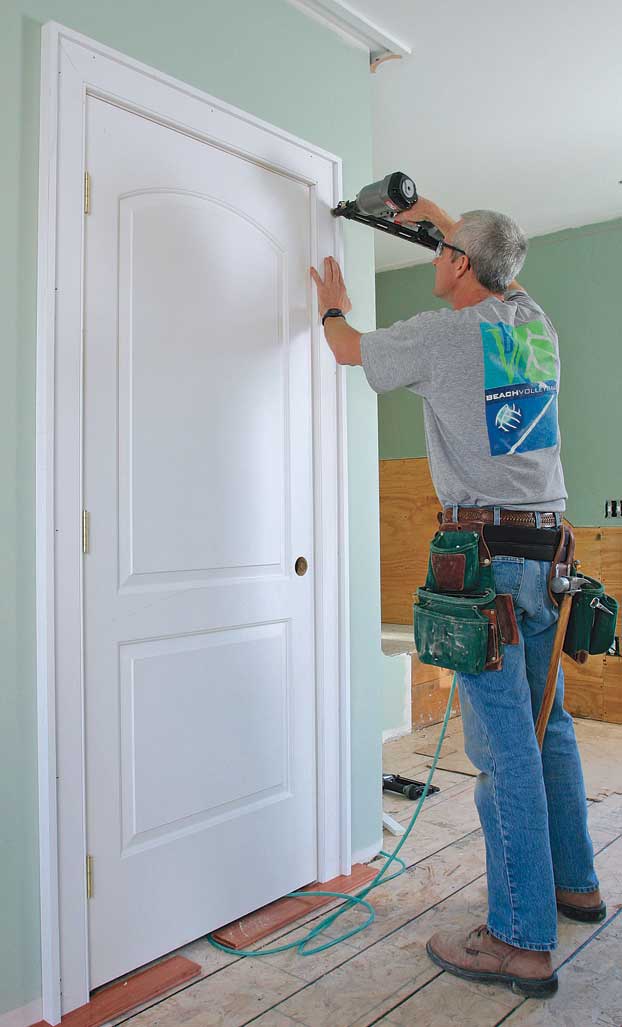
Trimming a matching door? Height is the keyThe process of installing the built-up molding around doors is the same as it is for windows, only there is neither a stool nor an apron. If the finished flooring is in place, I simply measure from the flooring as if it were the stool. In this case, the finished floor had not been installed, so I set pieces of the flooring in place temporarily and used them to gauge the length and height of the door casing. After I’ve finished trimming the door, I pull out the flooring pieces.
|
Fine Homebuilding contributing editor Rick Arnold lives and works in Wickford, R.I. Photos by Roe A. Osborn.
From Fine Homebuilding #172


