Casting a Concrete Fireplace Surround
From mixes and molds to finishes and installation details, a master craftsman shows how basic ingredients can yield elegant results.
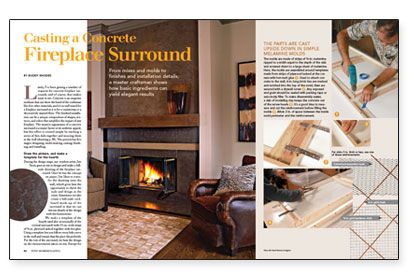
Synopsis: Concrete master Buddy Rhodes developed a method of precasting concrete countertops and architectural elements nearly 20 years ago. After building molds from sheets of melamine-coated fiberboard, Rhodes casts a simple fireplace surround that consists of a series of flat panels. Then he shows how to install the panels with adhesive and fasteners that extend into the wall framing. This six-page article is meant for the concrete novice who has some general skills. The article includes a source list for materials.
Lately, I’ve been getting a number of requests for concrete fireplace surrounds, and of course, that makes sense to me. Concrete is an exquisite medium that can show the hand of the craftsman like few other materials, and it’s as well suited for a fireplace surround as it is for a countertop or a decoratively stained floor. The finished installation can be a unique composition of shapes, textures, and colors that amplifies the impact of any fireplace. The massive appearance of a concrete surround is a major factor in its aesthetic appeal, but this effect is created simply by stacking a series of thin slabs together and securing them to the wall. The process has five stages: designing; mold-making; casting; finishing; and installing.
Draw the picture, and make a template for the hearth
During the design stage, our resident artist, Jim Scott, goes on site to design and make a full-scale drawing of the fireplace surround. Once he has the concept on paper, Jim likes to transfer the drawing onto the wall, which gives him the opportunity to check the scale and design in the room. Sometimes we also create a full-scale cardboard mock-up of the surround so that we can discuss details of the design with the homeowner. We make a template of the hearth (and also occasionally of the vertical surround) with 2-1⁄2-in.-wide strips of 1⁄8-in. plywood tacked together with hot glue. Using a template lets you follow every little curve in the wall and ensure that the piece fits perfectly. For the rest of the surround, we base the design on the measurements taken on site. Except for the hearth, molds are built from these detailed measurements and drawings, not from the templates.
We always note any site information on the template or drawings. Although concrete does not crack or become damaged from proximity to heat, we never plan for it to extend into the opening of a masonry firebox. Also during this stage, we decide how the surround will be divided for casting and where the seams will lie. I try to design a slab that won’t exceed the size of a pickup’s bed—about 8 ft.—and also try to consider access to the job site, especially doorways and stairs. Here in California, we also must consider the potential for earthquakes; a 2-in.-thick slab weighs about 20 lb. per sq. ft. The weight of the surround should bear vertically and be supported from underneath.
The last thing to note is the location of the framing in the fireplace wall. We cast brick ties into the slabs to serve as hanger straps during installation, so the ties and the framing locations need to correspond.
For more photos, drawings, and details, click the View PDF button below:
