
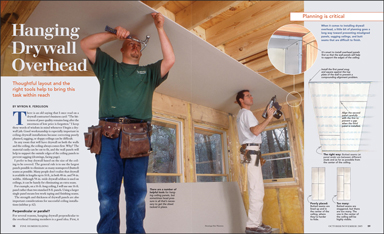
Hanging Drywall Overhead
Thoughtful layout and the right tools help to bring this task within reach.

Synopsis: The safe, non-strenuous route to a flat finished ceiling calls for the right lifting tools and innovative materials, as well as smart layout and installation strategies. Myron R. Ferguson, author of Drywall: Professional Techniques for Great Results (The Taunton Press, 2012), walks you through every detail necessary to achieve a sag-resistant ceiling. You’ll discover how to lay out drywall panels, handle butt seams with backerboards, and choose the proper length of drywall screws and the correct depth to set fasteners. The article also covers innovations in sag-resistant gypsum products, as well as the use of a panel lift, stiff arm, T-support, and adjustable bench.
There is an old saying that I once read on a drywall contractor’s business card: “The bitterness of poor quality remains long after the sweetness of low price is forgotten.” I keep these words of wisdom in mind whenever I begin a drywall job. Good workmanship is especially important in ceiling-drywall installations because correcting poorly planned, sagging, or sloppy ceilings can be difficult.
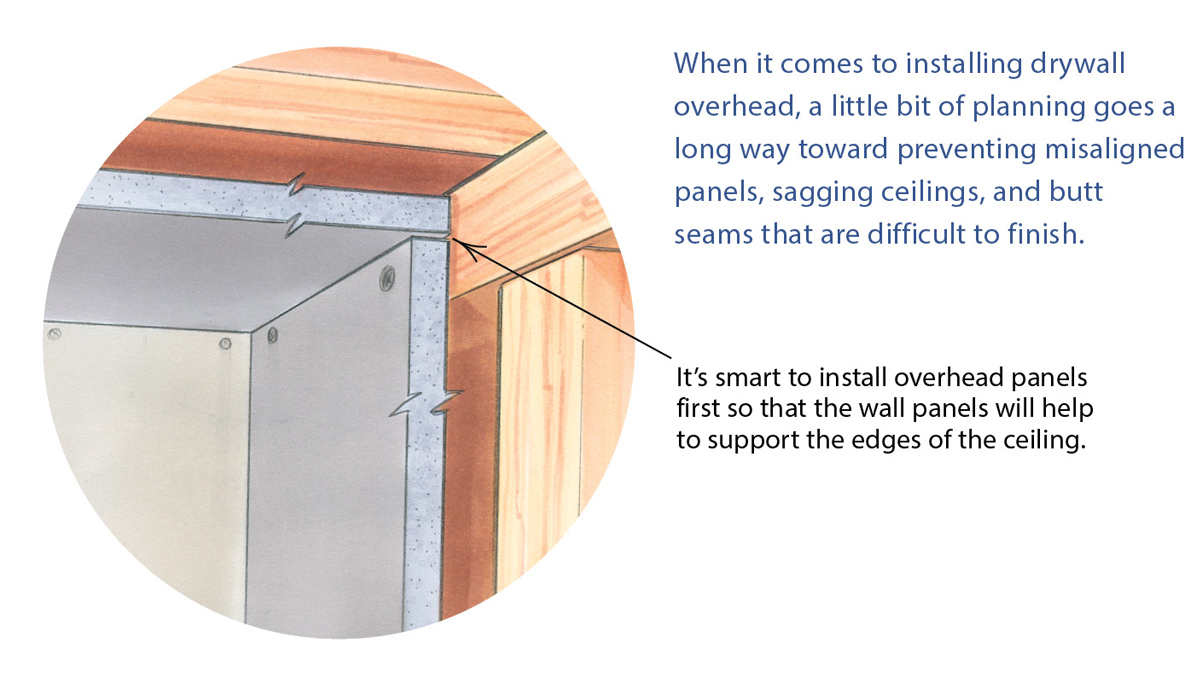
In any room that will have drywall on both the walls and the ceiling, the ceiling always comes first. Why? The material easily can be cut to fit, and the wall panels will help to support the outside edges of the ceiling panels to prevent sagging.
I prefer to buy drywall based on the size of the ceiling to be covered. The general rule is to use the largest panels possible to eliminate as many non-tapered (butted) seams as possible. Many people don’t realize that drywall is available in lengths up to 16 ft., in both 48-in. and 54-in. widths. Although 54-in.-wide drywall seldom is used on ceilings, it can be handy for eliminating an extra seam.
For example, on a 16-ft.-long ceiling, I will use one 16-ft. panel rather than two standard 8-ft. panels. Using a larger single panel means less work taping and finishing seams.
The strength and thickness of drywall panels are also important considerations for successful ceiling installations.
Planning is critical
|
Perpendicular or parallel?
For several reasons, hanging drywall perpendicular to the overhead framing members is a good idea. First, it allows the untapered ends of each panel to be butted together over the open space between framing members and back-blocked to give the panel a slight taper.
A perpendicular orientation also allows each sheet of drywall to float over the framing members, making uneven joists or trusses blend in over its length; plus, it’s much easier to see the framing when fastening the panels to the ceiling. But probably the most important reason to hang the panels perpendicular to the overhead framing is because drywall is approximately three times stronger in the long direction than it is in the short direction, which means less chance of sagging.
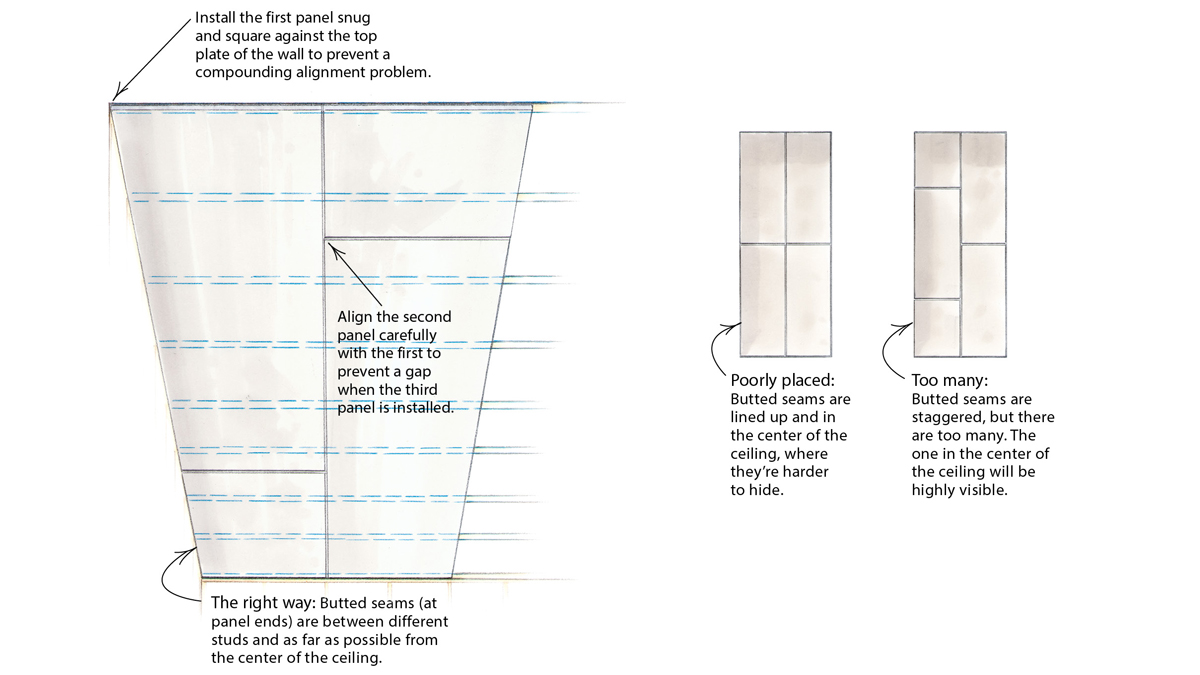
A good start means a good finish
When it comes to hanging drywall on ceilings, the question I am asked most often is “Where do I begin?” Every job is different, but my recommendation is to start hanging panels against the longest wall, and put in extra effort to get the first row as straight as possible. As each subsequent row of drywall is hung, keep it tight against the previous row to prevent a compounding problem. If the ceiling is more than 16 ft. long, at least two panels will be in each row, which means butted seams. If one or more of these pieces gets attached out of line—even by 1/8 in.—the gaps will become larger and the edges more out of line as you progress. Starting straight helps to reduce these problems.
Problems also can be caused by bowed top plates, which often are a sign of bowed walls. In these situations, it’s a good idea to snap a chalkline as a reference mark for the outside edge of the first run of drywall.
Most times, starting with a 48-in.-wide panel and letting seams fall where they will is fine. But if there is a row of recessed lights 12 ft. from one side of the room, avoiding a long seam in this area will make it easier to tape when the time comes. In a case like this, I just trim a few inches or a few feet off the first run so that the seams fall where I want them.
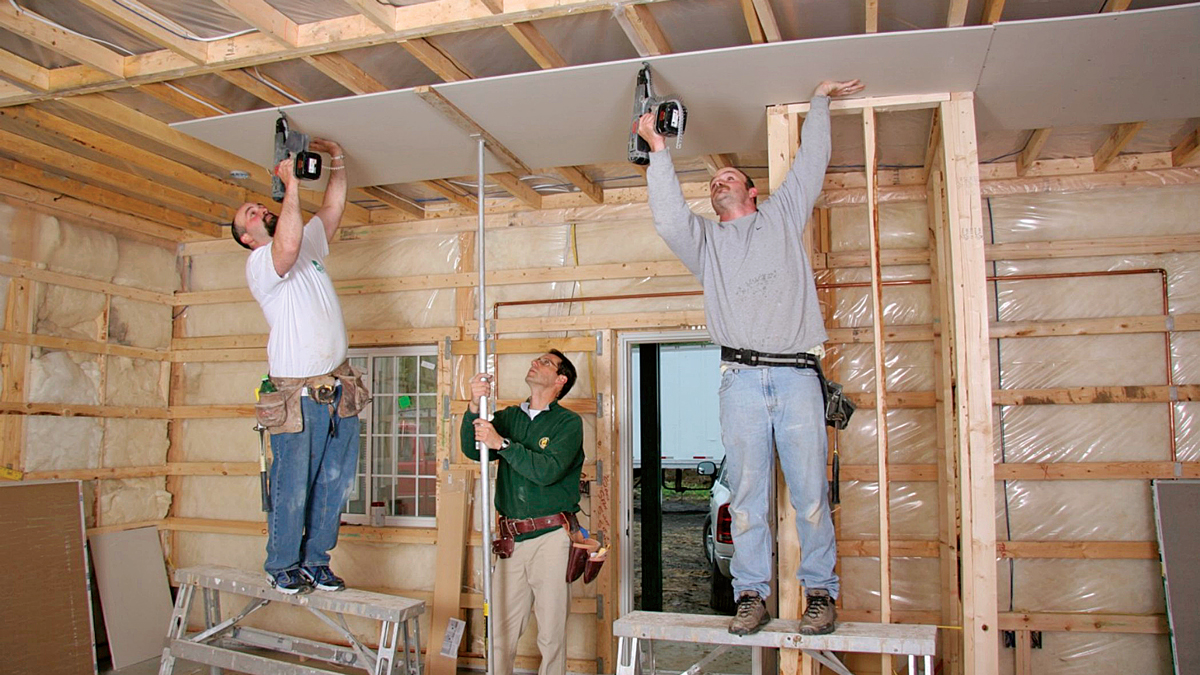
Work smarter, not harder
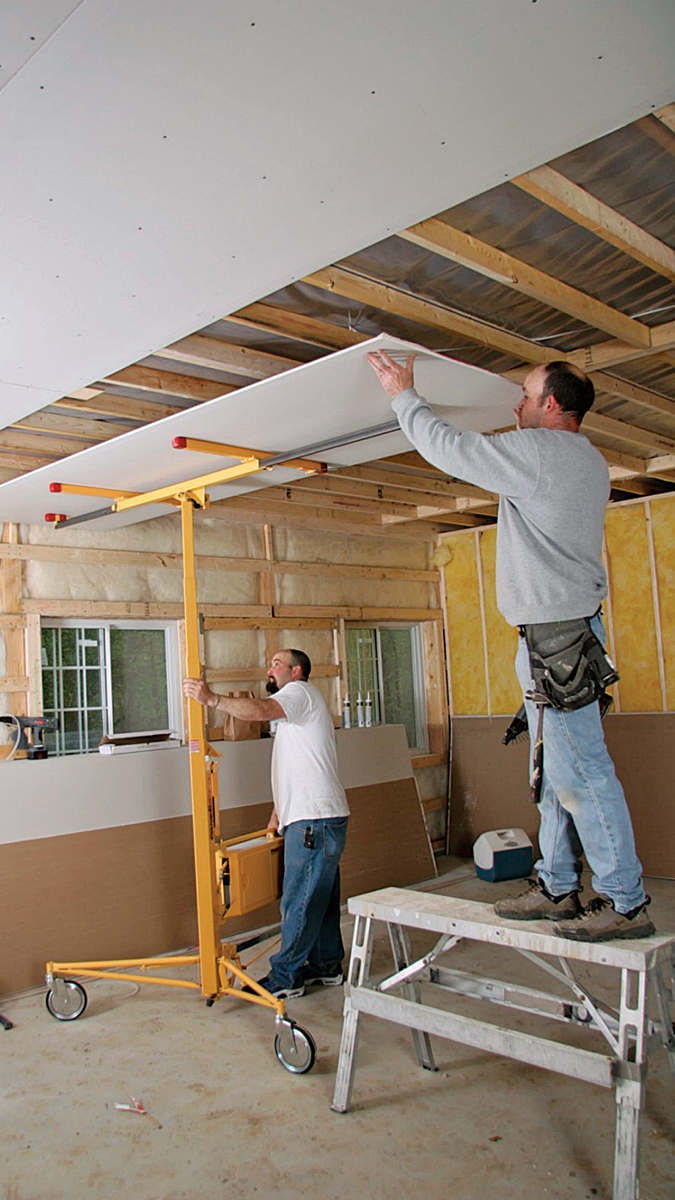
When you’re lifting panels into place, a helper is invaluable. Don’t grip the ends of the panel while the center sags down; hold it in from the ends a little to help support the entire sheet. If you’re working alone or if you simply want to make the installation easier, consider using a lifting tool to help carry the load.
Overcome gravity with smarter lifting and stronger fastening
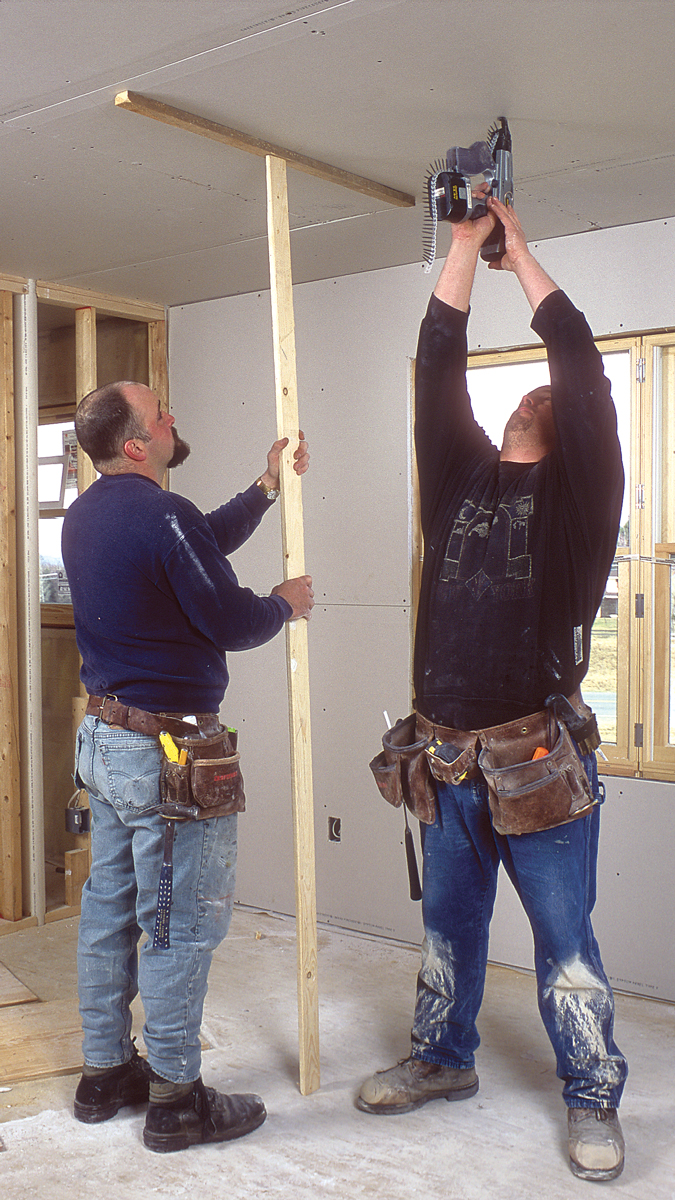
Stiff Arm A more modern version of the T-support, this metal tool adjusts to different heights and holds a panel firmly in place against the overhead framing. Unlike a homemade T-support, a stiff arm won’t fall down once the panel has been fastened to the framing. This tool costs about $160 (www .falconladder.com; 800-522-3313).
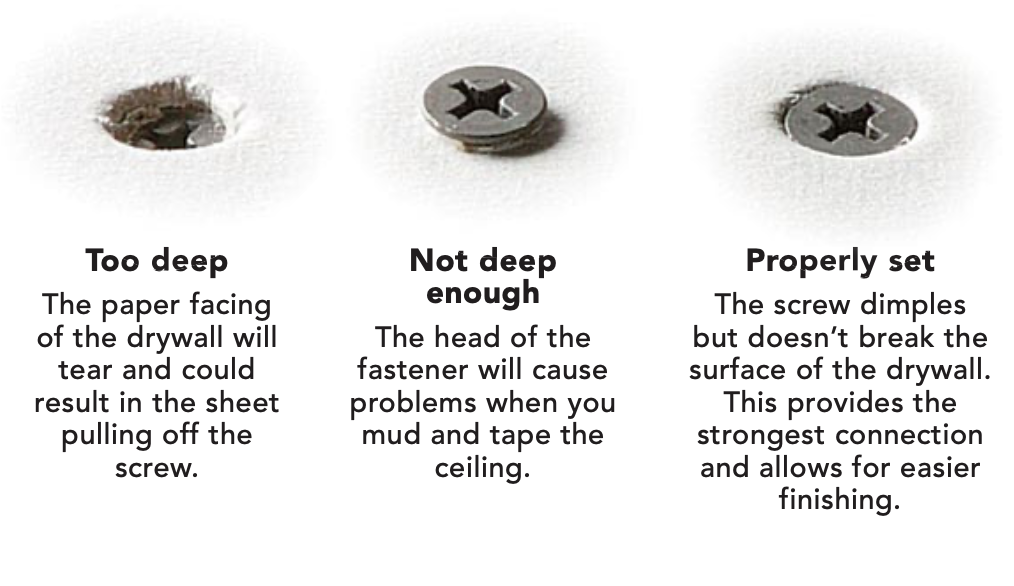
It’s important to set screws to the proper depth. Some self-feeding screw guns have an adjustable depth setting, and special attachments for cordless drills stop the screw right where you want it. For ceilings framed 16 in. on center (o.c.), I place screws 12 in. apart. If the ceiling joists are 24 in. o.c. or if I’m installing fire-code drywall, I drive screws 8 in. apart.
|
When you’re fastening each panel, secure the edge that’s butting against the top plate or previous run first, making sure that it doesn’t overlap or leave any gaps. To help attach the panel tight against the overhead framing, fasten from one long edge across the face to the other edge.
If you attach both edges and then attach the center, the panel may not pull tight against the ceiling.
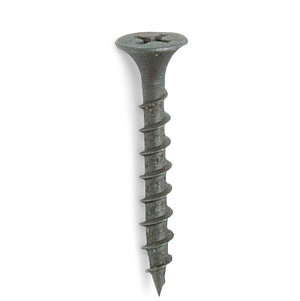
Tacking up panels with drywall nails is fine, but use drywall screws in the face of the panel because they provide a much stronger anchor. Screws typically should be spaced 12 in. apart and need to penetrate the framing only 5/8 in.
When you’re hanging drywall on a ceiling taller than 8 ft., it makes sense to finish securing each panel completely before moving to the next because the scaffolding or adjustable benches are already in place. If you’re working on a lower ceiling that can be fastened while you’re standing on the ground, you can tack each sheet in place, then go back and finish fastening after the whole ceiling is covered. Don’t wait until the next day, though, because once the panels start to sag and change shape, it’s difficult to snug them up to the framing members again.
Make a butted seam into a tapered seamEach of the long sides on a sheet of drywall has a tapered edge so that tape and joint compound can be applied without creating an obvious bump between sheets. It’s always a good idea to plan the ceiling with as few butted joints as possible, but sometimes they can’t be avoided. In these cases, it’s smart to use a backer to pull the butted ends of each sheet together and create a slight bevel. These backers can be purchased from a number of suppliers or made on site from shimmed plywood.
A manufactured backer, this 53-in.-long, 1/2-in.-thick MDF board has a beveled recess down the center. Slim and flexible, it requires only about 1⁄2 in. of clearance behind the drywall for installation. A box of 20 boards costs about $65 (www.rocksplicer.com; 717-766-4594).
The ButtHanger relies on metal brackets and a 1×3 board to provide tapered backing for butt joints. The pivoting brackets make this a good choice for working around diagonal bracing or pipes, and they can be purchased for about $7 apiece, a good choice for smaller jobs (www.butthanger.com). |


Making accurate cutouts
If the ceiling will have cutouts for recessed lights, vents, or electrical boxes, take measurements for them before tacking the drywall panels in place. Simply write down the measurements on or next to the surface measured from so that they can be recalled easily later.
Next, tack the panel in place, keeping the fasteners away from the planned cutout to help reduce some of the pressure against the back of the drywall. Transfer the measurements onto the panel to be cut, and use a drywall router or wallboard saw to make the cuts. It’s important to take your time making the cutouts; a mistake means a repair.
Finish up with a quick checklist
When all the drywall panels have been installed, do a walk-through, looking for unfastened areas and double-checking that all cutouts have been made. Also, check for poorly set fasteners; too deep is bad, and not deep enough is a huge pain when it’s time for mudding and taping.
A few innovative tools and materials
Ceilings commonly are finished with 1/2-in. regular or 5/8-in. fire-code drywall. Standard 4×8 sheets weigh about 58 lb. and 70 lb. respectively. Both types can be attached perpendicular to 16-in. or 24-in. o.c. framing.

Lightweight 1/2-in. Drywall. If you’re looking for a lightweight option that doesn’t sacrifice stiffness, Sheetrock’s 1/2-in. Sag-Resistant panels are stronger and less expensive than a 5/8-in. panel and weigh about 10 lb. less than a typical 1/2-in. panel (www.usg.com; 800-950-3839).
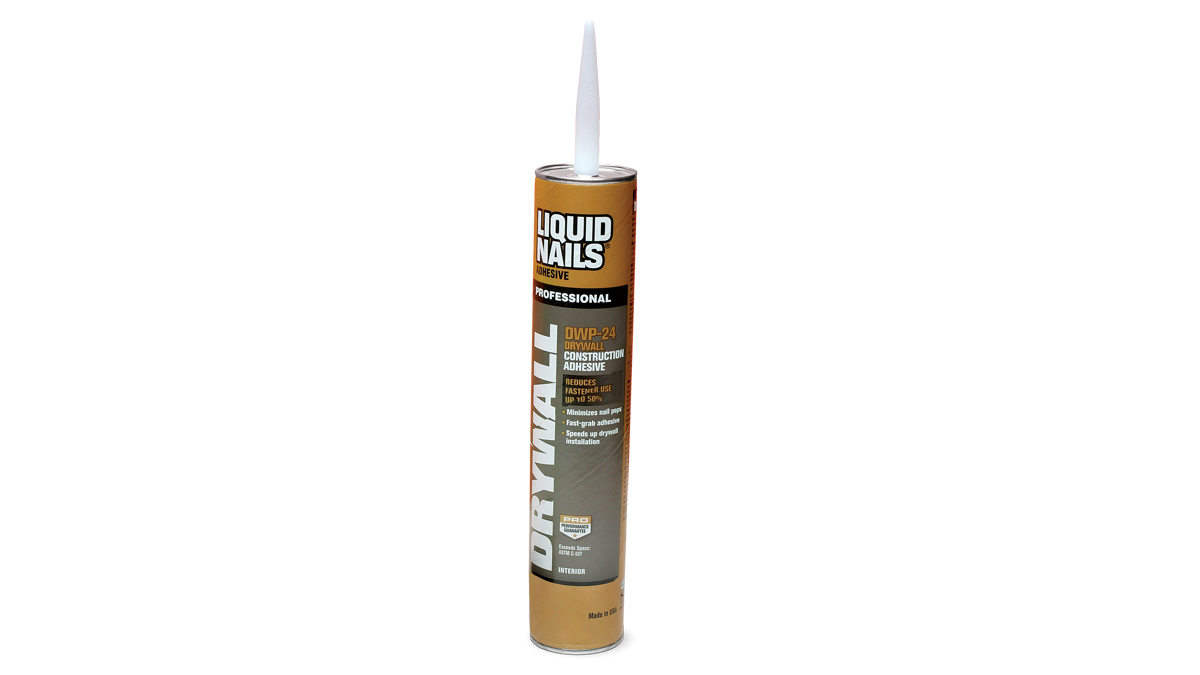
Drywall Adhesive. Drywall adhesive reduces the number of fasteners needed to secure each panel. It also has excellent shear strength and is not affected by changes in temperature or moisture. This means less chance of nail or screw pops. Note: Adhesive should be applied only to the framing, not to overlapping kraft paper or plastic sheeting. Starting at $2.50 for a 29-oz. tube.
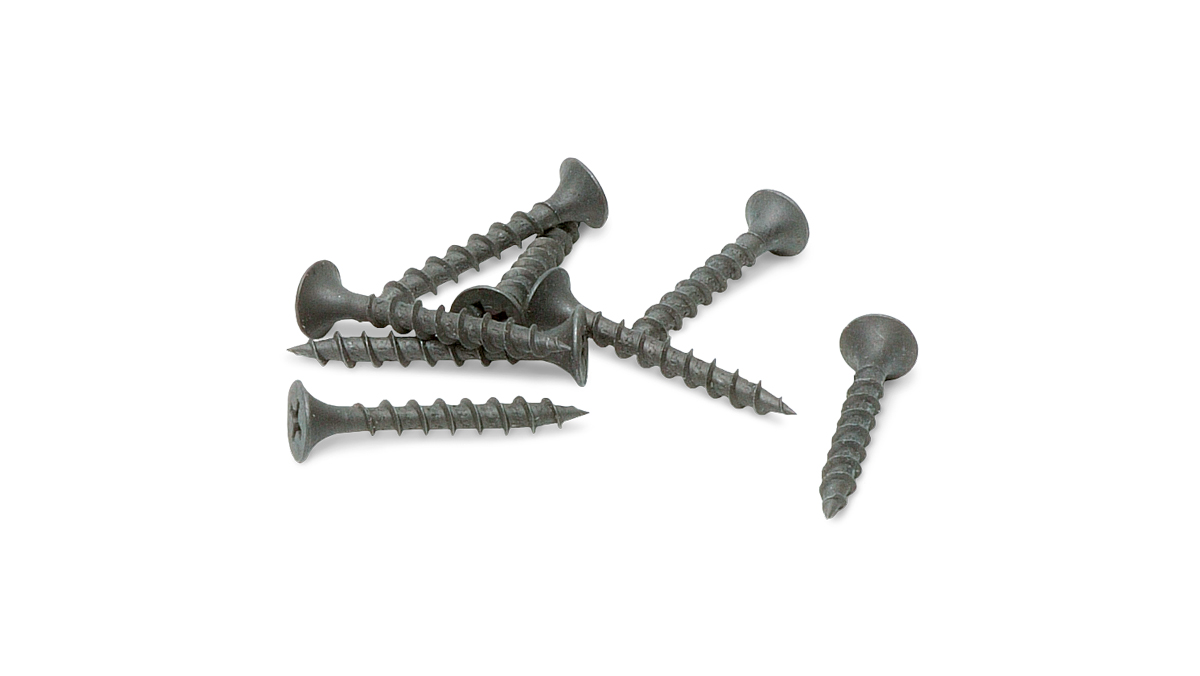
Drywall screws. Drywall screws rather than drywall nails—especially in the center, or field, of the panel—provide stronger attachment. Screws should be long enough to penetrate 5/8 in. into the framing. Longer screws are more likely to push outward as lumber dries and shrinks, which can
lead to screw pops or bumps on the finished surface of the ceiling.
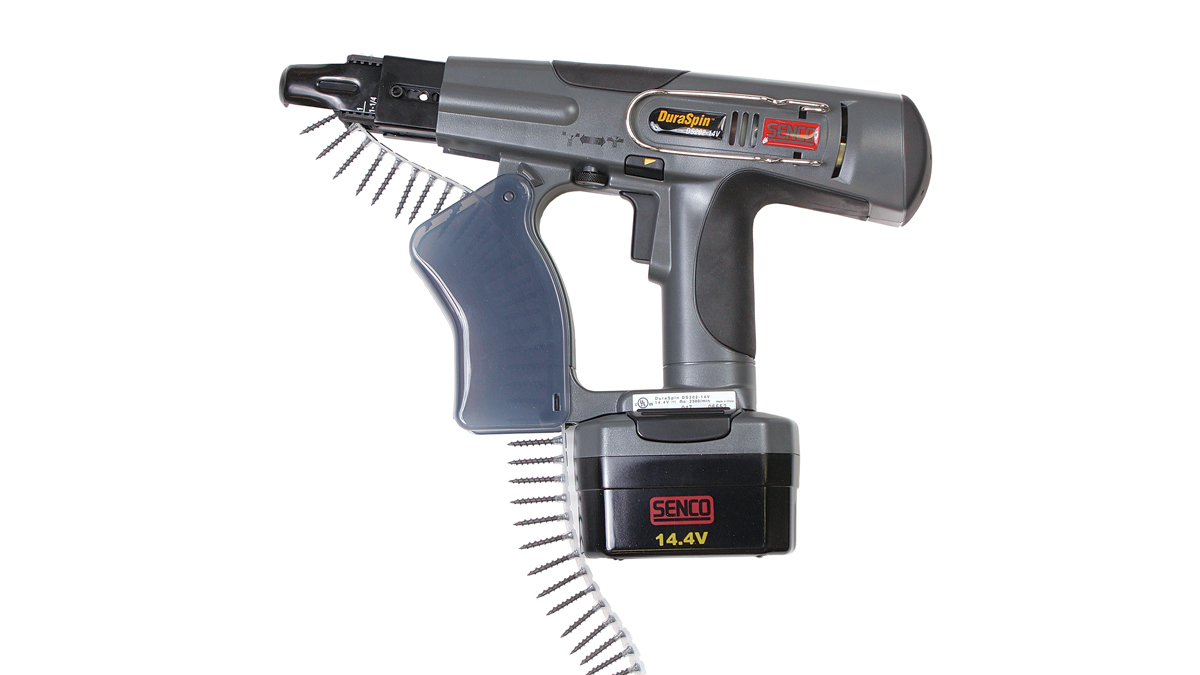
Cordless self feeding screw gun. With drywall screws eclipsing drywall nails and batteries replacing power cords, it’s no surprise that many drywall installers are switching to cordless self-feeding screw guns to reduce the time and effort needed to fasten each panel. The model shown here, a Duraspin DS202-14V, costs around $160 (800-543-4596; www.senco.com).
Myron R. Ferguson (www.thatdry wallguy.com), author of Drywall: Professional Techniques for Great Results (The Taunton Press, 2002), lives and works in Galway, N.Y. Photos by Mark Kozlowski, except where noted.
From Fine Homebuilding #174
