Running New Wires through Old Walls
With an assortment of tools, a few tricks, and a little luck, you can make electrical cable go where you didn't think it could.

Synopsis: Remodeling projects often include moving or adding an electrical circuit, which in turn requires running wires blindly inside walls and between floors. This article gives an overview of the basics of snaking wires, as seen from the viewpoint of several experienced electricians. Highlights of the article include a look at the specialized tools that electricians use to make the work easier, plus tips on safety and techniques.
Renovating a house is akin to surgery: calculated mayhem, followed by judicious repair and renewal. Sometimes the job is of the minor, outpatient variety, and sometimes the job is more like a heart transplant. Electrical renovations fall somewhere between the two extremes, not life-threatening to the patient, but tricky work just the same.
Like doctors, most electricians believe in doing no harm, at least as it applies to existing walls. (Why spend more time cleaning up and repairing the damage?) The veteran electricians I talked to all winced at the thought of making big holes in plaster walls, and only as a last resort would they remove baseboard or trim to run a wire. Instead, they’d rather practice noninvasive surgery and drill a series of holes hidden behind interior walls to create a new path for wire. The trick then is to thread a flexible rod, string, or steel tape back down that new path and use it to pull the wire through. Fortunately, the electrical code doesn’t require that you staple these wires to the framing.
To learn about the art of snaking wire, I spent time watching different master electricians practice their craft. These guys rely on a number of special tools, many of which are explained here. But what really makes them successful are large measures of creativity, patience, and a thorough understanding of a particular house’s structure.
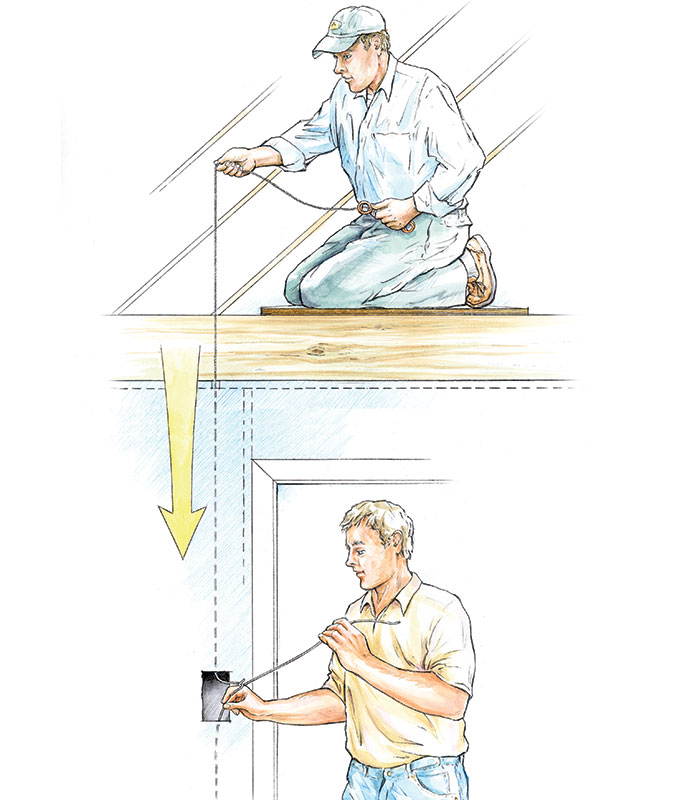
Start a tiny hole to go from the basement to the first floor
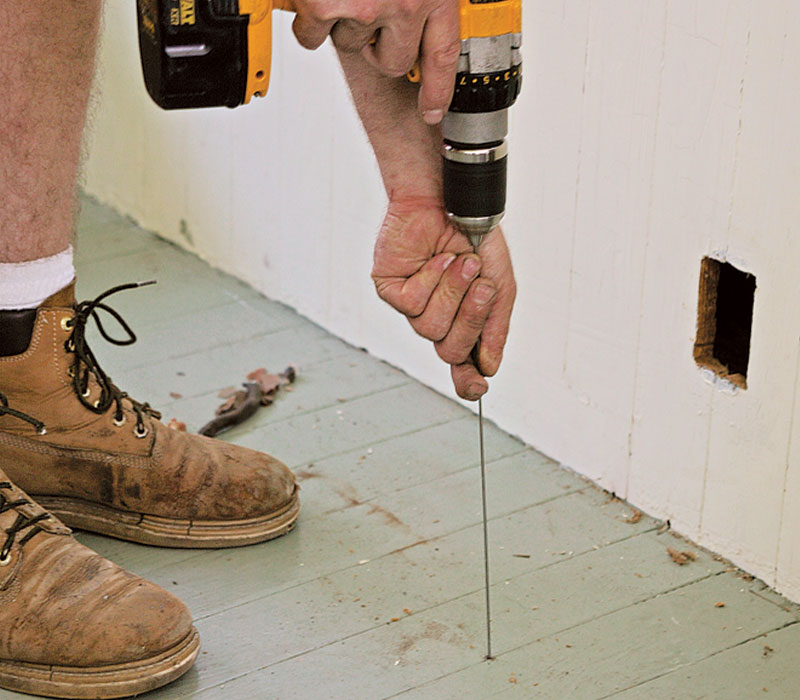
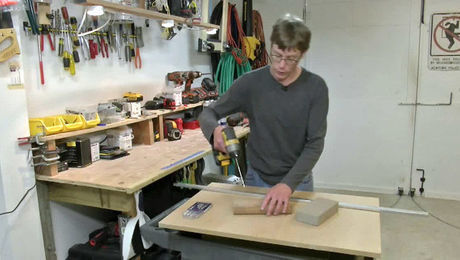
1. Determine the position of the outlet or switch in the wall. To locate the corresponding spot in the basement, drill down in a convenient place (between two floorboards, for instance, or next to the baseboard) with an insulation batten. The long thin wire batten is easy to find and leaves a small hole that’s easy to patch.
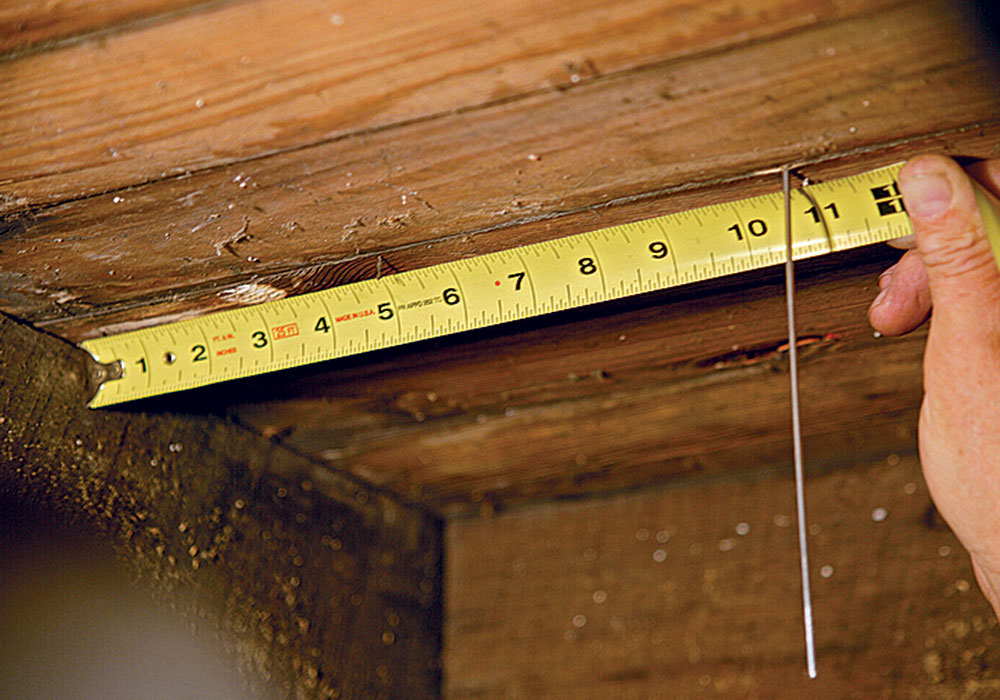
2. Downstairs, find the wall-plate location by measuring over from the protruding wire batten. (You also can find the plate by locating the nail ends that anchor the plate to the floor.)
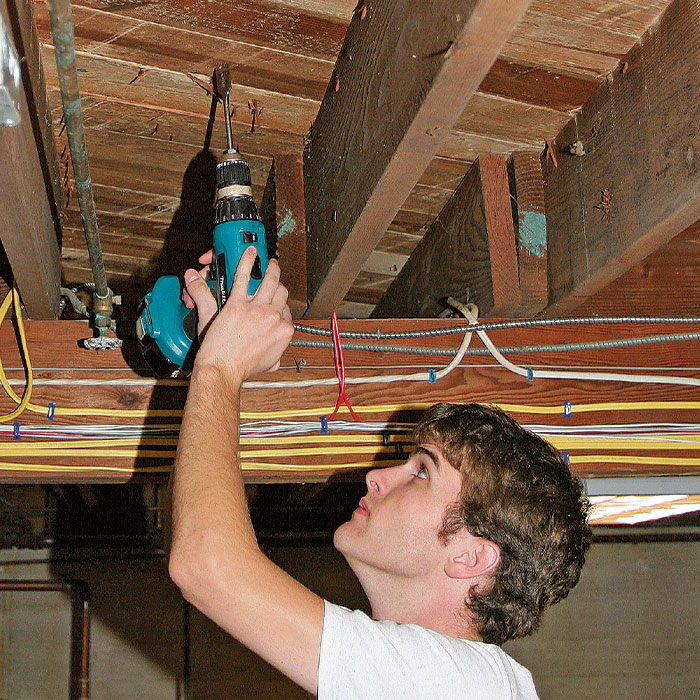
3. From the basement, use a 3 ⁄ 4-in.-dia. bit, and drill an access hole up into the stud bay.
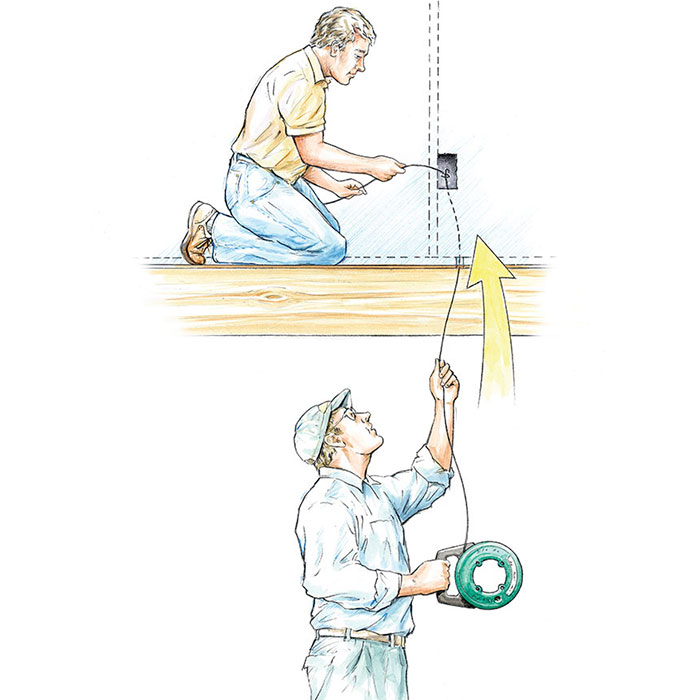
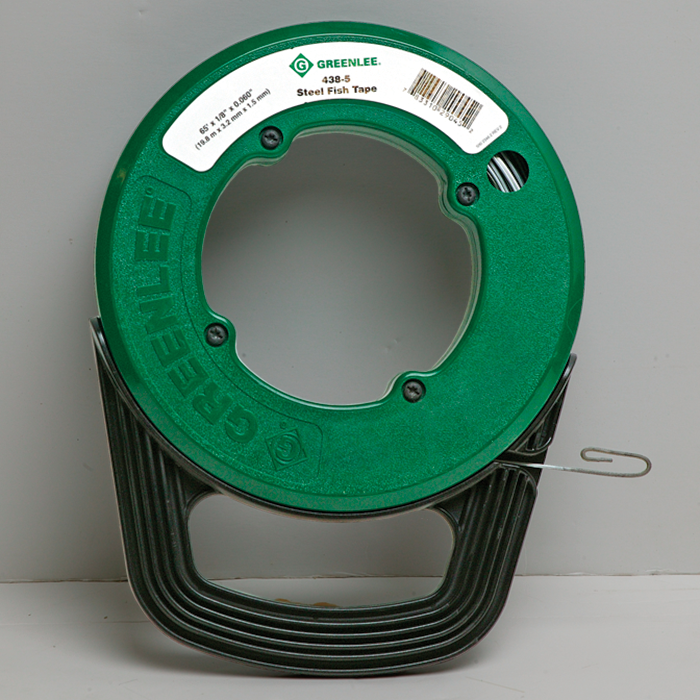
4. Reach up from the basement into the bay with a fish tape; have a helper grab the tape from above and pull up. Fishing longer runs may require repeated attempts to snag the end of the tape. Thin, flexible steel tape is the most common fishing tool. Many electricians cut two lengths from a reel, about 12 ft. and 2 ft. long, and use them for the majority of their work. The grabbing end of the tape is bent back onto itself into a hook. Another common method is to drop a weighted line from above down into the basement and reverse the procedure.
 |
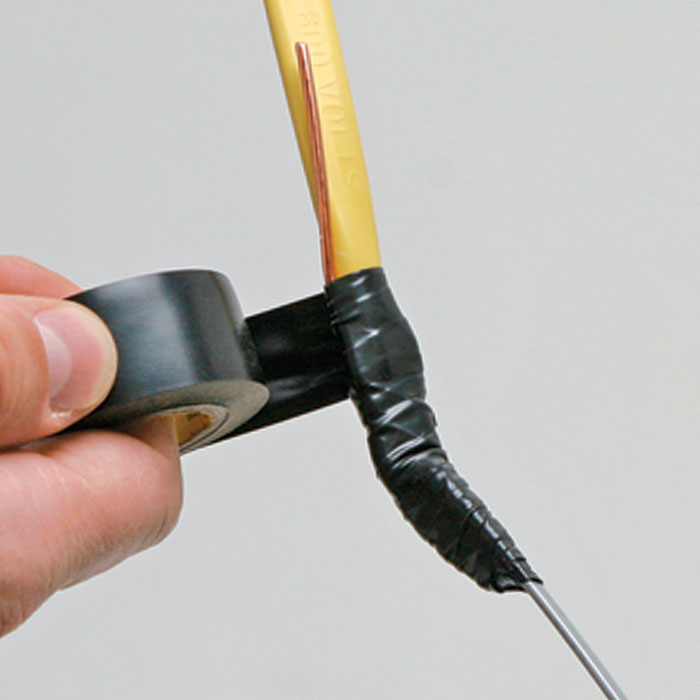 |
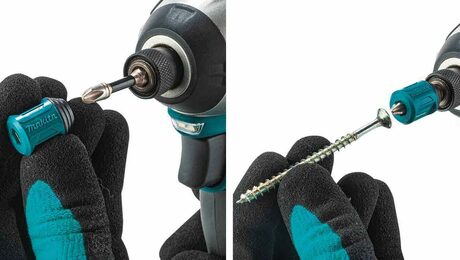
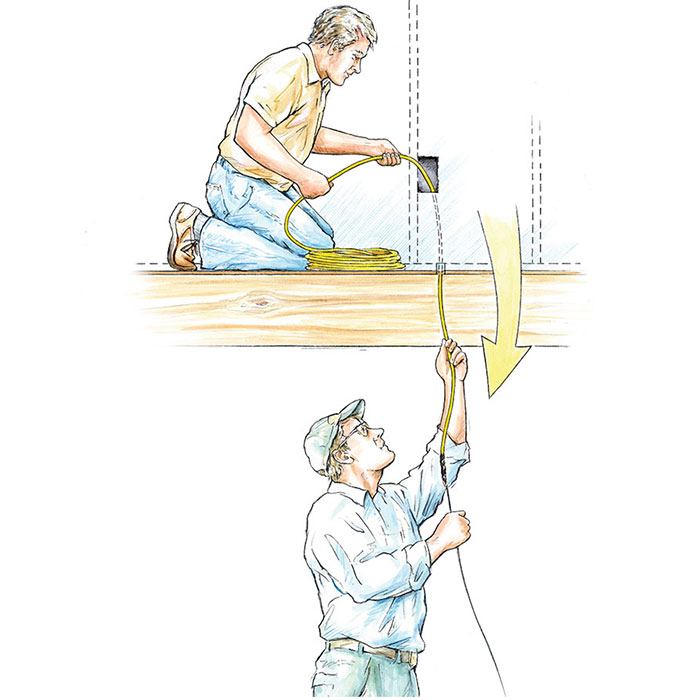
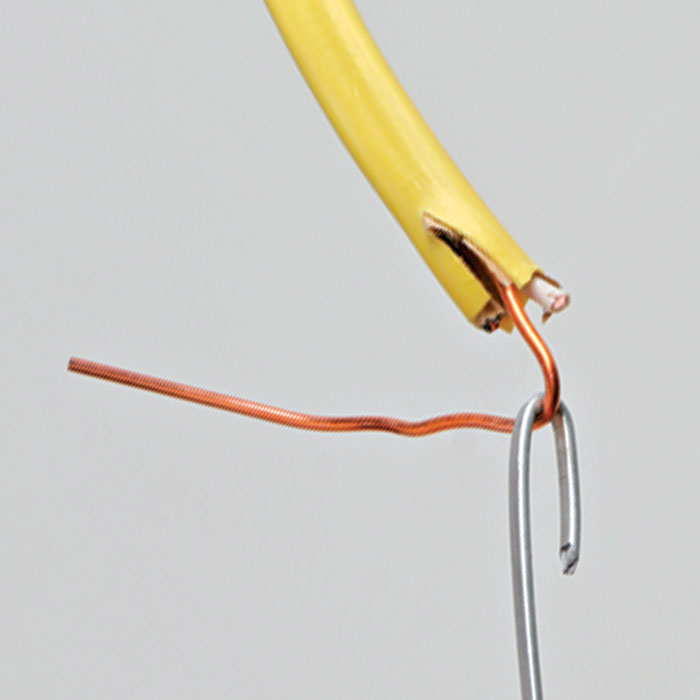
5. Once you’ve pulled the tape through, you have to secure it to the Romex. First, strip back the jacket about 4 in., cut the paper wrap, and trim back two connectors to the jacket. Now loop the remaining conductor (most contractors use the bare ground) through the bend in the tape, and tightly wrap the connection with electrician’s tape. Don’t be stingy with the tape (you don’t want the fish tape and Romex to separate in the wall), but be sure that the electrical tape is smooth and won’t get hung up as it passes through the wall.
Fish tape
Available in steel and nonconductive nylon, fish tapes are sold in sizes ranging from 25 ft. to 240 ft. A 125-ft. reel costs about $35.
 |
 |
“At the end of my fish tape, I make a halfdozen loops of twine and tape them securely to the tape hook. Inserted into the wall cavity, the rat’s nest increases my chances of grabbing it from the other direction.”
— David Albanese, electrical contractor, Wind Gap, Pa.
Avoid those hot wires!
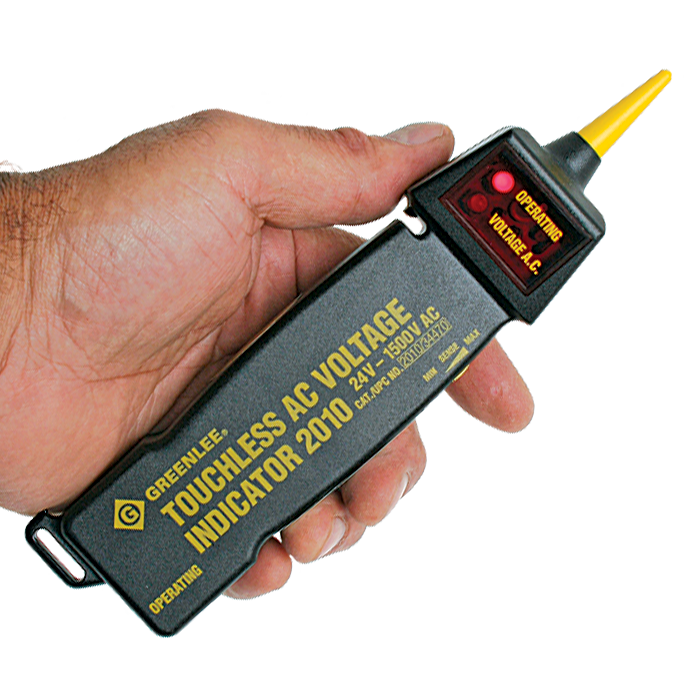 by Clifford A. Popejoy When you’re blindly drilling holes through framing, you run the risk of drilling into an existing circuit, breaking a wire, causing an arcing fault, or worse, electrocuting yourself. Here are a few preventative measures: ● First, look for nearby outlets, switches, and fixtures, and estimate the wiring paths. For a house wired in cable (i.e., BX or Romex), most switches have cable running to the top plate; a ceiling fixture has a cable running to the switch that controls it. Receptacle outlets may have cable running to them from any and all directions. ● You also can get a stud finder that detects live wires behind drywall. However, I use a touchless ACvoltage detector made by Greenlee (photo right) that has adjustable sensitivity. It beeps at a rate determined by the sensitivity setting, and when you get close to the 60-Hz. electromagnetic field created by line voltage, the beeping rate increases. It costs about $85. ● Of course, there’s no detector for when a drill bit goes through a wall and into a television set. Mark the long shaft of your drill bit with white tape at 16-in. intervals. If you’re not hitting a stud at the right interval or if you’re hitting something too soon, stop and find out why. — Clifford A. Popejoy is an electrical contractor in Sacramento, Calif. |
Going up, over, and sideways: can you get there from here?
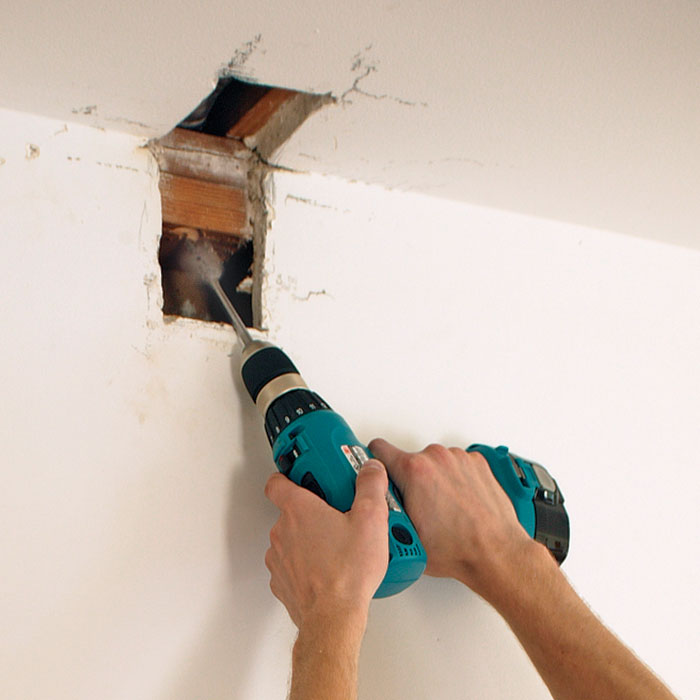
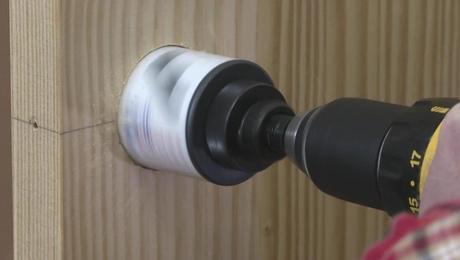
1. One of the most difficult snaking jobs is to connect a ceiling fixture to a wall switch when there’s no access from above. In addition to a flex bit, extensions, and fish rods, you’ll probably need to cut out and repair some drywall. To connect a ceiling fixture and wall switch, start by cutting box locations in both areas. Open an access hole at the junction of ceiling and wall, large enough to allow access to the top plate. Using a spade bit or flex bit, drill a 3 ⁄ 4-in. hole up through the plates.

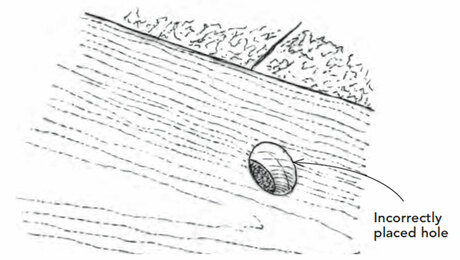
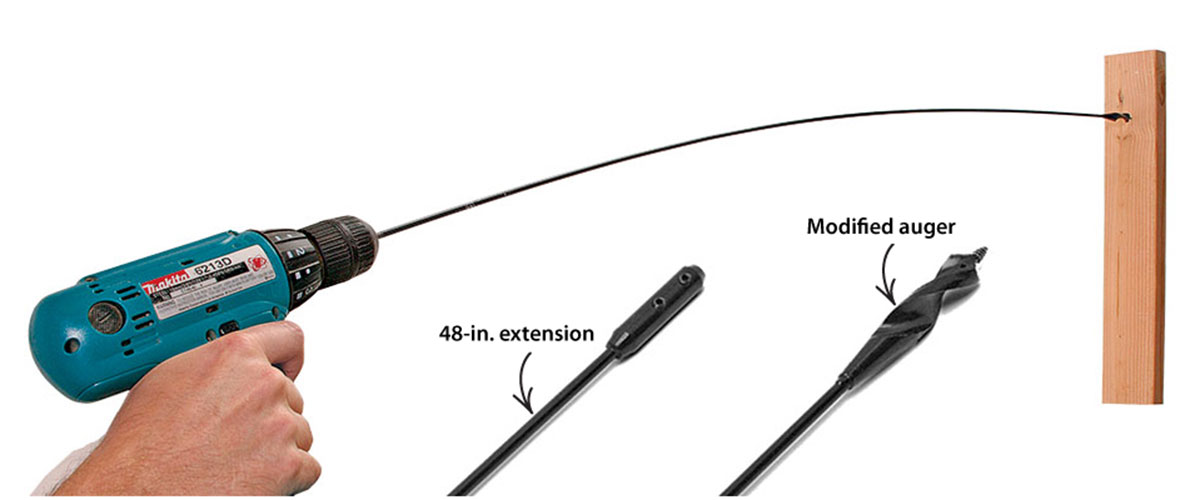
2. Depending on the direction of the joists, you may have an open run to the ceiling-fixture location, or you may have to use a flex bit to drill from the ceiling location across ceiling joists to the wall plate. Made for longdistance drilling, a common flex bit consists of a 1 ⁄ 4-in.- dia. shaft that is 48 in. long, ending in a modified auger. Connected to a 48-in. extension, the bit can drill into framing nearly 8 ft. away. Flex bits are a little tricky to use because they can wander and pop out of the drywall sideways instead of drilling through their intended targets.

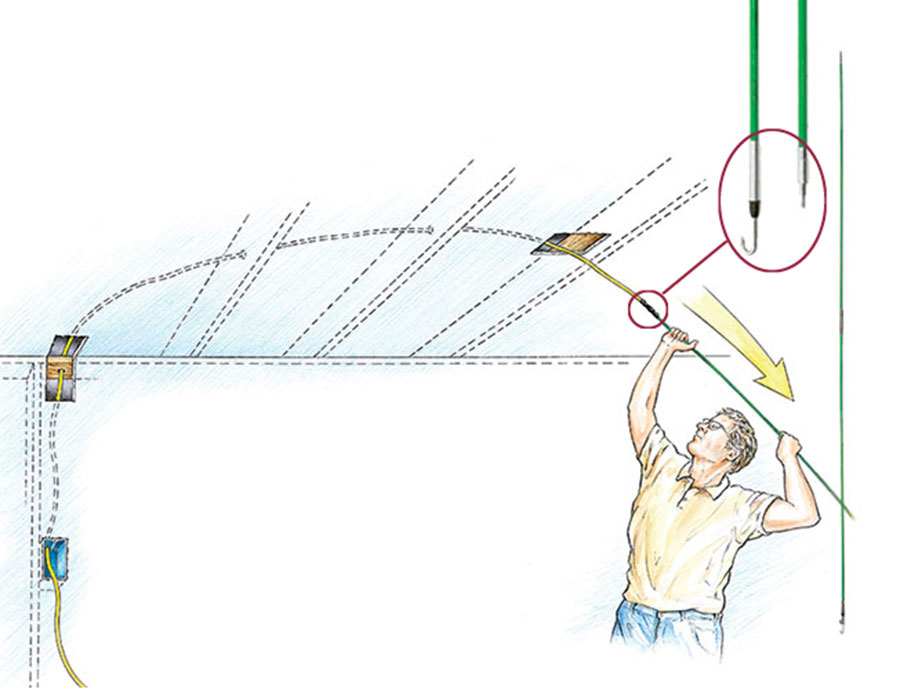
3. Thread a fish rod from the ceiling-fixture location to the plate-access hole. Bring the Romex up from the switch location, attach to the tape, and pull it through.
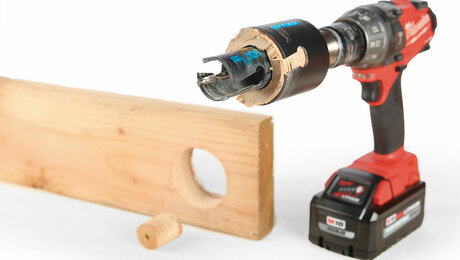
Flex bits
These bits are available in bore diameters ranging from 1 ⁄ 4 in. to 1 in., and in lengths up to 72 in. A bit and extension like the ones shown here cost about $45.
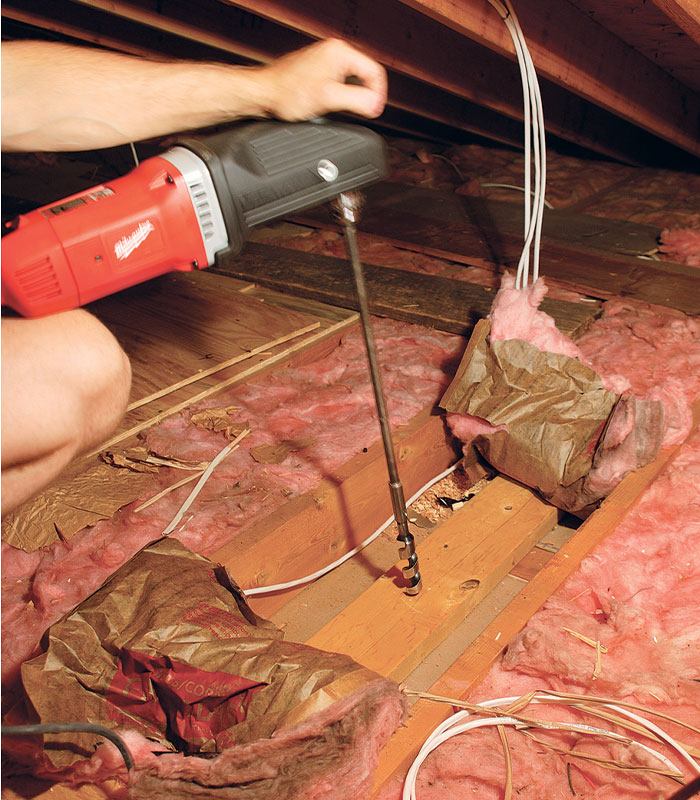
“If you want to add more recessed lights to a ceiling, first cut a hole for the new fixture. Then pull down a nearby existing fixture, drill through the joists into the desired bay, and fish the wire.”
—Jason Zelek, Zelek Electric, Old Lyme, Conn.
Fish rods
When they have to push to find the hole they’ve drilled, especially in insulated walls, electricians go to the truck for these 4-ft. lengths of 1 ⁄ 4-in.-dia. fiberglass rod. The rods can be screwed together for a longer reach. Like fish tape, they are connected directly to the wires with electrical tape. A set of four rods costs about $45. Some electricians prefer the thinner models made by Bergstrom for their flexibility. A pair of Bergstrom rods costs about $35.
“When screwed together end to end, fish rods can loosen as you twist and push them. I duct-tape them together at the ferrules to keep them united.”
—Mark Carlson, Roger Electric, Danbury, Conn.
Go through the top plate to get from the attic to the second floor
1. In many ways, this method is identical to coming from the basement, except that it’s upside down. Once you’ve picked a spot for the secondfloor switch, for instance, use an insulation-batten wire to drill up from the ceiling below or to find the top plate upstairs by measuring from a reference point common to both levels. Drill a 3 ⁄ 4-in.-dia. hole through the wall’s top plate.
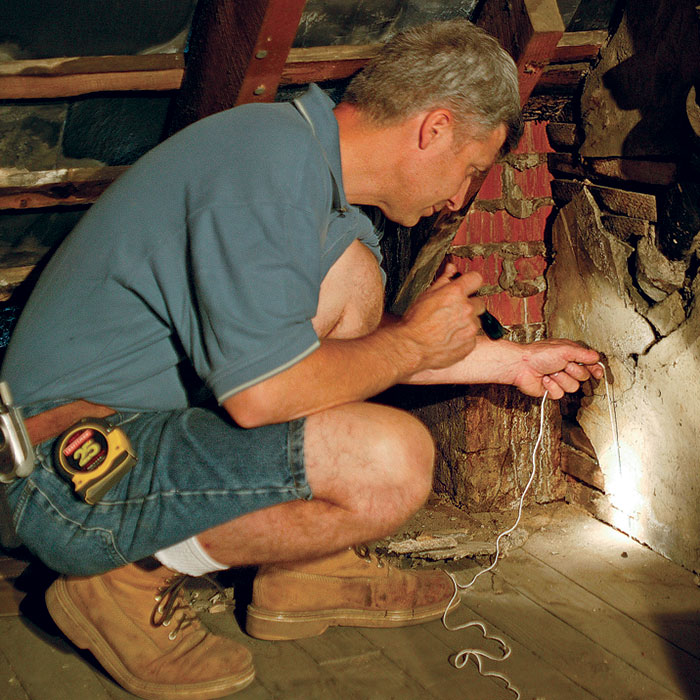
2. Drop a weighted line down through the hole from above, bouncing the weighted end off any obstacles until it reaches the opening below, where a helper can snag it.
Weighted line
One of the most common low-tech tools is a spool of twine that’s weighted at one end, often with 3 ⁄ 8-in. nuts. Electrician David Albanese prefers cotton twine that terminates with 12 in. of sash chain; Karl Linck likes to weight the line with beaded chain. Both like the line weighted with chain because it flows easily over obstacles.

3. Once the path is established, the wire is connected to the line and is pulled down into the opening.
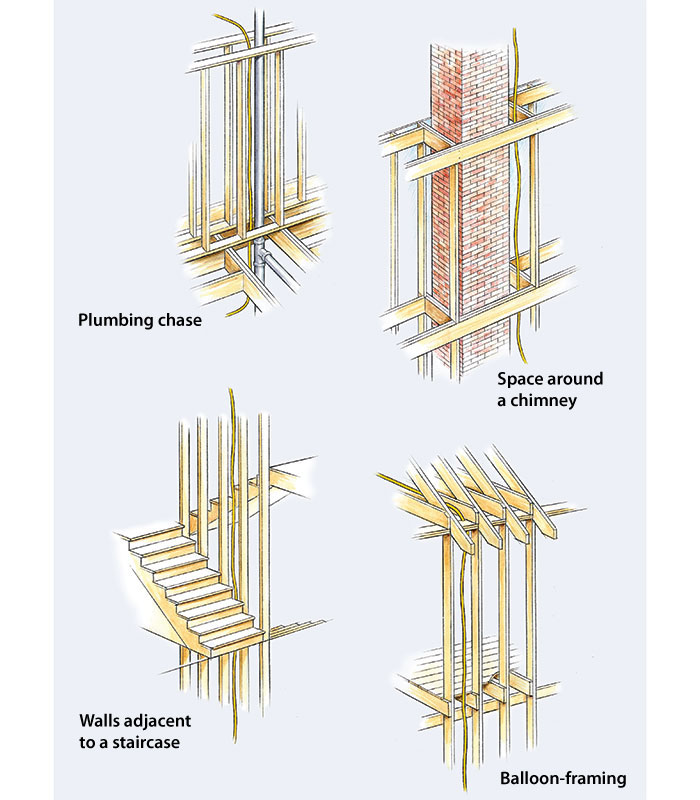
To feed the attic, find the path of least resistanceIf you must run wires to the second floor, the easiest method is to pull them up from the basement to the attic and then rout them down. Overall, it’s best to bring the wires up in the center of the house. Several options are available. ● In many houses, you can bring the wires up a plumbing chase. ● Building codes allow the use of the space around a chimney, providing it’s modern construction (see tip below). ● Snaking wires down interior walls is a possibility, but usually requires drilling down from the attic and drilling up from the basement to make the connection. Walls adjacent to a staircase offer possible routes as well. ● In older houses that are balloon-framed, the exterior walls often have no blocking and offer the easiest path. Modern platform-framed houses present a more difficult job; their exterior walls are not only insulated but also contain horizontal plates and fire blocking.
—Karl Linck, electrical contractor, Kohler, Wis.
|
Sources for tools and information
Greenlee
Electrical tools and testing equipment
Labor Saving Devices Inc.
Supplies for wire and cable installers. Web site contains installation tricks.
Bergstrom Manufacturing Inc.
Fishing tools
Klein Tools
All manner of electricians’ tools
— Charles Bickford is a senior editor at Fine Homebuilding.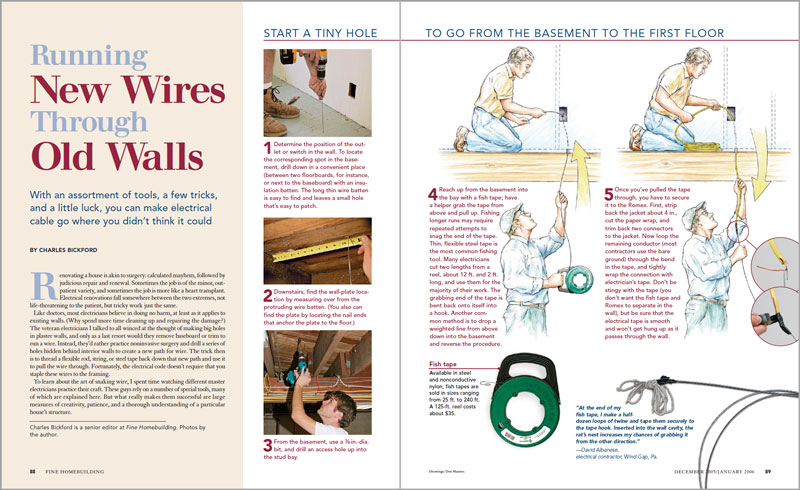
Photos by the author.
From Fine Homebuilding #176
For more photos, illustrations, and details, click the View PDF button below.