Dust Control
Nobody will notice your flawless miters if the home is covered in filth—here's how to clear the air and contain the mess.
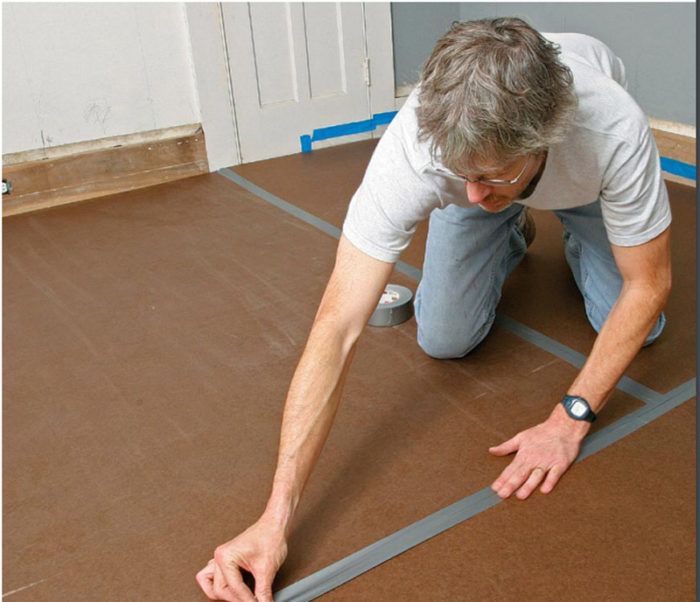
Synopsis: A good dust-control strategy is essential to keeping your customer or spouse happy throughout a remodeling project. Former Fine Homebuilding editor Tom O’Brien outlines the steps necessary to protect your work area and isolate it from the rest of the living space. Details include building a temporary dust barrier and fashioning a homemade airlock.
For those of us who get our hands dirty every day, dismissing dust as a minor annoyance is easy. No big deal. Nothing that a whisk broom and a Shop-Vac can’t make quick work of. But then you spend a day cleaning drywall dust out of every nook and cranny in what had been a spotless kitchen. Or maybe you have to come up with the cash to refinish a hardwood floor scratched and pitted by demolition dust. To avoid such costly, time-consuming consequences, you have to get serious about controlling dust during remodeling projects.
Keeping dust in its place requires a modest investment in time and materials, but it pays huge dividends, and not just in cost savings or goodwill. Over the years, I’ve become convinced that my work is more precise, better organized, and more efficient when dust is kept under control.
My dust-containment strategy has two parts. First, I isolate the work area from the occupied portions of the house to make sure that none of the dust that’s generated is allowed to escape. Second, I try to cut down on activities that generate dust, and when that’s not possible, I capture dust at the source using shrouded power tools combined with a tool-triggered vacuum cleaner.
Floor protection comes first
I start a typical job by clearing the work area. Any items that absolutely cannot be moved are wrapped in plastic sheeting, then covered with a thick drop cloth or mover’s blanket to add an extra layer of protection.
Next, I cover the floors with a layer of 6-mil plastic. I used to try to protect floors with tarps or drop cloths, but they never stayed in place and couldn’t be cleaned easily. Plastic sheeting is a better choice because it can be balled up and thrown away at the end of the job, taking the dust with it.
To fashion a seamless barrier between the dust and the floor, I overlap the edges of the plastic by 6 in. or so and tape the seams with painter’s tape. I turn up the edges at the baseboards and secure them with 3M #2090 blue masking tape, which is designed to be removable for up to 14 days without pulling off the paint or leaving a sticky residue. The company makes another tape that can stay stuck for 60 days without damage (#2080), but it’s flimsier.
Be careful: Plastic sheeting can be slippery until it has been scuffed up by foot traffic. A few rows of masking tape laid down in high traffic areas will help to improve traction.
Carpeting usually is replaced or removed during remodeling, but if it must be saved, I cover it with two layers of plastic. To guard against punctures during demolition or high risk operations, I usually cover plastic with a heavy-duty tarp. After the dirty work is done, I sweep up the debris, then thoroughly vacuum the tarp before I fold it up and pack it away.
Finished hardwood floors aren’t as forgiving as carpets and need more than a thin layer of plastic to guard against scratches.
For photos and more on how to seal off the work area, click the View PDF button below.









View Comments
Love the tip about putting masking tape across high-traffic areas to reduce slipping. This should be presented in all EPA Renovation, Repair, and Painting (RRP) lead safe work practices workshops. Contractors complain about how unsafe the plastic is.