
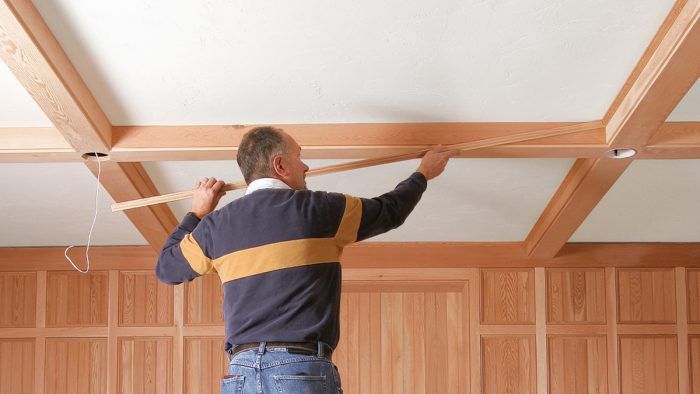
Add Character with a Box-Beam Ceiling
Hollow beams transform a room’s level of detail while making it easy to integrate lighting and run wiring.
Synopsis: Box-beam ceilings can add elegance to any room: round, triangle, square, or rectangle. By adding a soffit, you can normalize an oddly shaped room to accept this ceiling treatment. The hollow beams are great for installing lights and hiding wires or pipes in remodels. Veteran finish carpenter Chris Whalen shows how to assemble a simple box beam using quirk joints between the sides and bottom, and gives several options for intersecting the bottoms of the beams across the grid.
Box-beam ceilings are a great way to add personality, elegance, and character to an otherwise ordinary space. In a room with an oddly placed structural beam, box beams can make sense of the unbalanced ceiling. Furthermore, the hollow beams can house recessed lighting and provide a chase for wiring. Whether the beams are painted or stained, the layout principles are the same, and the joinery and design can be as simple or as elaborate as you want.
A recent restoration that my company undertook provided an excellent opportunity for a box-beam ceiling: a 1970s breezeway connecting a 19th-century Queen Anne Victorian to its detached garage. The box beams and custom wall paneling helped to convert this cold breezeway into an inviting entertainment room, a cozy place to enjoy the fireplace, the wet bar, and the entertainment center.
Combine basic ingredients to create an attractive beam detail
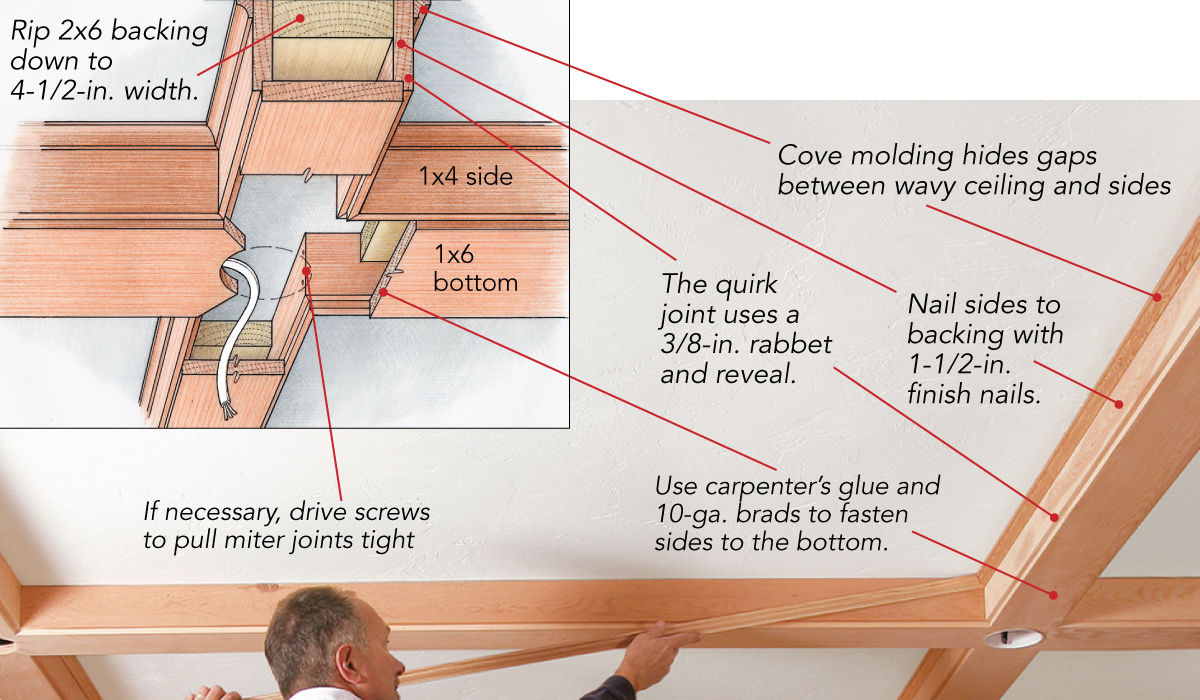
The built-up beam is anchored to backing cut from 2×6 framing lumber. A quirk joint formed by rabbeting the sides and slipping the bottom between them makes a tight-fitting, attractive, relatively simple joint. Cove molding provides a graceful transition between the sides and the ceiling. This simple joinery is typical of the Craftsman style.
You don’t need a perfectly shaped room
Although square or rectangular rooms are the most likely candidates for box-beam ceilings, almost any room shape will work, even circular or triangular rooms. The key is to create a symmetrical layout. The breezeway is roughly rectangular, with a small bump-out in the ceiling on one end. We eliminated the bump-out by adding a soffit to one end of the room.
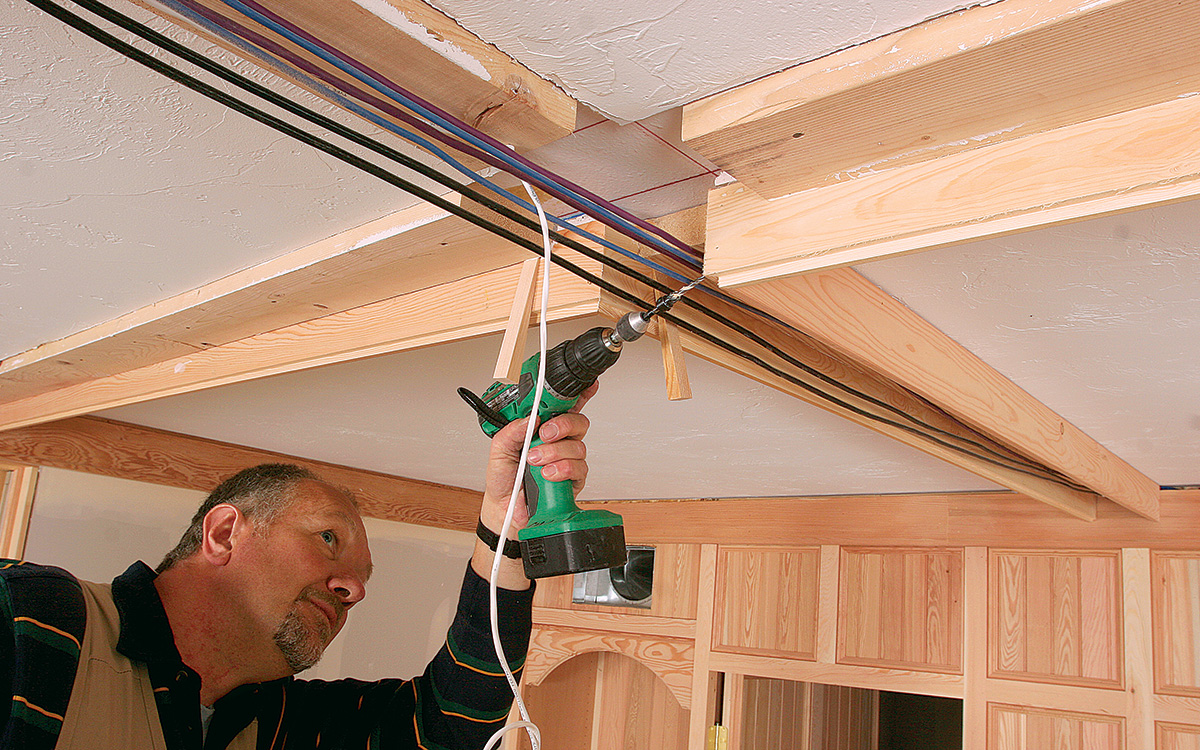
A typical box-beam installation usually includes some sort of perimeter band that the box beams butt into. Because banks of tall windows ran along the sidewalls, we chose to run the window head-casing assembly (which extended to the ceiling) continuously around the room, thus using it as the band. The head casing had a curved face, so the beam ends needed to be scribed and cut to fit tightly against the profile.
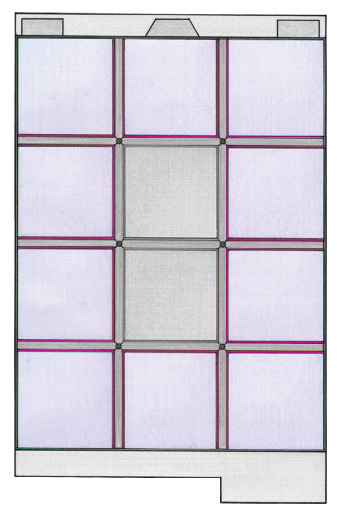
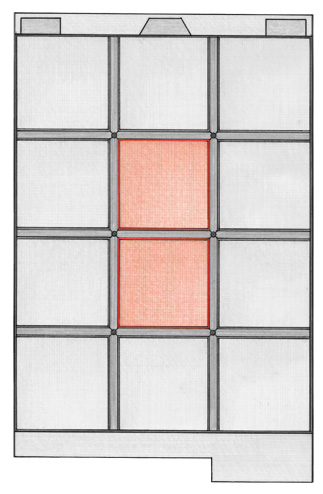
Start with a symmetrical layoutBox-beam ceilings need some sort of symmetrical layout grid, which can be hard to plan in a room with bump-outs. Although you can’t change the shape of the room, you can change the shape of the ceiling by adding a dropped soffit. I started the layout at the fireplace, which is the focal point of the room, and adjusted the soffit’s placement to get a grid composed of square panels. You also can use the golden-rectangle dimensions of 1:1.62 as a grid if squares don’t fit your space or taste.
Step 1: Focal point dictates the layoutThe fireplace is centered on the wall, so I divided the ceiling into three sections. Two or four sections would have put a beam running through the center of the fireplace. Starting with the focal point gave me the on-center width of the panels for rough-layout purposes. Step 2: Use the panel width to determine the soffit placementI multiplied the panel widths (83 in. in this case) until I landed just short of the end of the room. Four panels ended around 1-1/2 ft. from the far wall. Calculate the exact openings and the soffit placement by subtracting actual beam widths from the overall dimensions. Step 3: Devise an assembly strategyThere are three types of panels in the project featured here: corners, sides, and centers. Each type of panel has different parts and different assembly requirements. The edge panels must be cut, fit, and installed one piece at a time, whereas the center sections can be assembled on the floor and installed whole. |
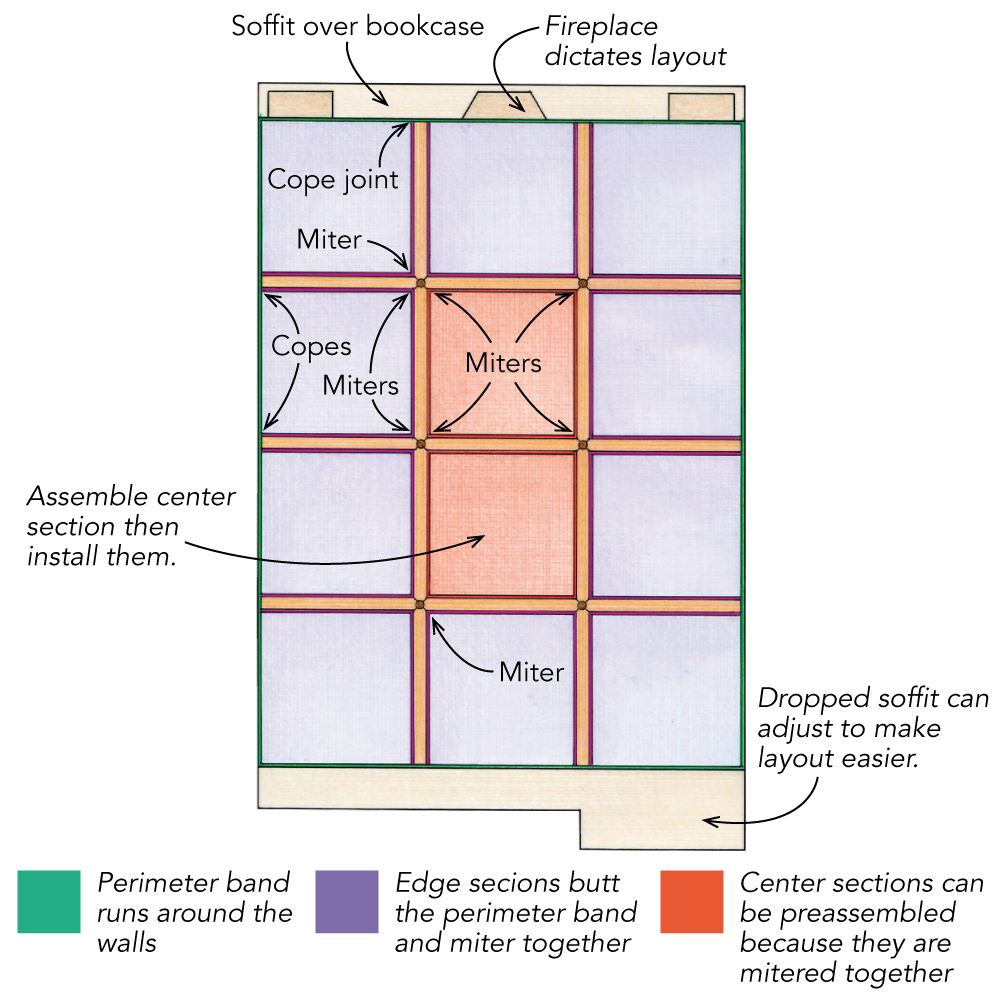
The grid created by the beams should be either rectangular or square. We designed a square grid that lined up with other details in the room. Along one wall is a fireplace with flanking bookcases. Dividing this space with two beams centered the fireplace nicely and visually separated the bookcases. Placement of the perpendicular beams was determined by the space between the first two; adjusting the soffits made the grid roughly square.
There are many ways to make a box beam
The size of the perimeter band determines the height of the box beams. We could have aligned the bottom of the beams with the bottom of the band, but because the ceilings in this breezeway are about a foot and a half lower than the 10-ft. ceilings in the Victorian house, we were nervous about making the room too short and top heavy. Instead, we chose 1x4s for the sides of the beams and used a 1×6 for the bottom.
There are several ways to assemble the box beam itself. Our design, which relies on rabbet joints and a simple cove molding, manages to convey Craftsman-style detail with simple joinery.
Because the ceiling in this breezeway was plywood, attaching backing was a breeze, so to speak. We used construction adhesive and screws to hold ripped-down 2x6s in place. Without a plywood ceiling, you could attach the backing to ceiling joists in one direction and rely on heavy-duty drywall anchors (or toggle bolts) and construction adhesive in the other. I like to hold the backing away from grid intersections a few inches to make fitting the inside miter joints easier.
Install the edge sections one piece at a time
Because the peri-meter sections butt against the profiled band, these sections must be installed one piece at a time. After getting a tight fit on the cope joints, fit the miters with shims and screws.
 |
 |

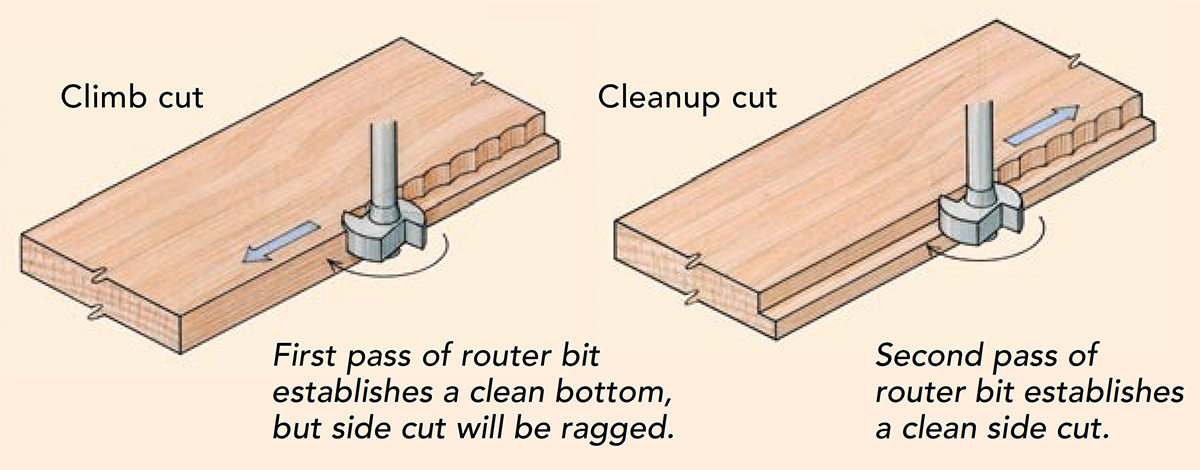
Climb-cut with care to reduce splintering
Moving the router from right to left is called climb-cutting because the bit’s clockwise rotation pulls, or climbs, into the workpiece. Rabbeting an edge with a climb cut and then a cleanup cut will produce a crisp joint, but climb-cutting can be dangerous. Grip the router firmly, and test your technique on scrap first.
Mill and cut the stock all at once
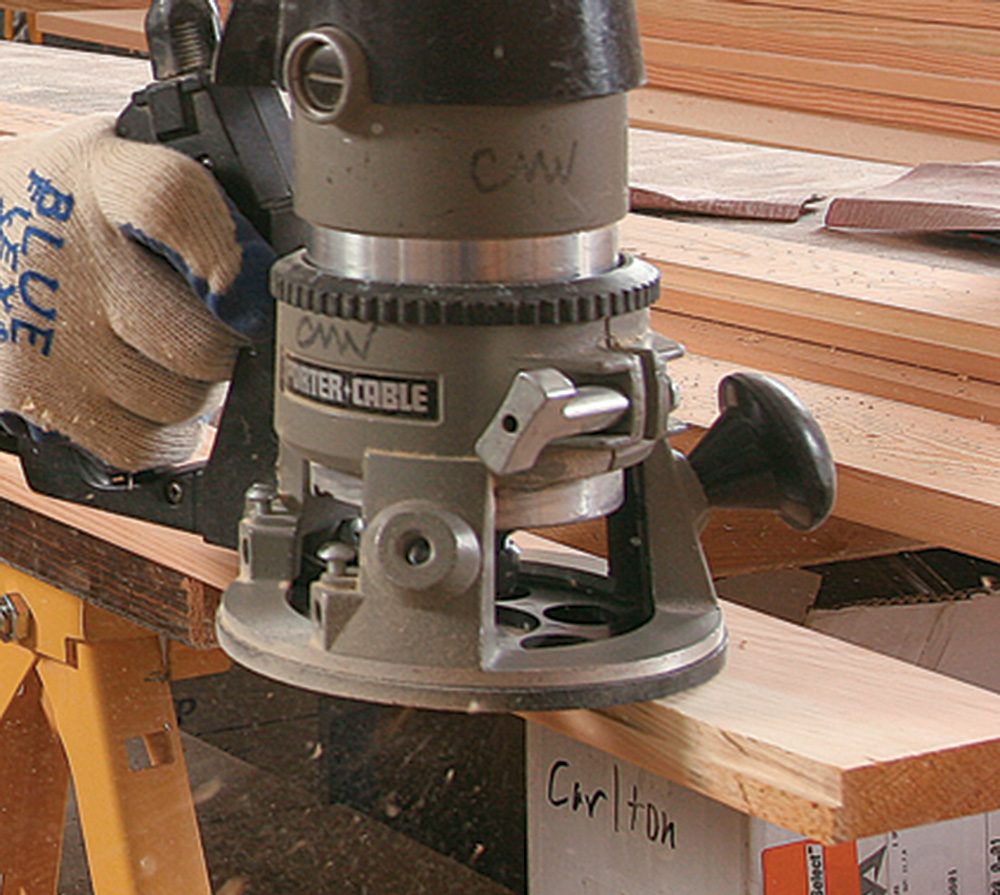
There are a lot of cuts, rabbets, and copes to make in a ceiling, and I save time by doing them all at once. After totaling the footage of beam sides and bottoms I need, I plow the rabbets using a router and a 3/8-in. bearing-guided rabbeting bit. Next, I cope all the ends of the pieces that will fit against the curved perimeter band (numbering them as I go). Last, I cut the miters at the inside corners.
To eliminate chipping and blowout while routing the sides, I use a technique called climb-cutting, which is done by running the router backward (right to left) along the stock. Climb-cutting can be dangerous because with the router bit spinning clockwise, the cutting edge strikes the wood first and causes the router to climb (or jump) along the board toward you. But on the first pass, climb-cutting creates a clean edge that resists tearout on the second pass (left to right).
Once the sides are rabbeted, I rough-cut them to length and fit them to the perimeter band with a cope joint. Normally, a cope joint is used to mate two pieces of stock with the same profile. To cope flat stock to a profiled piece, I scribe the profile, cut it with a jigsaw, then grind a back cut with a disk grinder. Touch-up can done with a rasp.
Once coped, the other end of the box-beam side can be mitered to final length. Remember, the unrabbeted face is the finished face and will be the short point of the miters.
Assemble the middle sections
Because the joints are all miters, the middle sections can be assembled on the floor and installed as a unit. Biscuits, glue, and brads keep the miter joints tight.
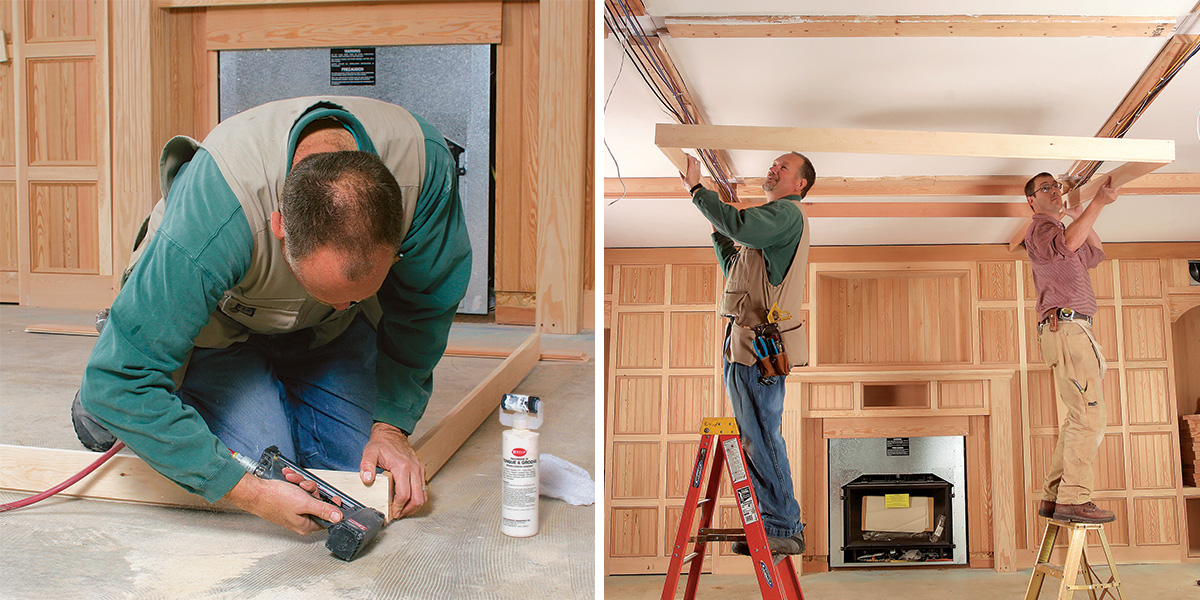
Install edge parts singly, and build the center sections on the floor
Box-beam ceilings have one, two, or three different types of sections: corners, sides, and centers. The corners and sides need to be installed one piece at a time because the cope joints must fit tightly before the miters can be cut.
The center sections consist of four pieces that are mitered together. These mitered assemblies can be built on the floor and raised into place in one piece. I strengthen the miter joints with biscuits and glue before nailing them with 1-in. brads.
It’s impractical to biscuit-join the miters of the perimeter parts, so I use glue, drywall screws (drill pilot holes with a countersink bit), and shims to align them properly. When installing the beam sides in place, the rabbeted bottom edges must be flush and level with each other; otherwise, the beam bottoms won’t align with each other, which causes problems at the intersections. There always will be small discrepancies between the bottom pieces, but they can be resolved with an orbital sander. If your ceiling has humps or bumps, you may need to scribe the sides to the ceiling or hold them down to keep them in alignment.
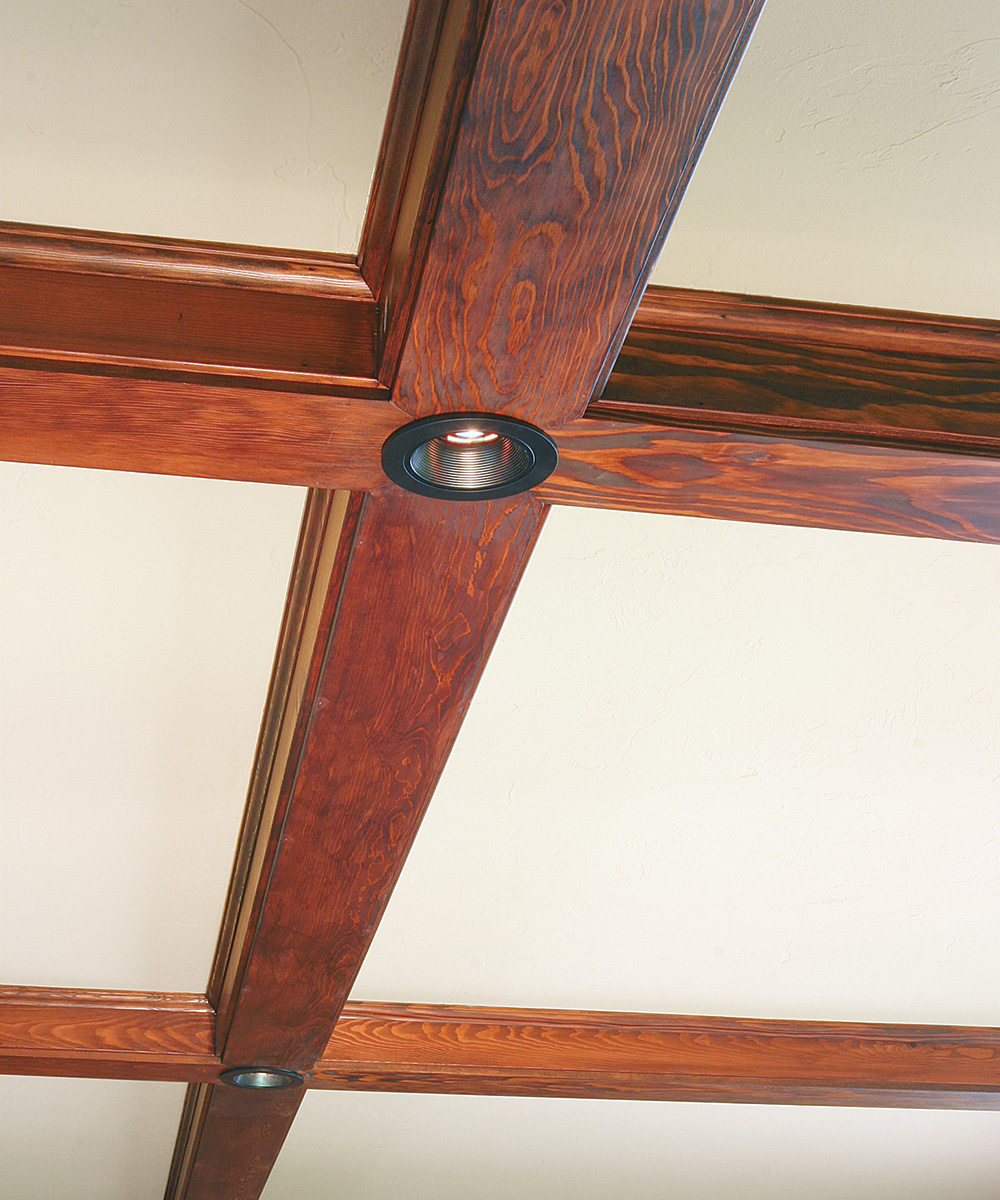
Beam intersections: Simple to spectacular
You can butt the bottoms of the beams together, or you can use a four-way miter like the one in this project. Within these two methods, a few options exist.
 |
 |
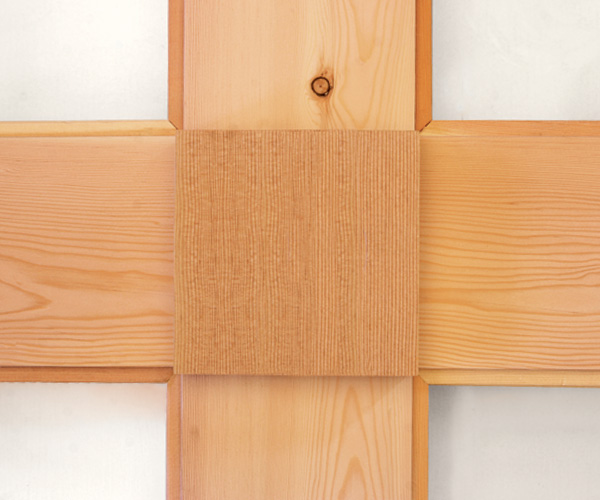
Butt joints and blockHide butt joints with a block of wood to hang a light fixture from. |
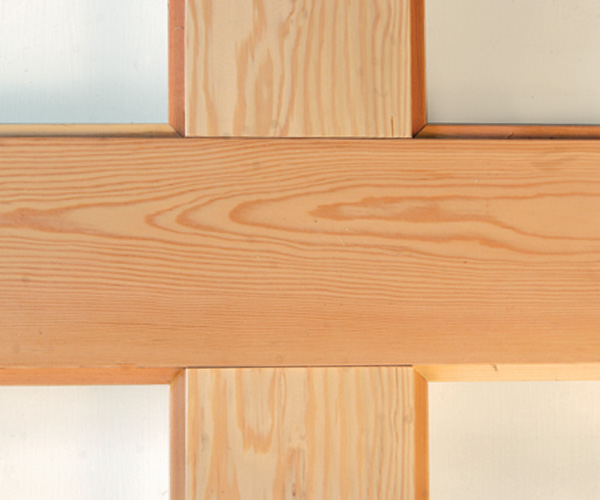
Fender jointEasing the edges of a butt joint highlights the simple joinery and is common with Craftsman-style woodworking. |
 |
 |
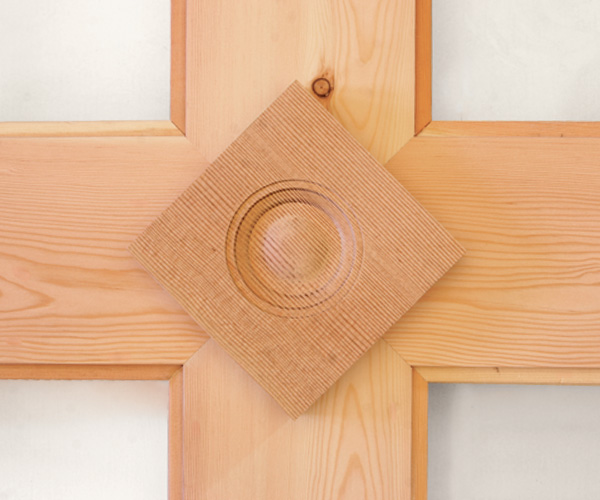
RosettesHiding most of a difficult joint simplifies the joinery while embellishing the bottom of the beam. |
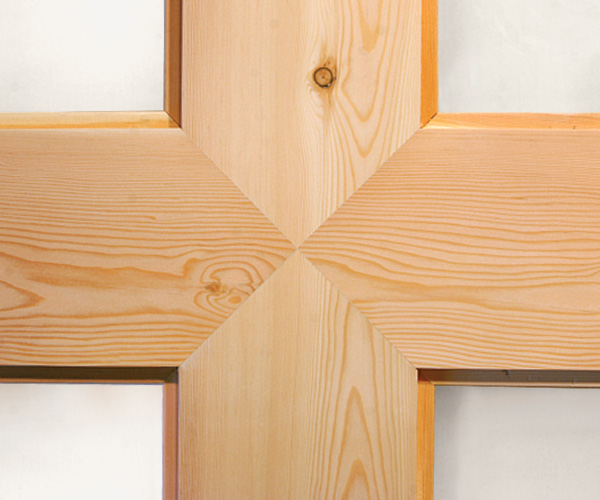
Four-way miter jointThis joint is the most difficult because eight different cuts need to align perfectly. |
A few choices for bottom joints
After the side pieces are installed, it’s time to insert the 1×6 bottoms between them. You can deal with the intersecting bottoms in several ways: They can be square-cut and butted together tight for a seamless look, or the edges can be eased, thereby accentuating the joints. Another option is to cover the butt joints with a rosette.
For this installation, we chose the most difficult and trickiest method: a four-way miter joint at the intersections. The mitered boards need to fit tightly against each other, but also to the corners of the beam sides. Most of the pieces must be fit between two stationary points (the perimeter band and the four-way miter), so there is no room for error. Because recessed light fixtures were incorporated into the beam intersections, our joints had to be perfect only up to the hole for the light.
The bottom pieces are tricky because both ends need to fit perfectly. First, get a tight fit against the perimeter band, then focus on the four-way miter. Because this band is curved in profile, I back-cut the end at a slight (5°) angle. Once this cut is made, I mark where the bottom crosses the intersecting beam and make a 45° angle cut from each edge, forming a point at the end.
Test-fit this piece, making sure it isn’t too long and that it lines up with the inside corners of the beam sides; then glue and nail it in place. After assembly, the beam bottoms can be sanded smooth.
The final step in this project is to apply a small cove, quarter-round, or crown molding to cover the gap between the beams and the ceiling. We chose a part of the head-casing assembly, allowing us to continue a theme already established in the original house. The end result is the opposite of our original fears of a top-heavy ceiling. Rather than lowering the ceiling, the box beams open it up. Instead of the large, uninterrupted expanse of ceiling that used to loom low overhead, 12 individual ceiling spaces rise above the new box beams, giving the impression of a larger, more defined space.
Photos by Daniel S. Morrison.
From FineHomebuilding #181
Fine Homebuilding Recommended Products
Fine Homebuilding receives a commission for items purchased through links on this site, including Amazon Associates and other affiliate advertising programs.

100-ft. Tape Measure
Original Speed Square

Smart String Line
