Building a Divided-Lite Storm Sash
Changing the setup of router bits is the key to quick window construction.
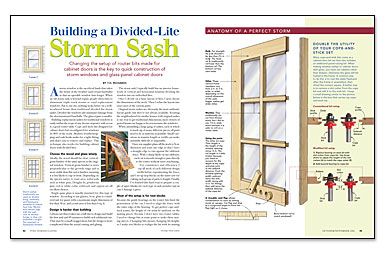
Synopsis: Although it’s easy to replace a storm window with a vinyl or aluminum unit, nothing’s better than the real thing, according to Canadian builder T.H. Richards, who presents his technique for building wooden divided-lite storm sashes. Richards uses a modified router-bit setup to shape the wooden pieces for the sash, then uses hardwood assembly blanks to put together the windows. He incorporates vent holes to allow condensation to escape. Richards’s technique also can be used for building glass-panel cabinet doors.
A storm window is the sacrificial lamb that takes the brunt of the weather (and errant baseballs) so that an operable window lasts longer. When an old storm sash is beyond repair, people often turn to aluminum triple-track storms or vinyl replacement windows. But to my eye, nothing looks better on a well-weathered house than traditional divided-lite storm sashes. Divided-lite windows also minimize damage from the aforementioned baseballs: The glass repair is smaller.
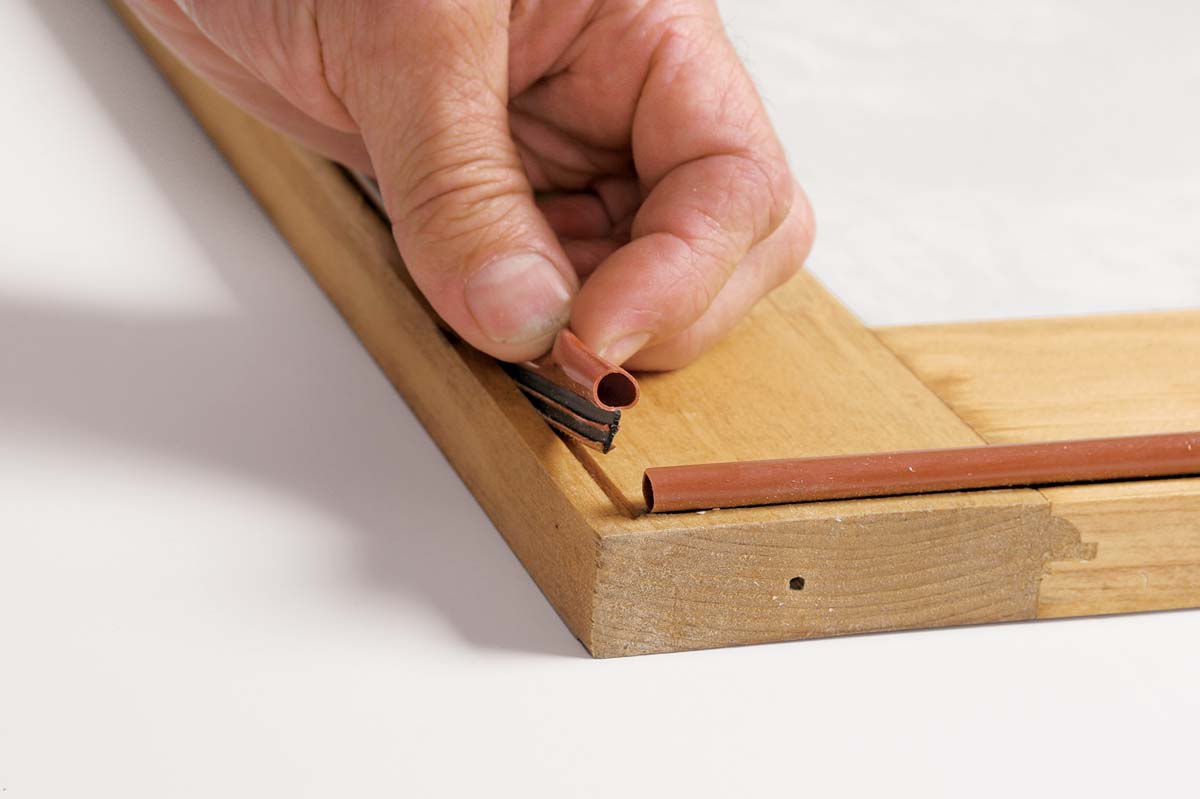
Building replacement sashes for traditional windows is easily within the scope of any decent carpenter with access to a good router table. Cope-and-stick bits designed for cabinet doors but reconfigured for windows do 80% of the work. Modern weatherstripping and sash hooks make for a tight-fitting sash that’s easy to remove and replace. This technique also works for building cabinet doors with divided lites.
Choose The Wood And Glass Wisely
Ideally, the wood should be clear, vertical-grain lumber of the same species as the original window. Vertical-grain lumber is sawn perpendicular to the growth rings and is more stable than flat-sawn lumber, meaning it is less likely to cup or twist. Depending on the species native to your area, softwoods such as white pine, Douglas fir, ponderosa pine, red or white cedar, redwood, and cypress are all excellent choices.
Single-pane glass is usually standard for this type of window. According to my glazier, 1 ⁄8-in. glass is considered safe for panes with a maximum single dimension of less than 30 in. and a total area of less than 6 sq. ft.
Design Is Harder Than Building
I always say that it takes me a full day to design and build the first sash and 45 minutes to build each additional one. That may be a small exaggeration, but the design is more complicated than the actual cutting and gluing.
The storm sash I typically build has an interior framework of vertical and horizontal muntins dividing the window into six individual lites.
Once I decide on a basic layout of lites, I next choose the dimensions of the stock. Then I refine the layout into exact sizes of the various parts.
Original storm sashes are obviously the most authentic layout guide, but they’re not always available. Scouting the neighborhood for similar houses with original sashes is one way to get traditional dimensions; most owners of period houses are happy to let you measure the windows.
When assembling a large gang of sashes, each of which is made up of many different pieces, all parts need to be as uniform as possible. Small variations in muntin length or width can make assembly difficult or impossible.
I have my supplier plane all the stock to 7 ⁄8-in. thickness and joint one edge so that I have a straight edge to run against the tablesaw fence. With a sharp blade on my tablesaw, each cut is smooth enough to pass directly to the router without more machining.
For consistency and efficiency, I rip all stock of each different design width before repositioning the fence, and I set up stop blocks on the miter saw for cutting each group of parts to length. Finally, I’ve learned (the hard way) to prepare a couple of spare blanks for each type of sash member just in case I damage a piece.
Most Of The Setup Is For Test Blocks
Because the guide bearings on the router bits limit the penetration of the cut, I need to align the fence with the outer edge of the bearing. To get perfect cope-and-stick joints, the height of cut must be uniform on the mating pieces. Because I don’t have two router tables, I need to change bits at some point to make these mating pieces. Changing bits means changing bit height,
so I make test blocks to realign the bit with its mating piece. Because changing bits introduces chances for error, it’s smart to change bits as infrequently as possible; starting the whole test-block process with the correct bit is important. I like to finish the routing process with a stick bit because it removes tearout left by the cope bit. This means that I need to start the test-block-making process with the stick bit.
When I start the production run, I feed the stock through with the better face down because that’s the sash interior (mark the up side “up” to help keep it straight). After the copes are all cut, I change bits and machine the inside edges of the rails and stiles, and both edges of
all the muntins. Machining the second edge on these skinny pieces is probably the most difficult cut in the whole job; that’s where a shopmade sled comes in handy (photos this page).
Vent Holes Clear Condensation
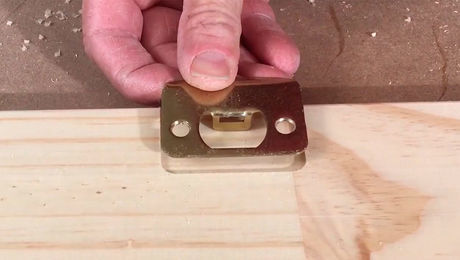
Because storm sashes seal out the weather completely, they also seal in moist air, so condensation is common. The great majority of old storm sashes were designed with vent holes in the bottom rail covered by a pivoting wooden flap. I drill vent holes before glue-up because it’s easier to put the bottom rail on my drill-press table than it is to put the entire sash there. A Forstner bit with a backing scrap gives a clean entry and exit cut, and a fence on the drill press ensures consistent alignment.
I make the flap from 1⁄4-in. or 3⁄8-in. stock. After cutting and shaping the flap, I cut a short piece off the end to serve as the stop. I cut the stop on a compound-miter saw with a 15° miter and a 45° bevel. The miter slope is cut so that the stop piece is wider on the bottom, and the face of the bevel on the stop is toward the sash. When the flap is closed, the miter prevents it from passing the stop, and the bevel forces it against the sash for a tight seal. I use a screw as the pivot, and I glue the stop itself in place.
Use Hardboard Assembly Blanks
In a small shop or on a job site, it’s rare to have a dedicated bench large enough to handle the assembly and glue-up of a big sash. But a portable assembly table set on sawhorses works nicely. Melamine-surfaced particleboard makes a great gluing table because glue won’t stick to the melamine. The worksurface should be reinforced underneath with 1×3 ribs to keep it perfectly flat. Two perpendicular 1×3 cleats screwed flat to the surface of the table form a jig to square up the sash during assembly.
Before starting the glue-up process, I cut panels of 1⁄4-in. hardboard to the full design dimensions between the sides of the rabbeted edges. These panels are my assembly blanks. I place one blank in each lite as I assemble the sash to space the muntins and square the sash automatically. It’s a good idea to rub the hardboard edges with paraffin to aid in their removal after the glue has dried.
I use bar clamps to hold things tight during glue-up, one clamp each for the top and bottom rail, plus one for each row or column of muntins. I use yellow carpenter’s glue, which takes 24 hours to cure completely but sets up in about 45 minutes. After an hour, I can remove the clamps and assembly blanks, then set the sash aside to cure while I glue up the next one.
Finishing Touches
I usually sand the assembled sashes with an orbital sander using 120-grit sandpaper and ease the edges with a belt sander to put a slight bevel toward the inside of the house. Whether paint or stain, apply finish to the entire window, including the rabbets that the glass will sit in. A complete coat of finish helps the window to resist moisture damage.
I do my own glazing, but you also can take the finished sashes to a glazier. Virtually all glaziers today use silicone or latex caulk to seal glass in place. Traditional glazing putty is another option. Each material has pros and cons; see p. 112 for more information. Maybe it’s the memories of scratching pictures of snowmen into the frost on my grandmother’s windowpanes, but I like old windows and think it’s worthwhile to build replacements.
Anatomy Of A Perfect Storm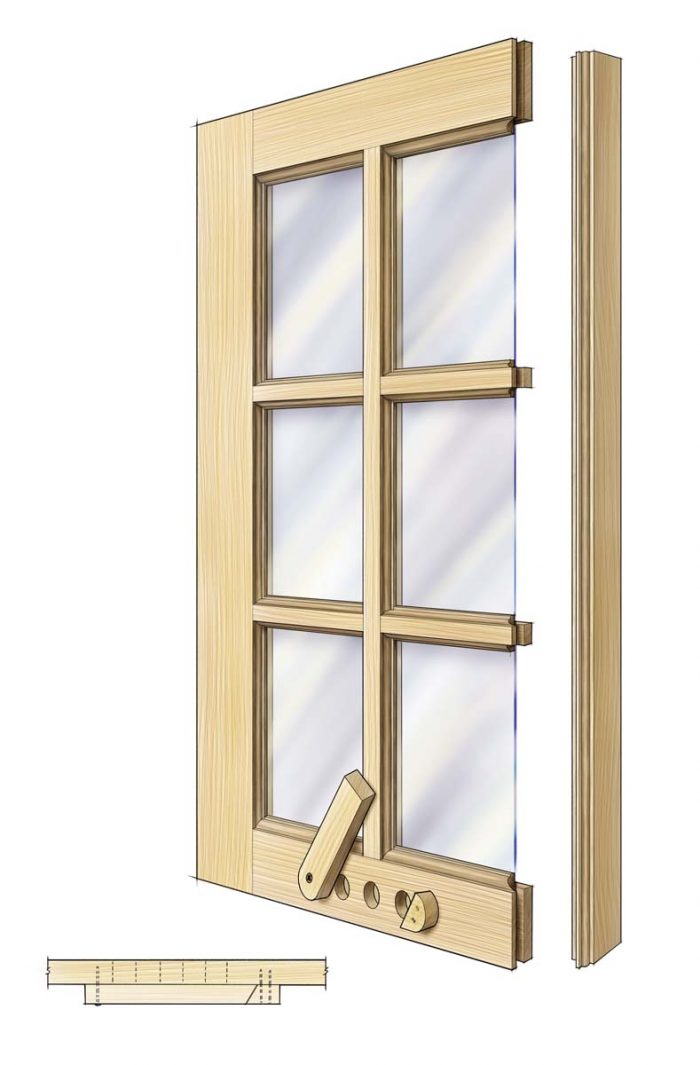

|
Rails. For strength, the rails shouldn’t be less than 21⁄2 in. wide. The head rail is traditionally narrower than the bottom rail. The bottom rail has vent holes. |
Stiles. These vertical frame members vary from 2 in. to 3 in. wide, or wider, depending on the overall dimension of the sash; bigger sashes get wider stiles. |
|
Muntins. They traditionally are cut from thinner stock, but I like to use 11⁄2-in.-wide stock because it is safer to mill on a router table. |
Sizing the parts. The stiles are easy: Their length is the height of the window opening minus 1⁄8 in. The rail length is a little trickier because you need to account for the depth of the cope-and-stick joint, or the setback distance. From the window-opening width, subtract twice the stile width (along with 1⁄8 in. for fitting); then add twice the setback distance of the cope bit. |
|
A closable vent flap allows condensation to clear by letting moist air escape. Cut flap and stop at a compound angle to force the flap tight as it closes. |
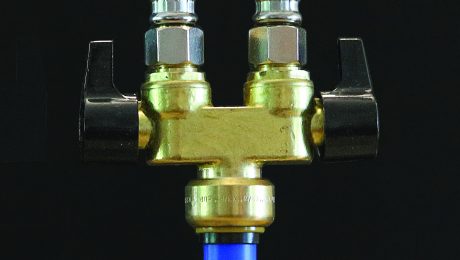
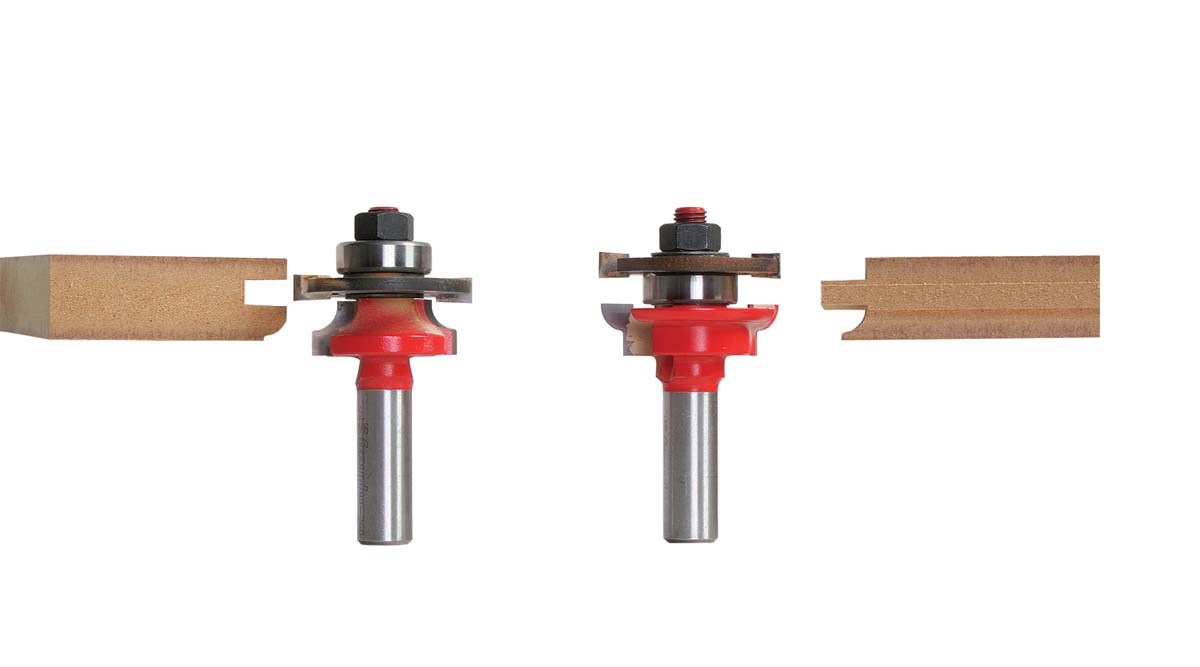
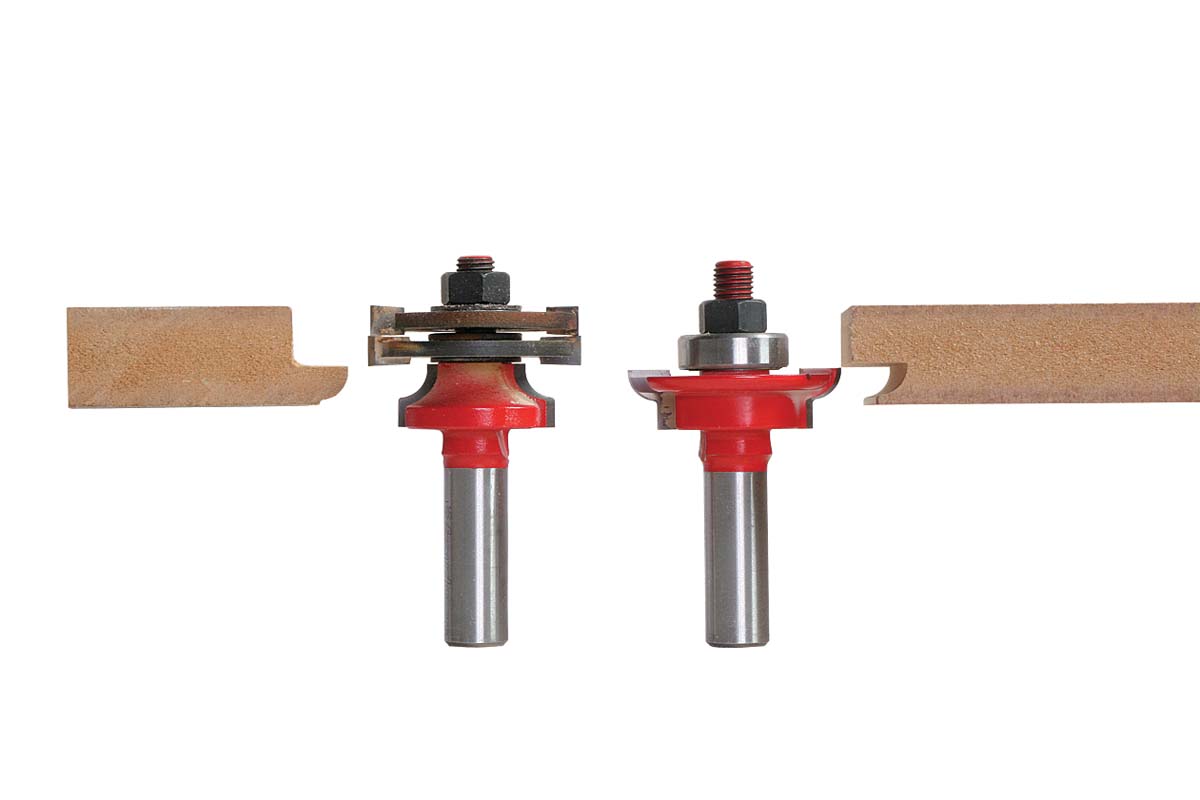
Double The Utility Of Your Cope-And-Stick Set
Many cope-and-stick bits come in a cabinet-door bit set that also includes an additional panel-raising bit. When making window sashes or cabinet doors with glass, you must cut rabbets rather than dadoes; otherwise the glass will be locked in the frame. A common way to do this is to rout the dado freehand after the frame is assembled, then chisel the corners square. A better way is to remove a slot cutter from the cope bit and add it to the stick bit. I keep a small drawing similar to the photos below in the box that carries my cope-and-stick set.
|
Conventional bit setup
|
Modified bit setup
|
Perfect Joinery Depends On Careful Setup
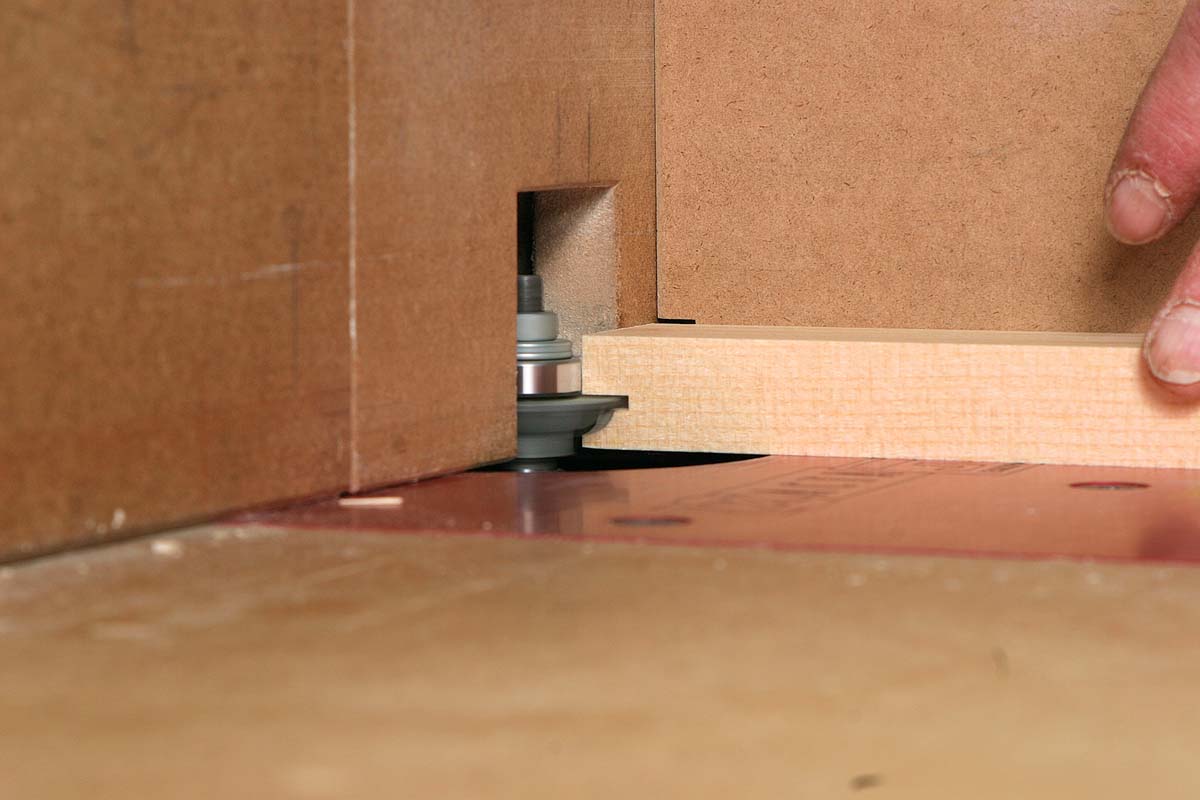
Set The Bit Height
 Align the guide bearing with the fence. The guide bearing acts as a depth gauge for the fence position. If the bearing protrudes from the plane of the fence, a bump or burn cut |
 |
 |
Use a test block to set the bit height precisely. A single test block aligns the bit that cuts the stick profile (photo left) and the bit that cuts the cope profile (photo above). |
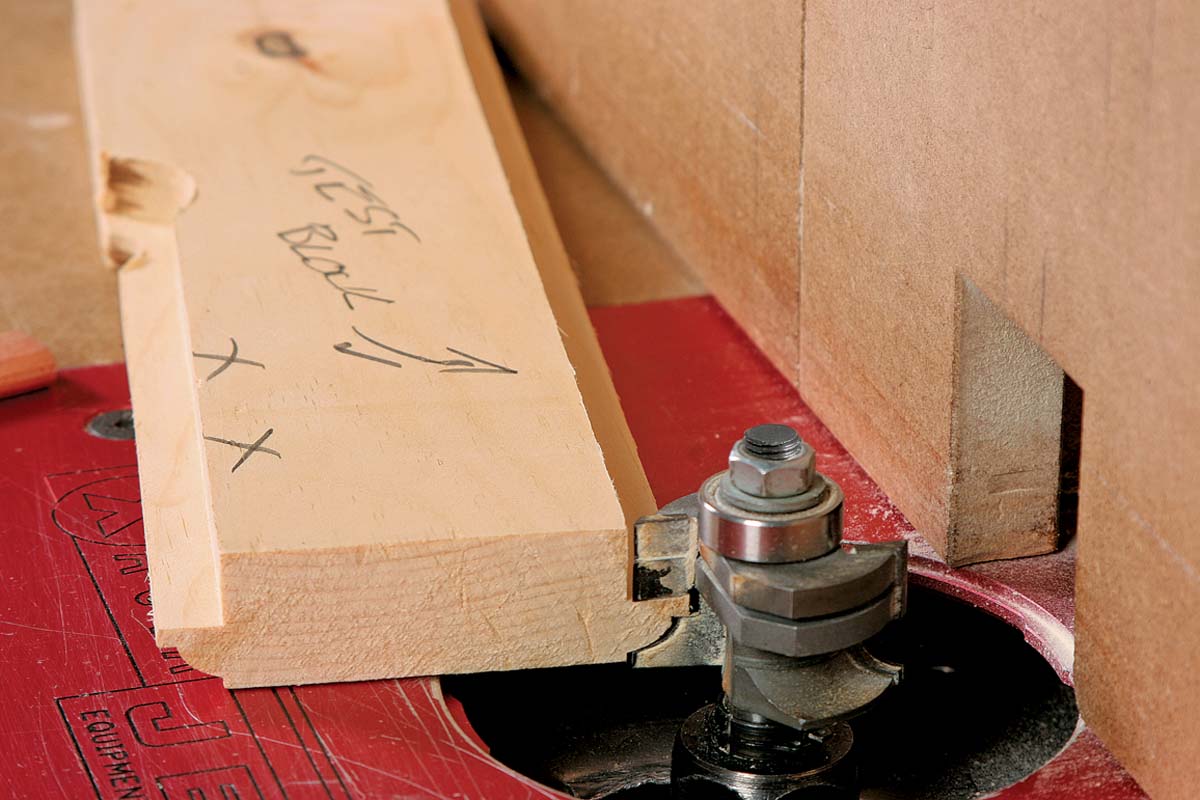
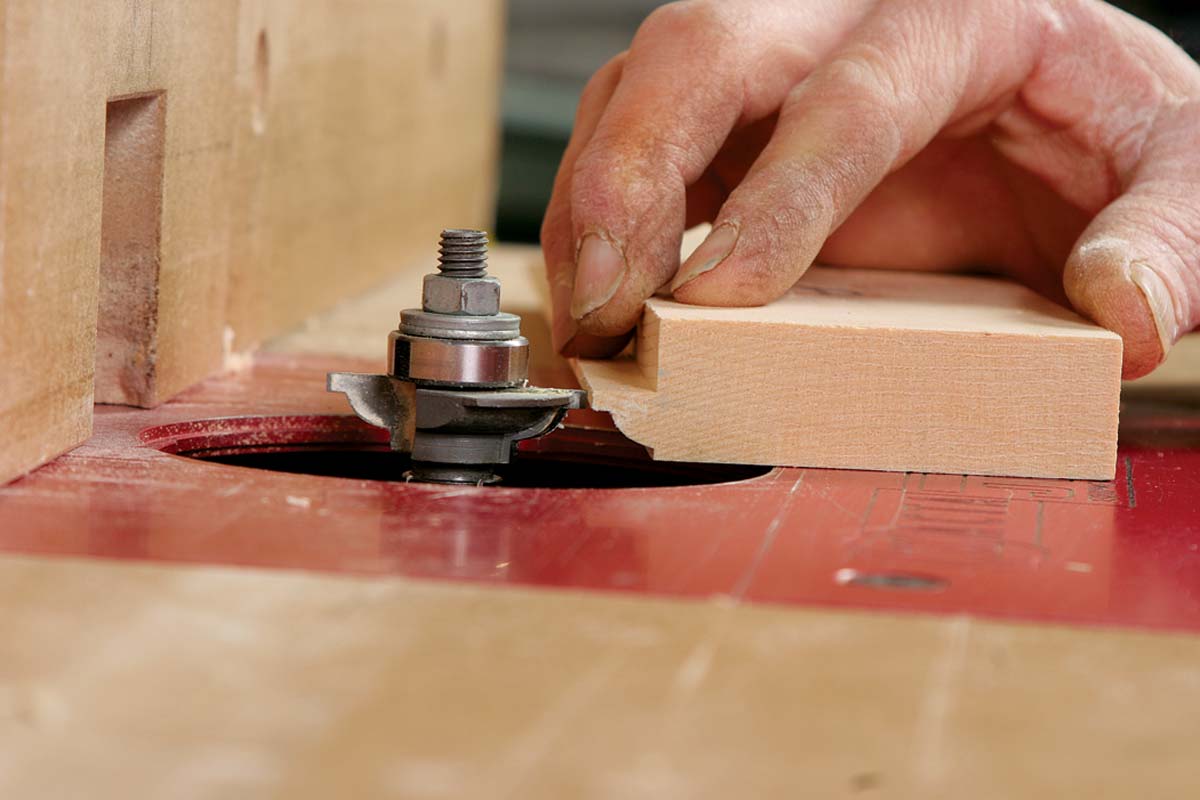
Rout The Cope Ends First
 |
Keep the stock running square to the router-table fence. By coping the ends first, I can remove tearout on the next pass with the stick bit. If your router table has a miter-gauge slot, you can guide the workpiece with a miter gauge. Otherwise, use a guide block. |
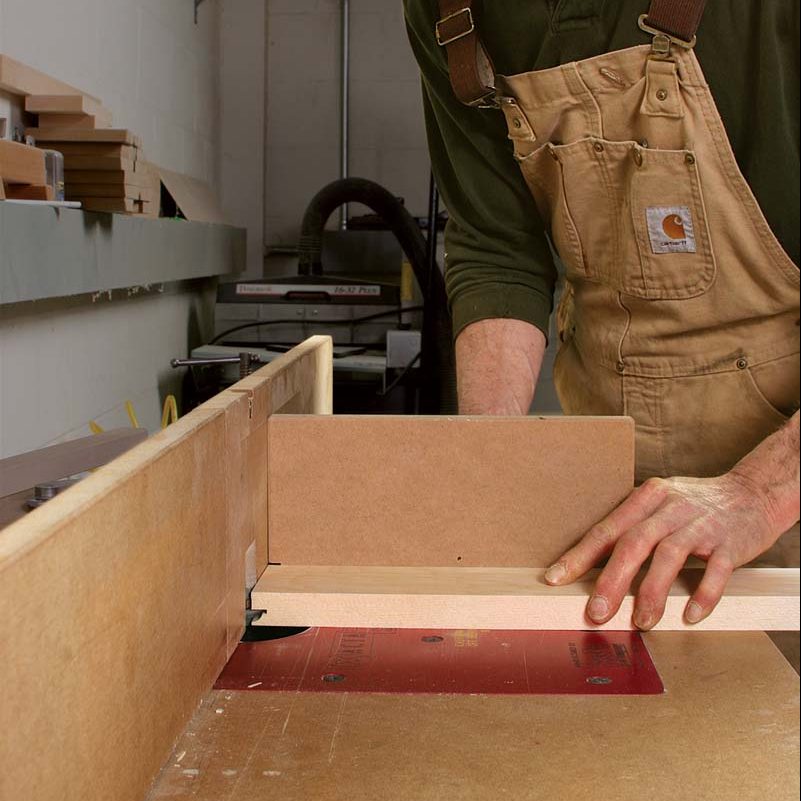 |
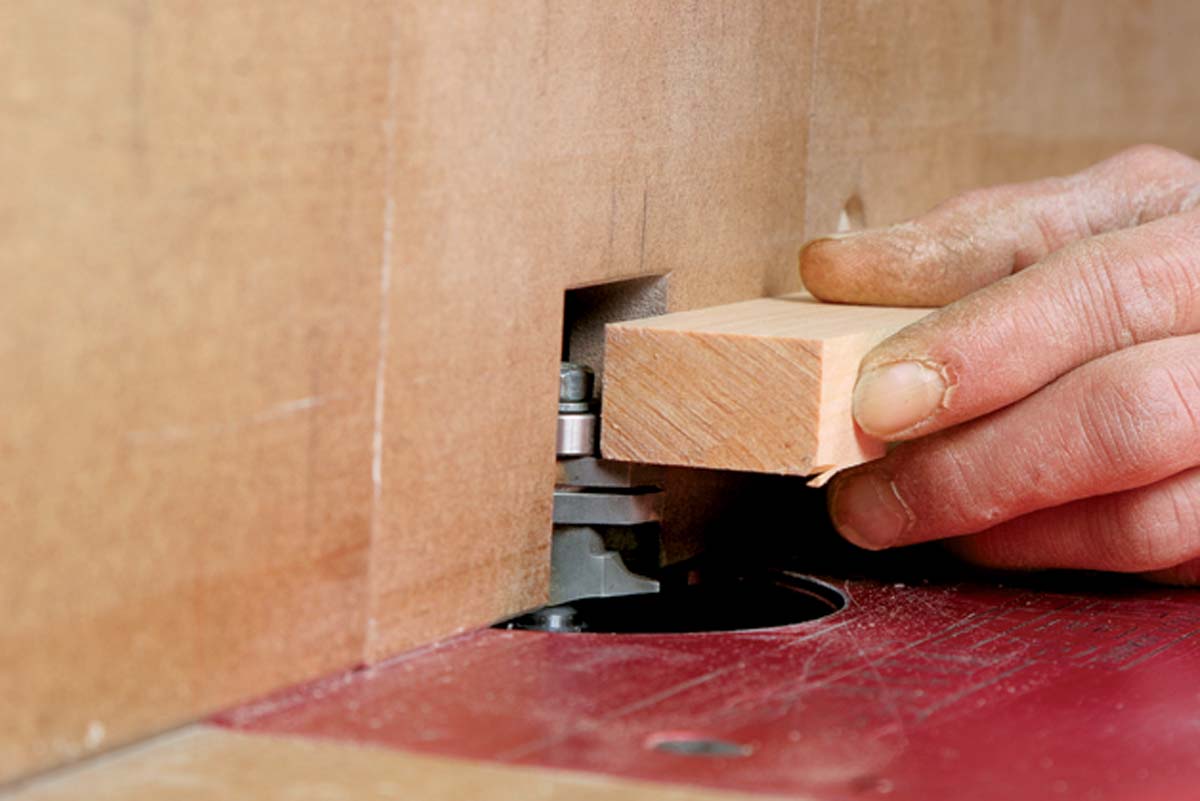
Rout The Stick Profiles Last
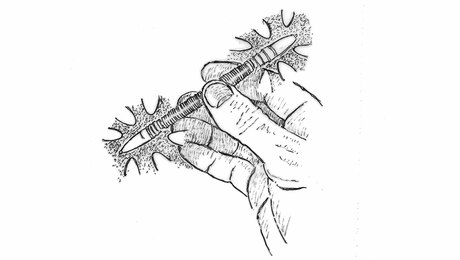
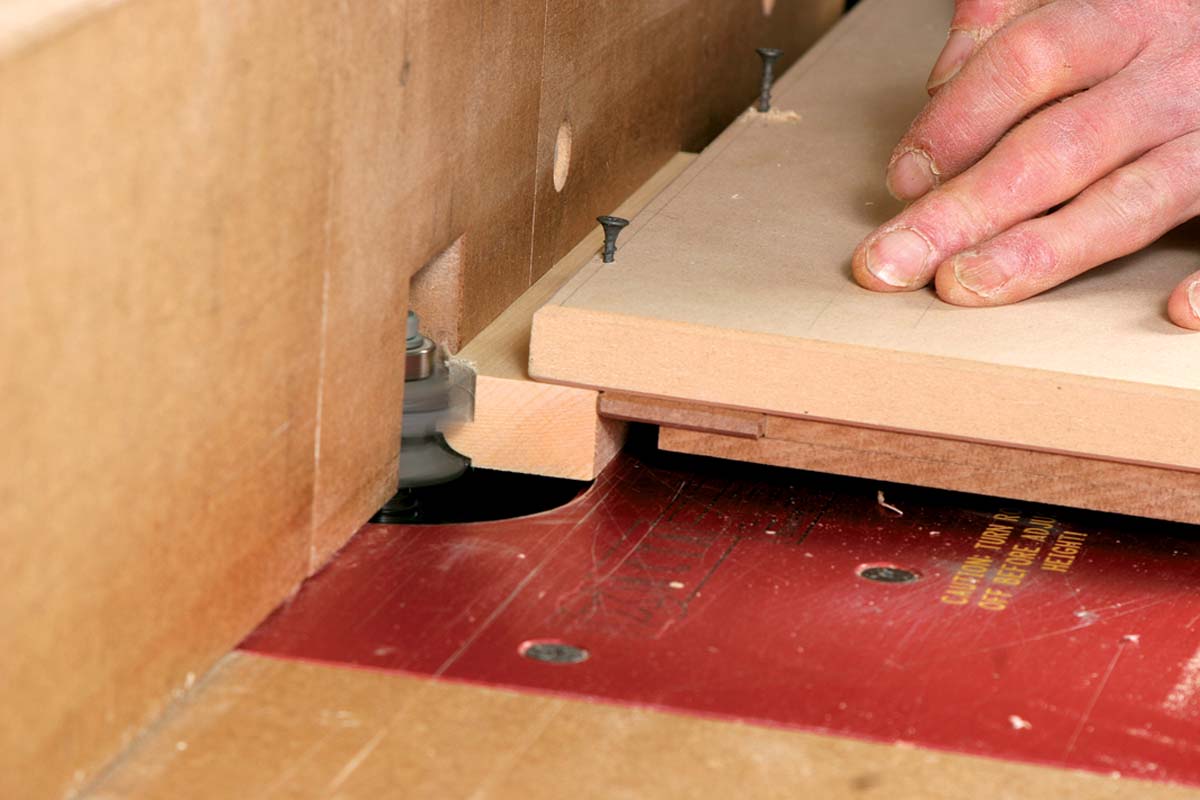 Use a safety sled to rout muntins. These narrow parts can’t be guided safely by hand. This sled (left) holds the workpiece securely while allowing my hands to stay well clear of the bit. |
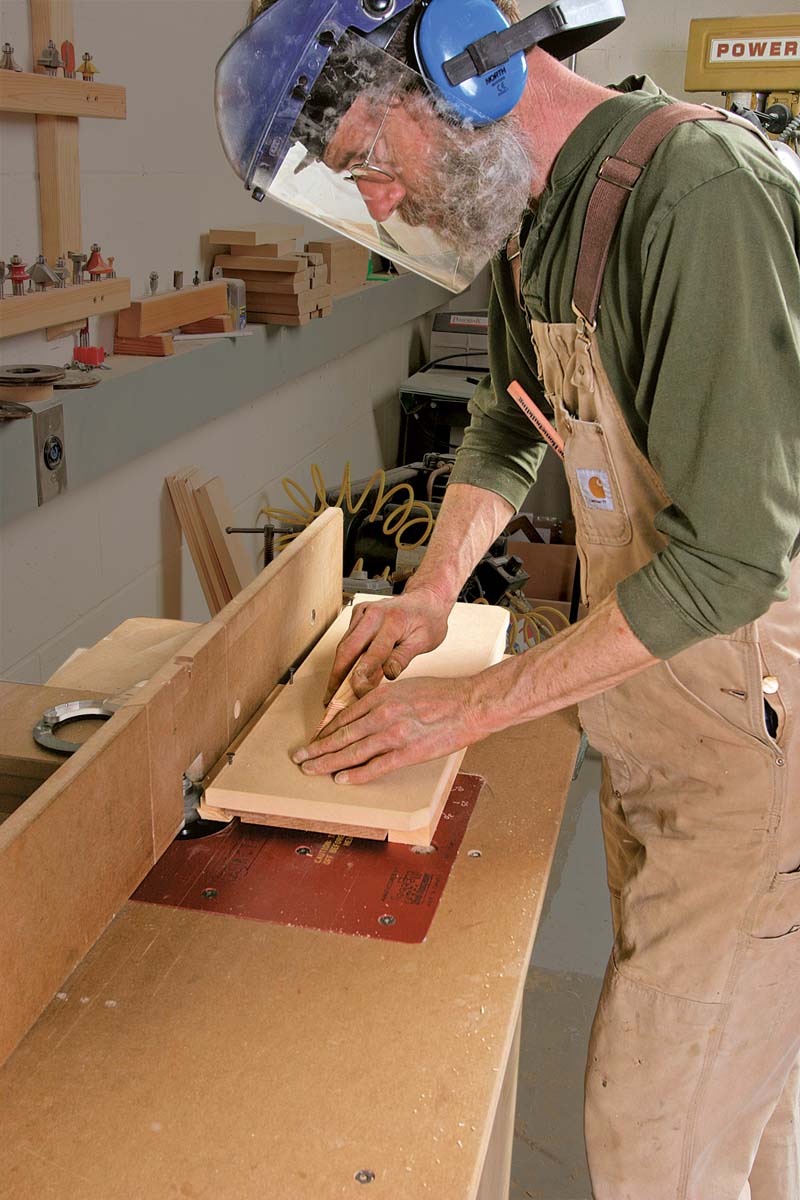 |
|
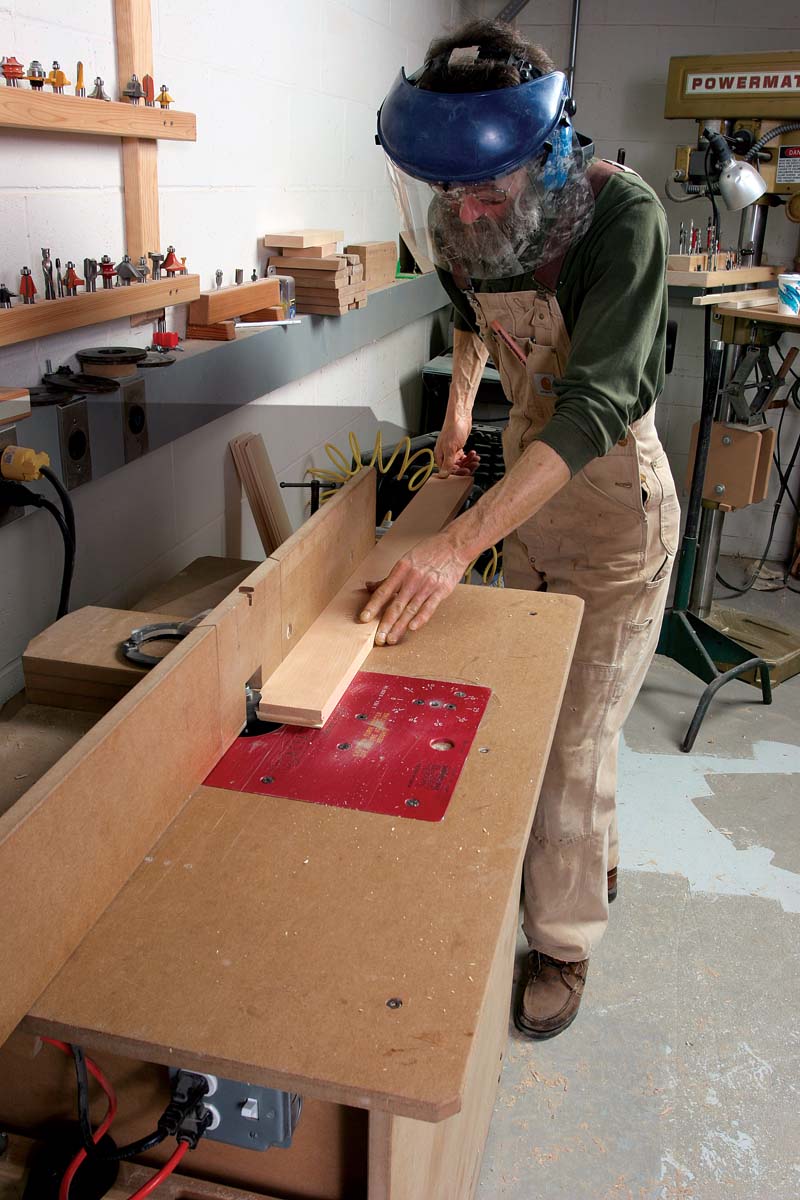
Remove tearout with the stick bit. The window stiles are wide enough to be guided safely by hand against the router fence. |
 |
Use Cleats, Blanks, And Clamps For A Smooth Assembly
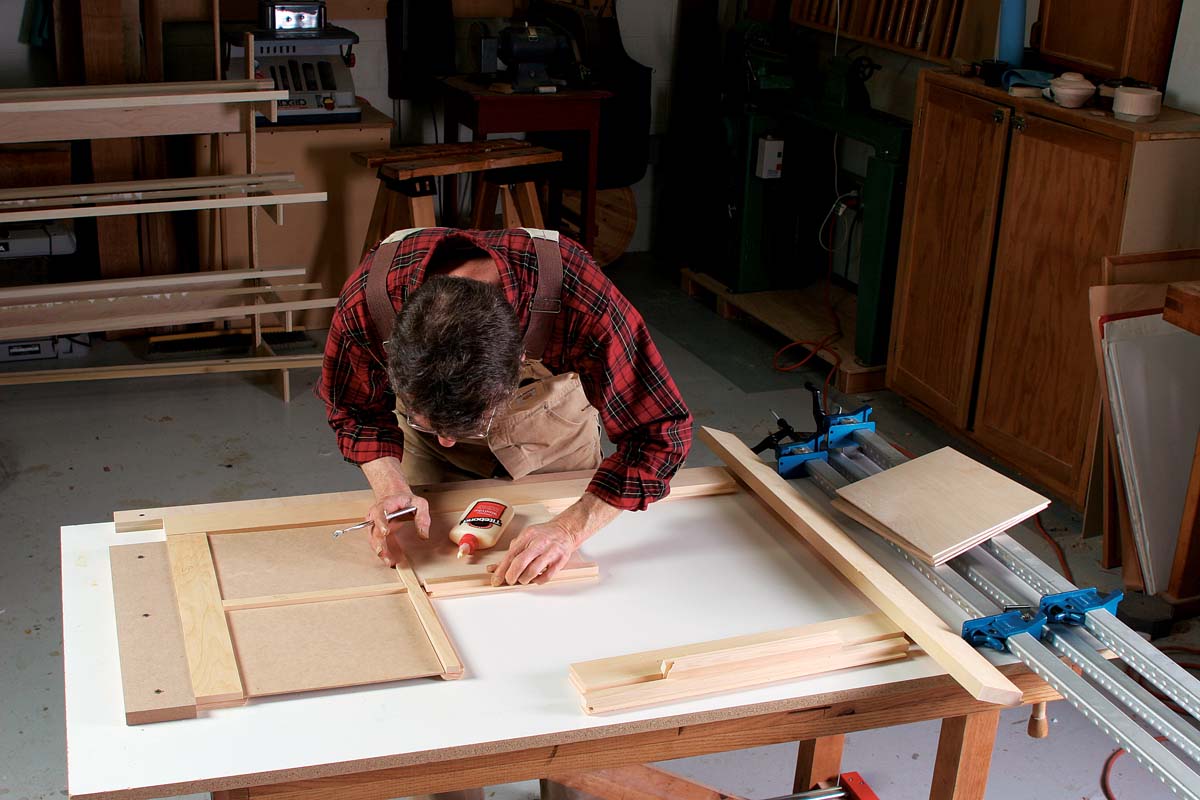 |
Cope-and-stick profiles provide lots of glue area. On this 7⁄8-in.-thick stock, there’s 11⁄2 in. of surface area for the glue joint. Gluing tips 1. Use a nonstick table surface such as melamine. 2. Screwed-in-place cleats provide a square starting spot. 3. A little glue brush allows you to coat cope-and-stick profiles fully. 4. Assembly blanks make muntin-spacing easier. 5. Don’t stand the glue bottle between squeezings. Instead, lay it down to keep glue near the tip. |
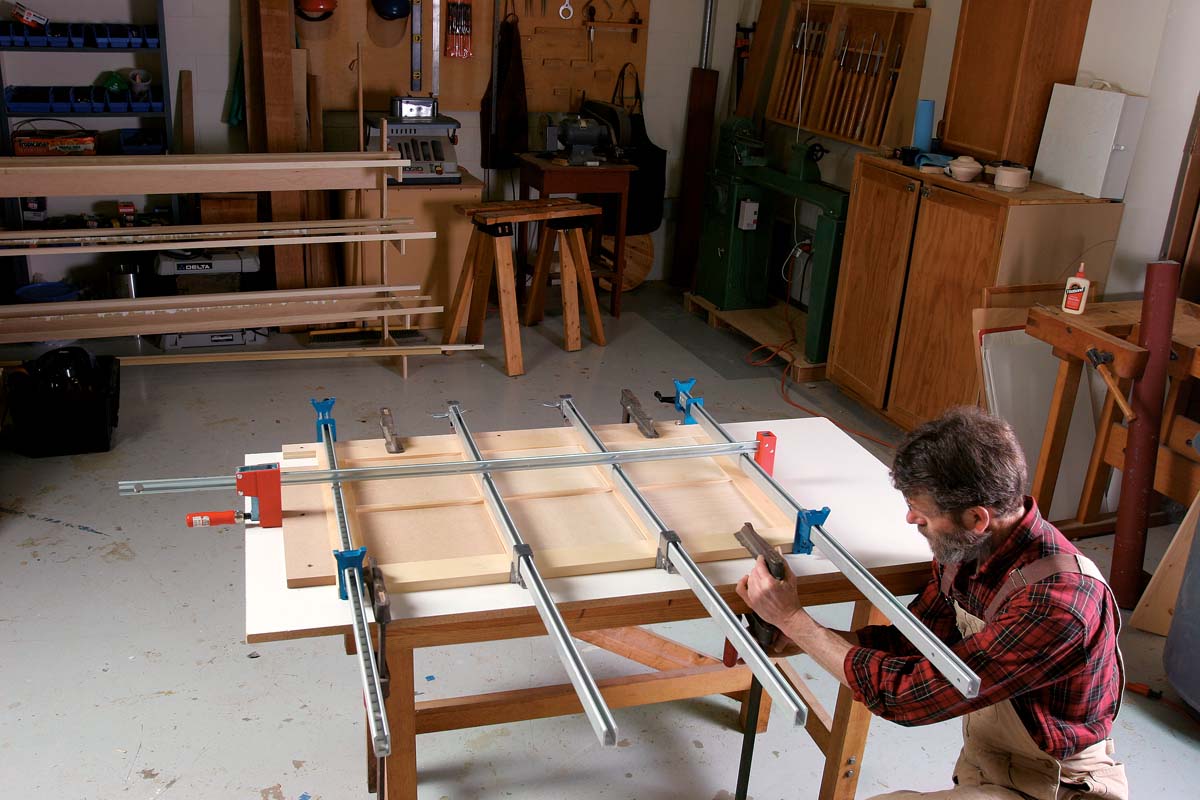 |
Pull it all together, and keep the frame flat. Set the bar clamps in place and loosely tightened, pull the frame flat to the table with clamps at the corners, then tighten the bar clamps and corner clamps in unison. |
 |
Weatherstripping: where energy |
Magazine extra: Watch a step-by-step video of Richards configuring his bits to make rabbet instead of dado cuts.
For more photos, drawings, and details, click the View PDF button below: