
When I see a fellow carpenter install a prehung door the old-fashioned way with layers of opposing shims, I shake my head. Why hasn’t my new and improved way caught on? It’s faster, stronger, and less filling.
Other installers place the door jamb in the opening and start pushing in and pulling out tapered shims, then checking the hinge-side jamb for plumb. The procedure goes in a little, out a little until the jamb looks right. Then the carpenter drives the fasteners home through the hinge jamb. This sometimes compresses wooden shims, and if the installer doesn’t overcompensate a pinch, the fasteners can knock the jamb out of plumb.
My installation method minimizes tapered shims and begins the night before I plan to install the door. I start by making a pile of square shims of various thicknesses. I make them with 1/8-in. and 3/16-in. hardboard, and 3/8-in. and 1/2-in. plywood. They are typically 4-1/2 in. or 6-1/2 in. square.
Then, on my level, I use an erasable felt-tip pen to mark the centers of the hinges of the doors to be installed (get a 6-ft. 8-in. level; you’ll thank me later). Next, I mark which end of the level is up.
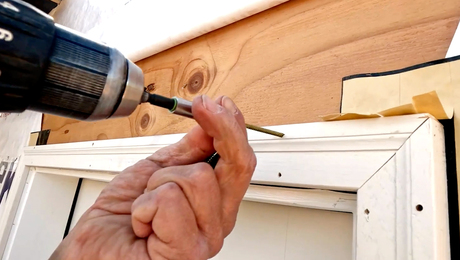
Then I mark the hinge locations on the hinge-side trimmer and install a top and bottom shim of the same thickness (usually 1/8-in. hardboard) at the hinge locations. Now I check the two shims for plumb and add shims as necessary until perfectly plumb. Then I screw (nails are passé) the hinge-side jamb leg to these shims, and I’m nearly done.
If there is a center (third) hinge, I shim that location after the top and bottom are perfectly plumb. I use a thinner shim so that the level touches just the top and bottom shims. After I have the jamb screwed to the trimmer through the top and bottom shims, I tweak the center hinge as necessary the old-fashioned way, with tapered shims.
I leave the door on its hinges during this operation because it’s more efficient. To hold up the latch side of the door until the jamb is positioned properly, I use a nifty tool originally designed for lifting cabinets during installation. FastCap’s Jack of All Trades jack (available at Amazon.com for about $60 per pair) makes this operation a breeze. I take the plastic jaws off the jack’s mast and use the angled flange at the bottom to lift the door. This method for adjusting the height of the door is much easier than using a pile of shims and 2x scraps.
I use the traditional shim method to finish the installation of the latch side of the jamb.
Mike Zielinski, Klamath Falls, OR











View Comments
This might be a great idea but I cannot understand it without
pictures and drawings etc. Please provide illustrations.
Agree with Scott...I am a DIYer and read this twice, and understand it, but pictures would sure help.
Listen, I've used all kinds of methods and shims to install a door but nothing was as simple as a product I discovered at Home Depot. Now I'm not connected with this product in anyway but you should do yourself a favour and check out the video at http://www.TheQuickDoorhanger.com , a little pricy at $7.95 so I cheated and used half of them only on the hinge heavy side relying on standard shims to align the latch side. This was the easiest and fastest door I ever hung. Decide for yourself.
Sounds complicated. I pin two tapered shims facing the same direction onto the top of the rough opening. If the door is 3/4 smaller that the RO, each tapered shim should be slightly more than 3/8 at the widest contact point in the RO. You can now tap the prehung door into the framed RO to be held firmly while you plumb and straighten. Regular opposing shims works for me for that. This method also makes it easy to compensate for the rare door that comes with small twist
You're assuming the jack studs are perpendicular to the opening and not twisted like I have seen many times. Tapered shims are often required on the hinge side to square the jamb to the opening, otherwise the door may end up hinge-bound to an out of square jamb.
An illustration would help.
I think Zielinski's point is that at some point, you GOTTA have a mounting surface for the hinge jamb that's reasonably plumb in both directions and perpendicular to the plane of the wall. You can create it with the finish jamb in place or before it's in your way. Option 2 sounds like a good idea.
For me, Step Zero is surveying the rough opening, especially the hinge jack- check it for plumb both directions, then use a Speed Square and a straight stick across the rough opening to gauge twist in the jack, specifically at the hinge locations. Sometimes it's twisted enough to throw the door off, but so little that a standard shim will throw it off the other direction. About the only cure there is a thin flat shim under one side of a Zielinksi-style shim
Also check the effective width top and bottom- if the RO is a trapezoid, skewed in the wall, shimming the hinge jack to plumb may reduce the effective RO width so much you can't even get the finish jamb into it. You want to know about that early in the process.
In the best of all possible worlds, you'd do your survey before the drywallers showed up- then you could use an 8 pound micrometer to adjust the wall to your liking.
I agree with PDR. Quick door hanger from HD and we typically go to https://ezhangdoor.com/ and order a large quantity. Defiantly still need to install shims after the door is set to secure. But getting the prehung door into place is quick and easy.