Reducing the Risk of Cracks in Concrete Slabs
Builder Larry Haun explains reliable methods for properly positioning rebar, plus a method for tying a new slab into an old one.

Q:
Our house is on a slab, and we’re planning an addition that also will have a slab foundation. We had to repair some cracks in the old slab. Is there anything we can do to reduce the chances of cracks in our new slab?
Jeff Snyder, Kent, WA
A:
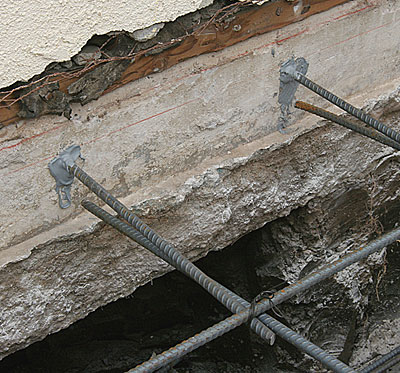
West Coast builder Larry Haun replies: The first thing to do is to check with your local building department. The building code might require that you tie the old slab to the new one. This typically is done by epoxying short lengths of rebar to the edge of the old slab. Use a hammer drill to bore a 5/8-in.-dia. hole at least 6 in. deep every 16 in. Clean all dust from the hole before filling it with epoxy and a 16-in. length of #4 (1/2 in.) rebar. These rebar stubs then can be tied to the reinforcement in the new slab.
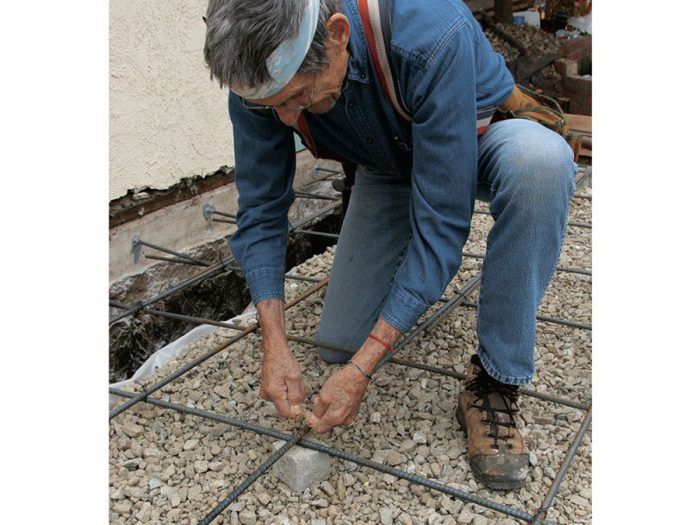
To reduce cracking in the new slab, I suggest upgrading from standard 6-in.-sq. welded-wire mesh to a grid of #4 rebar. John Gibson, a friend of mine who builds houses in earthquake-prone Southern California, routinely installs a 16-in.-sq. grid of #4 rebar in his slabs; it’s a code requirement in many areas. The rebar grid is held together with standard tie wire and is elevated on 2-in.-tall concrete spacers that we call dobies.

Although this approach adds $200 or so to the construction cost, it provides excellent insurance against cracking. When a slab is being poured and the mud is being pushed and prodded into place, standard welded-wire mesh often is trampled to the bottom of the concrete layer. If the mesh isn’t cast into the center of the slab’s thickness, it loses its ability to reinforce the concrete. In contrast, the #4 rebar grid stays put, springing back into place after it’s stepped on. This is another reason why upgrading to rebar makes sense.
From Fine Homebuilding #185


