1
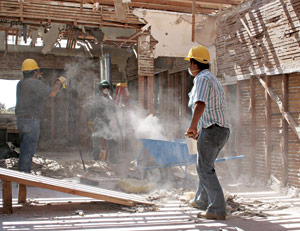
After we removed the roof shingles on this house, we moved inside to attack the walls. The house had been remodeled over the years and contained a mixture of interior wall finishes. The added dormer was gypsum drywall, and the first floor was lath and plaster. If you use the right techniques, removal of both types of finishes is relatively easy.
Lath and plaster removal
Lath and plaster is an old type of interior finish that’s found in most homes built before World War II. The most common type of lath is wood, though metal lath is also found (and is more difficult to remove). Although lead-based paint is more likely on exterior wood siding than on interior plaster, it’s a good idea to test for lead because removing plaster creates a lot of dust. Chapter 5 explains how to use a lead test kit.
The common mistake in removing wood lath and plaster is to use a claw hammer or sledgehammer and try to remove both materials in one step. This method is slow and exhausting, and the head of a hammer is simply too small for the job; all you will do is punch holes in the plaster and break the wood lath. Also, you end up with a pile of intermixed lath and plaster that is difficult to shovel and bulky to move. A much more effective method is to remove the plaster completely, clean it out of the room, and then come back in and remove the lath. Pulling off the lath in a separate step allows you to more compactly bundle the lath for efficient removal and possible recycling.
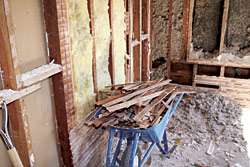
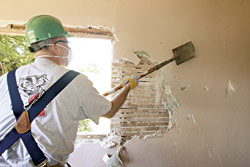
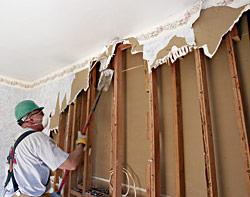
Start the plaster (and drywall) removal process by creating maximum ventilation—such as opening or removing windows and doors, if they haven’t already been removed. A flat-bladed or roofer’s shovel works well to remove the plaster. Basically you want to hit the wall to crack the keys off the back of the plaster then use the blade of the shovel to remove sections of the plaster face. The idea is to make the most of each hit by aiming each blow to a spot midway between the underlying studs. This flexes the plaster and more effectively cracks it. It’s important to hit the plaster hard enough to crack it, but not hard enough to crack the wood lath, which will only make the lath harder to remove later. It helps to shovel off as much as possible in a direction parallel to the lath strips, so you don’t constantly catch the tip of the shovel in the gaps between the lath.
Place a wheelbarrow against the wall directly below the plaster to eliminate at least some of the work of scooping it off the floor. Alternatively, line part of the wall with several wheeled rectangular plastic trash cans, which can be rolled outside to dump (be careful not to fill them so full that you can’t move them—plaster is heavy!). Work around the room and finish the walls before tackling the ceiling.
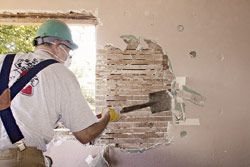
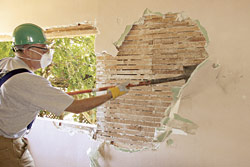
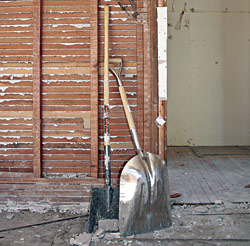
Waiting to do the ceiling till last means you don’t have to contend with dropped plaster all over the room while you’re working on the walls, minimizing a slip and trip hazard on the floor and making it easier to move the wheelbarrow. It’s harder to get the plaster off the ceiling than off the walls as now you have to swing a heavy shovel above your head. Standing on a rolling scaffold makes the job easier because if you are closer to the ceiling you can more effectively hit with the flat of the shovel, and it is easier on your shoulders and back. If you have access to the ceiling lath from the top side—that is from the attic or second floor above—you can make the plaster removal job easier by whacking the lath between the ceiling joists in the same manner (except now from the backside) as described for the walls. Because you have gravity and the weight of the plaster working for you, much of it will fall from the ceiling, eliminating the need to use a shovel to remove it from the ceiling below. A flat-headed shovel and a scoop shovel work best for cleaning up the plaster.
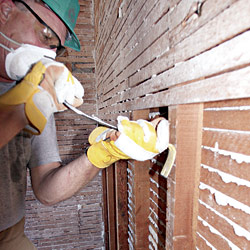
Once you have the plaster removed and cleaned up, it’s time to start with the lath. Ideally, you want to remove each piece of lath along with all its nails. Lath is held to the wall with small nails, so you can simply hook a tool behind the lath and yank it from the wall. If you hook your tool close to the stud, you will break less lath. Because the lath is pretty flexible, you have to develop a feel for pulling hard enough to pop the nails out, but not so hard you break the lath.
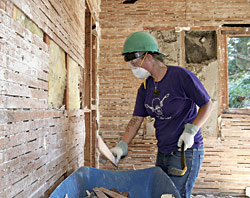
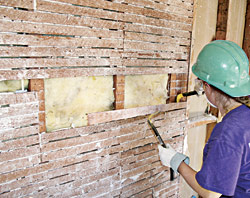
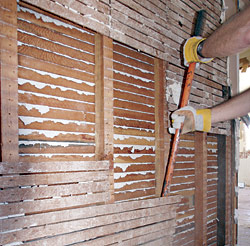
There are a couple of tools that work for removing lath. A flat-bladed prybar is small and easy to handle and has about the right length of blade to hook behind one lath at a time. It also allows you to pull nails as you go. Some people prefer a bigger tool, such as a short-handled pick or mattock or a long-handled shovel. Though heavier, a larger tool allows you to pry against several lath strips. Crowbars don’t work well for lath removal as the curve of the bar is too tight and all you’ll do is break the wood.
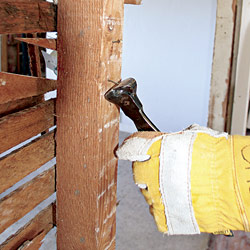
Once all the lath is removed, pull out any remaining nails. We prefer to use a flat prybar rather than a hammer for this job as the small lath nails tend to get stuck between the claws of the hammer, requiring you to stop to clear each nail.
Drywall removal
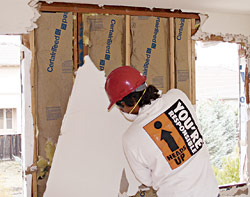
If you’re dealing with drywall, try to remove it in the biggest pieces easily handled by one person. Drywall is somewhat frustrating to remove, as it always seems to break where you don’t want it to. To get started, use a flat-bladed shovel, garden spade, or roofer’s shovel to make a horizontal cut at about shoulder height. This helps create a place you can grab the drywall and pull it down in pieces. For the upper part of the wall, place the head of the spade or shovel along the wall behind the drywall, angle the handle across the nearest stud, and then pry the piece off.
Once you have removed the drywall from one side of the wall, it is easy to remove it from the other side of the studs if you push it off from the backside. Some people use a garden rake to pull drywall off by hooking the tines of the rake behind the edge of the piece. In any case, avoid using tools with a small head, such as a claw hammer or a sledgehammer. You’ll only create a mess and wear yourself out.
Bob Falk is a supervisory research engineer at the U.S. Forest Products Labratory in Madison, Wisconsin. He is also a ground-breaking researcher in the recycling and reuse of building materials. Brad Guy trained as an architect and is currently the president of the Building Materials Reuse Association.


