Interlocking-weatherstripping techniques
A step-by-step guide to making your entry door waterproof and windproof
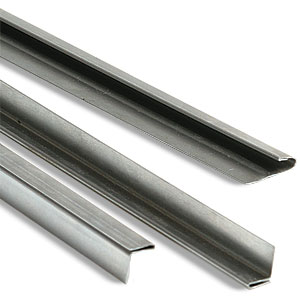
I live and work in an area where most of the houses were built between 80 and 100 years ago, before weatherstripping was made from plastic, urethane, or silicone. The entry doors of the day often were outfitted with an interlocking bronze weatherstripping that made the door impervious to everything up to and including hurricane-force winds. Early in my career, I met a father-and-son team who had been installing the weatherstripping for years; I learned the job by watching them work. When they moved to Florida, the father gave me his contacts.
These days, the interlocking material is available in either zinc or bronze, the latter costing about three times as much as the former.There’s not much difference between them as a working material, but the bronze lasts longer in service. Many of the doors in my neighborhood have their original weatherstripping, installed during U.S. president Herbert Hoover’s administration.
Recently, my helper and I installed weatherstripping on double out-swinging patio doors. The installation procedure is the same for a typical in-swinging entry door, except for the lock. The one weakness in this system lies around the lock’s faceplate. There’s usually not enough width between the edge of the door and the faceplate to install a 1/2-in.-wide strip. Although many installers substitute a narrower metal compression strip, it’s often not as airtight. To avoid settling for less, I use a 1-in.-wide faceplate or offset the lock whenever possible to allow for a continuous rabbet along the lock or latch side of the door. In some cases, it’s necessary to file the faceplate to a narrower width. This extra work has a payoff: It makes the opening so airtight that when the homeowners close the door, they’ll think they’ve just shut the door on an expensive car.
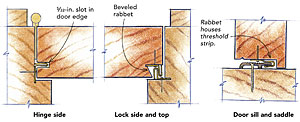
The first step is making sure that the door is fitted properly to the jamb. The airspace around the door should be between 1/16 in. and 1/8 in. wide. As shown in the drawings, the door’s top, latch side, and bottom need to be rabbeted to accept the weatherstripping material. The door’s hinge side is routed with a 5/32-in. slot. When you get the weatherstripping material, it’s smart to test-fit the strips before installation.
With a pencil, I scribe the stops onto the door along the head and the lock side to indicate the amount of the door that strikes the stops. (If the door is finished, I protect the surface with painter’s tape first.) You must cut the rabbets between this mark and the edge of the door. I also fit the saddle onto the sill and make a mark 1/8 in. above it on the door to indicate the location of the bottom rabbet.
Once the perimeter is marked, I take down the door. While I’m cutting rabbets on the door, my helper can cut the kerf in the hinge side of the jamb. Nailing the weatherstripping onto the door and jamb is straightforward, but remember not to mix metals. If you have a bronze strip, use bronze nails; zinc takes aluminum. Although most installations don’t take that long, I usually set aside an entire day for the procedure.
When power tools aren’t an option
Here’s a great trick of the trade:
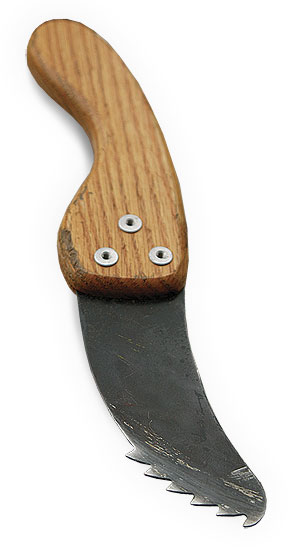
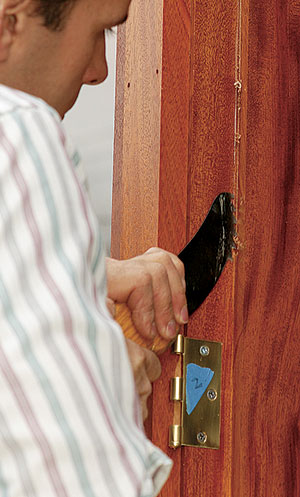
The only way to cut the groove that houses the weatherstripping in the jamb’s stops is with a kerfing handsaw, available from Accurate Metal Weather Stripping (800-536-6043); they also supply all styles of weatherstripping. The side of the blade is registered against the jamb, then drawn downward. The kerf is cut in three or four passes. The corners can be finished with a chisel. I check all the kerfs with a sample to be sure the weatherstripping will fit.
Step 1
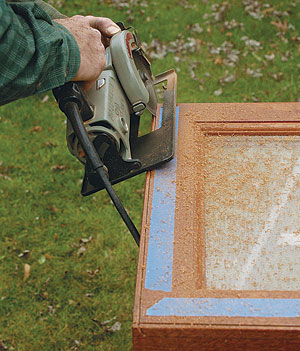
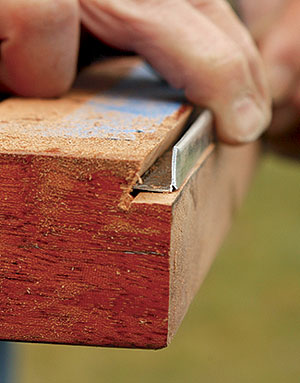
Make controlled cuts with a compact saw. I use a 4-1/2-in. trim saw to cut the rabbets along the head, bottom, and latch side of the door. A finish-cutting blade seems to produce less tearout in mahogany than a router; it’s also easier to control. As shown in the photo, the first cut on the door face is made at an angle of approximately 30°, with the blade set at 1/2-in. depth. The angled cut provides less resistance when the mating strips interlock and is easier to trim. The second cut is made from the door edge and is slightly deeper, creating a small kerf for the strip. Familiarity with the material helps in determining these settings. I use a utility knife and a kerfing handsaw to clean up the kerf.
Step 2
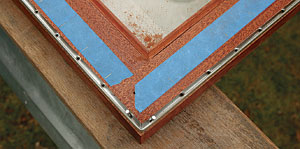
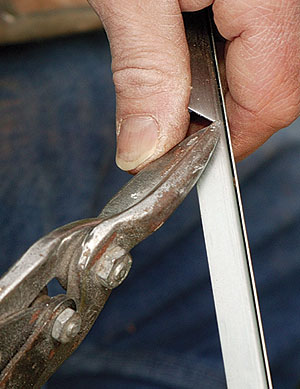
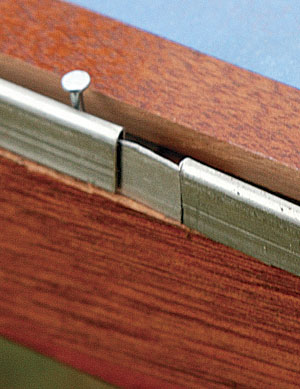
Continuity counts. Starting at the top, I run the strip across the top of the door and down the lock side. I clip a triangle from the strip and bend it around the corner so that it will form a continuous seal. I use an awl to punch nail locations every 11/2 in., then drive the nails home with a set. At the proper depth, the strip reveals a thin edge of the rabbet. To seal butt joints, I snip out a thin strip from scrap and use it like a spline to join the two pieces.
Step 3
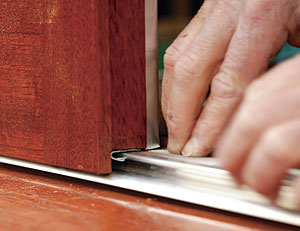
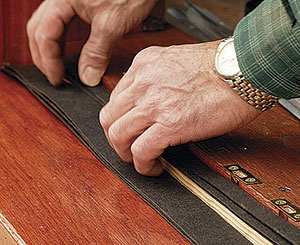
Fine-tune the saddle. For a tight fit at the bottom, begin by cutting the saddle to length and drilling holes for the screws. Test the fit by closing the door, making sure the saddle is in line with the door’s bottom rabbet. Now it can be screwed down, which compresses the saddle. I cut strips of 30-lb. builder’s felt to shim it back to the correct height. Adjustment also can be made by gently bending the metal hook.
Step 4
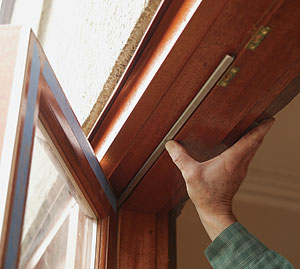
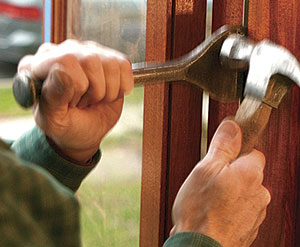
Set the jamb side after the door is hung. For an accurate fit between door and jamb strips, I start on the jamb’s head and locate the strip’s position by the relation of the door slot and the hinge. I tack one nail at the top of the strip; then, closing the door slowly, I move the strip in or out until it engages the door’s slot. Once I’ve got the right location, I nail it off. If the door hits the strip, I also can adjust the strip with a piece of wood or a wide mason’s chisel. The lock and hinge sides are fitted next, in that order.
Photos by Charles Bickford, drawings by Dan Thornton






View Comments
I have an old door with some of this weatherstripping that has been damaged. Where can I get replacement materials in Portland Oregon? Failing that, who makes this stuff?
@Pergelator - not sure if this is helpful or way too late for you, but this thread I found has some manufacturers that may or may not be still in business. The article mentions Accurate Metal Weatherstripping which was in the NYC area; they closed and sold all their equipment to Killian's, which is mentioned in this link. It also mentions another company in the Midwest, where I hear there is demand. Hope this helps.
http://saveamericaswindows.com/forum/viewtopic.php?t=9