Making a French knot
Through the proper combination of butt and miter joints, a flooring specialist shows how he likes to raise the stakes in a new-floor installation
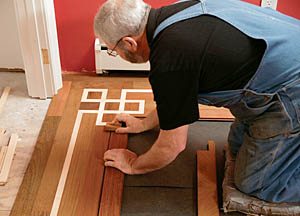
A border kicks up the stakes in a new-floor installation; a narrow band of contrasting wood defines the space and makes a rug seem unworthy. Decorative inlays installed at each corner raise the game even further. The French-knot detail is one of my favorites. At first glance, the intricate appearance almost always dazzles viewers. But as shown in the drawing below, the knot is really an illusion created with the right combination of butt and miter joints.
When planning any border design, I’ve found that it looks best to scale the border’s size and location to fit the space. After drawing a design, I usually make a sample to see how it looks in the room before going farther.
In this example, the main flooring material is ipé; the border and its corner knot are maple. I cut and dry-assemble the pieces of the knot, then use construction adhesive to glue them to the subfloor.
First, I check the moisture content of both flooring and subflooring to ensure that the materials are not too wet. In the Boston area, where I live, flooring should have a moisture content of 7% to 8%, and the subfloor should be less than 12%. (For more information, check www.woodfloorsonline.com/techtalk/US_moisture_map.html.) These target numbers are extremely important; big changes in moisture content.
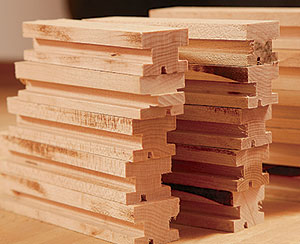
Accent strips are grooved and ready. I make up as many pieces as I can before I begin the installation. These maple strips are one-third the width of a nominal 3-in. floorboard. Grooving the stock on both edges makes assembly easier; no matter which way they’re oriented, they’ll mate with an adjacent tongue. A piece of plywood about 2 ft. square serves as a work board. I screw down a 1x fence in a 90° arrangement on the board. This makes a form sturdy enough to withstand any pressure as I put together the inlay.
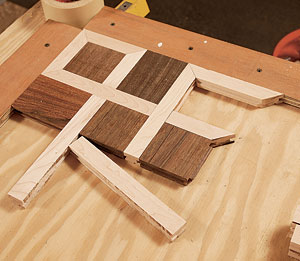
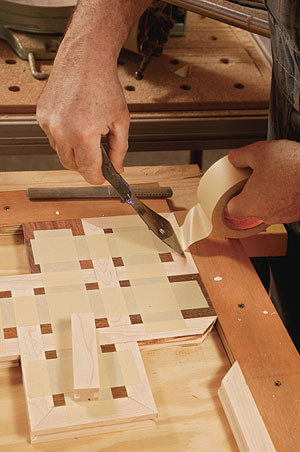
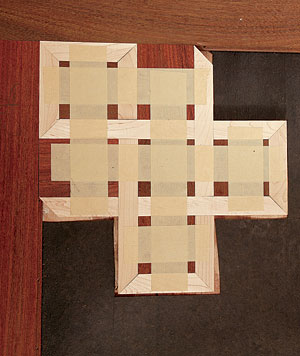
Hold the knot together with tape. Once the pieces are assembled dry, wide masking tape keeps everything tight until the inlay is installed. A razor knife might leave marks, so I use a broad putty knife to hold the tape as I tear it.
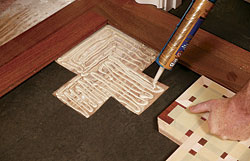
Glue trumps nails. It’s impractical to nail small pieces individually, so after cutting away the builder’s felt, I use construction adhesive to glue the knot into position. The slower set time of the adhesive gives me a chance to get everything lined up and keep the finished product looking crisp. It’s a good idea to press down on the assembly to make sure all the pieces are adhered.
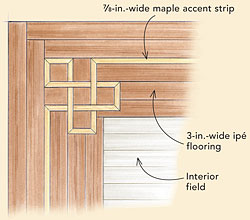
A French knot is tied with miter and butt joints. Although there are many variations of this floor treatment, the knot design is a common theme. Here, the knot is built as a separate assembly. Full-width pieces of the border bind the knot design into the floor. The trick is to lay out the knot so that the space inside the knot’s loops matches the width of the flooring.
Trick of the trade
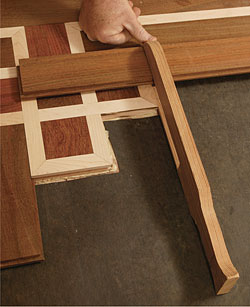
A cutting gauge. I first saw this cutting gauge being used by a veteran stairbuilder who referred to it as “the pair of pants.” He was using the gauge to mark and cut stair skirtboards to length. I made a smaller version for myself to fill in pieces of a floor. The jaw opening is cut just a shade wider than the thickness of a typical floorboard. To use the gauge, I place the board I need to cut in position, with the end running past its intended length. The gauge straddles the width of the board, and is held tight and aligned with the reference face of the adjoining board. A pencil line or knife mark is scribed for an exact fit.
Photos: Charles Bickford; Drawing: Dan Thornton


