Building Concrete Countertop Forms
These three-part forms contain and shape the concrete mix
Step 1: Build the Base
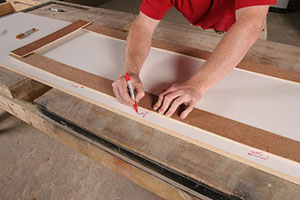
Use a luan template. Glue strips of luan together to make a template the length and width of the countertop. Remember to flip the template so that the top faces down and to transfer the layout accordingly (everything is upside down and backwards). After transferring the measurements onto the melamine, cut the melamine. This piece becomes the bottom of the base form.
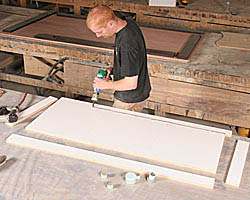
Seal the seams with silicone. Ripped strips of melamine attach to the base bottom, but first they need to be sealed. Run a bead of black silicone on each strip where it will attach to the base’s bottom. (Note: The editor forgot to get those sink knockouts out of the way before taking this photo. Don’t be confused – they don’t need to be around at this stage).
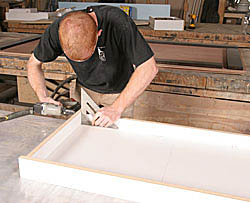
Square the edges as you go. The sides of the base will become the edges of the top, so make sure they’re square to the base’s bottom. Using a speed square as a guide, nail the sides to the bottom with a finish nailer. Overlap the corners in the manner shown here.
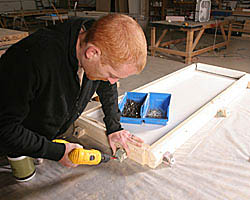
Cleats secure the base to the table. Wrap 2x4s around the base, and screw them to the table to lock the base in place. Screw cleats to the table around the 2x4s as reinforcement. Cover all of the screw heads with modeling clay so that they don’t get filled with concrete during the pour.
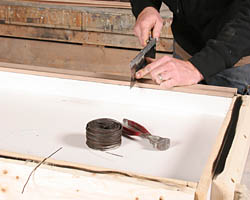
Inset tie wire into saw kerfs. After locking the base in place seal the remaining parts with silicone. Cut four kerfs around the base sides so that the tie wire fits flush with the base’s top. Screws in the table will secure the tie wire in place once attached to the rebar cage. Setting the tie wire into kerfs ensures a tight seal once the cap is installed during the pour.
Step 2: Build the Knockouts
A rip guide for the sides. The bowl side dimensions for this project were based on a typical vanity cabinet base, and allow enough clearance for the three-hole faucet to be located behind the sink. Use the dimensions to create a saddle for cutting the MDF on the table saw.
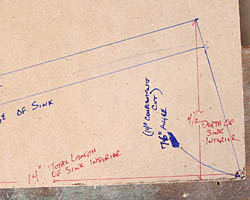
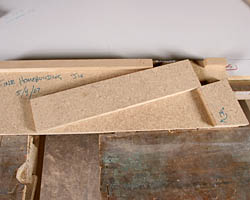
Glue and nail the parts together. After cutting 1/2-in. deep kerfs into the sides, glue these side parts to the front. Don’t cut kerfs into the front, though; they might weaken the form enough to buckle from the concrete.
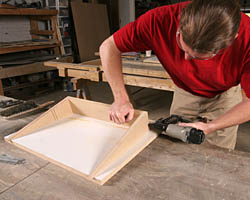
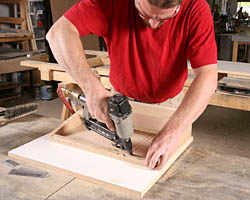
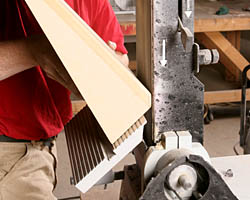
Add drainage plane. Cut a drainage plane into the top of the sink bowl knockout (which will become the bottom of the sink). Here, table-top belt sander does the trick, but a jig saw, random-orbit sander, or belt sander could work as well. Once the knockout is the shape you want, seal the seams with Bondo.
Bondo evens the surface
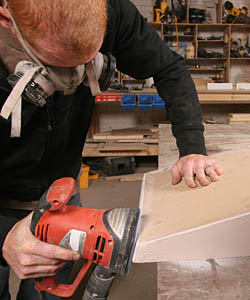
Spread a thin, even layer of Bondo to the outer edges of the bowl knockout, making sure to cover all of the seams. Once the Bondo is dry, sand it smooth. Repeat this process until the entire knockout is perfectly smooth. Every imperfection in this surface will show in the poured concrete.
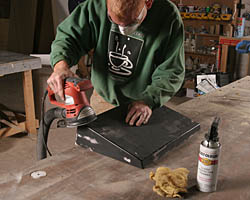
Seal the knockout. Spray gloss enamelover the entire knockout. Sand the first coat with fine-grit sandpaper to reveal any high spots. Build up the finish with multiple coats, repeating this process until the bowl form is as smooth as glass.
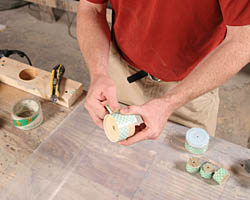
Locking nuts and faucet stems. Wrap the knockouts with foam tape. Faucet knockouts have two parts: one for the faucet stem, and one for the locking nut. Cut each part from a block of wood using a hole saw sized to match the stem or locking nuts. Wrap the wood with double-sided foam tape, then with clear packing tape. The piece that is being wrapped is for the locking nut on a single-hole faucet. It will attach to a smaller diameter wooden dowel sized to match the faucet’s stem.
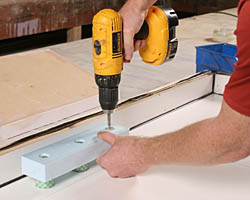
Locate the holes before the sink bowl goes in. Here, a standard threes-hole faucet knockout is screwed into the form, then removed to install the sink bowl knockout. Wood dowels are sized to match the faucet stems. A block of rigid foam ripped large enough to provide clearance for the faucet locking nuts sits on top of the dowels.
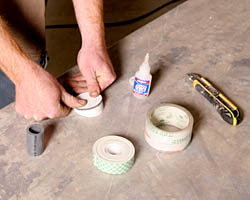
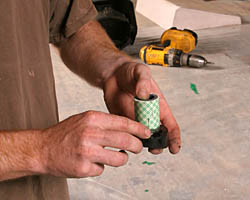
PVC, Masonite, and super glue. After cutting the 2-1/2-in. PVC, glue the Masonite to the top edge. Spray the 2 1/2-in. PVC and Masonite with gloss enamel. Once the paint dries, glue a length of 1-1/2-in. PVC to the center of the Masonite. Wrap the 1-1/2-in. PVC with double-sided foam tape, then with clear packing tape. Finally, seal the joint between the 1-1/2-in. PVC and Masonite with black silicone.
Step 3: Build the Cap
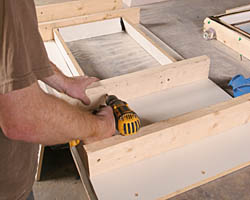
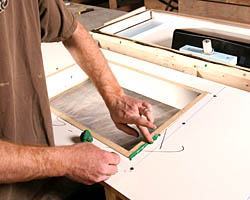
Screws secure the rim. Run screws through the 2x bracing into the melamine rim. These screws will be removed after the pour is complete so that the cap can come off, but not the rim. Flip the cap over and seal the joint around the rim with modeling clay or silicone.
Concrete cured? Removing Concrete Countertop Forms is the next step in the process.
To learn more about Matt’s and Jeremy’s process, read A Concrete Countertop and Sink in a Single Pour from Fine Homebuilding Issue #190 (Oct/Nov 2007), pp. 86-91.
Photos by: Chris Ermides


