A Balcony Deck Built to Last
Durable finish materials hide strong framing connections in a graceful design that overlooks the ocean.

Synopsis: When builder Michael Maines set out to build a balcony deck in Portland, Maine, he needed to make it strong enough to withstand the power of hurricanes and nor’easters. By using smart framing details and strong steel connectors, and planning the frame to promote drying, Maines and his crew crafted a deck that looks great and will be around for years to come.
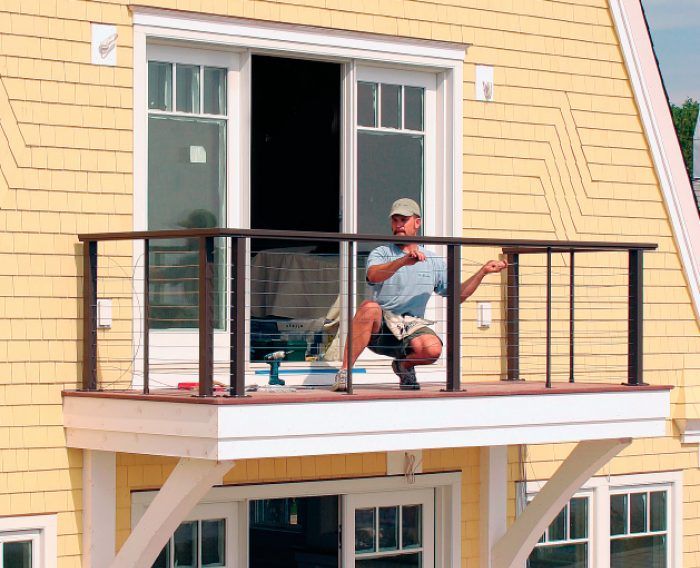
If decks and patios are outdoor living rooms, balcony decks are more like small, private nooks. Just because they’re little, though, doesn’t make them simple. The fact that balconies don’t touch the ground makes them complex and challenging to build. The balcony featured here faces the ocean, which adds another design challenge: stability and durability in the face of hurricane-force winds. In fact, while we were running exterior trim on this house in Maine, two nearby houses were swept off their foundations and into the ocean during a severe storm.
You can support a balcony by using wooden knee braces angled back to the house or by cantilevering the interior floor joists through the wall. The problem with the former method is that wood-to-wood structural connections are rot-prone. The problem with the latter method is that it eventually channels rot into the house.
Welded stainless-steel connectors anchor the deck to the house
For this project, we decided that the best way to support the balcony was to create a sturdy pressure-treated wood frame that later would be wrapped in PVC trim. An architect in our office consulted with a structural engineer for a plan that would support the necessary loads, be assembled easily, and show off nice proportions.
We used custom-made stainless-steel framing connectors to reinforce the major bracket-and-beam assembly and to tie it to the house framing. It’s important to use stainless-steel fasteners on the coast, but it’s even more critical when working with ACQ pressure-treated lumber, which is highly corrosive to plain and galvanized steel.
The metal framing connectors were all TIG-welded by a certified welder using 304 stainless steel, which is strong, corrosion-resistant, and easily obtainable. The brackets are strong and durable, but expensive: around $1500 for the set.
I wanted to through-bolt the brackets to a built-up post inside the wall, but our engineer calculated that more support was needed. For the lower connector, he specified a steel fin that would run through an LVL post inside the wall, which then was through-bolted to hold it in place.
Because we didn’t have access to a timber framer’s chain mortiser, the best way for us to make the slot for the lower connector’s fin was to start the cut with a circular saw, then plunge-cut it with a chainsaw. Fortunately, the chain’s thickness matched well with the fin’s thickness. The most-complicated framing connector is the top 2 1⁄2-in.-dia. steel pipe through the joists. We attached a heavy-duty pipe hanger, or stirrup, to the pipe, and we used a length of 1⁄2-in. threaded rod and a coupler to connect with the stainless-steel threaded rod that was welded to the framing connector.
For more photos and details, click the View PDF button below:
Fine Homebuilding Recommended Products
Fine Homebuilding receives a commission for items purchased through links on this site, including Amazon Associates and other affiliate advertising programs.

Flashing and Joist Tape

Angel Guard Deck Demon

4-Gallon Piston Backpack Sprayer


