Laminating a curved rail with a vacuum press
When strip-laminating a curved piece of wood, a vacuum press can be a useful alternative to standard clamps
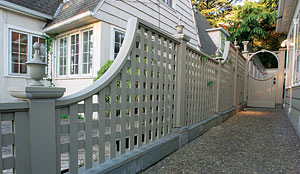
There are three ways to make a curved piece of wood: Saw it out of solid stock, steam-bend it, or strip-laminate it. For our fence project covered in the article “A Fence Forever,” I had to consider the effects of weather on the longevity of the curved piece. Steam-bending would not have been precise enough, especially for the size and shape that we were making, and a sawn curve likely would have broken across the short grain after being out in the weather. Strip-laminating was the best choice here. The result is stronger than the original wood, and it yields a more exact curve.
Having decided to laminate, I still had to consider what kind of glue to use and what kind of mold to build, and to determine the thickness of the strips. The thicker the strips, the more pressure it takes to force them into the desired shape, and the more tension will be locked into the finished piece.
The glue choice depends on the amount of tension in the wood. A waterproof aliphatic resin (Titebond III, for instance) is fine for most exterior joints, but in bent laminations, the tension between the strips can cause the glue to creep slowly. Creep occurs because this type of glue never hardens to a crystalline structure, making it more prone to failure if glue-lines are under pressure.
The best glue choice for bending is one that’s 100% rigid, such as a urea-based glue or epoxy. I used Weldwood (www.dap.com) plastic-resin glue. This urea-based glue comes in powder form; you add water before using it. It’s also easy to get at my local hardware store.
When strip-laminating a curved piece of wood, a vacuum press can be a useful alternative to standard clamps. The beauty of laminating bent pieces in a vacuum bag is that the form, or mold, is simple to make. The even clamping pressure applied by the vacuum bag eliminates the need for a two-piece mold.
In this case, I built an outside-radius mold because I knew that it would be easier to press the workpiece into the mold by pushing on the center. An inside-radius mold would require the laminations to be pulled from both ends. The mold I used was small enough to fit easily into a standard 4-ft. by 8-ft. vacuum bag.
I started off by ripping and wider than their finished dimensions. I always try to choose straight-grained, defect-free lumber for better results. I plane the pieces on both sides in a surface planer. It’s important to test the first piece planed by pushing it into the mold by hand to see how much pressure is required. If the wood doesn’t conform easily, it’s too thick and must go back through the planer.
The goal is to plane the layers thin enough to bend easily into the mold without breaking. If it takes 10 lb. of pressure to bottom out a 1/8-in.-thick board in the mold and the lamination has eight layers, it will take 80 lb. to press them all. But if you tried to make the same 1-in.-thick lamination out of thicker stock, the pressure required would be much greater. The whole stack should be able to conform to the mold without too much effort. (Keep in mind that the vacuum press applies only about 14 lb. per sq. in. of pressure) If you have to plane the pieces thinner than expected, you might need to cut more pieces to attain the required thickness.
When it is time for assembly, I do a dry-run first. I press the pieces into the mold while my helper tapes them down with packing tape. As the vacuum bag is sucked up tight, we tuck the vinyl into all the nooks and inside corners of the shape, and we pinch a little bead around all the outside corners. This keeps the piece from deforming and the vinyl from becoming overstretched. When everything comes together tightly, it’s time for glue.
We lay out all the pieces side by side in order and apply glue with a fine-nap roller. Then we stack up the laminations and repeat the vacuum-clamping process. If we find any open seams in the glue-up, we throw on a clamp or two where needed. Once the seams are pulled down, the clamps can be removed; the vacuum bag keeps the laminations tight.
My favorite part of the job is popping the dried board out of the mold and cleaning it up. After knocking off any big globs of excess glue, I run one edge on the jointer, wrapping it around the guard, then rip the other edge on the tablesaw, starting with one end in the air and ending in the opposite position. Both jobs are best done with a helper.
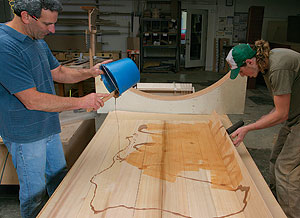
Spread it around. After building the form and planing the laminations to a thickness of 1/8 in., the author and his assistant coat each layer of wood evenly with plastic-resin glue.
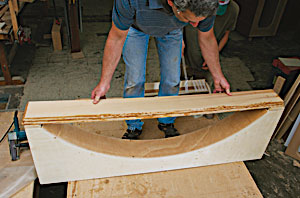
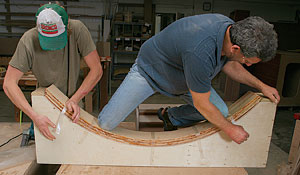
A form controls the curve. With glue applied, the laminations are stacked together, and the assembly is pushed down into the plywood form. Packing tape holds the assembly in the form until the vacuum press is put to work.
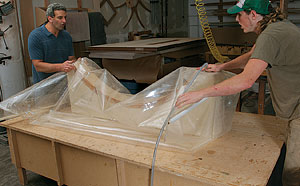
Better than clamps. The beauty of the vacuum press is that it applies consistent pressure. The bag has to be folded carefully around the form ends to keep it from deforming the laminations. Turning on the vacuum pump sucks air out of the bag, pulling the plastic tight around the form.
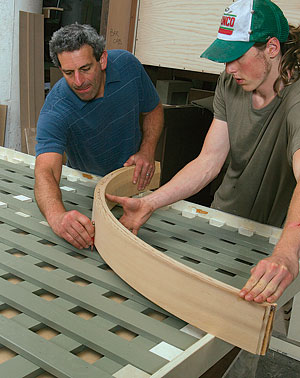
Scribe it in place. After a custom-made lattice panel was assembled, the curved section of rail was scribed to the panel so that both could be cut to fit.
Beveling after bending
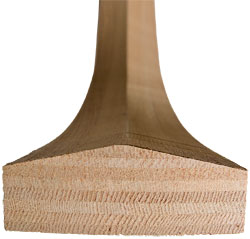
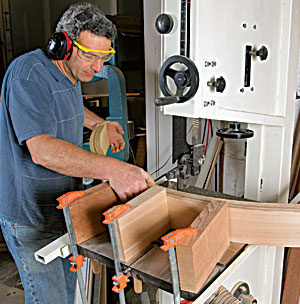
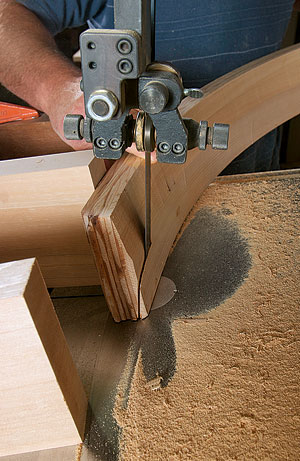
Straight sections of the top rail were beveled by mounting them on an angled jig that was then run through a planer; the curved sections had to be beveled on a bandsaw. A beveled rail top sheds water. The marks from the bandsaw cuts are cleaned up with a light sanding.
After ripping each section to width and smoothing the edges on a jointer, the author set up guide blocks on his bandsaw table, set the table to the desired angle, and cut both sides of the bevel.
Creating negative pressure
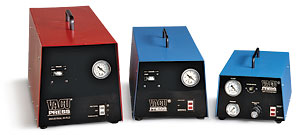
The vacuum press I use in my shop comes in handy, mostly for applying veneers to curved or irregular substrates. Made by VacuPress (www.vacupress.com), the pump is a 1/3-hp unit that has a 5-cfm vacuum rate; the 49-in. by 97-in. bag is made of 30-mil-thick vinyl. The kit usually sells for about $900; bigger pumps and bags are also available, either direct from the manufacturer or from catalogs.
Photos by: John Ross, except where noted


