Tips for Pouring a Concrete Patio
Mike Guertin outlines the entire process, from preparing the site to pouring and finishing the concrete slab for a patio.

Synopsis: Sooner or later, you’re bound to encounter a project where you need to pour a concrete slab. When you do, take advantage of the lessons contributing editor Mike Guertin has to share. Guertin outlines the process, from the proper way to prepare for the pour with the right techniques and materials to the best way to finish the concrete after it has been poured. Also find tips on minimizing concrete cracks and ordering concrete.
For the first 15 years of my building career, my partner and I subcontracted all the flat work: basement, garage, and patio slabs; driveways; and sidewalks. But as labor prices went up and scheduling concrete pours became harder, I figured we could do it ourselves. Pouring concrete slabs didn’t look very complicated.

Luckily, our first foray was on my own house. The look on the ready-mix truck driver’s face showed that he knew we had only half a clue. What I learned during that 17-yard pour was that the same critical ingredients for any construction project — planning, preparing, and having the right equipment — apply to even the seemingly simple task of placing concrete.
It took a few pours, but we picked up some basic knowledge and a few handy tips that don’t come easily to someone not working with concrete every day. I hope the following information will take some of the anxiety out of your next slab pour.
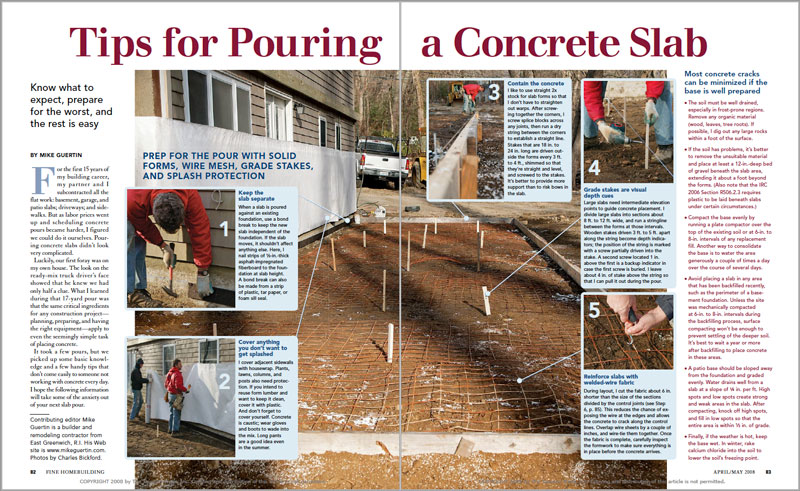
Most concrete cracks can be minimized if the base is well prepared
The soil must be well drained, especially in frost-prone regions. Remove any organic material (wood, leaves, tree roots). If possible, I dig out any large rocks within a foot of the surface.
If the soil has problems, it’s better to remove the unsuitable material and place at least a 12-in.-deep bed of gravel beneath the slab area, extending it about a foot beyond the forms. (Also note that the IRC 2006 Section R506.2.3 requires plastic to be laid beneath slabs under certain circumstances.)
Compact the base evenly by running a plate compactor over the top of the existing soil or at 6-in. to 8-in. intervals of any replacement fill. Another way to consolidate the base is to water the area generously a couple of times a day over the course of several days.

Avoid placing a slab in any area that has been backfilled recently, such as the perimeter of a basement foundation. Unless the site was mechanically compacted at 6-in. to 8-in. intervals during the backfilling process, surface compacting won’t be enough to prevent settling of the deeper soil. It’s best to wait a year or more after backfilling to place concrete in these areas.
A patio base should be sloped away from the foundation and graded evenly. Water drains well from a slab at a slope of 1⁄4 in. per ft. High spots and low spots create strong and weak areas in the slab. After compacting, knock off high spots, and fill in low spots so that the entire area is within 1 ⁄ 2 in. of grade.
If the weather is hot, keep the base wet. In winter, rake calcium chloride into the soil to lower the soil’s freezing point.
—Contributing editor Mike Guertin is a builder and remodeling contractor from East Greenwich, R.I. His Web site is www.mikeguertin.com.
Photos by Charles Bickford.
For more photos and details, click the View PDF button below:
From Fine Homebuilding #194
Magazine extra: Read Finishing a Patio Slab to learn how to achieve the right finish for your project.


