
Finishing a Drywall Inside Corner
For a professional finish, you have to tape, then wait.
The average house has as much lineal footage of inside corners as it does flat seams. A good system for taping and mudding inside corners improves the look of every room and saves time. A quality drywall job starts with careful planning.
Applying mud (drywall joint compound) and tape to an inside corner is difficult because it typically involves blending three corners — the intersection of two adjacent walls and the ceiling. For inside corners, I prefer to use paper tape instead of fiberglass-mesh tape because it is creased down the center, and it’s strong and easy to work with.
Before I tape inside corners, I tape and mud the flat seams first so the inside-corner tape laps over them. Taping inside corners is done in three steps on three different days: one day for taping and two days for the finish coat.
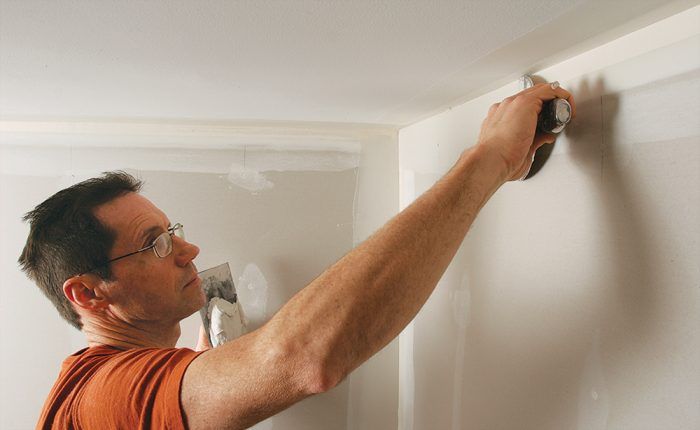
After each coat dries, I use a pole sander with 150-grit paper to knock down bumps or rough spots. If you don’t have a pole sander, you could use sandpaper wrapped around a flat wooden block. After the final coat, I use 150-grit (or finer) paper and sand more thoroughly.
Sanding drywall mud can produce a lot of fine dust. If you’re concerned about that, you might try one of the drywall sanders and dust collection systems on the market, or experiment with wet-sanding.
Tape the flat joints before the corners
Step 1. Spread the compound, and place the tape. Spread the joint compound at least 1/8 in. thick over the length of the joint. Starting in the corner, carefully place the tape on the surface of the compound over the joint. Press the tape into the compound.
Step 2. Bed the tape with a drywall knife. Starting from the center, bed the tape by moving the knife against the joint with medium pressure. The knife should be angled at about 45°. To stop the tape from moving with the knife, press the corner of the hawk, or trowel, into the tape near the other end.
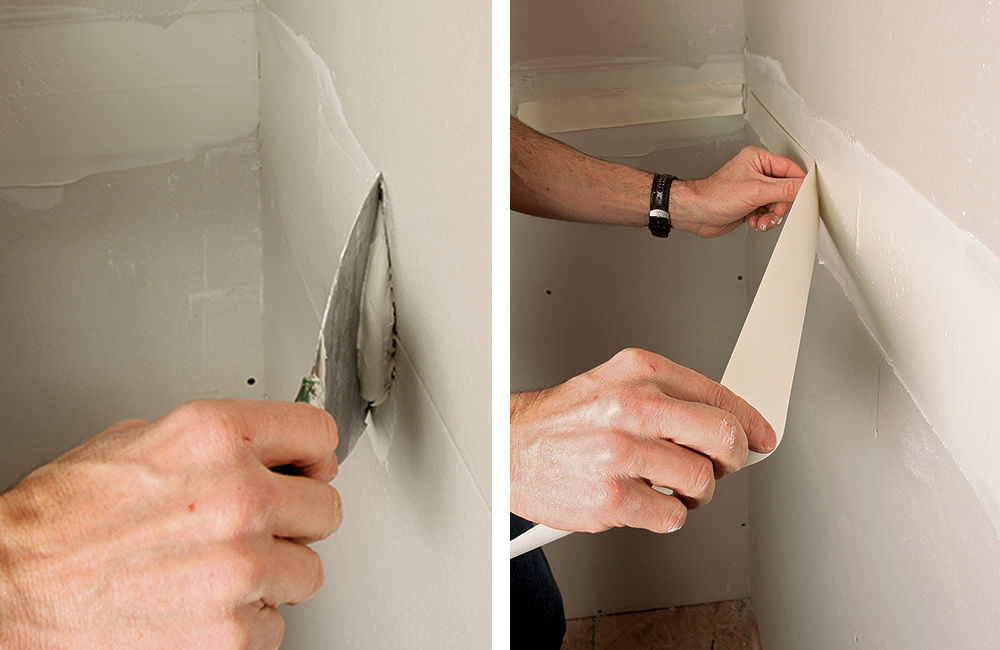
Bed the tape in the corners
Step 3. Apply compound to each side of the corner. Just as with the flat seams, don’t skimp on the compound at this step. Compound 1/8 in. thick is about right.
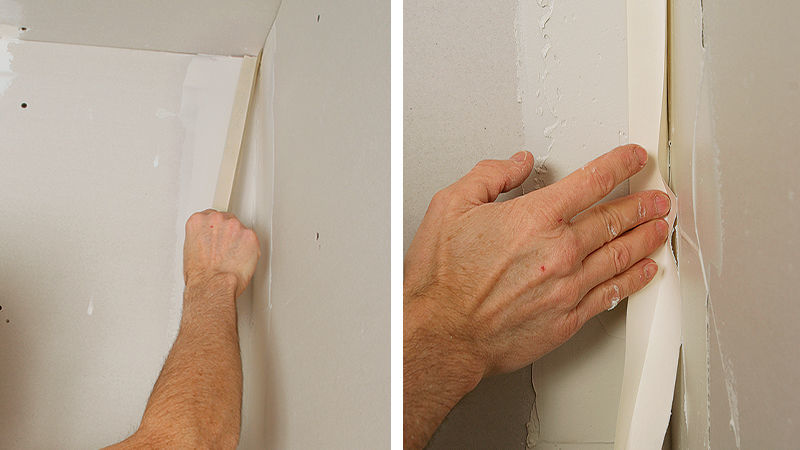
Step 4. Fold the tape to fit in the corner. All paper tape has a crease along the center to allow it to fold easily and fit snugly in a corner. To place the tape, keep it pulled tight, pressing it into the corner every 24 in. instead of along the whole length.
Tip: Tear the tape at an angle for a better fit at the ceiling. This allows the tape to fit tight without bunching.

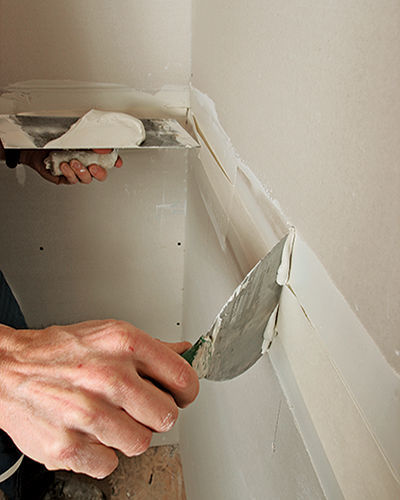
Step 5. Bed tape from the top. At first, use light pressure with the knife to avoid pulling the tape away at the top. After the first foot of tape is set in the compound, apply more pressure.
Step 6. Apply tape to the ceiling as you did in the corners. To apply more pressure, hold the knife at a steep angle. This allows the knife to press the tape tightly in the corner. After this pass, most of the compound is removed as the tape is embedded. The edge should be feathered right to the tape.
Take two more days for the finish coat
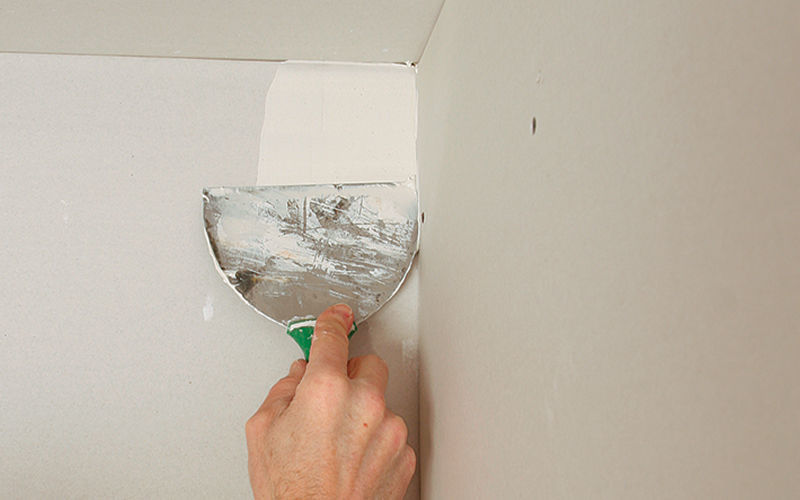
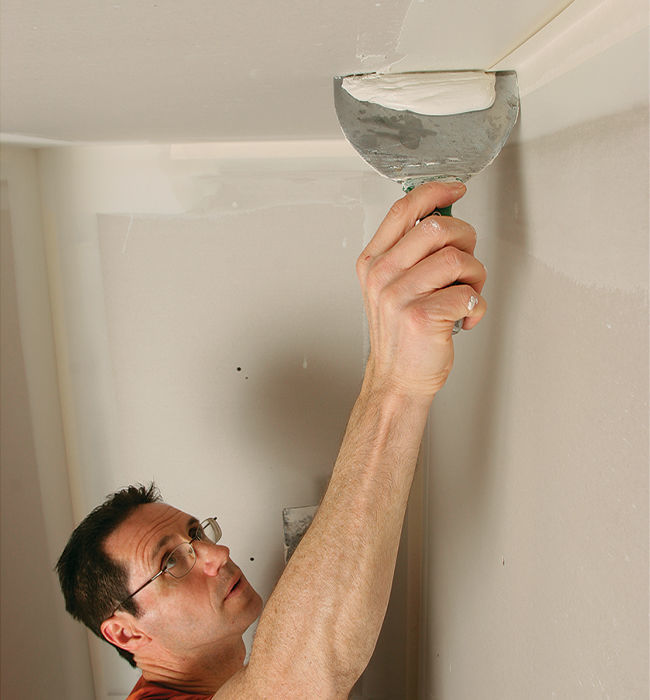
Step 7. On the second day, finish one side of every corner. Apply the wet compound so that it does not overlap (shown in yellow). The edge of the taping knife rides on the base coat of dry compound applied the day before. Keep the handle parallel to the adjoining wall to prevent the compound from loading up on that wall.
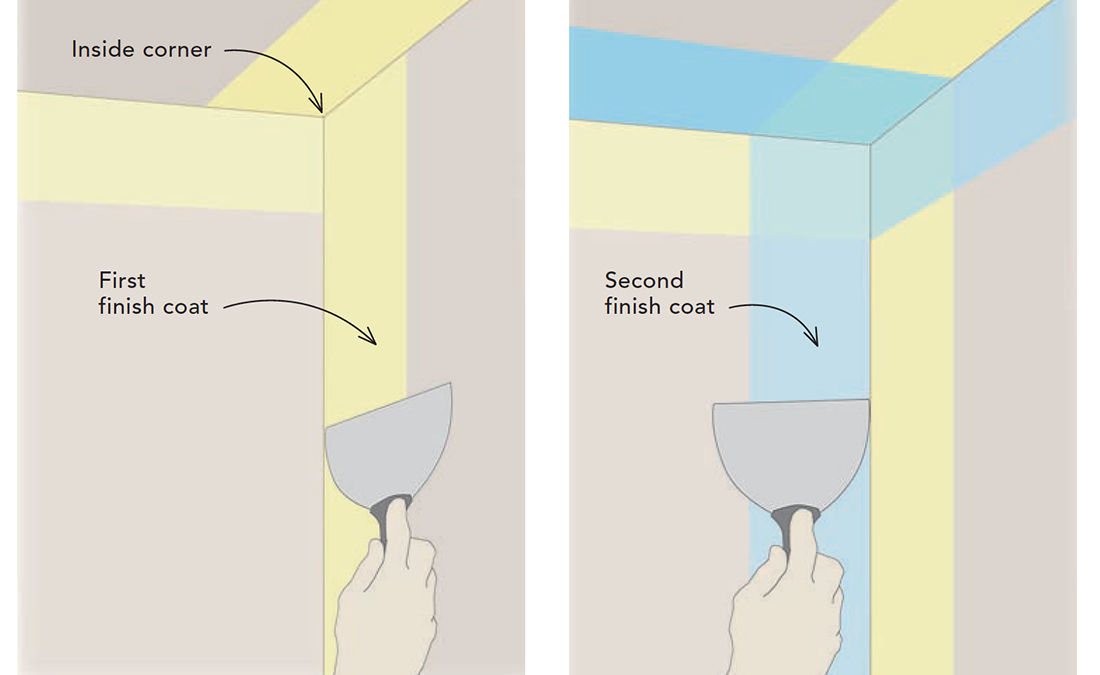
Step 8. On the third day, finish the corner’s other side. While applying the other side of the finish coat (shown in blue), the edge of the taping knife rides on the adjoining dry coat of compound. If I’m careful not to let excess compound build up, I can achieve a nearly perfect inside corner that requires minimal sanding.
Tip: When applying the finish coat, I hold the knife flatter to the wall to leave more compound over the tape. Feather the compound by pressing slightly harder on the outer edge of the drywall knife. I feather the outside edge first, then smooth the inside corner with a second pass.
Managing the mud
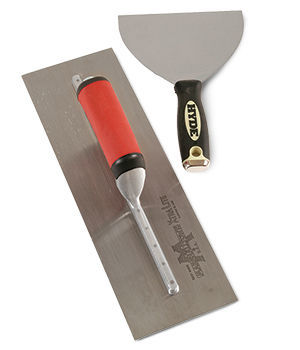
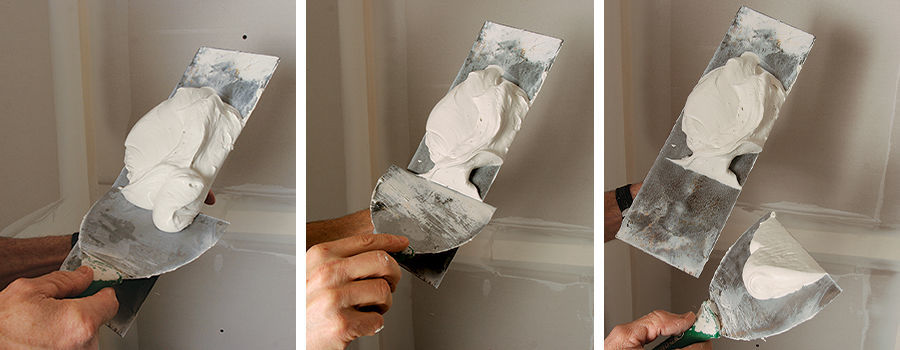
Messy drywall compound can kill the efficiency of even a small job. Having the right amount of mud on my drywall knife lets me think about getting on with the job instead of cleaning up after myself. My primary application tool is a $6 stiff-bladed 6-in. drywall or taping knife (www.hydetools.com). To hold a ready supply of joint compound, I use a $35 14-in.-wide by 4 1/2-in.-tall curved plaster trowel as a hawk (www.marshalltown.com).
I use the knife to scoop compound from the bucket and wipe it onto the hawk. A simple twist-and-cut motion transfers the mud back to the knife as needed. I push the knife under the mud to load it, then twist the knife, cutting the compound against the trowel, and then visually check to make sure I have the right amount. To clean the knife, I wipe it against the side of the hawk and start over with twisting and cutting.
Photos by John Ross, except where noted. Drawings by Dan Thornton.
More on drywall:
Secrets to Smoother Drywall – Dead-flat walls aren’t just about taping. They start with careful planning, smart staging, and solid installation strategies.
Crisp Corners for Drywall – Learn how to install metal, vinyl, and paper-faced corner beads so that wall edges are straight, corners are tight, and bubbles are nonexistent.
Faster Drywall Finishing – Automatic tools produce better walls in less time. Here’s a rundown on how they work, and how much they cost.
