Cutting and Bending Curved Floor Parts
Whether you achieve your curve with a saw or by lamination, a homemade template and jig ensure a tight fit.
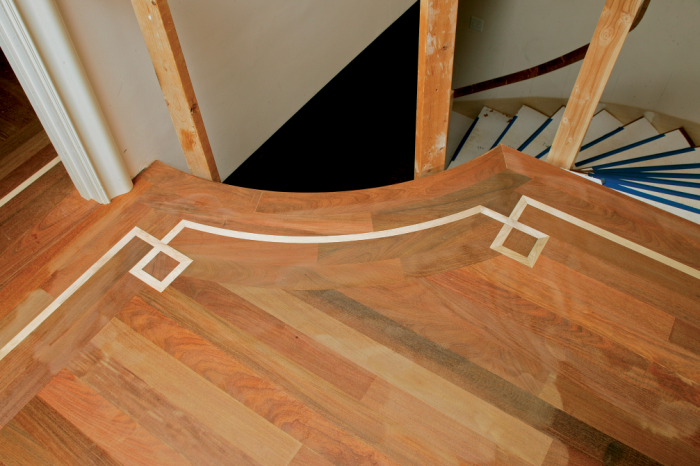
If you work with wood long enough, eventually you will hit a curve. Probably the two most-common ways of making a curve are either to saw the shape from a bigger piece of wood or to bend a board. As a flooring installer, I’ve had to use both methods. For wide boards, I use a jigsaw and a router to cut the shape; for decorative accents, I laminate thinner strips. On jobs like the one shown here, I use both methods. I cut, trim, and install the wider pieces, then use them as forms for the decorative laminations.
Rough it out, then trim precisely
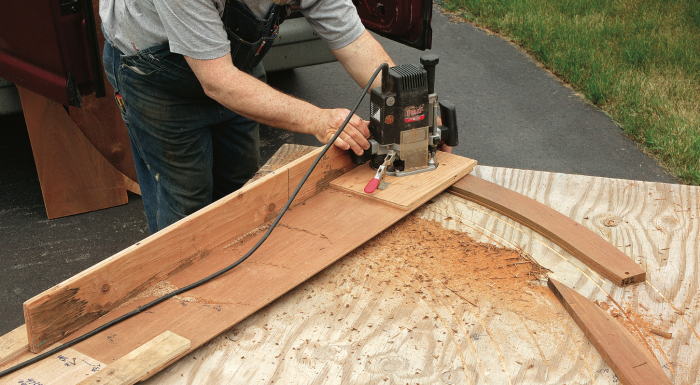
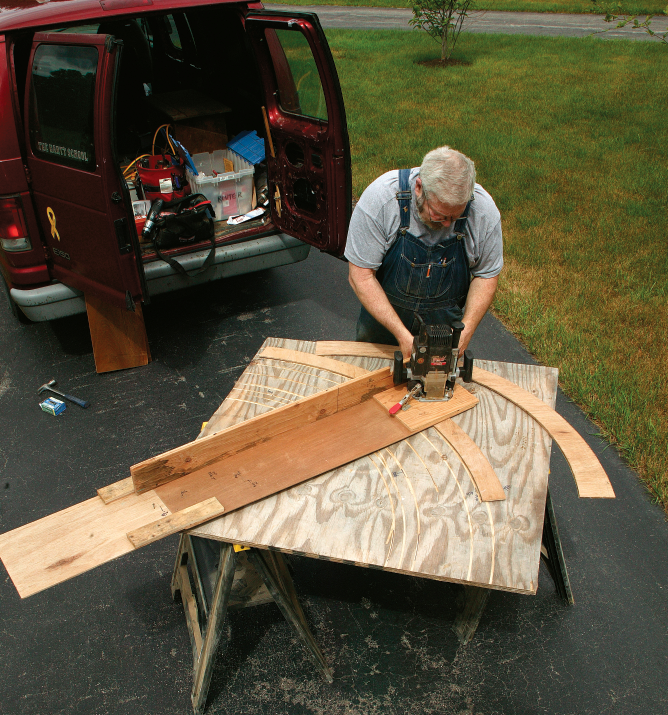
A router attached to a trammel is the most precise method for cutting curves (see “Fair curves, every time”). The problem is that cutting cleanly through 1-in.-thick stock with a router requires several passes, so I use the router only in the final stage.
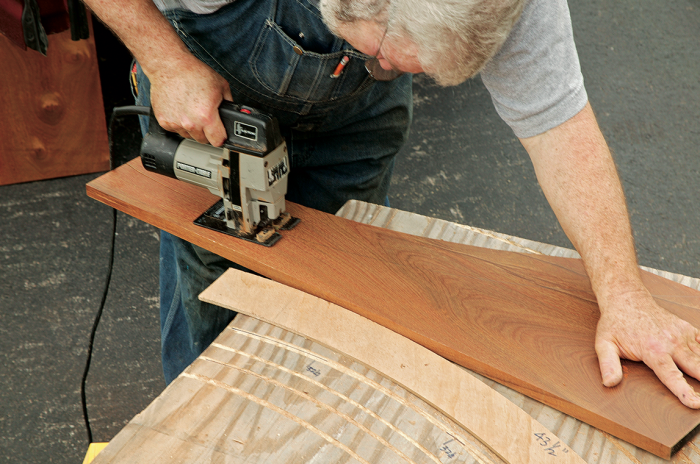
After tracing the curve on the board, I rough-cut the stock with a jigsaw, leaving about 1/8-in. excess that I trim with a router and trammel. I’d figured out the radii I needed for this job, so it was simply a matter of determining the placement of the pivot pin on the trammel. I trim one side of the piece, then move the pivot point on the trammel a distance equal to the finished width of the board and trim the other side. If I didn’t change the trammel’s pivot-point location but moved the piece, the radii wouldn’t be concentric.
Align rips for a seamless curve
Steam-bending has been an accepted practice for centuries. In my line of work, though, it’s usually easier to laminate a curve by reassembling a board that has been ripped into pliable strips. I first select a clear, straight-grained piece of stock, wide enough to contain all the strips for the curve and about 10 in. to 12 in. longer than necessary. The straight grain helps to prevent breakage when the narrow strips are flexed. The strips’ width is determined by the least number of rips that will still be flexible enough to be bent. These laminations ended up at about 5/32 in. I used a sharp 50-tooth combo blade on my tablesaw to keep the cuts smooth.
Two ways to clamp laminations
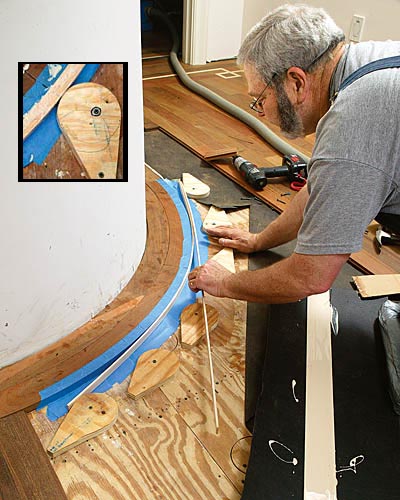
After I’ve installed the wider curved boards, I use them as a form to laminate the accent strip. I cover the subfloor and the flooring with painter’s tape so that the laminated piece can be removed and cleaned up after the glue dries.
I’ve tried two methods of clamping laminations. The first consists of several sets of opposing wedges set against plywood blocks screwed into the subfloor. I apply glue to one side of each lamination and reassemble them.
The method shown here uses plywood cams set every 8 in. to 12 in. I do a dry run so that I’m confident the pieces will lie flat; any final adjustments can be made without the hindrance of oozing glue. I use Titebond III glue (www.titebond.com), but any high-strength glue works. The important factors are color match and sufficient open time.
Three steps to a sawn curve
Step 1: Start with a plywood template. To get curved pieces that fit snugly, I first make a template from 1/4-in. plywood by measuring the radius of the location and then cutting the template with my router and trammel. Once I’m satisfied with the fit, I trace the template on a piece of wide stock and rough-cut the shape with a jigsaw.
Step 2: Next, I screw each end of the stock into the plywood platform to immobilize the piece, and I trim to the line with multiple passes of my router.
Step 3: After cutting them to length, I install the pieces. In this case, I used flooring mastic to glue the pieces; plywood blocks screwed to the subfloor immobilized the piece until the adhesive set.
Accents, bent in place
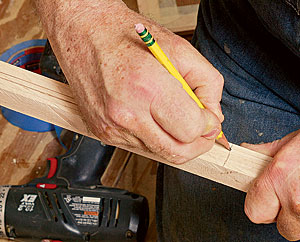
Reference marks keep order. Before ripping the board into strips, I mark a perpendicular line at the center and diagonal marks at one end. The centerline keeps the grain looking approximately the same as it bends, and the end marks keep the pieces in proper sequence.
Site-made cams do the clamping. To make the cams, I cut out teardrop-shaped pieces of 3/4-in. plywood (inset photo) and sand the sides smooth. The cams are screwed through 1/4-in.-dia. holes to the floor; the off-center hole allows the cam to swing freely. After the strips are glued up and in the bending form, I start at the center cam and turn it against the laminations until it’s tight, then drive a screw into the tail to hold it in place. I work my way along, alternating from left to right of center. I tap the strips flat with a softer wood that will not damage the pieces and, if necessary, attach hold-downs.
Fair curves, every time
A router and trammel allow you to cut precise arcs, individually or on a production basis. Because I’m thrifty, I used scraps to make this trammel jig. I took a long piece (approximately 6 ft. long by 1 ft. wide) of 1/4-in.-thick plywood, cut a hole at one end, and attached the router base with recessed screws. Thin stock is better because I can use a standard-length bit to trim the 3/4-in. stock. I reinforced the area around the router base with 3/4-in. plywood and attached a strongback along the length for rigidity. The pivot pin is a 12d common nail. After measuring from the bit, I drilled and marked the reference holes at the trammel’s opposite end. The pivot is seated in a small 3/4-in. hardwood block attached to the table.
Magazine extra: Watch a video of Howard Brickman creating curved flooring.
Photos by: Charles Bickford
