FHB Logo Facebook LinkedIn Email Pinterest Twitter X Instagram Tiktok YouTube Plus Icon Close Icon Navigation Search Icon Navigation Search Icon Arrow Down Icon Video Guide Icon Article Guide Icon Modal Close Icon Guide Search Icon Skip to content
Subscribe
Log In
  • How-To
  • Design
  • Tools & Materials
  • Restoration
  • Videos
  • Blogs
  • Forum
  • Magazine
  • Members
  • FHB House
  • Podcast
Log In
How-To

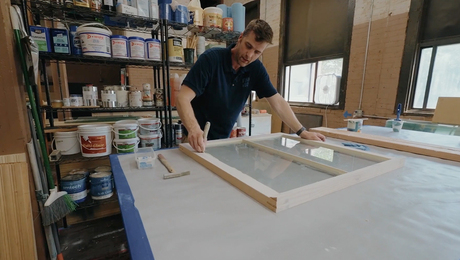
Job-Site Router Techniques

Gary Striegler shares the skills—and the tools—that make better site-built cabinetry, casing, brackets, and flooring 

By Gary Striegler Issue 198
  • X
  • facebook
  • linkedin
  • pinterest
  • email
  • add to favorites Log in or Sign up to save your favorite articles

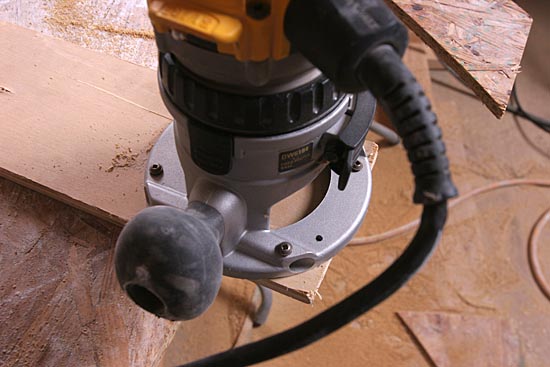
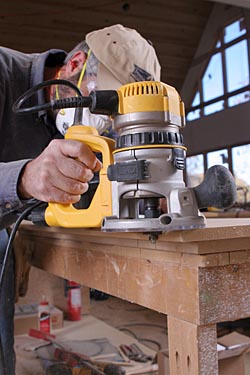
Trim carpenter extraordinaire and frequent contributor to Fine Homebuilding Gary Striegler has accumulated enough routers over the years that he’s actually stopped counting them. And he’s got his favorites. The routers Gary reaches for most are his trim and midsize D-handle models, and he favors pattern, flush trim, and dado bits, depending on the project.

In his article Router Tricks for Trim, Gary shares his top-five problem-solving tips for trim, cabinets, doors, and stairs. Here, Gary goes beyond his article and shares the tools and techniques he uses on the job site to construct built-in shelving, curved casing, closet corner shelves, custom brackets, and tongue-and-groove flooring. 

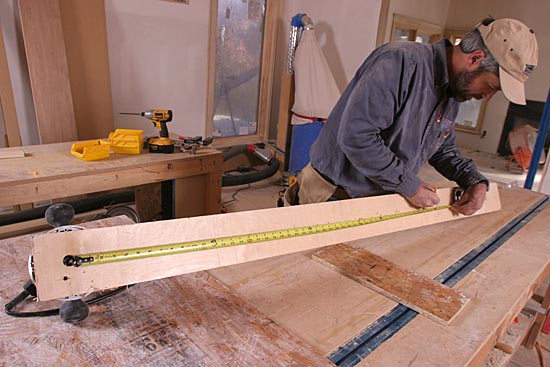
Build quick and sturdy paint-grade built-ins

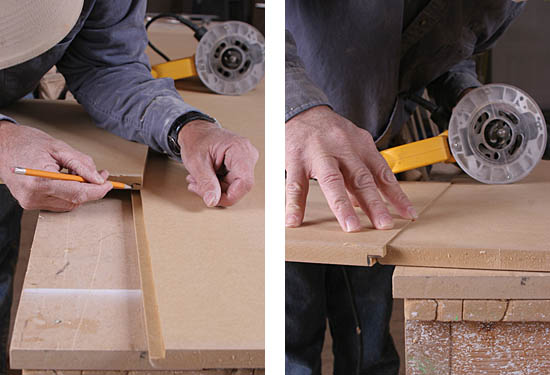
Most of the built-ins we make on site have adjustable shelves, but for projects like entertainment centers and walk-in closets, we often make units with fixed shelves. To support the shelves we plow a dado on each of the unit’s sides, then seat the shelf in the dado. As with other paint-grade built-ins, we use sheets of 3/4-in. MDF ripped to width, and we space the shelf height appropriately for the built-in’s intended use. 

My method requires a D-handle router equipped with a 3/4-in. pattern bit, two clamps, and a sturdy straightedge.

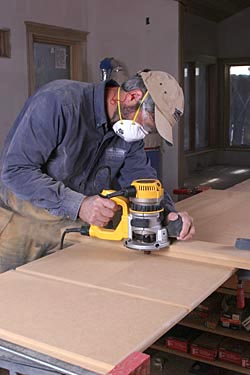
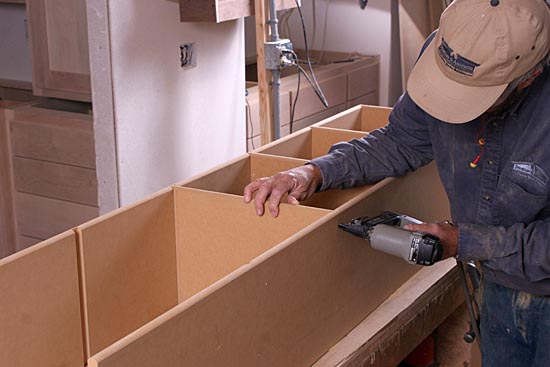
Plow the dadoes. First, rip the shelving unit’s sides to width, then clamp them together. Next, mark the shelf locations on each end of the unit’s sides. Clamp the guide along each layout mark, and plow the dado. Make the dado 3/8 in. to 1/2 in. deep. Be sure the surface is flat and sturdy. Any flex in the unit’s sides will affect the depth of the dado.

Glue and nail the shelves. After ripping and cutting the shelves to size, attach them to the unit’s sides. Run a bead of wood glue in each dado, and nail into the shelf about every 4 in. to 6 in. Make sure the unit is square after attaching the first shelf before proceeding. A framing square works for short, narrow units, but pulling diagonal measurements is the most accurate way to measure larger units.
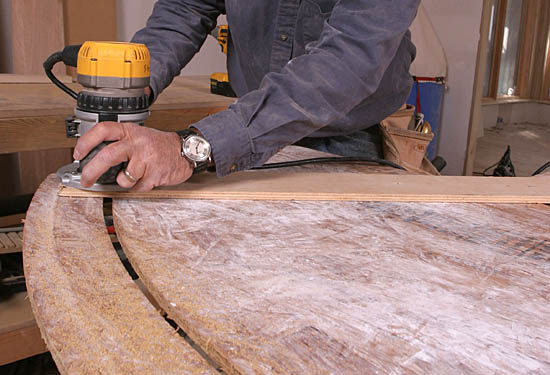
Cut a perfect curve

Whether making casing for an arched window, roughing in an arched opening for drywall, or cutting plates for a curved wall, I use a router and trammel to make accurate cuts instead of a jigsaw. The router leaves a nice, clean edge, and the trammel ensures a perfectly symmetrical cut.

For this method, I use a D-handle router equipped with a 1/2-in. dado bit. 

Set up the router and trammel. First, I mount the router base to an 8-in.-wide piece of 1/2-in. plywood. I run screws directly through the base and bore a hole wide enough to accept the bit (top photo). Then I run a screw into the center of trammel at the appropriate radius for the cut I’m going to make (bottom photo).

Cut the top edge. I make the top cut first, pulling slightly away from the centerpoint to maintain tension on the trammel.

Then cut the bottom edge. Once the top cut is finished,I move the screw up toward the router the same measurement as the width of the plate or casing I’m making plus the width of the bit (top photo). Then I make the second cut (bottom photo).

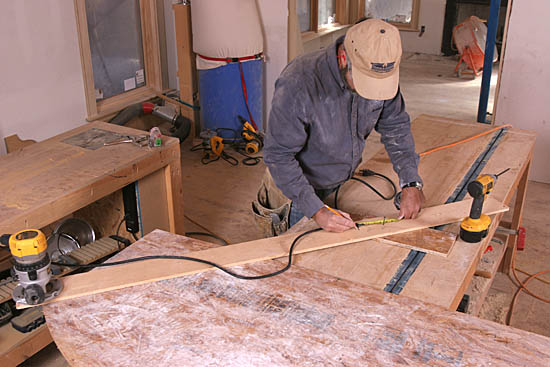
Make strong corners for closet shelves

We often have to run shelves in walk-in closets that turn one or two corners. There are a number of ways to make theses corner joints, but we’ve found a half-lap joint to be the quickest and most sturdy approach for the job. We use factory-ripped 3/4-in. MDF shelf stock to makes our closet shelves. It’s available in varying widths and comes already bullnosed, which saves us from having to mill it on site.

A D-handle router equipped with a 1/2-in. rabbeting bit is ideal for half-lap joints such as these. 

Plow one rabbet at a time. Set the bit halfway down the width of the stock; then plow the rabbet. It may take a couple of adjustments to get the bit depth set right, but make sure this rabbet is not more than half the thickness of the stock. Make this cut down the front edge of the shelf only as far as the adjoining shelf is wide.

Sneak up on the second rabbet. I like to mark the layout of the second rabbet so I don’t rout the wrong face. It’s a good idea to  make the cut a little shallow at first, then dry-fit the pieces. If necessary, lower the bit and plow the rabbet again.

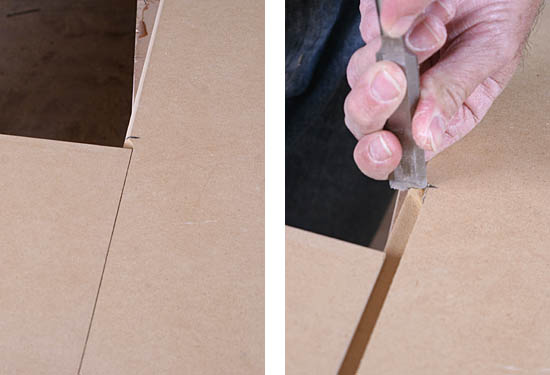
Square the corners. The rabbeting bit leaves a radiused corner where the two pieces join (photo left), so I square the corner with a chisel (photo right).

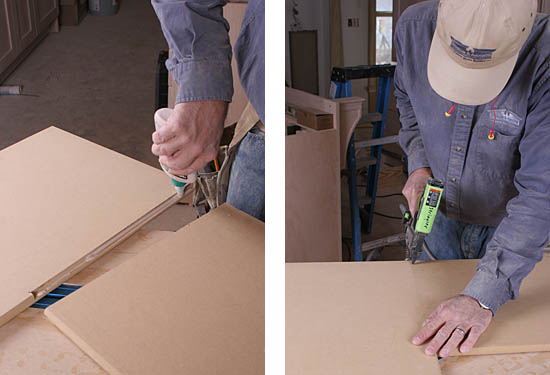
Glue and nail the joint. Finally, I run a bead of wood glue along the bottom rabbet (photo left) and nail the joint together with 3/4-in. headless pins (photo right). Running the pins in at an angle provides a stronger hold and keeps them from exiting the bottom edge of the shelves.

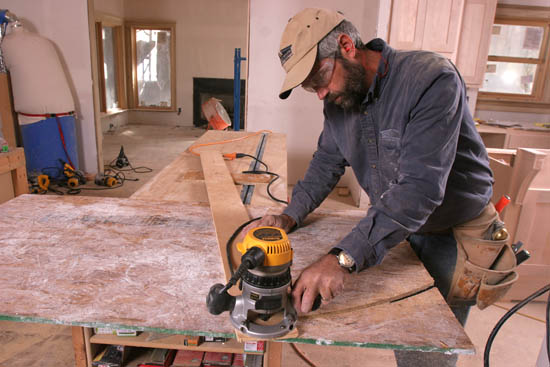
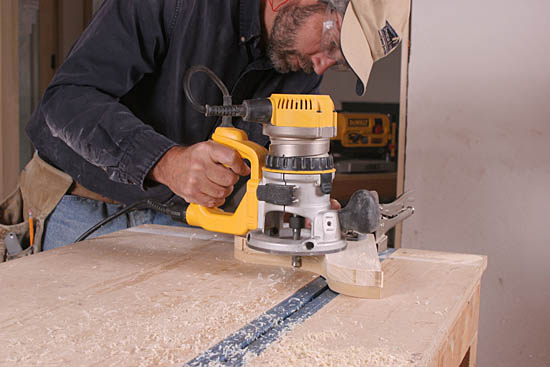
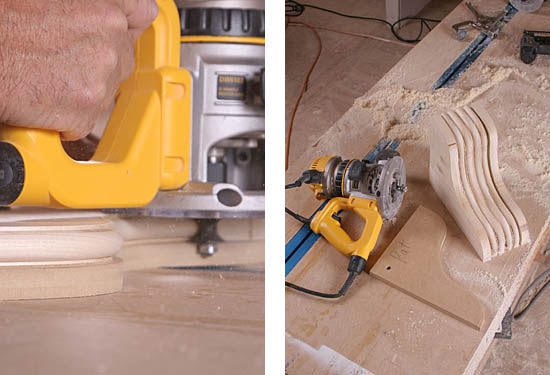
Build wide custom brackets

We build a lot of brackets for mantels and kitchen islands on site. Instead of buying thick stock or factory-made versions, I prefer to laminate layers of 1x poplar stock together. I start by making a pattern out of 3/4-in. MDF, and I use it as a guide to mill the poplar sections. Beading the edges of the center pieces adds a nice design touch to the brackets and hides the joint between the laminated layers.

Use a D-handle router equipped with a 1/2-in.-dia. flush-trim bit to mill the layers and a 3/4-in. beading bit to shape the middle layers.

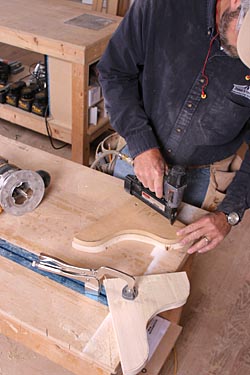
Rough-cut the pieces first. Then attach the pattern. After tracing the pattern onto the poplar stock, I rough-cut the pieces about 1/8 in. larger. Next, I attach the pattern to the rough-cut sections with 1-in. headless pins

Trim the poplar. Clamp the pattern and poplar to a bench, then trim the poplar flush. Make a couple of passes to ensure a clean cut. Keep the router base firmly planted on the stock as you go to keep the bit square to the stock.

Bead the edge. With the pattern still in place, bead the edge of the stock (photo left). Keep the base firmly planted on the stock as you go, and move slowly to prevent burn and tearout. Last, glue and nail the layers together (photo right).

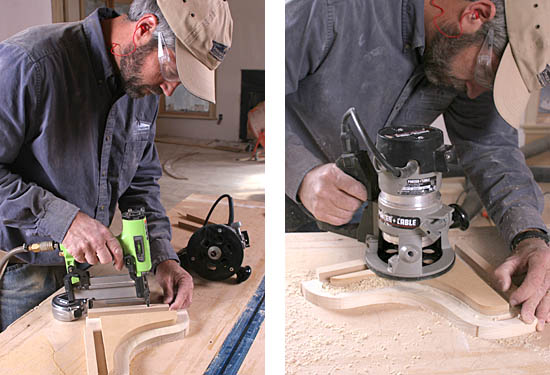
Plow a flute with a guide bushing

Mount the pattern, and use a cove bit. After making the pattern, I nail it to the stock with headless pins. I add guide pieces to the outside edge to provide support for the router base (photo left). Then I run the router along the pattern to plow the flute (photo right).   

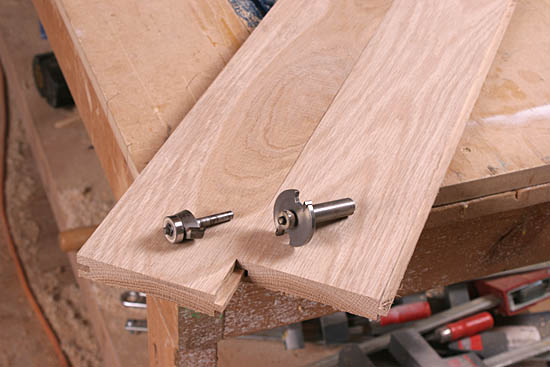
Mill tongue-and-groove flooring on site

Whether replacing damaged boards or creating custom details, it’s often necessary to mill tongue-and-groove flooring on site. I use a 1/4-in. slotting bit to cut the groove and a 1/2-in. rabbeting bit to cut the tongue.


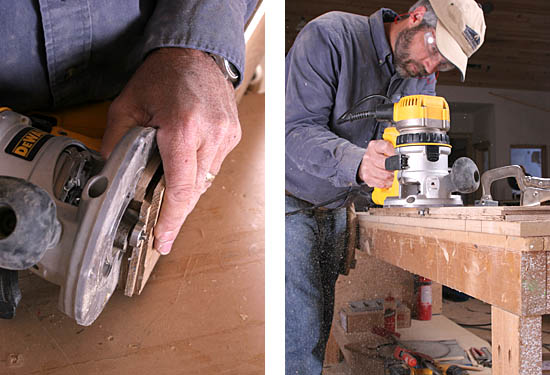
Set the bit depth. Using a piece of factory-milled flooring as a guide, set the depth of the slotting bit (photo left). Plow the groove in two passes to prevent tearout (photo right).

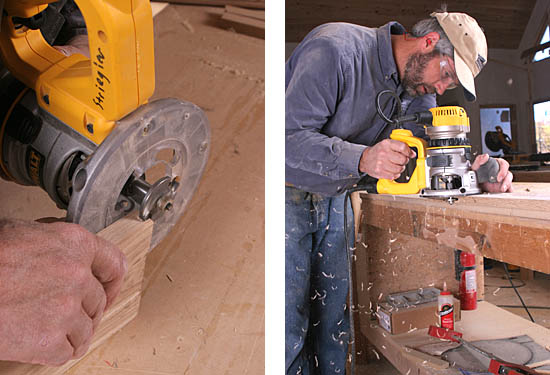
Make two passes on the tongue. Set the bit depth for the top rabbet (photo left). Plow the top rabbet in two passes, making the first cut shallow to prevent tearout (photo right). Flip the stock and repeat both steps for the bottom rabbet.

Photos by: Chris Ermides

Sign up for eletters today and get the latest how-to from Fine Homebuilding, plus special offers.

Signing you up...

This site is protected by reCAPTCHA and the Google Privacy Policy and Terms of Service apply.
See all newsletters
See all newsletters
×

Get home building tips, offers, and expert advice in your inbox

Signing you up...

This site is protected by reCAPTCHA and the Google Privacy Policy and Terms of Service apply.
See all newsletters
See all newsletters

New Feature

Fine Homebuilding Forums

Ask questions, offer advice, and share your work

  • X
  • facebook
  • linkedin
  • pinterest
  • email
  • add to favorites Log in or Sign up to save your favorite articles

Log in or create an account to post a comment.

Sign up Log in

Become a member and get full access to FineHomebuilding.com

Up Next

Video Shorts

Featured Story

FHB Summit 2025 — Design, Build, Business

Join some of the most experienced and recognized building professionals for two days of presentations, panel discussions, networking, and more.

Featured Video

Micro-Adjust Deck-Baluster Spacing for an Eye-Deceiving Layout

No math, no measuring—just a simple jig made from an elastic band is all you need to lay out a good-looking deck railing.

Related Stories

  • Installing Prefinished Cabinet Molding
  • A New Approach for Millwork Finishes
  • Prevent Paint Bridging With Picks
  • Bunk Beds and Built Ins

Discussion Forum

Recent Posts and Replies

  • |
  • |
  • |
  • |
  • |
  • |
View More Create Post

Highlights

Fine Homebuilding All Access
Fine Homebuilding Podcast
Tool Tech
Plus, get an extra 20% off with code GIFT20

"I have learned so much thanks to the searchable articles on the FHB website. I can confidently say that I expect to be a life-long subscriber." - M.K.

Get home building tips, offers, and expert advice in your inbox

Signing you up...

This site is protected by reCAPTCHA and the Google Privacy Policy and Terms of Service apply.
See all newsletters
See all newsletters

Video

View All Videos
  • 10 Great Gift Ideas for People Who Love Tools
  • Podcast Episode 102 — Bathrooms, Blades, and Batts
  • How to Drill a Lockset on a New Door
  • Bosch Daredevil Drill Bits
View All

Finish Carpentry

View All Finish Carpentry Articles
  • Making and Installing Wood Wall Paneling
  • Installing Prefinished Cabinet Molding
  • Window Glazing with Traditional Putty
View All Finish Carpentry Articles

Fine Homebuilding Magazine

  • Issue 331 - June 2025
    • A More Resilient Roof
    • Tool Test: You Need a Drywall Sander
    • Ducted vs. Ductless Heat Pumps
  • Issue 330 - April/May 2025
    • Deck Details for Durability
    • FAQs on HPWHs
    • 10 Tips for a Long-Lasting Paint Job
  • Issue 329 - Feb/Mar 2025
    • Smart Foundation for a Small Addition
    • A Kominka Comes West
    • Making Small Kitchens Work
  • Issue 328 - Dec/Jan 2024
    • How a Pro Replaces Columns
    • Passive House 3.0
    • Tool Test: Compact Line Lasers
  • Issue 327 - November 2024
    • Repairing Damaged Walls and Ceilings
    • Plumbing Protection
    • Talking Shop

Fine Home Building

Newsletter Sign-up

  • Fine Homebuilding

    Home building tips, offers, and expert advice in your inbox.

  • Green Building Advisor

    Building science and energy efficiency advice, plus special offers, in your inbox.

  • Old House Journal

    Repair, renovation, and restoration tips, plus special offers, in your inbox.

Signing you up...

This site is protected by reCAPTCHA and the Google Privacy Policy and Terms of Service apply.
See all newsletters

Follow

  • Fine Homebuilding

    Dig into cutting-edge approaches and decades of proven solutions with total access to our experts and tradespeople.

    Start Free Trial Now
    • Facebook
    • Instagram
    • X
    • LinkedIn
  • GBA Prime

    Get instant access to the latest developments in green building, research, and reports from the field.

    Start Free Trial Now
    • Facebook
    • YouTube
  • Old House Journal

    Learn how to restore, repair, update, and decorate your home.

    Subscribe Now
    • Facebook
    • Instagram
    • X

Membership & Magazine

  • Online Archive
  • Start Free Trial
  • Magazine Subscription
  • Magazine Renewal
  • Gift a Subscription
  • Customer Support
  • Privacy Preferences
  • About
  • Contact
  • Advertise
  • Careers
  • Terms of Use
  • Site Map
  • Do not sell or share my information
  • Privacy Policy
  • Accessibility
  • California Privacy Rights

© 2025 Active Interest Media. All rights reserved.

Fine Homebuilding receives a commission for items purchased through links on this site, including Amazon Associates and other affiliate advertising programs.

  • Home Group
  • Antique Trader
  • Arts & Crafts Homes
  • Bank Note Reporter
  • Cabin Life
  • Cuisine at Home
  • Fine Gardening
  • Fine Woodworking
  • Green Building Advisor
  • Garden Gate
  • Horticulture
  • Keep Craft Alive
  • Log Home Living
  • Military Trader/Vehicles
  • Numismatic News
  • Numismaster
  • Old Cars Weekly
  • Old House Journal
  • Period Homes
  • Popular Woodworking
  • Script
  • ShopNotes
  • Sports Collectors Digest
  • Threads
  • Timber Home Living
  • Traditional Building
  • Woodsmith
  • World Coin News
  • Writer's Digest
Active Interest Media logo
X
X
This is a dialog window which overlays the main content of the page. The modal window is a 'site map' of the most critical areas of the site. Pressing the Escape (ESC) button will close the modal and bring you back to where you were on the page.

Main Menu

  • How-To
  • Design
  • Tools & Materials
  • Video
  • Blogs
  • Forum
  • Project Guides
  • Reader Projects
  • Magazine
  • Members
  • FHB House

Podcasts

  • FHB Podcast
  • ProTalk

Webinars

  • Upcoming and On-Demand

Podcasts

  • FHB Podcast
  • ProTalk

Webinars

  • Upcoming and On-Demand

Popular Topics

  • Kitchens
  • Business
  • Bedrooms
  • Roofs
  • Architecture and Design
  • Green Building
  • Decks
  • Framing
  • Safety
  • Remodeling
  • Bathrooms
  • Windows
  • Tilework
  • Ceilings
  • HVAC

Magazine

  • Current Issue
  • Past Issues
  • Magazine Index
  • Subscribe
  • Online Archive
  • Author Guidelines

All Access

  • Member Home
  • Start Free Trial
  • Gift Membership

Online Learning

  • Courses
  • Project Guides
  • Reader Projects
  • Podcast

More

  • FHB Ambassadors
  • FHB House
  • Customer Support

Account

  • Log In
  • Join

Newsletter

Get home building tips, offers, and expert advice in your inbox

Signing you up...

This site is protected by reCAPTCHA and the Google Privacy Policy and Terms of Service apply.
See all newsletters
See all newsletters

Follow

  • X
  • YouTube
  • instagram
  • facebook
  • pinterest
  • Tiktok

Join All Access

Become a member and get instant access to thousands of videos, how-tos, tool reviews, and design features.

Start Your Free Trial

Subscribe

FHB Magazine

Start your subscription today and save up to 70%

Subscribe

This is your last free article.

Don't miss another expert tip or technique from building pros. Start your free trial today.

Start your FREE trial

Already a member? Log in

We hope you’ve enjoyed your free articles. To keep reading, become a member today.

Get complete site access to expert advice, how-to videos, Code Check, and more, plus the print magazine.

Start your FREE trial

Already a member? Log in

Privacy Policy Update

We use cookies, pixels, script and other tracking technologies to analyze and improve our service, to improve and personalize content, and for advertising to you. We also share information about your use of our site with third-party social media, advertising and analytics partners. You can view our Privacy Policy here and our Terms of Use here.

Cookies

Analytics

These cookies help us track site metrics to improve our sites and provide a better user experience.

Advertising/Social Media

These cookies are used to serve advertisements aligned with your interests.

Essential

These cookies are required to provide basic functions like page navigation and access to secure areas of the website.

Delete My Data

Delete all cookies and associated data