Arts and Crafts Style Built-in Bench
Templates, routers, and a foolproof finish make this traditional project approachable and elegant.
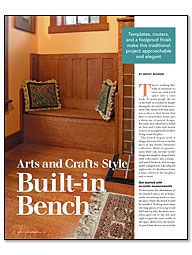
Synopsis: A built-in bench can be a perfect addition to any home. For cabinetmaker Brent Benner, an Arts and Crafts style built-in with under-seat storage was an elegant solution for clients who wanted to create a cozy nook near a fireplace. Using MDF templates, Benner was able to create consistently sized side pieces for the bench, and he used a router to create the details. Before he finished the bench, Benner assembled it dry to make sure that all the parts fit together. Finally, Benner finished the built-in bench with a combination of stains for a realistic Arts and Crafts finish.
There’s nothing like built-in furniture to turn an awkward space into a cozy nook. To many people, the art of the built-in reached its height during the Art and Crafts movement. My clients hold that opinion so dear to their hearts that they’ve turned their house into a showcase of period design. Recently, they asked me to build an Arts and Crafts style built-in bench to serve as an inglenook for their living-room fireplace.
The bench began with a design borrowed from a similar piece in my clients’ furniture collection. Made of quartersawn white oak, my take on the design has simple L-shaped sides with a decorative slot, a frame-and-panel backrest, and storage under a hinged seat. Like all good inglenooks, it’s shoehorned into a space between the fireplace and a corner.
Get started with accurate measurements
To determine the dimensions of the bench, I used a set of homemade measuring sticks to size the space where the bench would be installed. Nothing more than two long pieces of 1x scrap wood held side by side, the sticks were telescoped out to the left and right to span the exact width of the space allotted for the bench. A pencil line drawn across both sticks marked the measurements that I later transferred to the bench design.
Once I had accurate site measurements, I made a shop drawing of the piece, and used the dimensions to mill and glue up stock for the sides, seat, and panels. I used 6/4 stock for the sides and 4/4 stock for the back; the final thicknesses came to 1 1⁄8 in. and 13⁄16 in. respectively. (If you don’t have the tools to mill rough-sawn lumber, most local hardwood suppliers can plane and joint stock for a small fee.)
After all the parts were milled, I began building the bench, starting with the back. Made like a cabinet door, the back is a frame-and-panel assembly; the rails and stiles are milled with a square-edged stub-tenon-and-groove joint. The panels aren’t glued to the frame, so they can move seasonally. I made the panels 3⁄4 in. thick so that they’d never crack or rattle in the frame, and I used a raised-panel bit to relieve the panels’ edge to fit into the frame’s groove. Although the raised profile is hidden on the back of the bench, the detail is historically accurate. When I had the back glued up, I built the box for the bench’s storage space from 3⁄4-in.-thick maple plywood.
Use templates for consistency
Next, I created a template that was the exact replica of the side pieces. I used 1⁄4-in. MDF for the templates because it’s inexpensive and uniform. Once the template was drawn and cut, I traced its outline onto the side stock, rough-cut the pieces on a bandsaw, then cleaned up the line using the template to guide a router and a flush-trim bit, which I’ve found makes a cleaner cut than a straight bit and bushing.
RELATED STORIES
- Build an inglenook around a small fireplace
- Built-In Banquettes for a Kitchen Dining Room
- Make a Built-In Breakfast Nook
For more photos, drawings, and details, click the View PDF button below:
