A Custom Finish for Affordable Doors
Layers of dye and glaze add instant character to an inexpensive interior door.
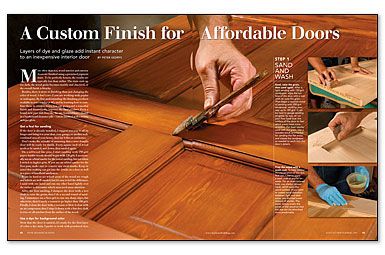
Synopsis: A door that looks like a million bucks doesn’t have to cost a fortune. Finisher Peter Gedrys shares his professional advice on creating custom finishes to make beautiful, one-of-a-kind doors. For Gedrys, the beauty comes from layering different staining products to achieve unique colors. Gedrys begins his process by sanding and washing the door’s surface. Next, he dyes and seals the door. Finally, he applies glaze and a top coat of shellac and wax.
More often than not, wood interior and exterior doors are finished using a premixed pigment stain. To be perfectly honest, the results are typically less than stellar. The stain ends up too dark, the wood grain becomes muddy and obscured, or the overall finish is blotchy.
Besides, there is more to finishing than just changing the color of wood. I don’t care if you are working with poplar or mahogany. By first understanding the finishing products available to you and by learning how to combine them in creative ways, you can go beyond a remedial finish and dramatically improve the final product. Even a brand-new pine slab door like the one featured here — found in a lumberyard clearance pile — can be finished with a warm, antique glow.
Get a feel for sanding
If the door is already installed, I suggest you pop it off its hinges and bring it to your shop, your garage, or another well-ventilated area of your house, then lay it flat on sawhorses.
Don’t make the mistake of assuming that a store-bought door will be ready for finish. Every square inch of wood needs to be sanded, wet down, then sanded again.
On a softwood like pine, I start sanding with 150-grit paper; harder woods should begin with 120 grit. I occasionally use an orbital sander for the initial sanding, but not when I switch to higher grits. If you use an orbital sander for the first pass, make sure to remove any swirl marks. Keep in mind that nothing can get into the details on a door as well as a piece of handheld sandpaper.
It can be hard to see which areas of the wood are rough and which are well-sanded, but it’s easy to feel the difference. I sand with one hand and run my other hand lightly over the surface to determine which areas need more attention.
After the first sanding, I dampen the door with a wet cloth to raise the grain; then I do a second round of sanding. I sometimes use a finer grit to ease any sharp edges, but otherwise, there’s rarely a reason to go higher than 180 grit. Finally, I clean the door with a vacuum or blow it clear with an air compressor; then I wipe it down with a lint-free cloth to remove all sawdust from the surface of the wood.
Use a dye for background color
Now that the door is sanded, it’s ready for the first layer of color: a dye stain. I prefer to work with powdered dyes because they are much more economical than liquid dyes, and I find that powder gives me much better control over color strength. A typical mixture is 1 oz. of powder dissolved in 1 qt. of warm distilled water; this mixture then can be altered to achieve the strength desired. I prefer to mix batches of dye at double strength (2 oz. of dye to 1 qt. of water), then add water as needed to get the look I’m after.
For more photos and details, click the View PDF button below:
