Site-Made Moldings in a Pinch
When all you need is a few feet of millwork to match existing trim, look to the tablesaw, a block plane, and some sanding blocks.

Synopsis: Renovating old houses can sometimes be difficult when it comes time to replace moldings. In many cases, old patterns are no longer available. When carpenter Kit Camp encountered this problem while working on his own house, he used a technique to create site-made moldings using plain stock, a tablesaw, a block plane, and some sanding blocks. Camp begins by scribing the profile to the stock. Next, he rips the profile on a tablesaw. Then, Camp uses a block plane and sanding blocks to create and smooth the details. Finally, after the profile is done, he cuts bevels so that the new stock will match the existing molding.
Our little 1920s house suffered more than a few “improvements” before we purchased it. The most egregious was the installation of cheap vinyl windows. To add insult to injury, the installers didn’t bother to match the existing trim when they replaced the apron moldings under the new windows. Although we have yet to remedy the window situation, I decided I could at least install some matching trim.
Because of the age of the house, I couldn’t find a stock profile to match the aprons, and I didn’t want to pay to have the profile custom milled; I needed only a couple of 8-ft. sticks. I decided to make the trim myself using my tablesaw, a few hand tools, and a technique that I’ve used in the past to match baseboard, door casings, and crown in a pinch. I also use aspects of this technique to make profile specific sanding blocks for fairing scarf joints on long runs of trim.
While not a speedy process, this technique can save you a lot of money in router bits, custom shaper knives, or order minimums at the lumberyard. That said, it’s difficult to reproduce some smaller, more intricate details without the help of old-fashioned molding planes, scratch stock, or custom-made scrapers, so take a hard look at the molding you need to duplicate before jumping in. If you are on the clock, a practical limit is around 16 ft. of trim.
Take your time at the lumberyard, and look for quartersawn stock that has straight grain to use for moldings. Poplar works well for painted interior moldings; fir and redwood are good for exterior use.
If possible, make a clean, square cut in a scrap of the molding to be copied, and use this scrap to trace the profile to the end grain of the new stock. Old trim often has many layers of paint, which must be scraped away to reveal the original profile. If you can’t use an actual piece, trace the profile onto a 3×5 index card. The profile then can be transferred to the blank stock. You can do this without removing the old trim; make a thin cut in the trim using a thin-kerf pull saw, slide the index card into the kerf, and trace the profile.
Scribe the profile to the stock
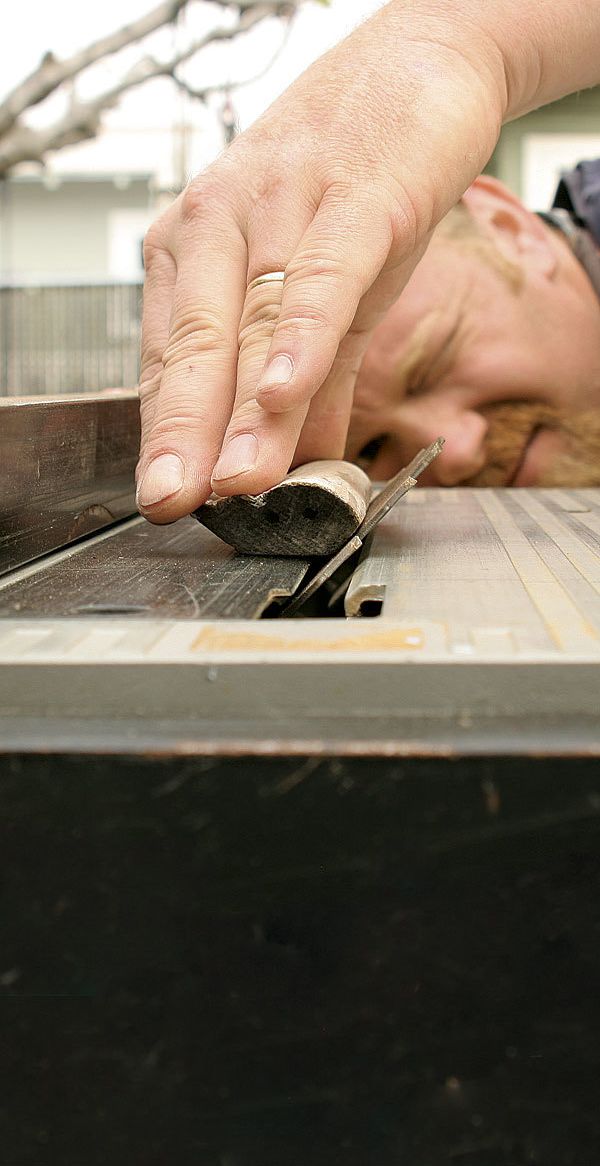
The first step is to mill the stock to the same dimensions as the molding to be copied. If it’s possible, use a square-cut piece of the original molding to trace the profile onto the end of the stock. This cutoff later can be used to set the tablesaw blade. If the molding can’t be removed, trace the profile onto an index card, then transfer this to the stock. A fine-point marker offers a thin, clean line in most cases, but if the wood is dark, consider a white-colored pencil.
For more photos and details, click the View PDF button below:


