Hammer Drill-Driver
Learn how a hammer driver works in this in-depth look at variable speed and torque settings, and the three modes of operation: hammer, drill, and drive
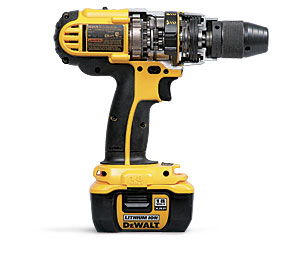
The hammer mechanism is located behind a spring in the gear-case assembly.
Hammer drill-drivers are major tool manufacturers’ most-prized and most-sought-after drills. They have a powerful 18v Li-ion battery, a beefy 1/2-in. chuck, variable speed and torque settings to match a broad range of tasks, and a hammer function that helps to punch through extrahard materials. Simply put, they are a must-have tool for anyone who works on a house.
In the tool test article, “18v Li-Ion Hammer Drills“, senior editor Justin Fink and contributors Andy Beasley and Kit Camp sort through seven hammer drill-driver models to find the top performer. Each manufacturer has a slightly different take, but their approach to the tool is essentially the same. If you’re looking to buy a hammer drill-driver or if you’re looking to get optimum performance from your current drill, you should understand the features and components that make it useful. Here’s how it works.
Mode Selection
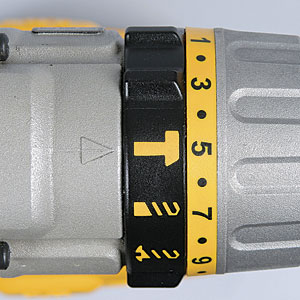
Every drill in this category has three mode settings: hammer, drill, and drive. The differences are simple and help to ensure that the drill operates at peak performance for a given application.
Hammer mode overrides the torque adjustment and introduces a pulsating action that helps to force masonry bits through concrete, brick, and stone.
Drill mode overrides the torque adjustment and delivers maximum torque to the bit. This ensures that the drill will not clutch out during drilling.
Drive mode engages the torque-adjustment setting so that screws of various sizes can be driven to a controlled depth.
Speed Setting
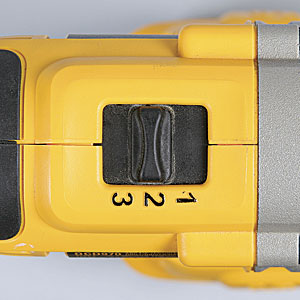
Most drills have two speed settings on top of the motor. (The DeWalt model is the only one with three.) Like the transmission in a truck, a drill’s first gear spins the chuck slowly but supplies the drill’s greatest output torque. Each subsequent gear increases drilling or driving speed, but not without sacrificing the amount of torque delivered to the bit.
Gear 1: Spins at roughly 400 rpm (depending on the model) and is ideal for driving large screws in dense materials or for boring large-diameter holes with spade bits, auger bits, or hole saws.
Gear 2 or 3: Typically spins at around 1800 rpm, which makes the drill perform best when drilling holes with twist bits or when running lots of small-diameter screws.
Torque Adjustment
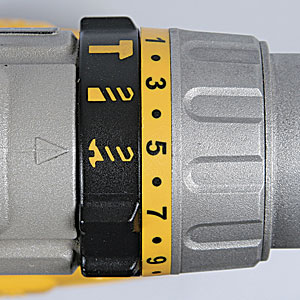
Surprisingly, gobs of torque isn’t always a good thing. So manufacturers outfit their drills with as many as 25 torque settings, typically referred to as the clutch, for greater control over the tool. Fine-tuning the proper setting is a matter of trial and error, so all adjustments should be made on scrap stock.
Light 1-7: In this range, the drill will have a greater tendency to clutch out under resistance. This is a benefit when installing hardware, like drawer slides or shelf standards that can be damaged from overtightening. It’s also a good range for driving brass screws, which are soft and easily stripped out.
Medium 7-14: The driving capabilities in this spectrum are not great enough for heavy-duty work, but are perfectly suited for assembling plywood cabinet carcases and MDF built-ins with pilot holes. At the low end of the range, the screws are more apt to sit flush with the material’s surface. At the high end, the screws sit just below the finished surface before the drill clutches out.
Hard 14-21: You’ll spend most of your time in this high range. These settings help to deliver the most torque to the fastener, which is a benefit when driving lag bolts into deck framing or long screws into dense hardwoods, such as ipé. While these high-torque adjustment settings are capable of burying a fastener well above its head, the drill’s variable-speed trigger helps to maintain some sense of control.
Hammer Mechanism
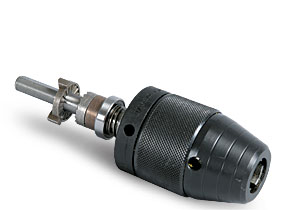
These drills don’t hit with the force of a rotary hammer, but they offer added performance when drilling holes in masonry. This feature is used most often for drilling small-diameter holes for Tapcon screws.
1. Positioning the drill in hammer mode engages a spring that forces two internal ratcheting disks together. One disk rotates with the drive shaft, and one remains in a fixed position.
2. As the drive shaft turns, one disk rotates against the other, which creates a pulsating action that drives the bit into the material being drilled. It’s similar to hitting the back of the drill with a hammer, only at a rate of approximately 34,000 blows per minute (for the DeWalt DCD970, shown here).
3. The size, spacing, and depth of the teeth on each disk are precisely engineered to be in sync with the rotational speed of the chuck. For example, if the rotating ratcheting disk spins too quickly or slowly, its teeth will not engage the teeth on the fixed disk. For this reason, some manufacturers recommend a specific speed setting while the hammer function is engaged.
Photos: Rodney Diaz
