Replace a Rotten Lally Column
A proper footing and post add floor support that will never fail again.
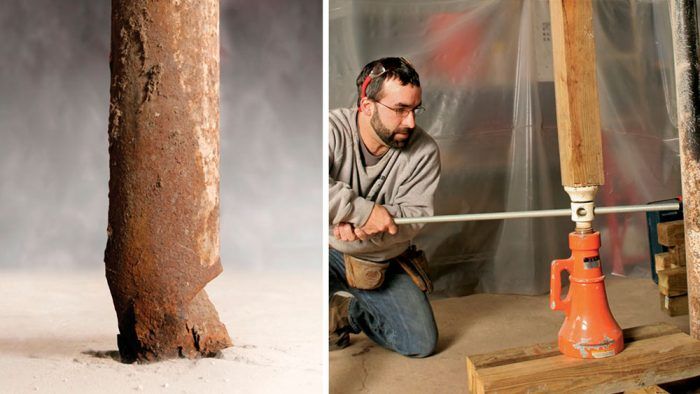
Synopsis: In many older homes, floor joists sag, the result of inferior, hollow Lally columns that have deteriorated and no longer provide the necessary floor support. Author Emanuel Silva, a restoration and remodeling carpenter in the Boston area, has replaced many such columns, and in this article he shows how he did it in one particular home. He began by jacking up the beam just enough so that he could remove the old column. The basement slab was thin, and the existing footing was little more than stones thrown in a hole, so he punched an opening through the slab, dug down, and poured a new concrete footing. Because the basement had moisture problems, he decided to build a pier to raise the column above the floor. Step-by-step instructions and detailed photos make this a thorough guide to replacing a Lally column.
As a restoration and remodelling carpenter in and around Boston, I get to work on a lot of old homes. The years have not been good to many of these old structures. Over the past 15 years, I’ve been called to address sagging floor joists and their support beams so often that shoring them up has almost become routine. Many of these older floor systems were supported by inferior, hollow Lally columns — steel pipes typically filled with concrete for increased durability and load-bearing capacity temporary jack posts, and even tree trunks. To make matters worse, they were typically set atop equally inferior footings, or on no footing at all.
By temporarily supporting and jacking up the beam just enough to loosen the existing column, I can create enough workspace to install a proper footing and Lally column. I don’t attempt to fix sagging or otherwise unlevel floors. My goal is simply to prevent further settling.
The house shown here has moisture problems as well, thanks to surrounding properties that seem to channel all their rainwater toward its foundation. While the concrete Lally columns will likely survive occasional flooding, I decided to anchor them atop small piers for longevity. However, the process is roughly the same whether you want columns raised or set flush to the slab.
Build cribbing to support temporary posts
When removing an existing column, it’s imperative that the temporary supports are as strong as the new columns being installed. Because most of the homes I work on have slabs that are in poor condition, I try to spread the load by building cribbing. The cribbing serves as a strong, level base in which I can place screw jacks. With the jacks in place, I can use 4×4 pressure-treated posts to raise the beam safely. It’s best to install these supports roughly 1 1⁄2 ft. from the location of the new footing. This lends the support you need and allows comfortable working room.
Punch a square hole in the old slab
This slab was in bad shape and, at 2 1⁄2 in. thick, thinner than the slabs poured nowadays. From my experience, I knew that if a footing existed, it would be little more than stones thrown in a hole. I was right. Not all footings have to be rebuilt, though. Assess the condition of the slab, and look for signs that the home was built to high standards. When in complete doubt, dig.
For more photos and details, click the View PDF button below:


