FHB Logo Facebook LinkedIn Email Pinterest Twitter X Instagram Tiktok YouTube Plus Icon Close Icon Navigation Search Icon Navigation Search Icon Arrow Down Icon Video Guide Icon Article Guide Icon Modal Close Icon Guide Search Icon Skip to content
Subscribe
Log In
  • How-To
  • Design
  • Tools & Materials
  • Restoration
  • Videos
  • Blogs
  • Forum
  • Magazine
  • Members
  • FHB House
  • Podcast
Log In

Fine Homebuilding Project Guides

Windows & Doors

Guide Home
  • Choosing Windows
  • Installing Windows In New Walls
  • Retrofitting Windows
  • Window Repairs
  • Door Basics
  • Interior Doors
  • Exterior Doors
How-To

Replace a Wood Window: Part 2

With the old window removed, carpenter Scott Grice outlines the steps necessary to install the replacement window.

By Scott Grice Issue 209
  • X
  • facebook
  • linkedin
  • pinterest
  • email
  • add to favorites Log in or Sign up to save your favorite articles

Synopsis: Wood windows look great on old houses, but they sometimes need to be replaced. In the second part of a two-part “Building Skills” article, carpenter Scott Grice continues outlining the steps necessary to replace a wood window. First, set the window in the opening and secure it to the framing. Next, apply the exterior trim, being sure to back-caulk it all the way around, and install the metal cap flashing above the head casing. Finally, insulate and trim the exterior. This article includes a sidebar about expanding polyurethane foam. Read the article from Part 1 here.

WATCH THE VIDEO SERIES:

How to Replace a Window with Scott Grice

Go step-by-step through the process of replacing your old wooden windows. Six episodes covering everything you need to know to upgrade your old wooden windows. Learn how to preserve or match your existing trim and siding for a simpler install. And learn best practices for insulating a new window.

Remodeling, repairing, and upgrading older homes often presents challenging circumstances. Rough openings are often out of square or out of plane. Weatherizing is like trying to make a Wiffle ball airtight, and plumb and straight are often less important than parallel and perpendicular. In other words, the success of a project like the window replacement shown here often lies in the compromises.

For example, if this had been a new home or a remodel that entailed stripping the siding, I would have lapped house wrap into the rough opening first. I also may have used a flanged window, which would have allowed me to lay flexible flashings over the house wrap and onto the window.

SET AND SECURE THE WINDOW

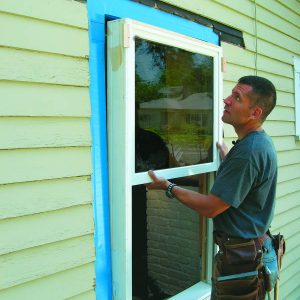
1. Set the window in the opening

Stop blocks help to align the window flush with the sheathing. Insert shims between the side of the window and the framing at the top and bottom to hold the window in place temporarily.

2. Center the window to the siding

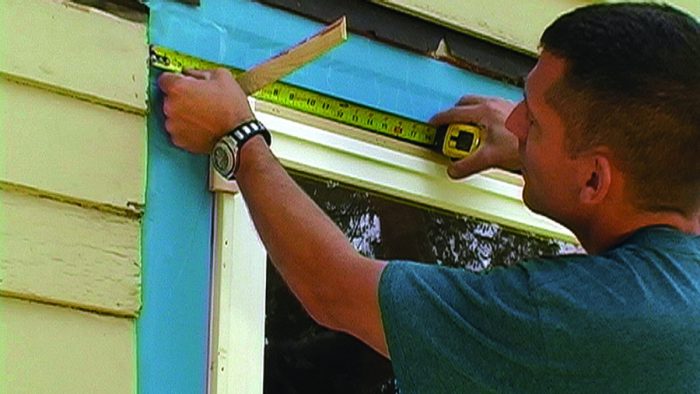
Adjust the shims to center the window. Use a level to ensure that the window is plumb, then cross-measure and square the window to within 1⁄8 in. This should closely match the center of the rough opening. If the existing edge of the siding is out of plumb by more than 1⁄4 in., you may have to taper the trim or cut the siding to make up the difference.


3. Secure the window

Shim the window every 2 ft. or so along the sides (but do not shim or use fasteners above the window), and drive trim-head screws through the jamb into the framing at the shim locations. With a level, ensure that the window frame is straight. If necessary, back out the screws, and adjust them. As a final check, make sure that the sashes move up and down smoothly.

APPLY EXTERIOR TRIM

4. Install the head casing

For wooden windows without a plastic flange, the trim helps secure the window in place and acts as a weather barrier. Back-caulk all exterior trim (applying a fat bead of caulk around the perimeter of the trim’s back face). Use 15-ga. nails to attach the trim to the window jamb and to the framing. Once the head trim is installed, apply metal cap flashing. If necessary, replace the one piece of siding above the window to aid in the cap-flashing installation.

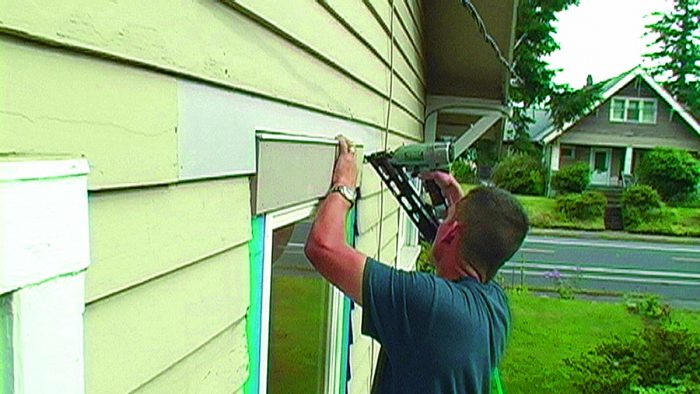
5. Install the side casing

Size the window trim to leave a 1⁄4-in. to 3⁄8-in. jamb reveal and to abut tightly against the existing siding. As with the head casing, prime the side casing on all sides and back-caulk it during installation. Bevel the bottom of the casing leg if it rests on a sloped windowsill. Last, keep a uniform nailing pattern for an ordered and pleasing final look.

INSULATE AND TRIM THE INTERIOR

6. Fill the cracks

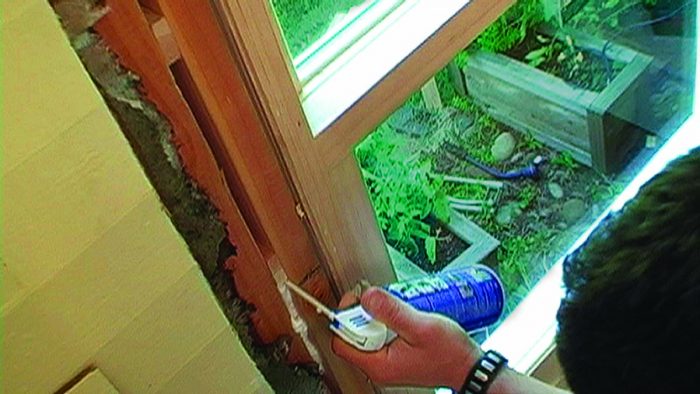
Use low-volume expanding foam to fill the void between the window jamb and the framing.


7. Apply the interior trim

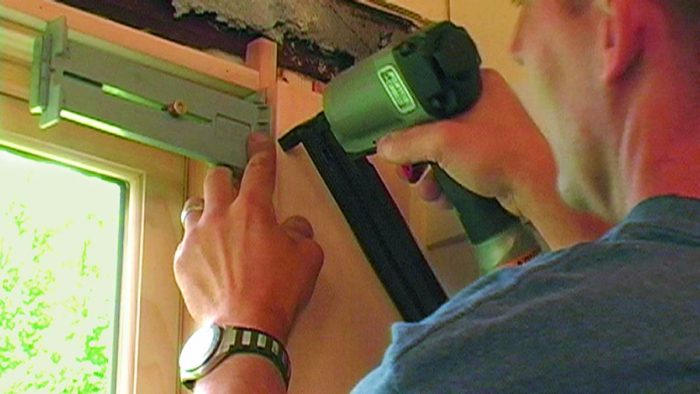
Like the outside trim, the interior trim helps to secure the window in place. Use 18-ga. fasteners for the trim-to-window connection and 16-ga. fasteners for the trim-to-framing connection. As shown in the photo below, you can use a reveal gauge to maintain a consistent reveal between the edge of the trim and the edge of the window jamb.


For more photos and details, click the View PDF button below:


View PDF
Previous: Replace a Wood Window: Part 1 Next: How to Install Replacement Windows

Guide

Windows & Doors

Chapter

Retrofitting Windows

Sign up for eletters today and get the latest how-to from Fine Homebuilding, plus special offers.

Signing you up...

This site is protected by reCAPTCHA and the Google Privacy Policy and Terms of Service apply.
See all newsletters
See all newsletters

View Comments

  1. empowersarchitect | May 20, 2016 03:59pm | #1

    The PDF button leads to a Page Not Found. Is there a PDF for this article?

  2. ChrisCasey | Aug 13, 2016 12:17am | #2

    It works now.

Log in or create an account to post a comment.

Sign up Log in

Become a member and get full access to FineHomebuilding.com

Windows & Doors

Windows & Doors

Trusted, comprehensive guidance from the pros for choosing, installing, replacing, and repairing windows and doors on any house

View Project Guide

View All Project Guides »

Become a member and get unlimited site access, including the Windows & Doors Project Guide.

Start Free Trial

Choosing Windows
  • Window Types
  • Design and Materials
  • Energy-Efficient Windows
Installing Windows In New Walls
  • Installation, Start to Finish
  • Head Flashing for Windows
  • Video Series: Nail-Fin Window over Zip System Sheathing
  • Video Series: Nail-Fin Window over Exterior Rigid-Foam Insulation
  • Video Series: Nail-Fin Window over Housewrap
  • Video Series: Nail-Fin Window over Peel-and-Stick Housewrap
  • Video Series: Nail-Fin Window over a Fluid-Applied WRB
  • Video Series: Weatherproof Window Installation
Retrofitting Windows
  • Removing the Old, Installing the New
  • Video Series: How to Replace a Window
  • Video Series: Install a Full-Frame Replacement Window in a Brick Wall
  • Video Series: Install an Insert Replacement Window in a Brick Wall
  • Video Series: Retrofit a Flanged Window
Window Repairs
  • Restoring Old Windows
  • Repairs and Upgrades
Door Basics
  • Tools & Jigs for Door Hanging
  • How to Install Doors
  • Hinges
  • Handles, Knobs, and Locksets
  • Fixing Door Problems
Interior Doors
  • Prehung Doors
  • Pocket Doors
  • Other Types of Doors
  • Custom-Built Doors
Exterior Doors
  • Door Choices and Design
  • Installing Entry Doors
  • Building Exterior Doors
  • Installing French Doors
  • Replacing a Door
  • Adding Weatherstripping and Sweeps

Fine Home Building

Newsletter Sign-up

  • Fine Homebuilding

    Home building tips, offers, and expert advice in your inbox.

  • Green Building Advisor

    Building science and energy efficiency advice, plus special offers, in your inbox.

  • Old House Journal

    Repair, renovation, and restoration tips, plus special offers, in your inbox.

Signing you up...

This site is protected by reCAPTCHA and the Google Privacy Policy and Terms of Service apply.
See all newsletters

Follow

  • Fine Homebuilding

    Dig into cutting-edge approaches and decades of proven solutions with total access to our experts and tradespeople.

    Start Free Trial Now
    • Facebook
    • Instagram
    • X
    • LinkedIn
  • GBA Prime

    Get instant access to the latest developments in green building, research, and reports from the field.

    Start Free Trial Now
    • Facebook
    • YouTube
  • Old House Journal

    Learn how to restore, repair, update, and decorate your home.

    Subscribe Now
    • Facebook
    • Instagram
    • X

Membership & Magazine

  • Online Archive
  • Start Free Trial
  • Magazine Subscription
  • Magazine Renewal
  • Gift a Subscription
  • Customer Support
  • Privacy Preferences
  • About
  • Contact
  • Advertise
  • Careers
  • Terms of Use
  • Site Map
  • Do not sell or share my information
  • Privacy Policy
  • Accessibility
  • California Privacy Rights

© 2025 Active Interest Media. All rights reserved.

Fine Homebuilding receives a commission for items purchased through links on this site, including Amazon Associates and other affiliate advertising programs.

  • Home Group
  • Antique Trader
  • Arts & Crafts Homes
  • Bank Note Reporter
  • Cabin Life
  • Cuisine at Home
  • Fine Gardening
  • Fine Woodworking
  • Green Building Advisor
  • Garden Gate
  • Horticulture
  • Keep Craft Alive
  • Log Home Living
  • Military Trader/Vehicles
  • Numismatic News
  • Numismaster
  • Old Cars Weekly
  • Old House Journal
  • Period Homes
  • Popular Woodworking
  • Script
  • ShopNotes
  • Sports Collectors Digest
  • Threads
  • Timber Home Living
  • Traditional Building
  • Woodsmith
  • World Coin News
  • Writer's Digest
Active Interest Media logo
X
X
This is a dialog window which overlays the main content of the page. The modal window is a 'site map' of the most critical areas of the site. Pressing the Escape (ESC) button will close the modal and bring you back to where you were on the page.

Main Menu

  • How-To
  • Design
  • Tools & Materials
  • Video
  • Blogs
  • Forum
  • Project Guides
  • Reader Projects
  • Magazine
  • Members
  • FHB House

Podcasts

  • FHB Podcast
  • ProTalk

Webinars

  • Upcoming and On-Demand

Podcasts

  • FHB Podcast
  • ProTalk

Webinars

  • Upcoming and On-Demand

Popular Topics

  • Kitchens
  • Business
  • Bedrooms
  • Roofs
  • Architecture and Design
  • Green Building
  • Decks
  • Framing
  • Safety
  • Remodeling
  • Bathrooms
  • Windows
  • Tilework
  • Ceilings
  • HVAC

Magazine

  • Current Issue
  • Past Issues
  • Magazine Index
  • Subscribe
  • Online Archive
  • Author Guidelines

All Access

  • Member Home
  • Start Free Trial
  • Gift Membership

Online Learning

  • Courses
  • Project Guides
  • Reader Projects
  • Podcast

More

  • FHB Ambassadors
  • FHB House
  • Customer Support

Account

  • Log In
  • Join

Newsletter

Get home building tips, offers, and expert advice in your inbox

Signing you up...

This site is protected by reCAPTCHA and the Google Privacy Policy and Terms of Service apply.
See all newsletters
See all newsletters

Follow

  • X
  • YouTube
  • instagram
  • facebook
  • pinterest
  • Tiktok

Join All Access

Become a member and get instant access to thousands of videos, how-tos, tool reviews, and design features.

Start Your Free Trial

Subscribe

FHB Magazine

Start your subscription today and save up to 81%

Subscribe

We hope you’ve enjoyed your free articles. To keep reading, become a member today.

Get complete site access to expert advice, how-to videos, Code Check, and more, plus the print magazine.

Start your FREE trial

Already a member? Log in

Privacy Policy Update

We use cookies, pixels, script and other tracking technologies to analyze and improve our service, to improve and personalize content, and for advertising to you. We also share information about your use of our site with third-party social media, advertising and analytics partners. You can view our Privacy Policy here and our Terms of Use here.

Cookies

Analytics

These cookies help us track site metrics to improve our sites and provide a better user experience.

Advertising/Social Media

These cookies are used to serve advertisements aligned with your interests.

Essential

These cookies are required to provide basic functions like page navigation and access to secure areas of the website.

Delete My Data

Delete all cookies and associated data