FHB Logo Facebook LinkedIn Email Pinterest Twitter X Instagram Tiktok YouTube Plus Icon Close Icon Navigation Search Icon Navigation Search Icon Arrow Down Icon Video Guide Icon Article Guide Icon Modal Close Icon Guide Search Icon Skip to content
Subscribe
Log In
  • How-To
  • Design
  • Tools & Materials
  • Restoration
  • Videos
  • Blogs
  • Forum
  • Magazine
  • Members
  • FHB House
  • Podcast
Log In

Fine Homebuilding Project Guides

Finish & Trim Carpentry

Guide Home
  • Trim Design
  • Tools and Materials
  • Interior Trim Basics
  • Window and Door Casings
  • Baseboard and Crown Molding
  • Wainscot and Paneling
  • Mantels and Fireplace Surrounds
  • Coffered Ceilings
How-To

Router Jig for Cutting Tapered Flutes

Learn how to use a router in combination with a simple ramp to produce period-accurate fluted columns.

By Gary M. Katz Issue 210
  • X
  • facebook
  • linkedin
  • pinterest
  • email
  • add to favorites Log in or Sign up to save your favorite articles

Victorian-style homes are mostly Greek-revival styles dressed up with Gothic ornamentation. One ornamental detail carried from Greek temples to Victorian-era design is the fluted column, which was often reincarnated as a flat pilaster. In renovation or restoration work, cutting the flutes is a necessary evil that makes reproduction possible. Along with the size and spacing of the flutes, you have to think about how they terminate.

I know of three ways to cut flutes with a router. The most common method creates a stopped flute that correctly echoes the classical example. But router bits often burn the stock when they stop moving forward at the end of a flute, unless the last pass is made at a very minimal depth. If the stock is finish-grade, a burn means extra time spent sanding.

To avoid the burn, some carpenters prefer to cut continuous flutes that run straight from plinth to cap. The result is a flute that stops abruptly without a terminating cove.

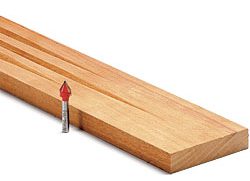
The third method is to taper the depth of the flutes as they terminate. Unfortunately, tapered flutes don’t really fit with most traditional Georgian- or federal-style details. But they work great on Victorian trim because they have the right Gothic feel, especially if you use a chamfer or V-groove bit (rather than a core-box bit) to cut the flutes.

In his article “Router Bits I Can’t Live Without” (FHB #173), Jim Chestnut figured out a way to taper the depth of the flute at each end to avoid the burn. He used a ramp that was screwed to the stock and a router fence.

setting up your tapered flute jig
(1) To register the stock so that the outer flutes are shorter than the center, remove the spacer at one end and pair it with the spacer at the far end, which pushes the stock toward the nearer stop block.

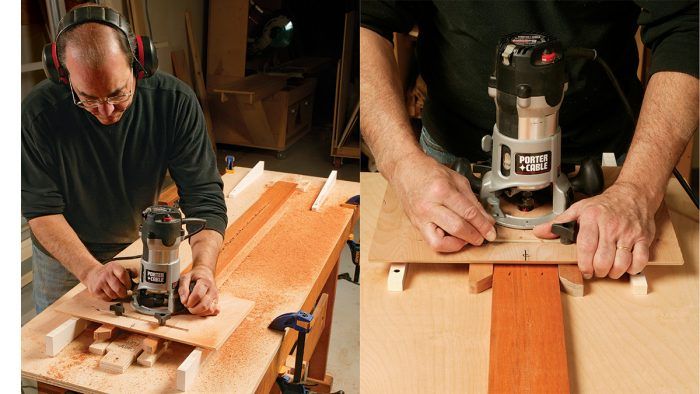
I took that idea and made a router sled with two adjustable fences that I can register to any width of stock. In turn, the stock is held in place on a plywood table. Ramps and stop blocks located at each end of the stock provide the setup for cutting the tapered flutes.

To estimate the ramp geometry, I drew the rise and run on a piece of stock. I wanted the tails of the flutes to be about 4 in. long (the run) and the cut to be about 3/8 in. deep (the rise). I found that I didn’t need to cut it to a sharp point. For instance, when fluting 3/4-in. material, the ramps should measure from about 1/2 in. tall to just over 1-1/8 in. tall (3/4 in. [thickness of material] + 3/8 in. [rise] = 1-1/8 in.). I cut the ramps longer and therefore taller, extending the angle of the ramp just to raise the bit before it enters the stock, because I hate accidents. I also cut the ramps from PVC trim so that they’d be slippery.

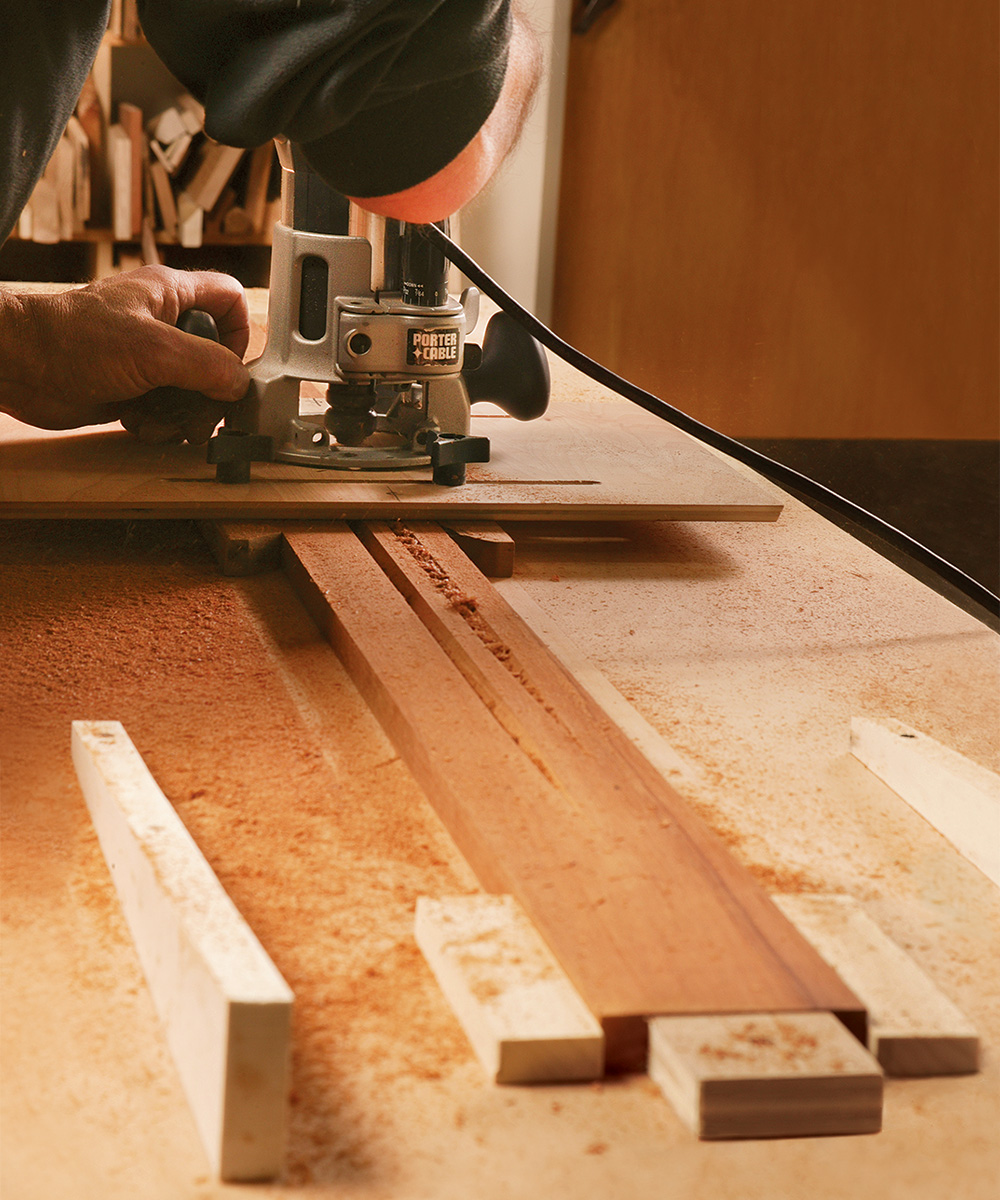
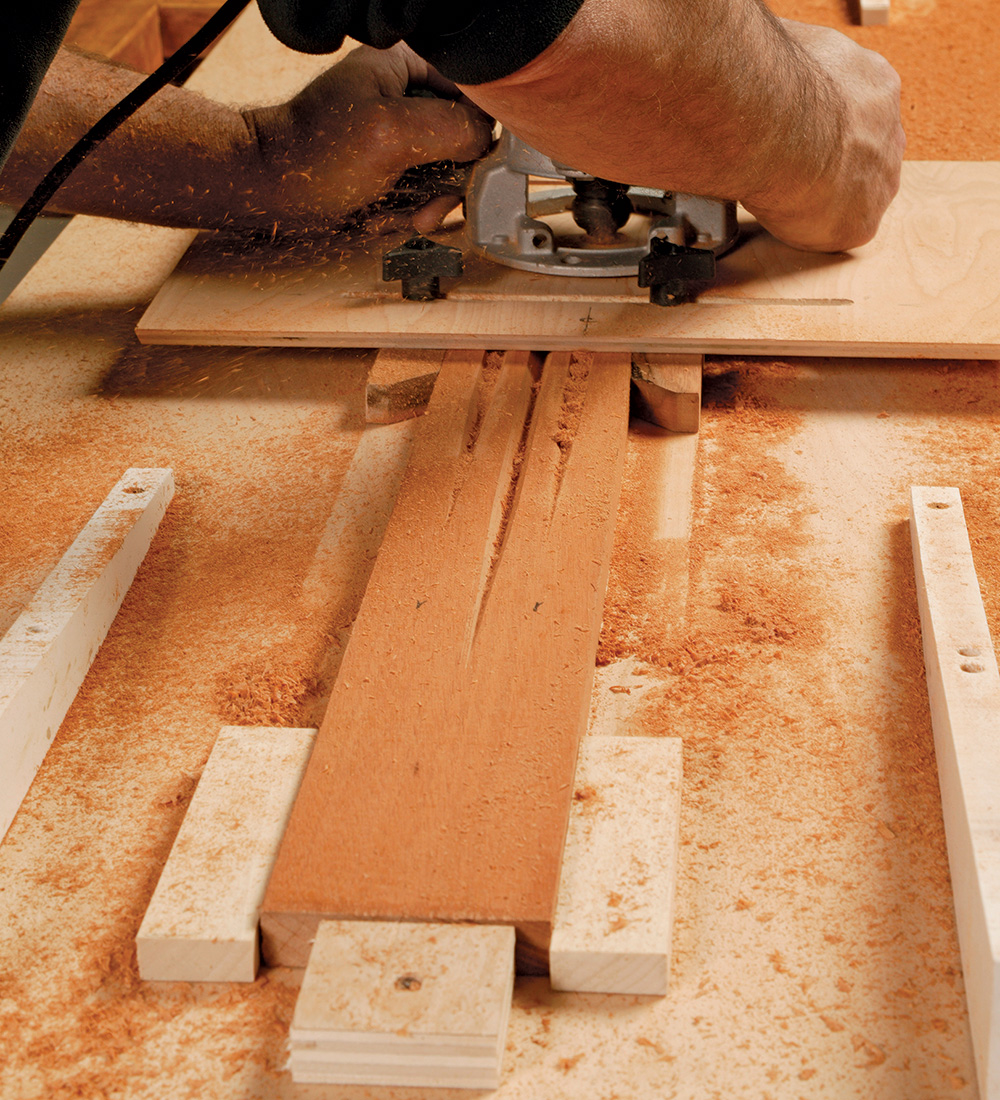
I registered the fences against the stock, then passed the router down the ramps along the length of the stock and up onto the ramps at the other end. I emphasized the length of the tapers so the flutes would slowly climb out of the stock. My advice is to cut several pieces of MDF to match your intended trim pieces and to make sure you have the whole system dialed in nicely before cutting hardwood. Like any production method, most of the time is spent on setup.

adjusting fences for router
(2) Adjust the fences so that the router is set to rout the outer flutes; be sure to stop the router in the middle of the stock.

removing spacers
(3) Next, remove the spacers, push the stock forward against the farther stop.
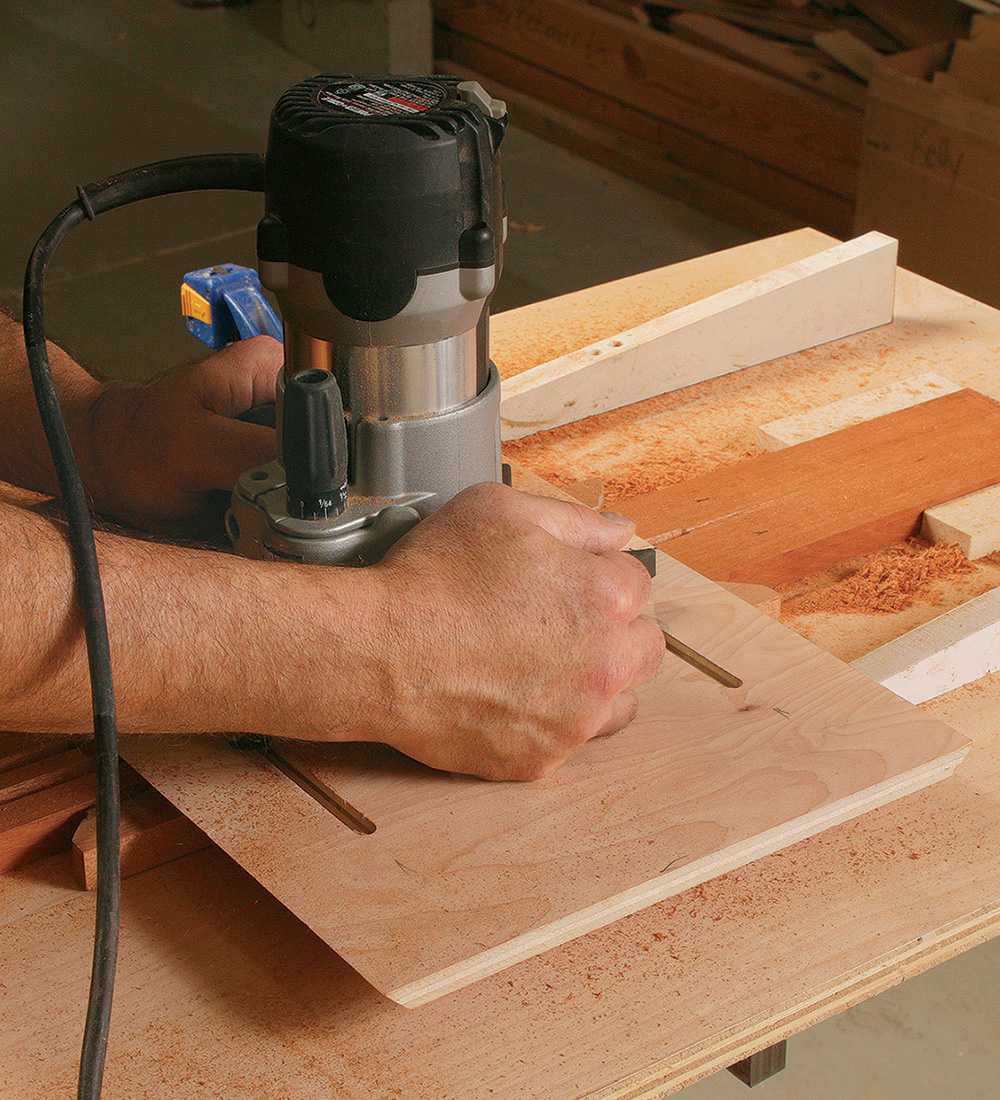
  • The router sled uses a double fence: After cutting parallel slots into a piece of 1/2-in. plywood, mount a router base to the sled. (Festool makes a quick-release guide that makes detaching the router a snap). Attach adjustable fences made from 1x stock through the slots. Chamfer the fences on the sled on both ends, and wax them so that they don’t hang up when they’re tightened down against the casing. Align the center line on the sled with the layout lines drawn on the casing.
  • The base holds the stock: Use a piece of plywood about 12 in. longer than the stock to allow enough room for stops and ramps. The location of stops and ramps is identical at each end. The distance between is determined by the length of the stock plus the stop blocks.
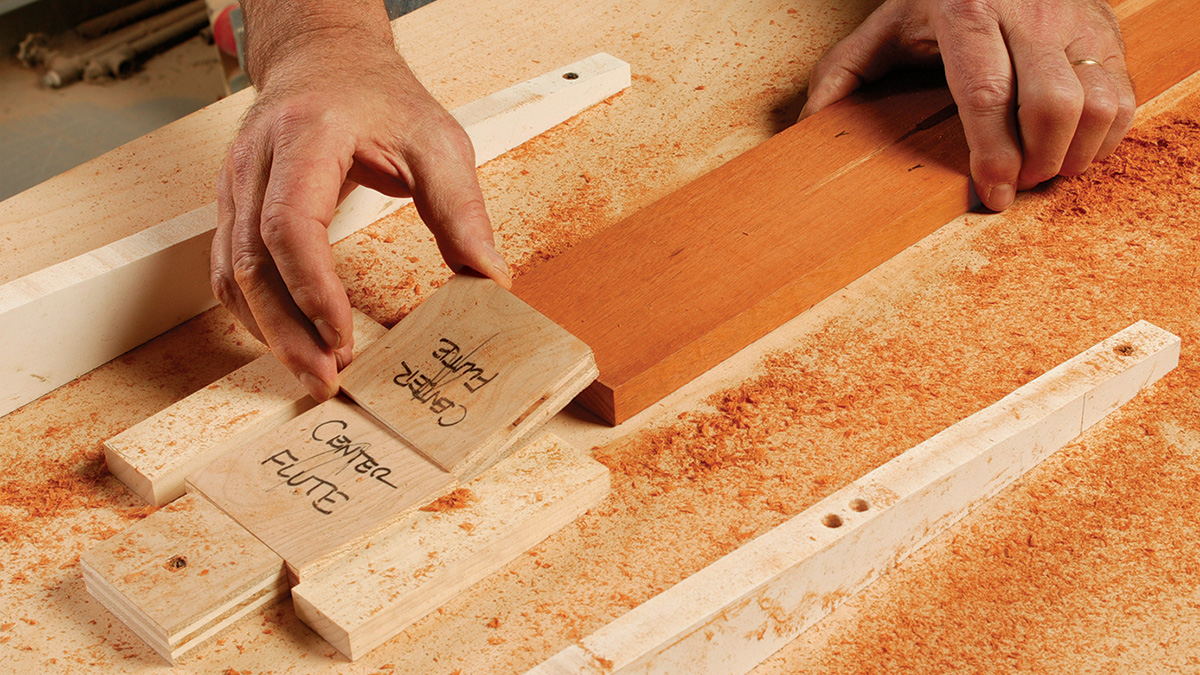
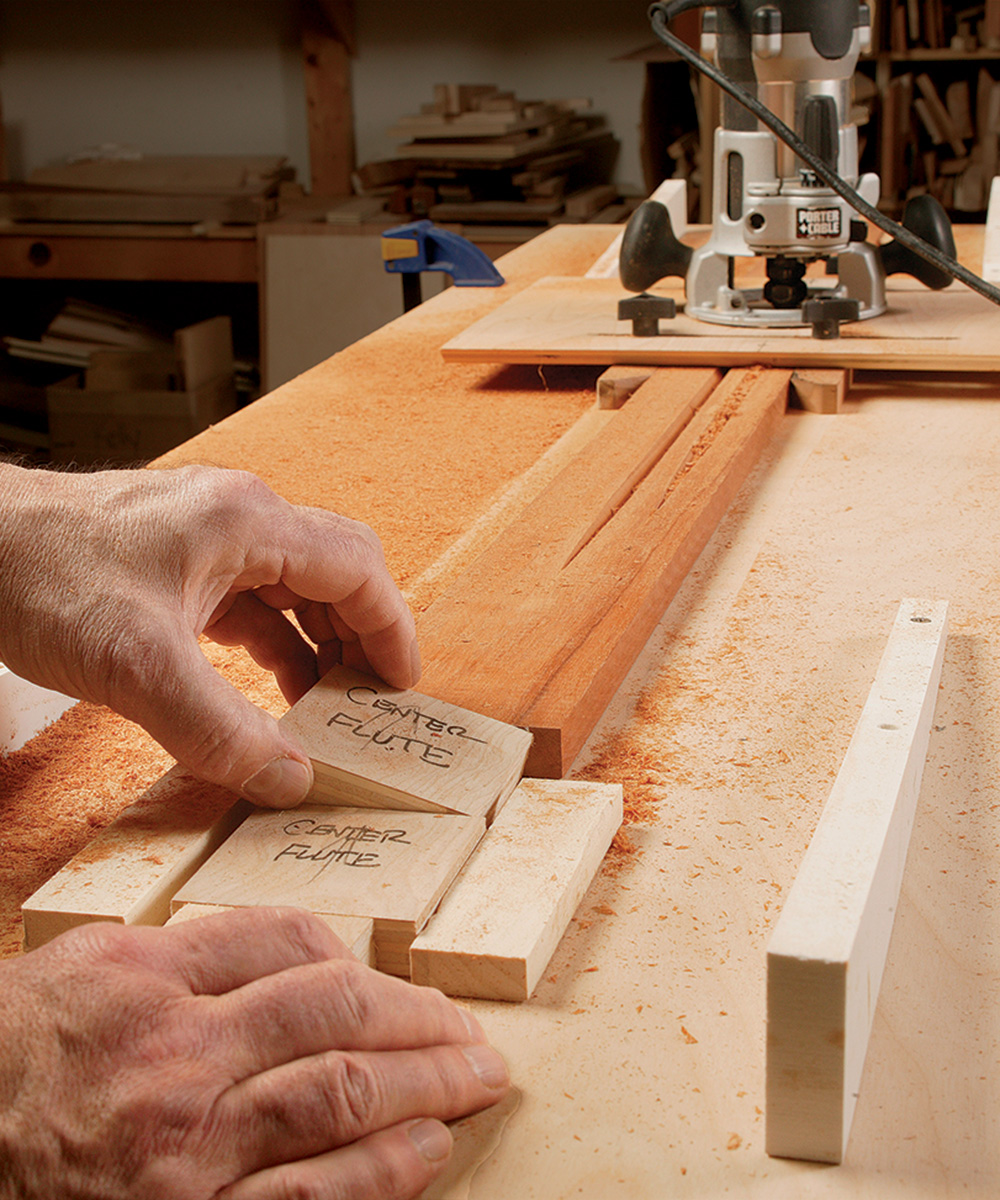
  • Spacer blocks determine the cut location: Because the ramps are fixed, the farther the stock slides toward the end of the table, the farther the flute’s starting point moves toward the center of the stock. To make the center flutes longer than the two outer flutes, place 3-in. spacers between the ends of the casing and the end blocks. With the stock held between the stops and spacers, cut the center flute.

Stop and start to cut the outer flutes

routing the flute
(4) Continue routing the flute.

using the flute jig on the other side
(5) Repeat the process for the opposite side.

To register the stock so that the outer flutes are shorter than the center, remove the spacer at one end and pair it with the spacer at the far end (1), which pushes the stock toward the nearer stop block. Adjust the fences so that the router is set to rout the outer flutes; be sure to stop the router in the middle of the stock (2). Next, remove the spacers, push the stock forward against the farther stop (3), and continue routing the flute (4). Repeat the process for the opposite side (5).


Tool of the Trade: Variation on a Theme

core-box bitTraditional flutes are cut with a core-box bit that produces the characteristic rounded profile. They’re the bit to use on federal- or Georgian-style trim. However, I’ve found that a 60° chamfer or V-groove bit does a great job when used on Victorian details. The bits are also available in angles from 15° to 90°, which allows a fair amount of customization. Prices for good-quality bits can range from about $20 to $60.


Photos: Rodney Diaz

From Fine Homebuilding #210

Previous: Mill Arched Trim with a Homemade Compass

Guide

Finish & Trim Carpentry

Chapter

Interior Trim Basics

Sign up for eletters today and get the latest how-to from Fine Homebuilding, plus special offers.

Signing you up...

This site is protected by reCAPTCHA and the Google Privacy Policy and Terms of Service apply.
See all newsletters
See all newsletters

View Comments

  1. user-7545904 | Sep 20, 2019 09:57am | #1

    I really appreciate this tip as I have been wondering how to make these tiered flutes. my question is in your first bullet above, you mention a festoon quick release jig. What is this jig?

    Thank you for your response.

Log in or create an account to post a comment.

Sign up Log in

Become a member and get full access to FineHomebuilding.com

Finish & Trim Carpentry

Finish & Trim Carpentry

Trusted, comprehensive guidance from the pros for creating perfect trim details in any room of the house

View Project Guide

View All Project Guides »

Become a member and get unlimited site access, including the Finish & Trim Carpentry Project Guide.

Start Free Trial

Trim Design
  • Trim Style and Design
Tools and Materials
  • Tools
  • Materials
Interior Trim Basics
  • Tips and Tricks
  • Techniques
  • Using Jigs
Window and Door Casings
  • Windows
  • Doors
Baseboard and Crown Molding
  • Baseboard
  • Crown Molding
  • Specialty Crown Situations
Wainscot and Paneling
  • Beadboard Wainscot
  • Paneled Wainscot
  • Chair Rails
  • Wall Treatments
Mantels and Fireplace Surrounds
  • Design
  • Installing Mantels and Surrounds
Coffered Ceilings

Fine Home Building

Newsletter Sign-up

  • Fine Homebuilding

    Home building tips, offers, and expert advice in your inbox.

  • Green Building Advisor

    Building science and energy efficiency advice, plus special offers, in your inbox.

  • Old House Journal

    Repair, renovation, and restoration tips, plus special offers, in your inbox.

Signing you up...

This site is protected by reCAPTCHA and the Google Privacy Policy and Terms of Service apply.
See all newsletters

Follow

  • Fine Homebuilding

    Dig into cutting-edge approaches and decades of proven solutions with total access to our experts and tradespeople.

    Start Free Trial Now
    • Facebook
    • Instagram
    • X
    • LinkedIn
  • GBA Prime

    Get instant access to the latest developments in green building, research, and reports from the field.

    Start Free Trial Now
    • Facebook
    • YouTube
  • Old House Journal

    Learn how to restore, repair, update, and decorate your home.

    Subscribe Now
    • Facebook
    • Instagram
    • X

Membership & Magazine

  • Online Archive
  • Start Free Trial
  • Magazine Subscription
  • Magazine Renewal
  • Gift a Subscription
  • Customer Support
  • Privacy Preferences
  • About
  • Contact
  • Advertise
  • Careers
  • Terms of Use
  • Site Map
  • Do not sell or share my information
  • Privacy Policy
  • Accessibility
  • California Privacy Rights

© 2025 Active Interest Media. All rights reserved.

Fine Homebuilding receives a commission for items purchased through links on this site, including Amazon Associates and other affiliate advertising programs.

  • Home Group
  • Antique Trader
  • Arts & Crafts Homes
  • Bank Note Reporter
  • Cabin Life
  • Cuisine at Home
  • Fine Gardening
  • Fine Woodworking
  • Green Building Advisor
  • Garden Gate
  • Horticulture
  • Keep Craft Alive
  • Log Home Living
  • Military Trader/Vehicles
  • Numismatic News
  • Numismaster
  • Old Cars Weekly
  • Old House Journal
  • Period Homes
  • Popular Woodworking
  • Script
  • ShopNotes
  • Sports Collectors Digest
  • Threads
  • Timber Home Living
  • Traditional Building
  • Woodsmith
  • World Coin News
  • Writer's Digest
Active Interest Media logo
X
X
This is a dialog window which overlays the main content of the page. The modal window is a 'site map' of the most critical areas of the site. Pressing the Escape (ESC) button will close the modal and bring you back to where you were on the page.

Main Menu

  • How-To
  • Design
  • Tools & Materials
  • Video
  • Blogs
  • Forum
  • Project Guides
  • Reader Projects
  • Magazine
  • Members
  • FHB House

Podcasts

  • FHB Podcast
  • ProTalk

Webinars

  • Upcoming and On-Demand

Podcasts

  • FHB Podcast
  • ProTalk

Webinars

  • Upcoming and On-Demand

Popular Topics

  • Kitchens
  • Business
  • Bedrooms
  • Roofs
  • Architecture and Design
  • Green Building
  • Decks
  • Framing
  • Safety
  • Remodeling
  • Bathrooms
  • Windows
  • Tilework
  • Ceilings
  • HVAC

Magazine

  • Current Issue
  • Past Issues
  • Magazine Index
  • Subscribe
  • Online Archive
  • Author Guidelines

All Access

  • Member Home
  • Start Free Trial
  • Gift Membership

Online Learning

  • Courses
  • Project Guides
  • Reader Projects
  • Podcast

More

  • FHB Ambassadors
  • FHB House
  • Customer Support

Account

  • Log In
  • Join

Newsletter

Get home building tips, offers, and expert advice in your inbox

Signing you up...

This site is protected by reCAPTCHA and the Google Privacy Policy and Terms of Service apply.
See all newsletters
See all newsletters

Follow

  • X
  • YouTube
  • instagram
  • facebook
  • pinterest
  • Tiktok

Join All Access

Become a member and get instant access to thousands of videos, how-tos, tool reviews, and design features.

Start Your Free Trial

Subscribe

FHB Magazine

Start your subscription today and save up to 81%

Subscribe

We hope you’ve enjoyed your free articles. To keep reading, become a member today.

Get complete site access to expert advice, how-to videos, Code Check, and more, plus the print magazine.

Start your FREE trial

Already a member? Log in

Privacy Policy Update

We use cookies, pixels, script and other tracking technologies to analyze and improve our service, to improve and personalize content, and for advertising to you. We also share information about your use of our site with third-party social media, advertising and analytics partners. You can view our Privacy Policy here and our Terms of Use here.

Cookies

Analytics

These cookies help us track site metrics to improve our sites and provide a better user experience.

Advertising/Social Media

These cookies are used to serve advertisements aligned with your interests.

Essential

These cookies are required to provide basic functions like page navigation and access to secure areas of the website.

Delete My Data

Delete all cookies and associated data