The Light in the Tunnel
Thankfully, the light I was seeing in the end of the tunnel turned out to be the daylight of completion, not just a freight train of more problems coming through the other way!
Rebuilding Process
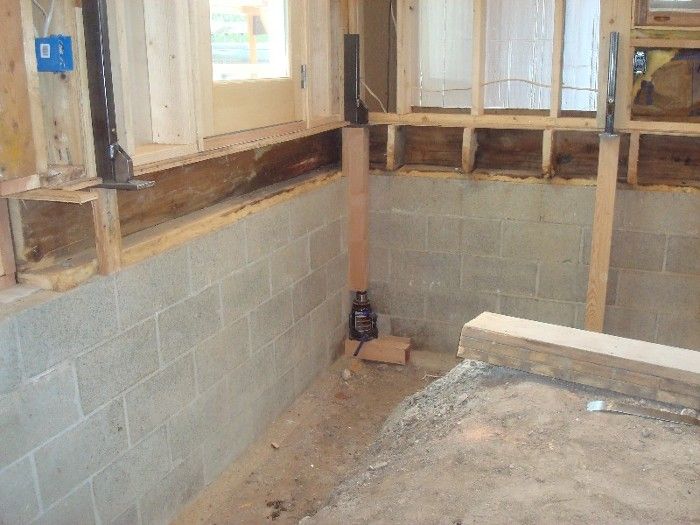
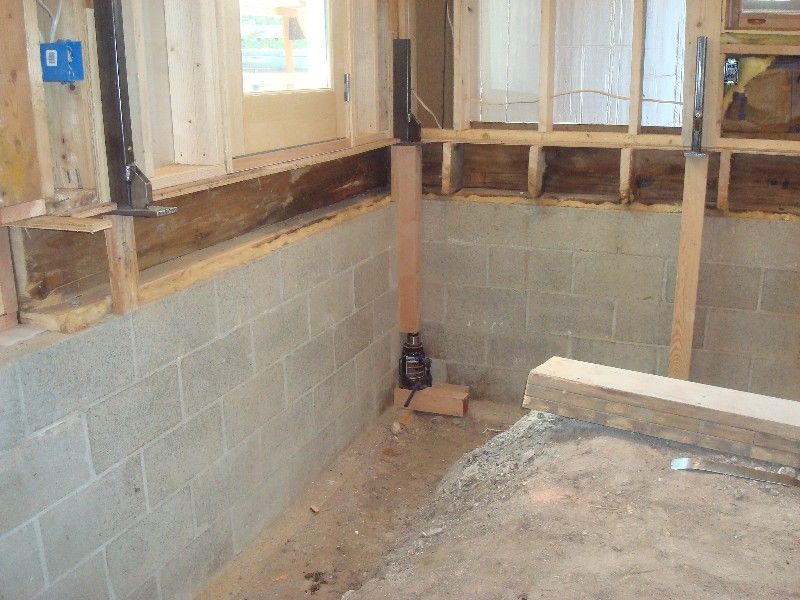
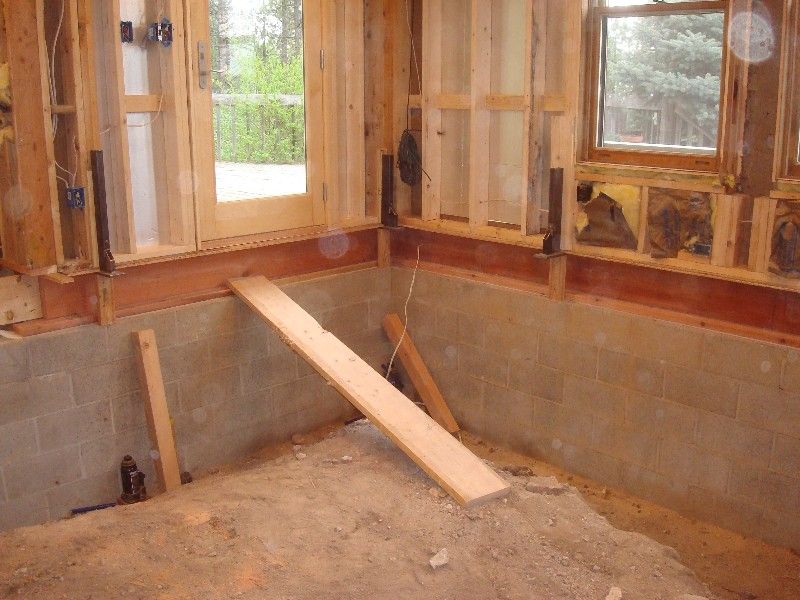
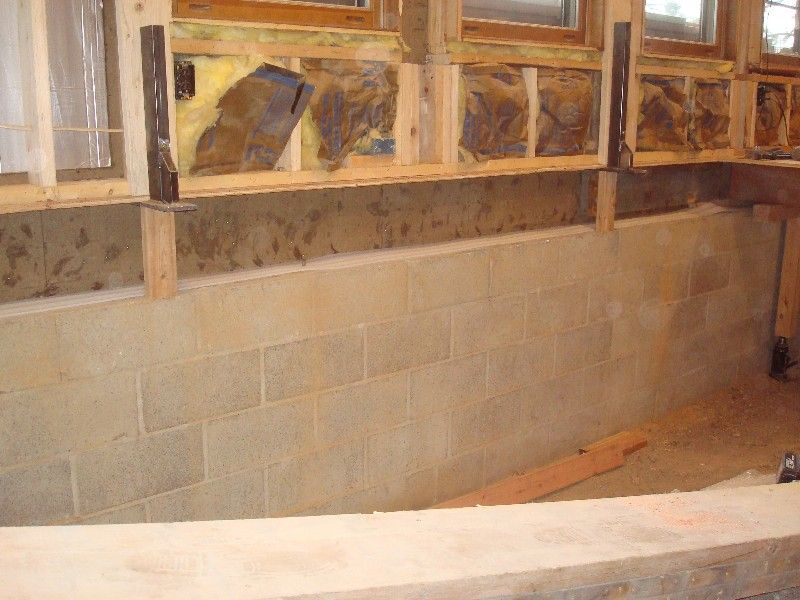
The welded steel lifting fixtures did a great job of taking the weight off the floor framing to allow removal and replacement of the rotted members as well as restoring the proper elevation for the subfloor. The rotted, compressed joist system had settled a full 3/4″ in the worst areas and is now back to level like new. With the weight of the walls supported with the lifting fixtures I was able to remove the rotted rim joist and sill plates, clean up all the debris, nails and stuff to prepare for installing new pieces. Some of the rot was caused by moisture condensing on the wood during winter months. The rest of the deterioration was water damage caused by improper building methods. First, there was no felt paper layer over the 3/4″ fuzzboard sheathing under the pine ship-lap siding. Next, the rim joists of the deck outside this room was just nailed to the face of the siding, without flashing where, over time, dirt accumulated, got wet and stayed wet, and eventually rotted all the way through the water logged rim joist, siding, fuzzboard and rim joists. I was able to put a layer of a heavy PVC sheet on the outside of the new framing to prevent water damage between now and when the decks get replaced later this year.
Out of the Tunnel
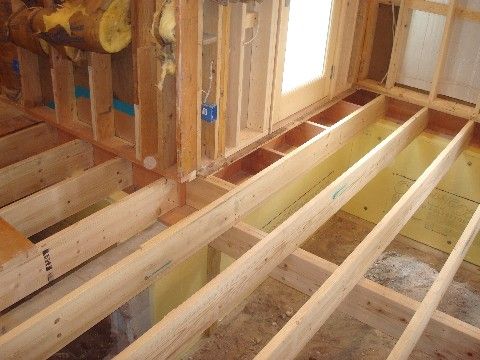
With all the rotted and moldy wood replaced, wrapping up this nightmare was straightforward carpentry. A new mid-span support beam was put in first with plinth blocks to support it. With the walls still supported with an extra 1/4″ of height for working room, new floor joists were set. Once all the framing was in place I removed the fixtures to let the new framing support the walls and structure above.
Pound of Prevention
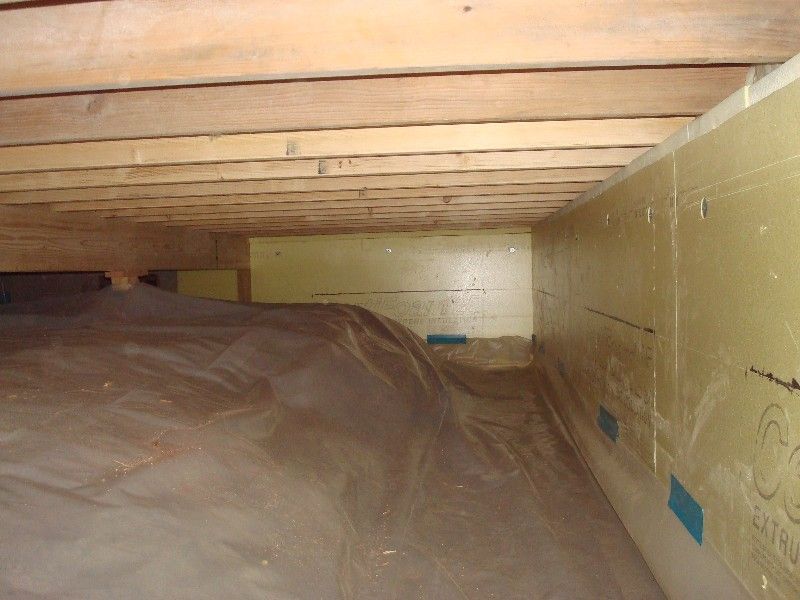
If an ounce of prevention is worth a pound of cure, I figure a pound of prevention should be worth roughly a ton of cure, which seems about what this project needs to stay fixed. With this idea in mind I mechanically fastened 2″ EPS foam to the inside of the foundation wall faces and tops, and then used batts to insulate the rim joist areas. Even though ground water was not a contributing factor to the original condensation problem a layer of 6 mil poly went down to cover the rock/dirt floor to prevent any future condensation from soaking into the soil. The crawlspace floor is far too irregular to get a 100% seal, so we plan to close off the space from outside and rely on interior space conditioned air to prevent moisture build up. I’ll monitor conditions as seasons change and consider adding a humidistat/temperature controlled vent in the future if required to maintain a dry, healthy environment and prevent this from becoming a recurring nightmare.
Fine Homebuilding Recommended Products
Fine Homebuilding receives a commission for items purchased through links on this site, including Amazon Associates and other affiliate advertising programs.

8067 All-Weather Flashing Tape

Reliable Crimp Connectors

Handy Heat Gun





View Comments
Having sealed the crawl space in my own house, I would strongly suggest installing a dehumidifier in the crawl space that can run at lower temperatures. Run a fixed drain line from the dehumidifier to an inside drain. This will really help prevent the moisture levels from reaching the point that caused all the rot in the first place. Thanks for sharing this horror story with us. There was at least redemption at the end of it all.
Andre
Mr. Jackson,
What are the name of those lifting fixtures you're using? I do this type of work fairly often and those would be perfect.
Thanks,
Matt
Edola,
I created the lifting fixtures specifically for this job in a design I came up with for the particular situtation I was confronted with. I whipped them up in my shop with some scrap steel I had on hand. Any local steel fab shop should be able to make something similar for your job conditions at a price.
I could add a close-up photo of the fixtures to the blog post if you are interested.
Matt Jackson
The Timber Tailor