FHB Logo Facebook LinkedIn Email Pinterest Twitter X Instagram Tiktok YouTube Plus Icon Close Icon Navigation Search Icon Navigation Search Icon Arrow Down Icon Video Guide Icon Article Guide Icon Modal Close Icon Guide Search Icon Skip to content
Subscribe
Log In
  • How-To
  • Design
  • Tools & Materials
  • Restoration
  • Videos
  • Blogs
  • Forum
  • Magazine
  • Members
  • FHB House
  • Podcast
Log In

Fine Homebuilding Project Guides

Windows & Doors

Guide Home
  • Choosing Windows
  • Installing Windows In New Walls
  • Retrofitting Windows
  • Window Repairs
  • Door Basics
  • Interior Doors
  • Exterior Doors
How-To

Troubleshooting a Prehung Door Installation

If you know where things go wrong, you can install a door that will swing the way it’s meant to for years to come.

By Tucker Windover Issue 217
  • X
  • facebook
  • linkedin
  • pinterest
  • email
  • add to favorites Log in or Sign up to save your favorite articles


Synopsis: Even when the factory has mounted the hinges and assembled the jambs, prehung doors still can be tricky to install. Finish carpenter Tucker Windover begins by assigning one carpenter to each side of a door. This team approach makes installation faster than two people working solo. In this article, he outlines nine steps for a basic installation of a solid-core prehung door, then gives solutions for five potential problems: (1) A bowed jamb above the top hinge creates a gap that’s too tight on the strike side; (2) the gap at the head is too tight on one side; (3) the gap at the head is too big on one side; (4) the door doesn’t close evenly against the stop; and (5) the door doesn’t close properly because the hinges are binding or because the hinge-side gap is too big.

The whole point of prehung doors is to save money on materials and labor, right? But even when the factory has mounted the hinges and assembled the jamb, a prehung door still can be tricky to install. After installing enough of these doors to spot the pitfalls, I have developed a series of techniques that explain away the mysteries and improve installations.

A prehung door assembly is really just a rectangle (the slab) swinging inside a rectangle (the jamb). I think of the door slab as a template for the jamb. The trick is to establish and maintain a consistent gap between the two, which should translate to a properly operating door.

Although prehung doors are far and away the most common setup found on a job site, there are some variations. The doors themselves may either be hollow core or solid core. Some prehungs (usually hollow core) are set in split jambs that fit together with a tongue and groove. These doors have casing already applied for a simple, one-person installation. The methods that I describe here, though, were developed to tackle the heavier solid-core doors.

Get Started Before The Door Delivery

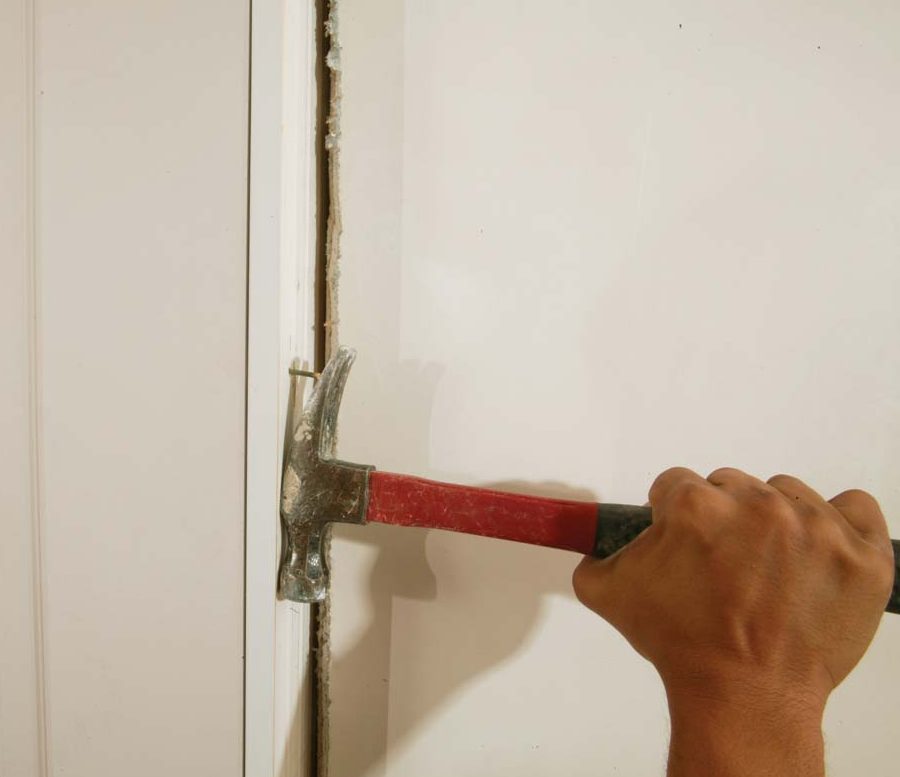
The first thing my crew and I do before the doors arrive is trim back the drywall from the frame. To make distribution efficient, we mark the door size on the hinge side of the frame and indicate its direction of swing with an arrow. When the doors are delivered, we place each one as close as possible to its intended location.

The existing conditions of the floors and walls are usually more important than the level. For example, if I’m installing a closet door in the corner of a room and the adjacent wall is out of plumb, I typically follow the wall. A plumb door in this situation creates noticeably converging lines. At this stage of construction, I prefer to keep the lines running parallel. While one side of the door may be adjacent to an out-of-plumb wall, the other side’s head jamb may need to be aligned with that of a nearby door. The solution is to split the difference between one side and the other. This situation happens a lot, and it’s one of the reasons I prefer to hang doors with a partner.

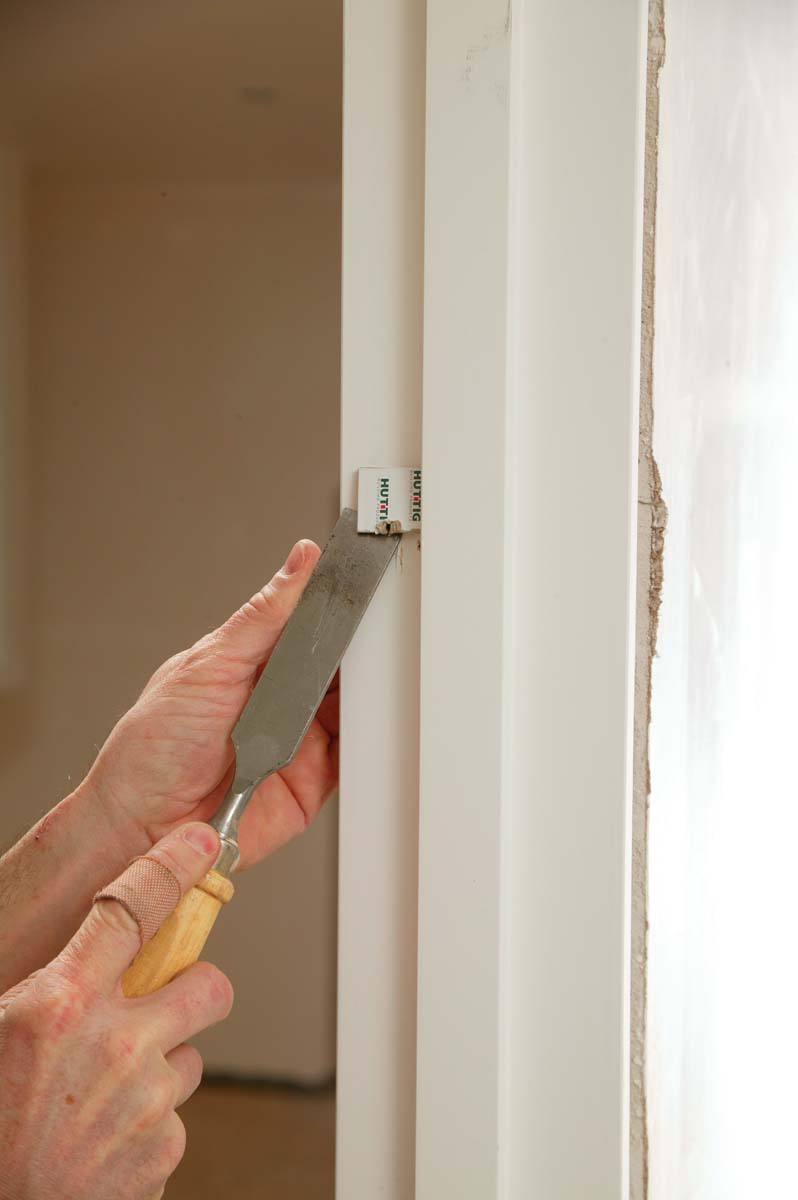
The other thing that no longer surprises me is finding a wall — even in new construction — that’s a bit wider (and occasionally narrower) than the jamb. By the time you add up the factors of a twisted or misaligned stud, a proud nail head in the rough frame, or built-up joint compound on the drywall, the wall thickness can easily exceed the jamb width by 3⁄16 in. or more. This can make the casing installation tricky, especially where the casing is mitered. Typically, when the jamb is more than 1⁄8 in. shy of the drywall, I install a jamb extension to make up the difference because trying to make a neat miter joint over uneven surfaces is a time-consuming chore. The simpler solution is to center the head jamb between the sheets of drywall, with each side just a little shy of the plaster. Any straightedge that can span the corner of the rough opening will give a quick and accurate reading of the jamb’s relation to the plane of the drywall. My colleague Alex and I take readings on each side of the wall, and we work together to split the difference.

It’s A Job For Two

I achieve the most consistent results with prehung doors when I work in tandem with another carpenter. Although prehung doors are sold as a one-man job, there’s too much to do on both sides of the door for one person to accomplish efficiently. Sometimes you’re trying to install a door so that it’s equal in height to an adjacent door, while at the same time centering the door in the opening, maintaining even gaps, shimming, and nailing. It’s easier with two people, and once you’ve established a rhythm, it’s quick. One person eyes the gap on one side, and the other person nails the jamb on the stop side. You don’t need two carpenters to install every door, but when you’ve got momentum, it’s nice to have those extra hands.


A Basic Installation In Nine Steps

Alex has a 6-ft. level, and he stands on the interior of the door to establish a plumb hinge side and to check the gap around the door.

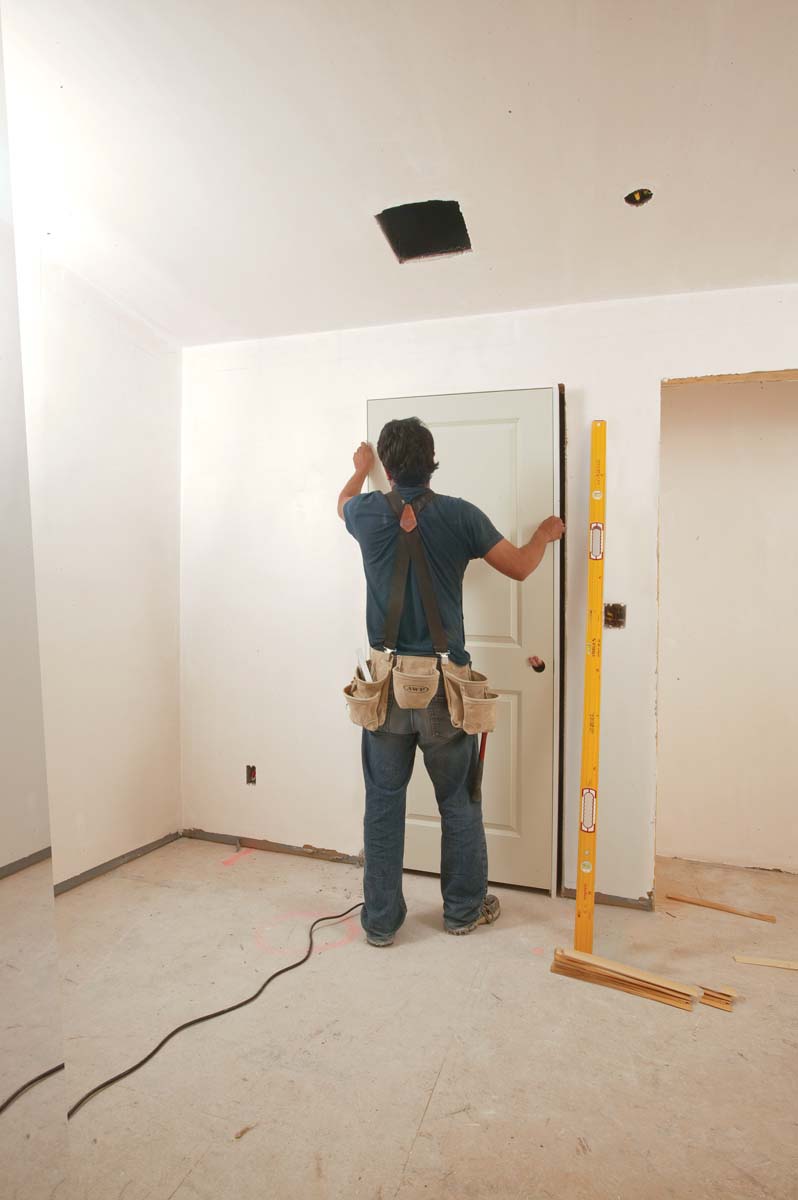
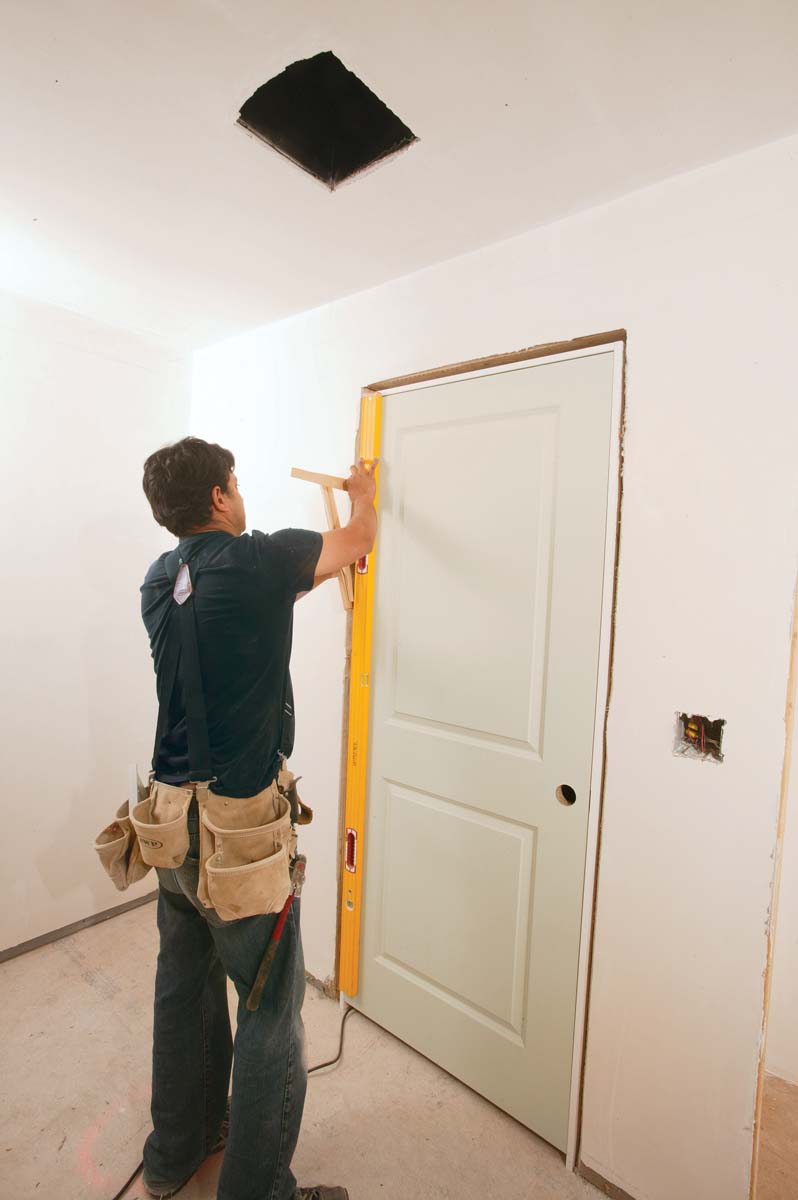
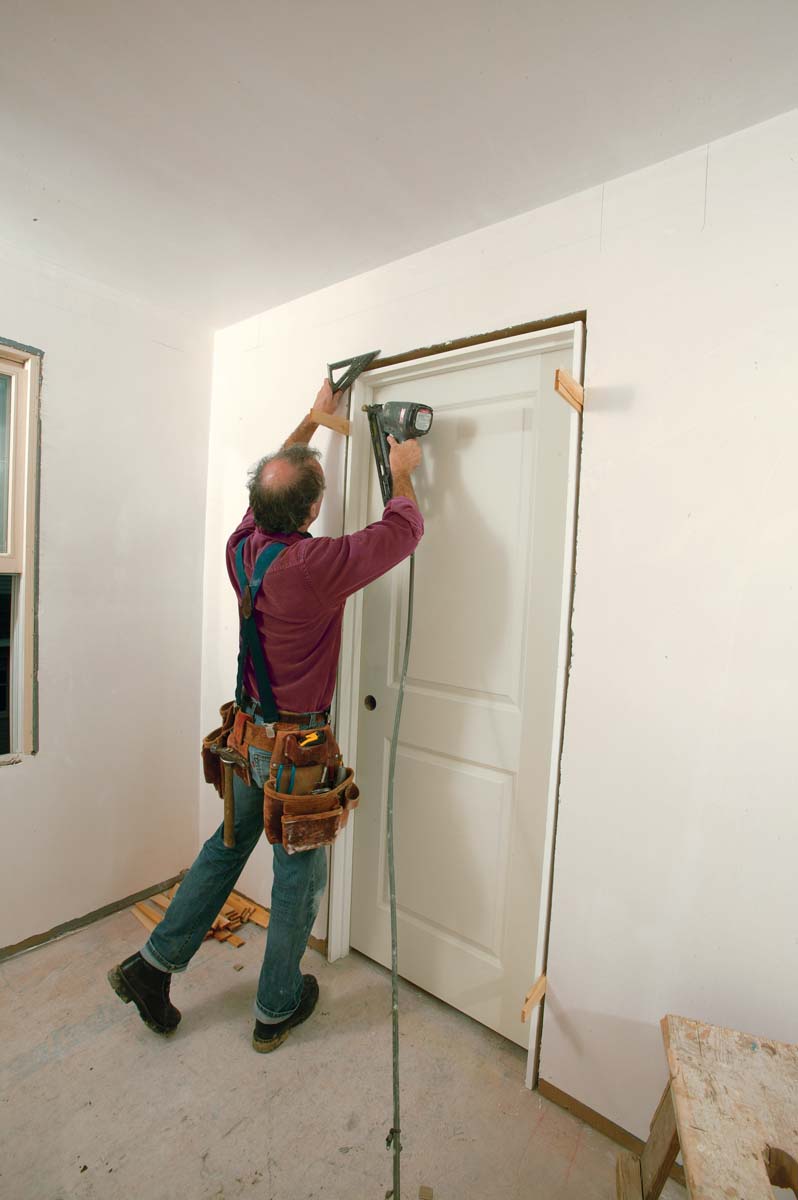
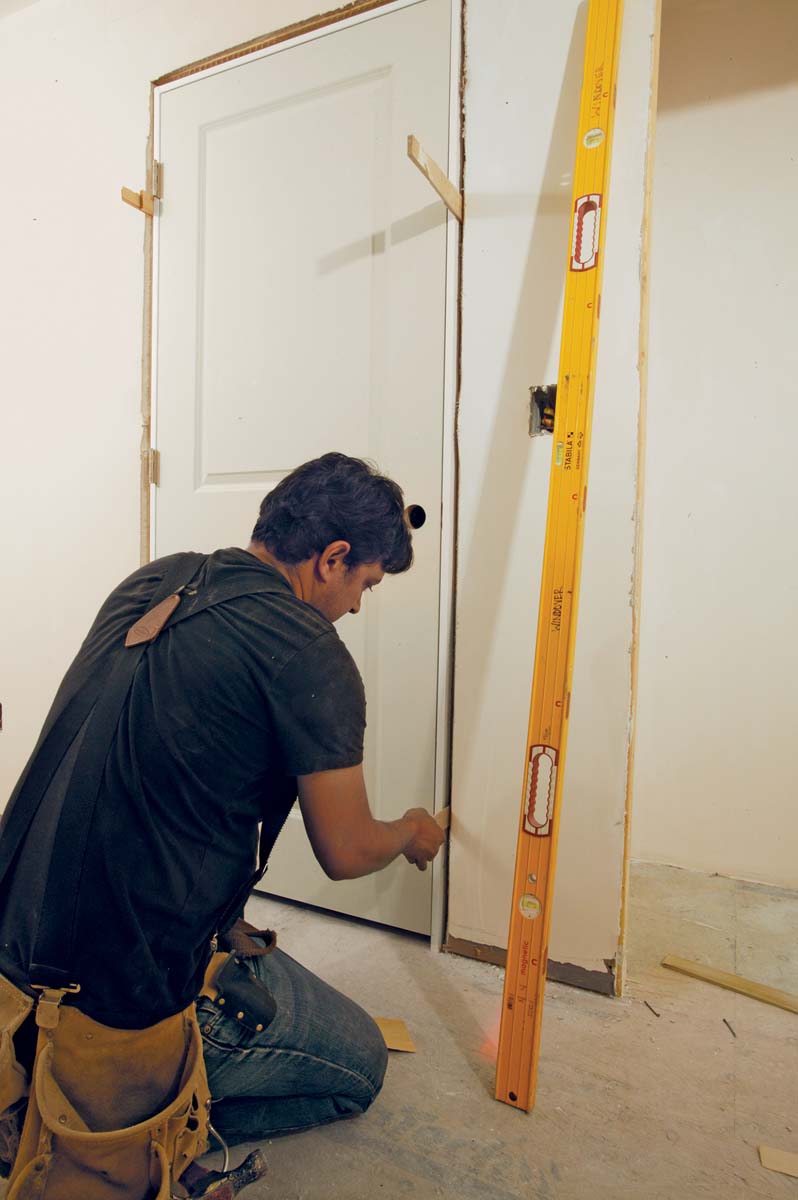
1. Two carpenters are better than one. Alex has a 6-ft. level, and he stands on the interior of the door to establish a plumb hinge side and to check the gap around the door. Tucker stands at the door’s exterior with shims and a nail gun. Alex can see when each jamb’s gap is consistent and tells Tucker when to adjust or nail.

Shims are placed just under the top and bottom hinges.
Speed Squares on both sides verify that the jamb is flush with the drywall.

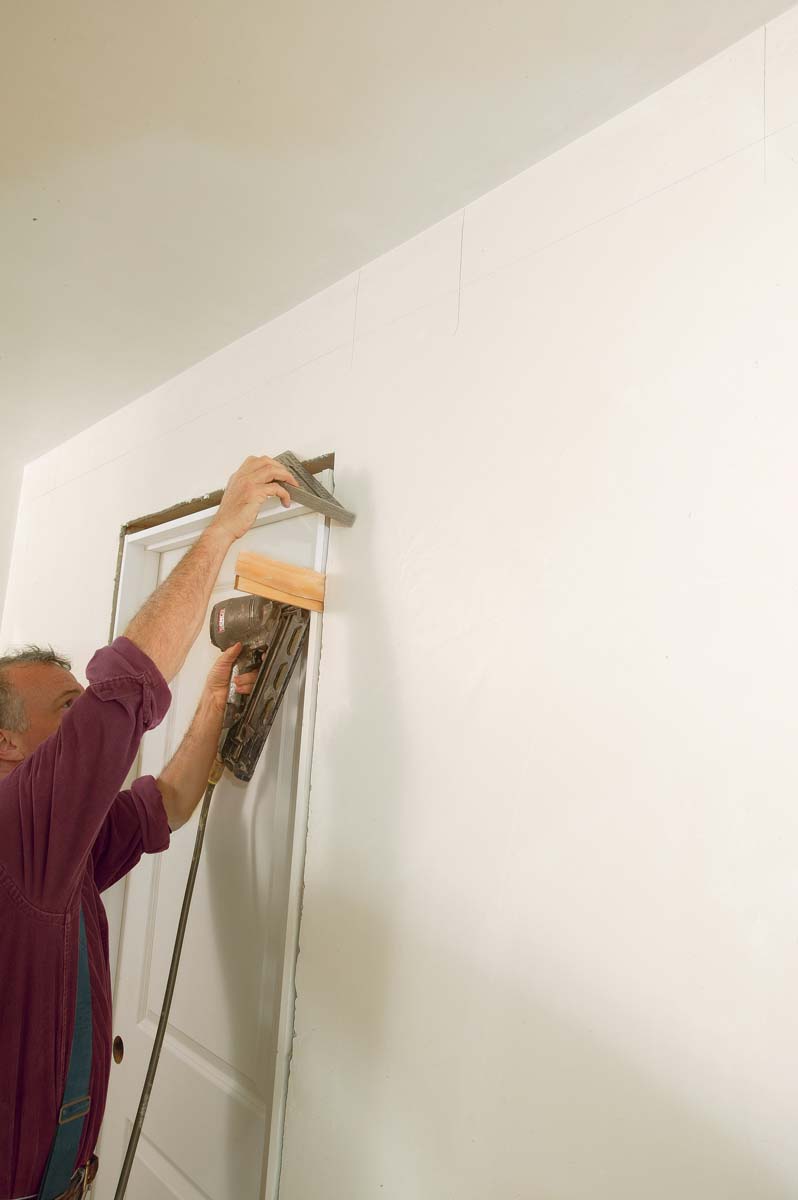
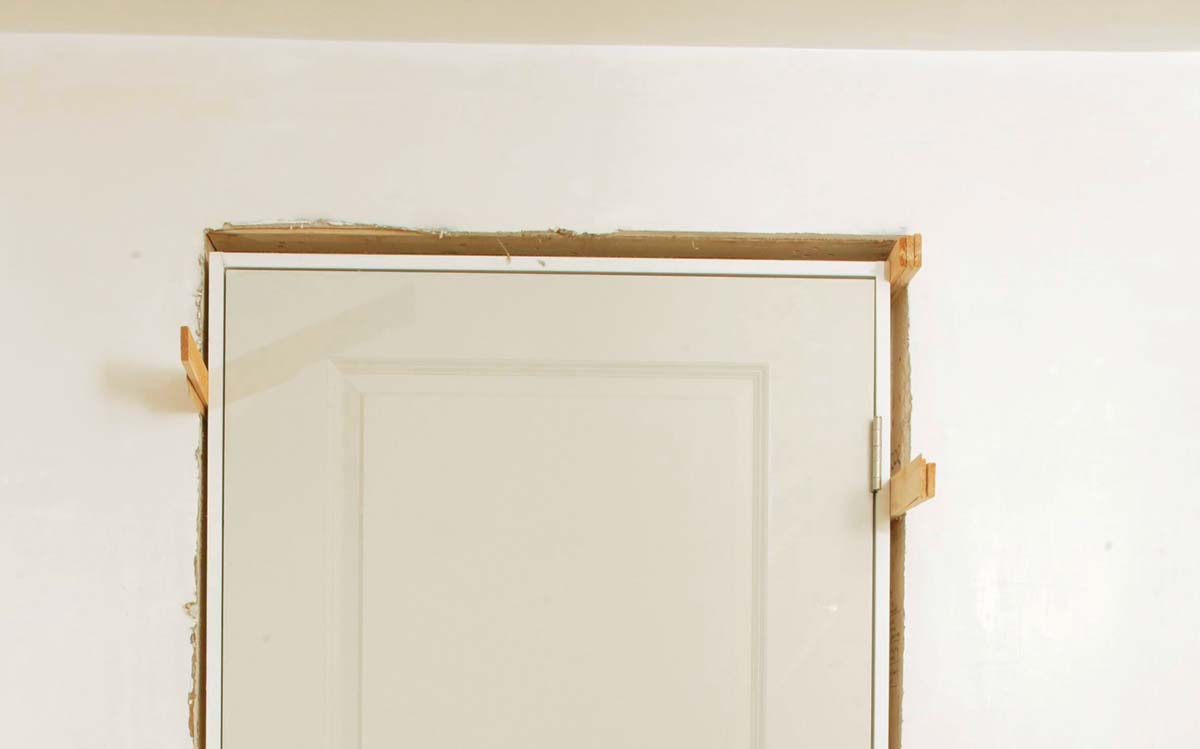
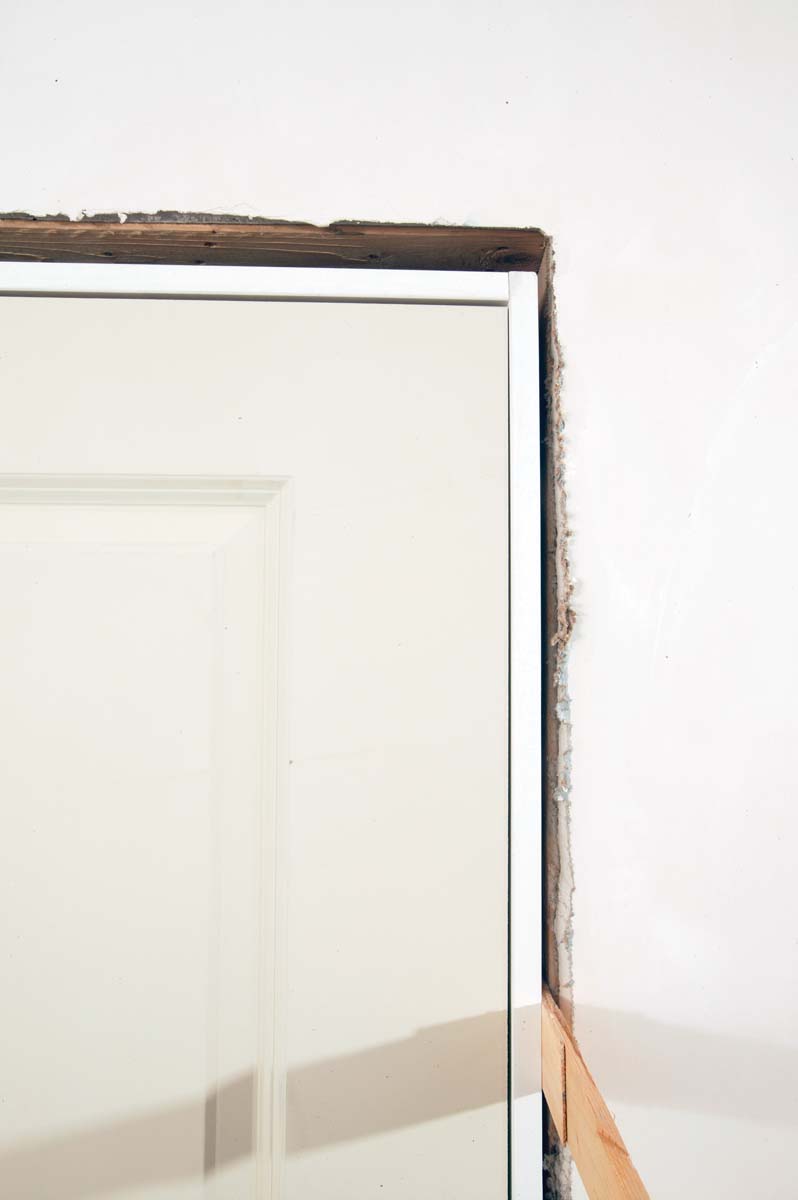
2,3. Start at the hinges. Shims are placed just under the top and bottom hinges. When the jamb is plumb, Tucker nails the jamb at the shims. Speed Squares on both sides verify that the jamb is flush with the drywall.

Remove the nail holding the door to the jamb and any cardboard shims stapled to the edge of the door.
Now the door will operate as dictated by the position of the hinge jamb.

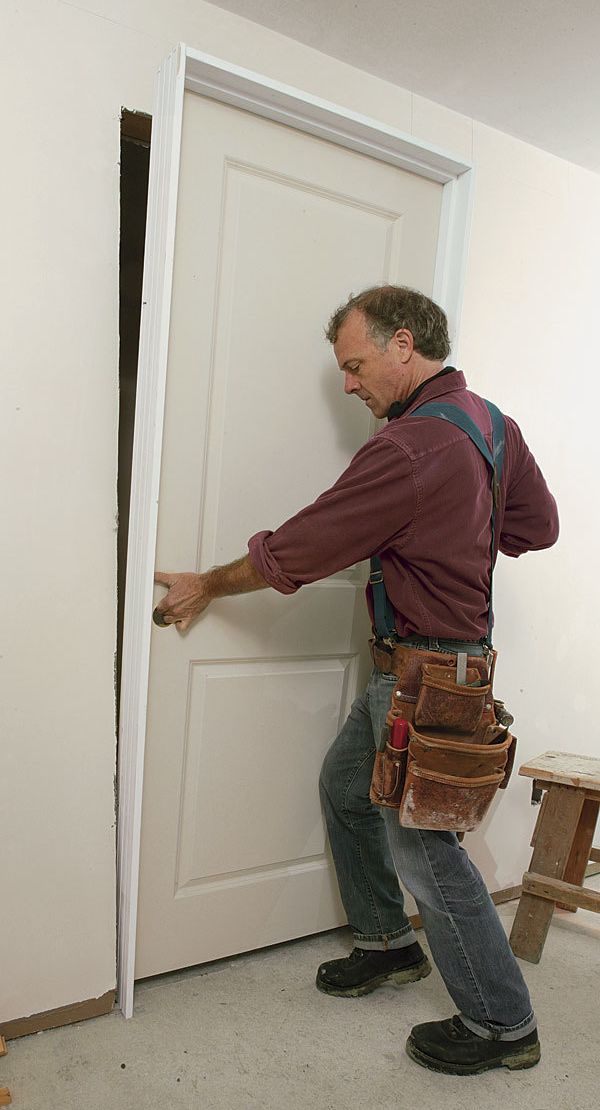
4,5. No false readings. Remove the nail holding the door to the jamb and any cardboard shims stapled to the edge of the door. Now the door will operate as dictated by the position of the hinge jamb.

If the gap is consistent across the head jamb, proceed to the strike side.

6. Check the head.

If the gap is consistent across the head jamb, proceed to the strike side.

Shim the strike side at the top, behind the strike plate, and at the bottom.
Check the gap, and nail off the jamb

7,8,9. Establish the gap at the strike side.

Shim the strike side at the top, behind the strike plate, and at the bottom. Check the gap, and nail off the jamb. Don’t forget to check the swing, too. When the door is closed, it should hit the stop evenly down its length.


Troubleshooting A Door In The Real World

A bowed jamb above the top hinge creates a gap that’s too tight on the strike side.
Drive shims at the hinge side of the head jamb until the gap is equal.

Problem: A bowed jamb above the top hinge creates a gap that’s too tight on the strike side.

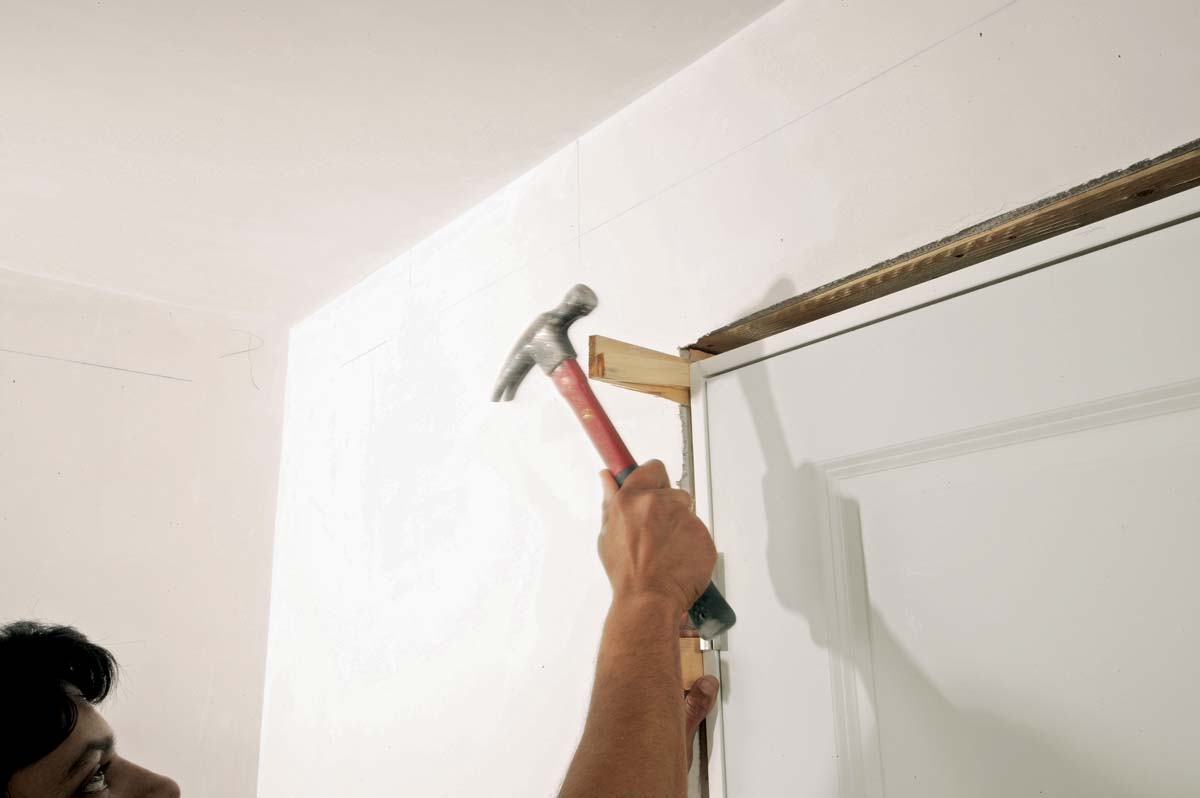
Solution: Drive shims at the hinge side of the head jamb until the gap is equal. Although this tight gap is more common on the hinge side, you also can use this solution to open the gap on the strike side.

The gap at the head is too tight on one side.

Lower the jamb on the wide side by trimming it with a reciprocating saw

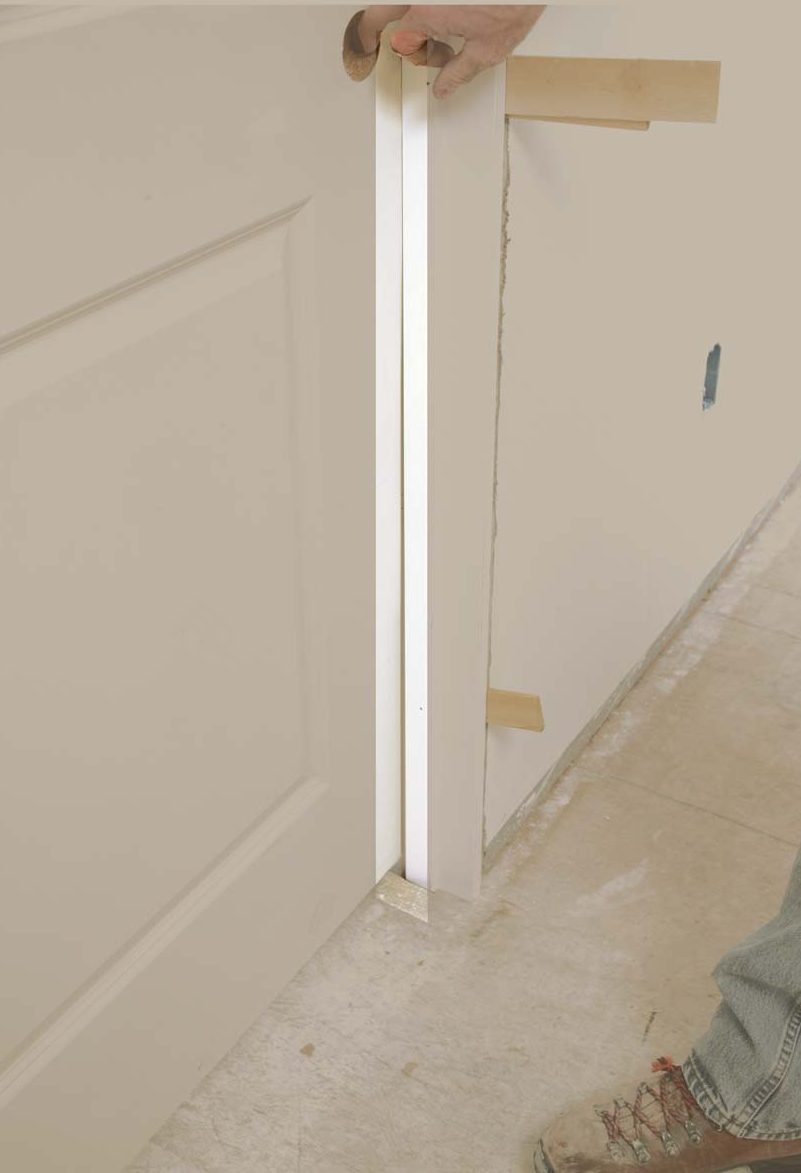
Problem: The gap at the head is too tight on one side.

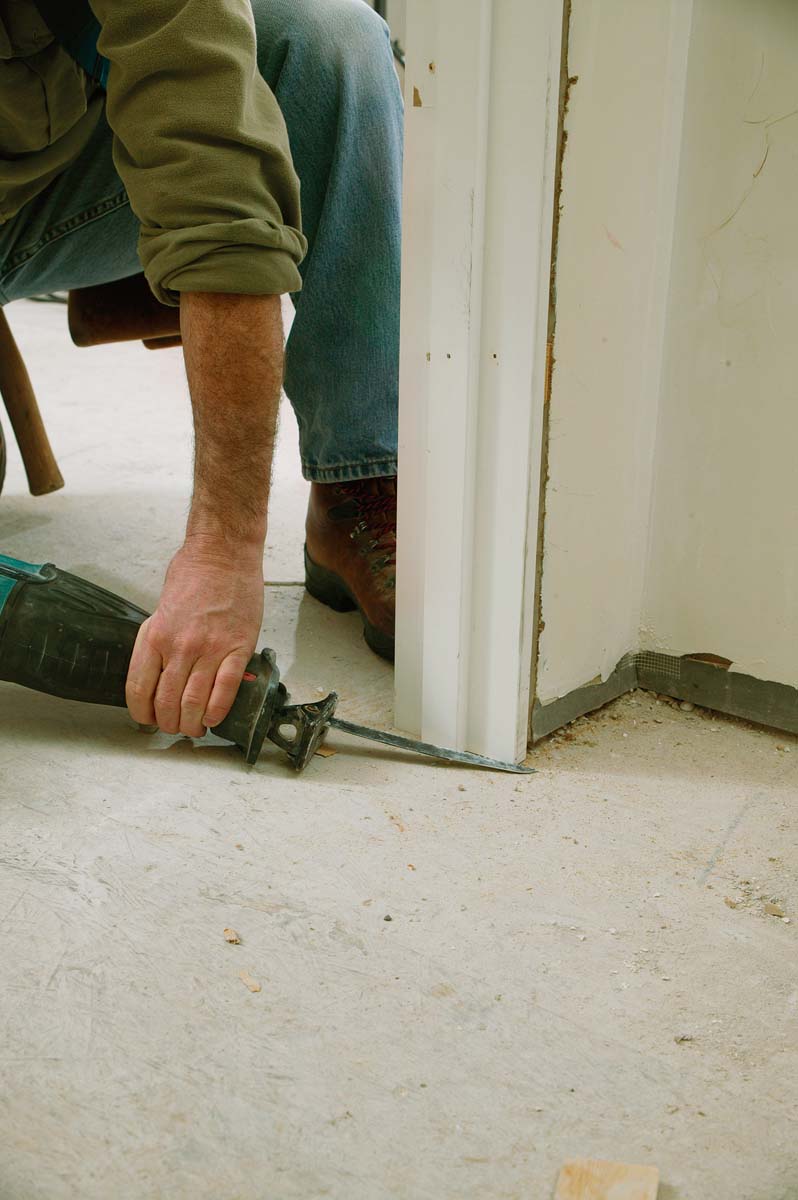
Solution: Lower the jamb on the wide side by trimming it with a reciprocating saw.

A nice fit at the lockset hole and a gap at the top or bottom signals that the jamb is out of alignment.

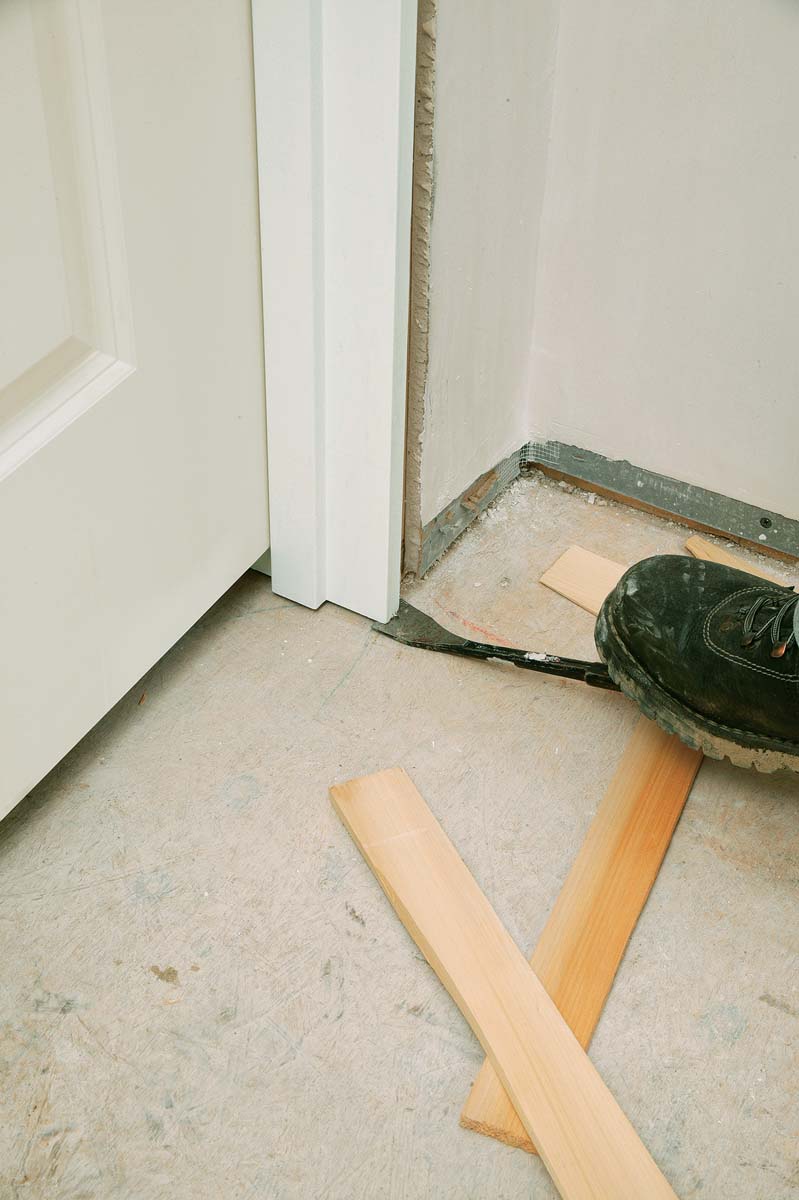
Problem: The door doesn’t close evenly

against the stop.

Align the plates on each side of the rough opening. The door isn’t closing evenly because the jamb legs are out of alignment. Unless the jamb legs can be adjusted back into alignment within 1⁄8 in
Cut two wedges from heavy stock, and screw one to the floor near the wall.

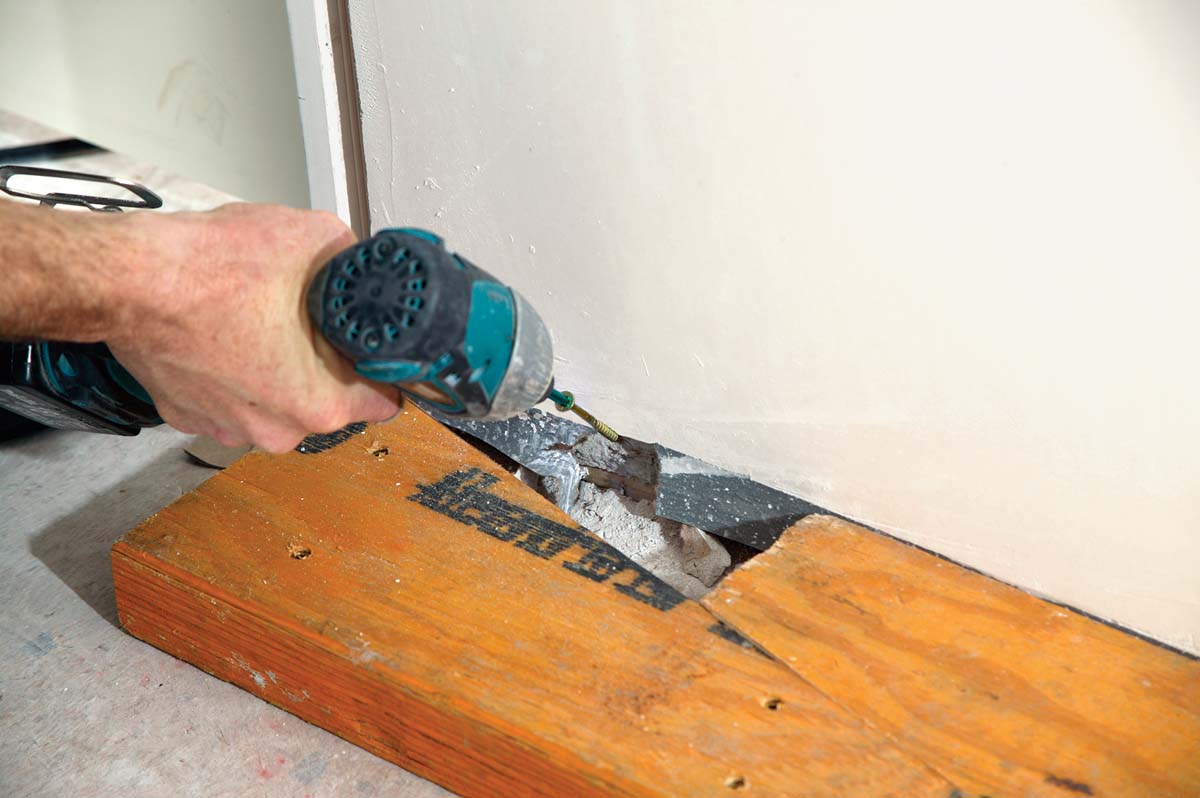
Solution: Align the plates on each side of the rough opening. The door isn’t closing evenly because the jamb legs are out of alignment. Unless the jamb legs can be adjusted back into alignment within 1⁄8 in. of the drywall plane, the solution is to move one plate. Cut two wedges from heavy stock, and screw one to the floor near the wall. Drive the second wedge into the gap until the door jambs are aligned (Left Photo). Cut the drywall back to gain access to the bottom plate, and drive a long screw through it into the subfloor to secure its new position (top photo).

The door doesn’t close properly because the hinges are binding or because the hinge-side gap is too big.
insert an adjustable wrench or something of a similar size between the hinge leaves, then slowly close the door.

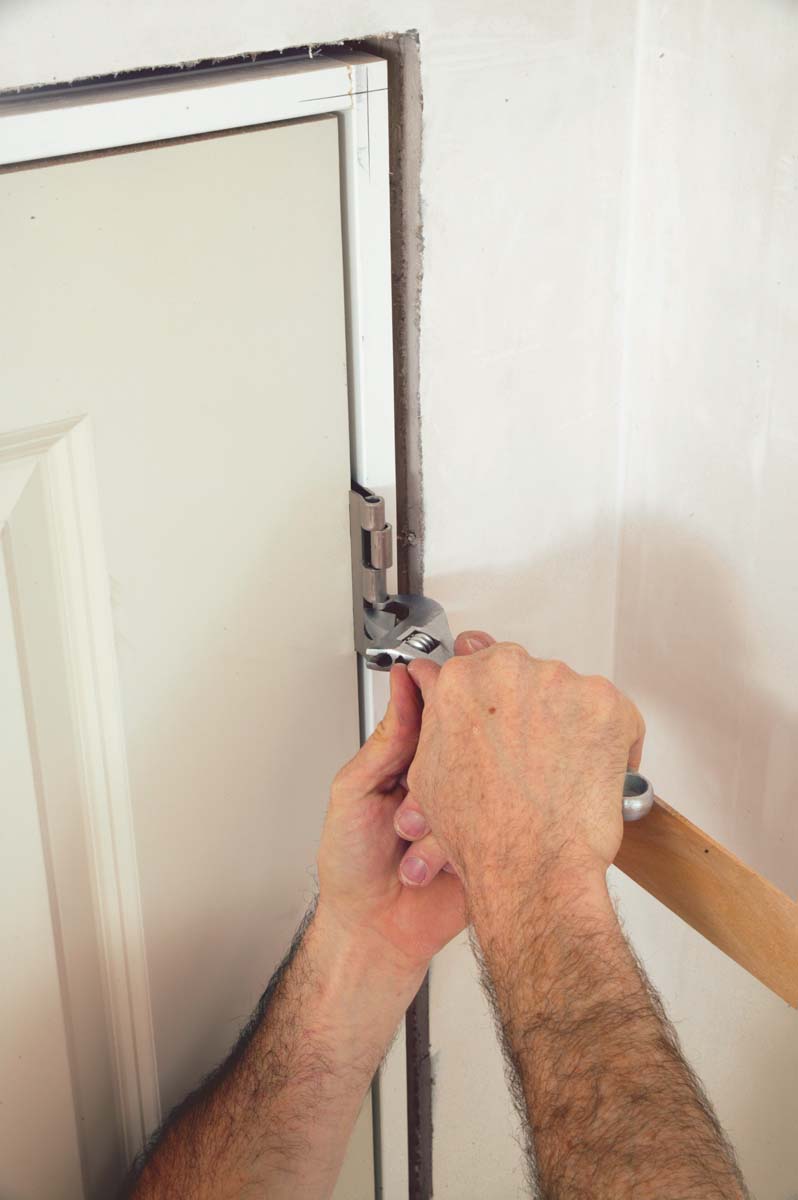
Problem: The door doesn’t close properly because the hinges are binding or because the hinge-side gap is too big.

Solution: Carefully bend the hinges. If the hinges are binding, the gap is too tight. To open the gap, use a crescent wrench to bend the jamb-side hinge knuckles toward the door handle. To close the gap, bend the knuckles away from the handle.

Alternative solution:

Another option for opening the gap is to insert an adjustable wrench or something of a similar size between the hinge leaves, then slowly close the door. Smaller items, such as a nail set, shouldn’t be used because they can ding the door edge as the door is closed.

For more photos and details, click the View PDF button below:


View PDF
Previous: Plumb Perfect Prehung Doors Next: Setting Prehung Doors

Guide

Windows & Doors

Chapter

Interior Doors

Sign up for eletters today and get the latest how-to from Fine Homebuilding, plus special offers.

Signing you up...

This site is protected by reCAPTCHA and the Google Privacy Policy and Terms of Service apply.
See all newsletters
See all newsletters

Log in or create an account to post a comment.

Sign up Log in

Become a member and get full access to FineHomebuilding.com

Windows & Doors

Windows & Doors

Trusted, comprehensive guidance from the pros for choosing, installing, replacing, and repairing windows and doors on any house

View Project Guide

View All Project Guides »

Become a member and get unlimited site access, including the Windows & Doors Project Guide.

Start Free Trial

Choosing Windows
  • Window Types
  • Design and Materials
  • Energy-Efficient Windows
Installing Windows In New Walls
  • Installation, Start to Finish
  • Head Flashing for Windows
  • Video Series: Nail-Fin Window over Zip System Sheathing
  • Video Series: Nail-Fin Window over Exterior Rigid-Foam Insulation
  • Video Series: Nail-Fin Window over Housewrap
  • Video Series: Nail-Fin Window over Peel-and-Stick Housewrap
  • Video Series: Nail-Fin Window over a Fluid-Applied WRB
  • Video Series: Weatherproof Window Installation
Retrofitting Windows
  • Removing the Old, Installing the New
  • Video Series: How to Replace a Window
  • Video Series: Install a Full-Frame Replacement Window in a Brick Wall
  • Video Series: Install an Insert Replacement Window in a Brick Wall
  • Video Series: Retrofit a Flanged Window
Window Repairs
  • Restoring Old Windows
  • Repairs and Upgrades
Door Basics
  • Tools & Jigs for Door Hanging
  • How to Install Doors
  • Hinges
  • Handles, Knobs, and Locksets
  • Fixing Door Problems
Interior Doors
  • Prehung Doors
  • Pocket Doors
  • Other Types of Doors
  • Custom-Built Doors
Exterior Doors
  • Door Choices and Design
  • Installing Entry Doors
  • Building Exterior Doors
  • Installing French Doors
  • Replacing a Door
  • Adding Weatherstripping and Sweeps

Fine Home Building

Newsletter Sign-up

  • Fine Homebuilding

    Home building tips, offers, and expert advice in your inbox.

  • Green Building Advisor

    Building science and energy efficiency advice, plus special offers, in your inbox.

  • Old House Journal

    Repair, renovation, and restoration tips, plus special offers, in your inbox.

Signing you up...

This site is protected by reCAPTCHA and the Google Privacy Policy and Terms of Service apply.
See all newsletters

Follow

  • Fine Homebuilding

    Dig into cutting-edge approaches and decades of proven solutions with total access to our experts and tradespeople.

    Start Free Trial Now
    • Facebook
    • Instagram
    • X
    • LinkedIn
  • GBA Prime

    Get instant access to the latest developments in green building, research, and reports from the field.

    Start Free Trial Now
    • Facebook
    • YouTube
  • Old House Journal

    Learn how to restore, repair, update, and decorate your home.

    Subscribe Now
    • Facebook
    • Instagram
    • X

Membership & Magazine

  • Online Archive
  • Start Free Trial
  • Magazine Subscription
  • Magazine Renewal
  • Gift a Subscription
  • Customer Support
  • Privacy Preferences
  • About
  • Contact
  • Advertise
  • Careers
  • Terms of Use
  • Site Map
  • Do not sell or share my information
  • Privacy Policy
  • Accessibility
  • California Privacy Rights

© 2025 Active Interest Media. All rights reserved.

Fine Homebuilding receives a commission for items purchased through links on this site, including Amazon Associates and other affiliate advertising programs.

  • Home Group
  • Antique Trader
  • Arts & Crafts Homes
  • Bank Note Reporter
  • Cabin Life
  • Cuisine at Home
  • Fine Gardening
  • Fine Woodworking
  • Green Building Advisor
  • Garden Gate
  • Horticulture
  • Keep Craft Alive
  • Log Home Living
  • Military Trader/Vehicles
  • Numismatic News
  • Numismaster
  • Old Cars Weekly
  • Old House Journal
  • Period Homes
  • Popular Woodworking
  • Script
  • ShopNotes
  • Sports Collectors Digest
  • Threads
  • Timber Home Living
  • Traditional Building
  • Woodsmith
  • World Coin News
  • Writer's Digest
Active Interest Media logo
X
X
This is a dialog window which overlays the main content of the page. The modal window is a 'site map' of the most critical areas of the site. Pressing the Escape (ESC) button will close the modal and bring you back to where you were on the page.

Main Menu

  • How-To
  • Design
  • Tools & Materials
  • Video
  • Blogs
  • Forum
  • Project Guides
  • Reader Projects
  • Magazine
  • Members
  • FHB House

Podcasts

  • FHB Podcast
  • ProTalk

Webinars

  • Upcoming and On-Demand

Podcasts

  • FHB Podcast
  • ProTalk

Webinars

  • Upcoming and On-Demand

Popular Topics

  • Kitchens
  • Business
  • Bedrooms
  • Roofs
  • Architecture and Design
  • Green Building
  • Decks
  • Framing
  • Safety
  • Remodeling
  • Bathrooms
  • Windows
  • Tilework
  • Ceilings
  • HVAC

Magazine

  • Current Issue
  • Past Issues
  • Magazine Index
  • Subscribe
  • Online Archive
  • Author Guidelines

All Access

  • Member Home
  • Start Free Trial
  • Gift Membership

Online Learning

  • Courses
  • Project Guides
  • Reader Projects
  • Podcast

More

  • FHB Ambassadors
  • FHB House
  • Customer Support

Account

  • Log In
  • Join

Newsletter

Get home building tips, offers, and expert advice in your inbox

Signing you up...

This site is protected by reCAPTCHA and the Google Privacy Policy and Terms of Service apply.
See all newsletters
See all newsletters

Follow

  • X
  • YouTube
  • instagram
  • facebook
  • pinterest
  • Tiktok

Join All Access

Become a member and get instant access to thousands of videos, how-tos, tool reviews, and design features.

Start Your Free Trial

Subscribe

FHB Magazine

Start your subscription today and save up to 81%

Subscribe

We hope you’ve enjoyed your free articles. To keep reading, become a member today.

Get complete site access to expert advice, how-to videos, Code Check, and more, plus the print magazine.

Start your FREE trial

Already a member? Log in

Privacy Policy Update

We use cookies, pixels, script and other tracking technologies to analyze and improve our service, to improve and personalize content, and for advertising to you. We also share information about your use of our site with third-party social media, advertising and analytics partners. You can view our Privacy Policy here and our Terms of Use here.

Cookies

Analytics

These cookies help us track site metrics to improve our sites and provide a better user experience.

Advertising/Social Media

These cookies are used to serve advertisements aligned with your interests.

Essential

These cookies are required to provide basic functions like page navigation and access to secure areas of the website.

Delete My Data

Delete all cookies and associated data