Finish Stairs With Finesse
Carefully planned skirts and a couple of tricks make trimming stairs an easier job, no matter how bad the framing.
Synopsis: Building stairs can be a tough job, but when you’re dealing with framing flaws, the work can be even tougher. In this article, veteran finish carpenter Tucker Windover describes his process for finishing stairs under any circumstances. Windover says that the skirtboards are the key to a good stair. Begin by carefully laying out the the inner skirtboard, then the outer skirt. Next, mark the riser locations on the inner skirtboard, and then repeat the process for the outer skirtboard. This process is made easier with a pitch block and a simple jig for cutting stringers. Next, the rough stringers are placed and adjusted, and finally, the treads are installed with hidden fasteners.
One of the most frustrating aspects of stair building is that many stair frames, the rough stringers, are built wrong. Perhaps the framer didn’t get the correct information about finish-floor height, an increasingly common problem since the advent of laminated hardwood flooring. Or maybe the framer made mistakes in math and layout. Sometimes it is just plain carelessness. Even if the frame is perfect when the framer leaves, the dimensional lumber often shrinks after installation.
For finish carpenters like me, the frustration starts when we chase these inaccuracies. To meet the building code, the maximum variation between risers is 3/8 in. I prefer to keep any difference between two adjacent risers to less than 1/8 in. Without a fixed point of reference, any adjustment I make to one riser height affects the height of the rise above and below it, until I reach the top of the staircase, where there is no more room for adjustment. In a typical staircase, three or four rough stringers carry 14 treads per flight, which means there are potentially 56 places to fine-tune. If I am to be confident that the stairs won’t squeak, the treads need to be sitting on a flat, level plane supported by these stringers.
The solution to this problem is to ignore the rough frame and lay out the tread and riser locations on the finish skirts. I then use the inner skirtboard as an index to position the riser dadoes and as a reference to make necessary adjustments to the rough frame. With an accurate layout, the incremental inaccuracies do not accumulate. It’s an efficient process that assures me that each riser is exactly the same height and that each tread is dead level.
The skirtboards are the key
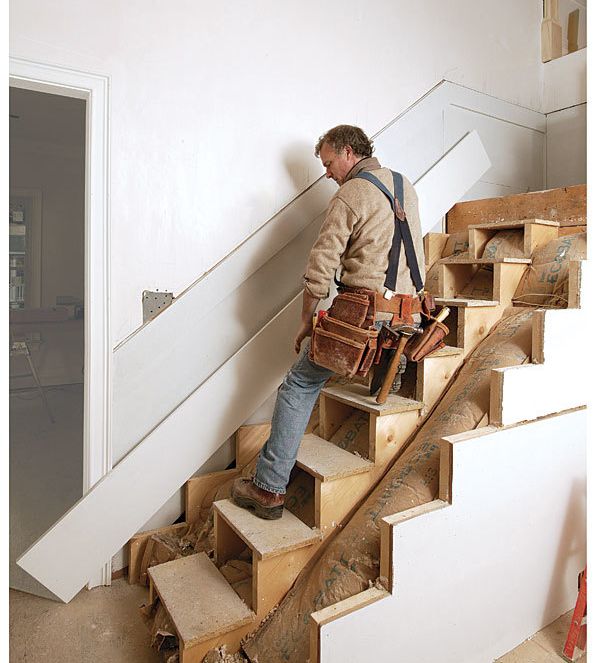
Made of wide stock (typically 1×12), the inner and outer skirtboards are carefully laid out to create a staircase that can be superimposed over original, imperfect framing.
1. Orient the board. Start by laying the skirtboard along the top of the inside stringer so that the board’s bottom corner is resting on the floor.
2. Mark the upper notch at the top of the stairs. First, draw a plumb line on the board. Next, measure up from the landing the height of one riser, and mark it on the plumb line. Draw a level line that intersects the plumb line.
3. Scribe the bottom. Draw a level line across the skirt from the bottom stringer’s first notch. Without changing the board’s position, mark its intersection with the door casing, and draw a plumb line. Marking the waste side of the cuts helps you to visualize the finished skirt.
4. Repeat the process with the outer skirt. With the board in place, scribe the top vertical line against the drywall, then mark the level line at the bottom. The bottom plumb cut is made after the skirt is laid out.
For more photos and steps on how to finish stairs, click the View PDF button below.


