
Stormproof Your Roof
Self-adhering underlayment provides critical protection in vulnerable locations.
Synopsis: When you’re making sure your roof is safe from water penetration, it’s important to use the right materials in the right locations. In this article, FHB editorial adviser Mike Guertin describes his process for making sure a roof is protected from water infiltration by using self-adhering underlayment in vulnerable locations such as roof valleys, eave edges (to help deal with ice dams), rake edges, roofs to vertical walls (such as dormers), sidewall protection, the bottom of dormer valleys, and joints in sheathing. When working with self-adhering membranes, Guertin cautions that it’s important to work carefully and to adapt based on outdoor temperature, to buy the appropriately sized membrane for the job, and to get a strong bond so that the membrane adheres firmly to the sheathing.
I’ve done enough roof repairs to know that storm water that gets past the shingles and underlayment doesn’t penetrate through the roof sheathing. Instead, it leaks through the joints between panels and the places where the panels tie into other building elements and roof planes.
The first and most obvious areas to focus on when preparing a roof for shingles are roof penetrations such as chimneys, plumbing vents, and skylights. A more thorough approach, though, involves protecting leak-prone areas such as rakes, eaves, valleys, and dormers. Some of these storm proofing details are installed before the underlayment and shingles. Others are layered into the underlayment or roofing so that water is redirected to the roof surface.
Because I’m going to all the trouble with these details, some people ask me why I don’t just cover the whole roof with self-adhering waterproof underlayment. Call me cheap, but I think I’m getting 98% of the benefit of covering the whole roof with 10% of the material.
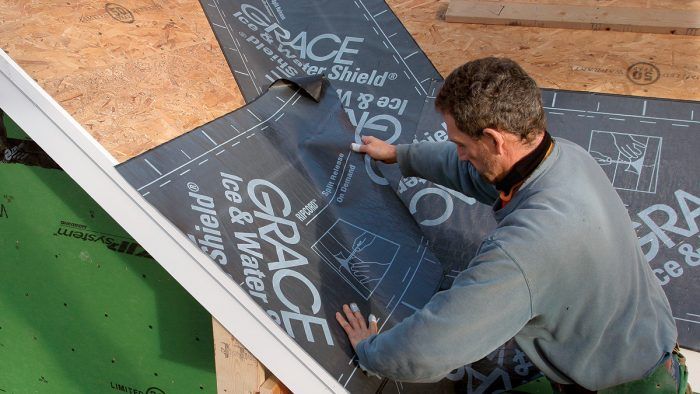
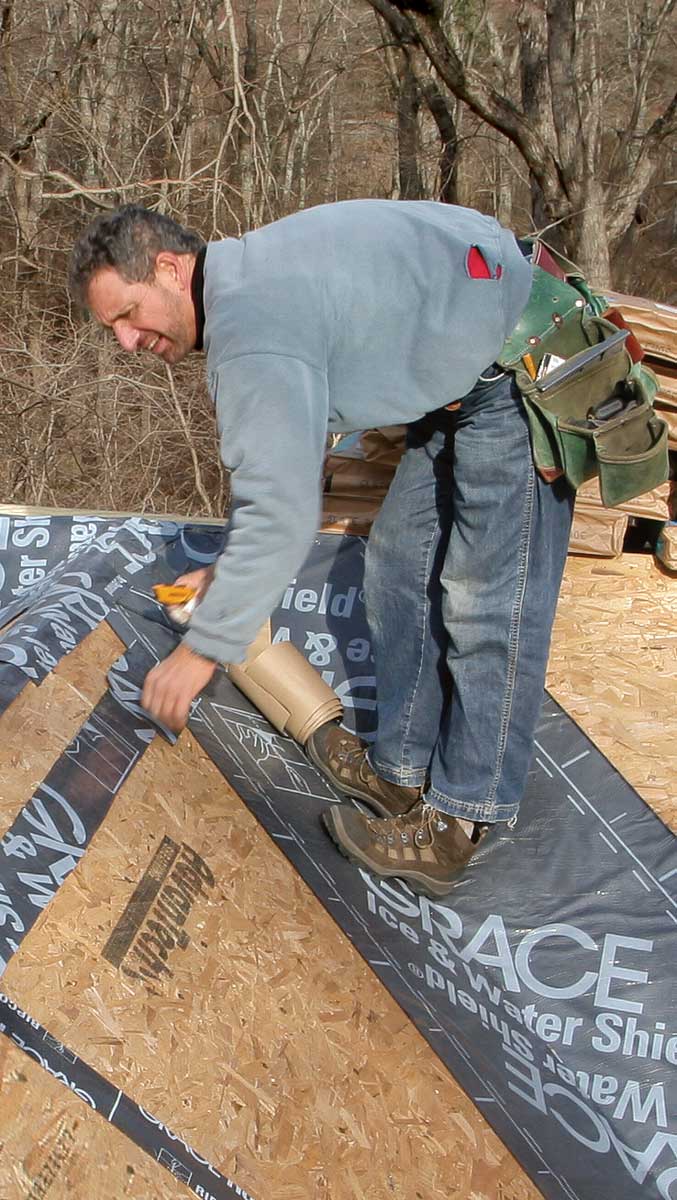
ValleysRoof valleys channel large volumes of water in rainstorms and are prone to snow buildup and ice dams in the winter. Building codes call for shingled valleys to be lined with either roll-roofing or self-adhering membrane. I prefer self-adhering membrane because it seals around nail penetrations much better than roll-roofing membrane. I like to use 3-ft.-wide membrane for valleys, which provides 18 in. of coverage to each side of the centerline. To be most effective, the bottom end should seal to the fascia board, and the top end should lap over the ridge at the top of the valley. To resist punctures, the middle of the sheet needs to be pressed tight to the valley center. The key to wrangling such a long sheet of flashing membrane is to work from the center of the valley out, adhering one half of the sheet at a time. 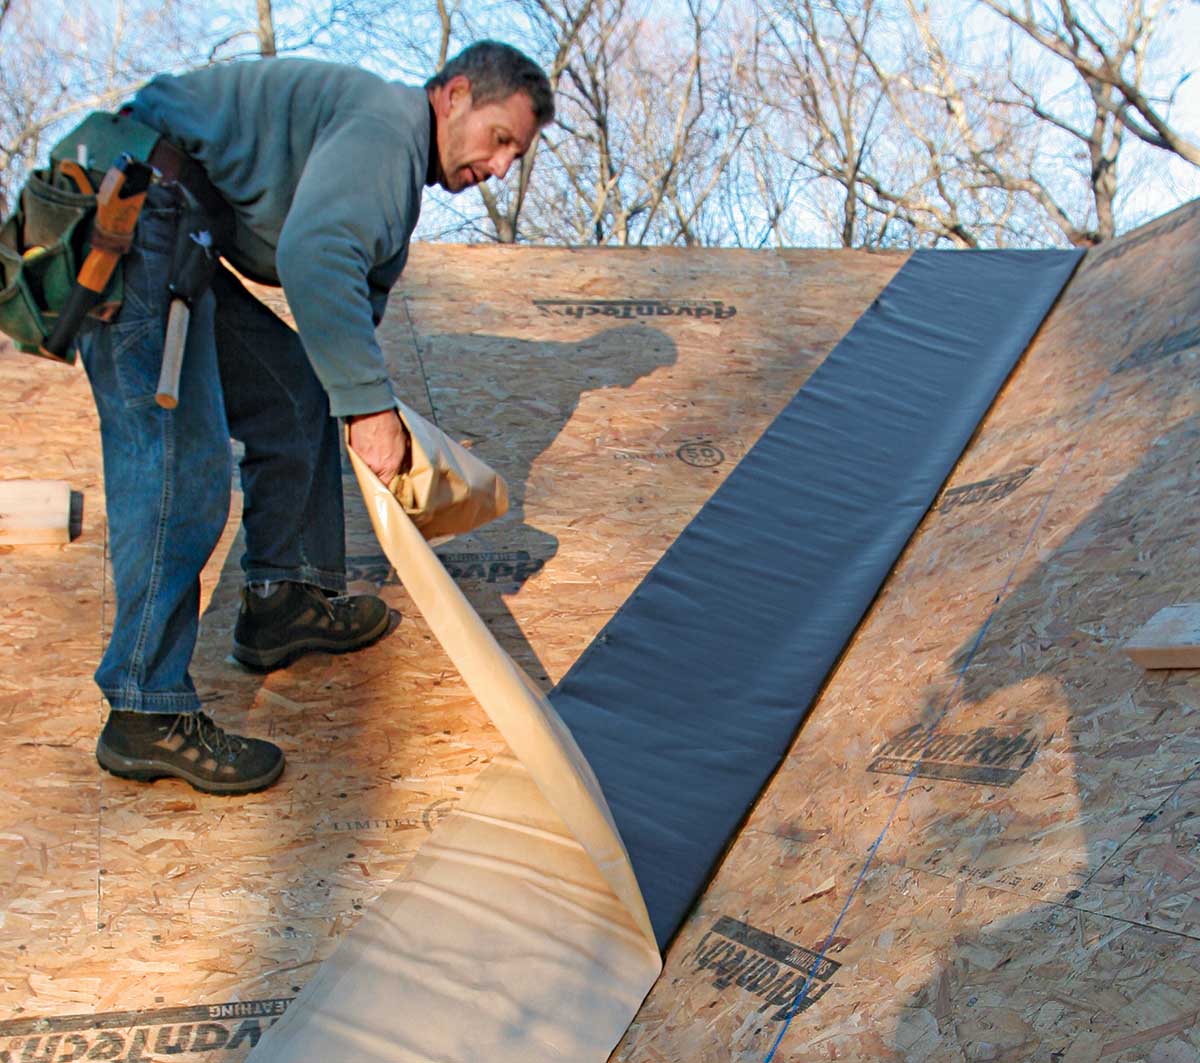 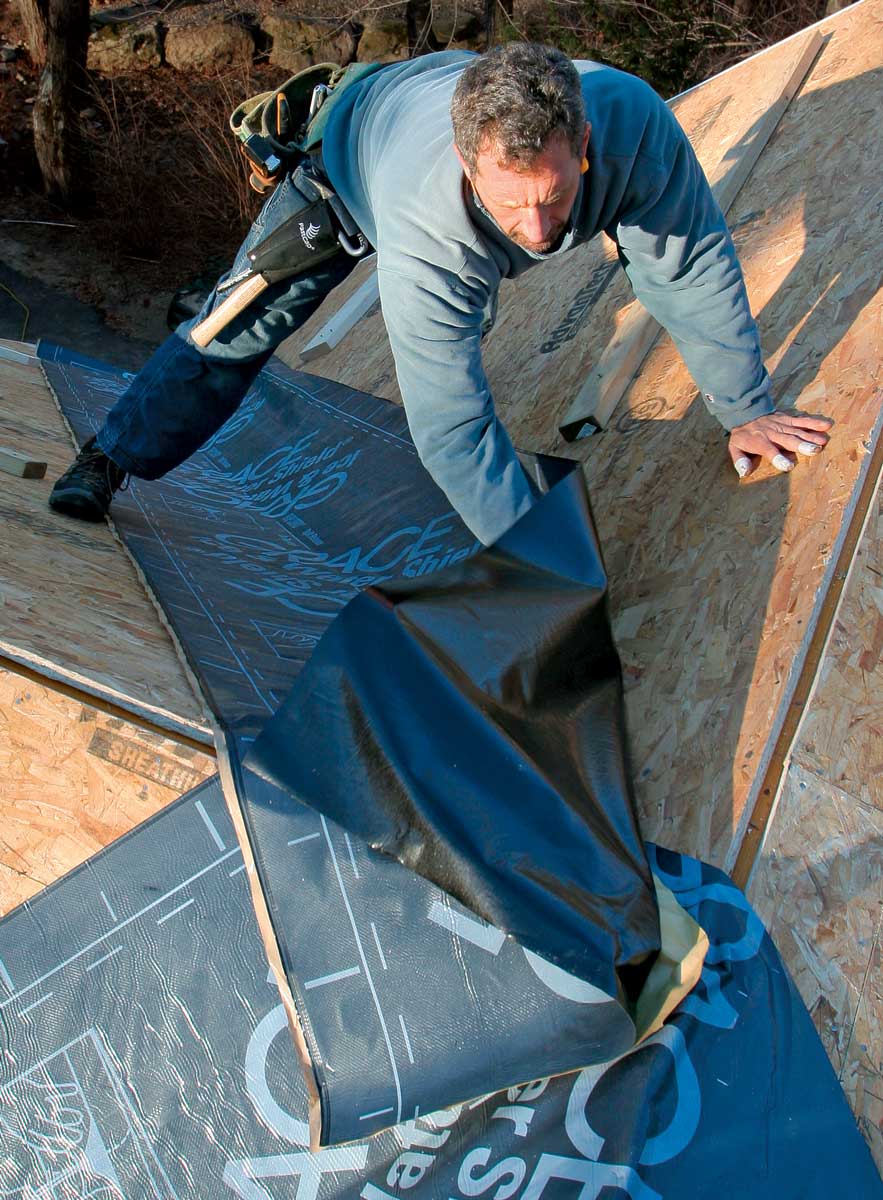 |
Working with sticky stuff
Plastic-surfaced self-adhering membrane is best for the detailed work involved in storm proofing a roof. The plastic folds tight into and around corners, and the adhesive is more aggressive than that on granular-surfaced self-adhering membranes. Still, there’s a definite learning curve to working with this material. Here are a few tips.
Eave EdgesIce dams can form along eaves. As a precaution, most builders in northern locations install a 3-ft.-wide strip of self-adhering membrane as their first sheet of underlayment. Building codes call for this layer of protection to extend to a point 2 ft. in from the outside wall. For larger overhangs, the membrane might need to extend farther up the roof deck. Traditionally, this underlayment goes on after the drip edge and covers its connection to the roof sheathing. This placement doesn’t keep ice dams that form in gutters from backing up and getting under the lower lip of the drip edge. To prevent this, I lay out the membrane so that about 1⁄2 in. of a 3-ft.-wide roll overhangs the fascia. Then I install the drip edge over the top of this overlap. 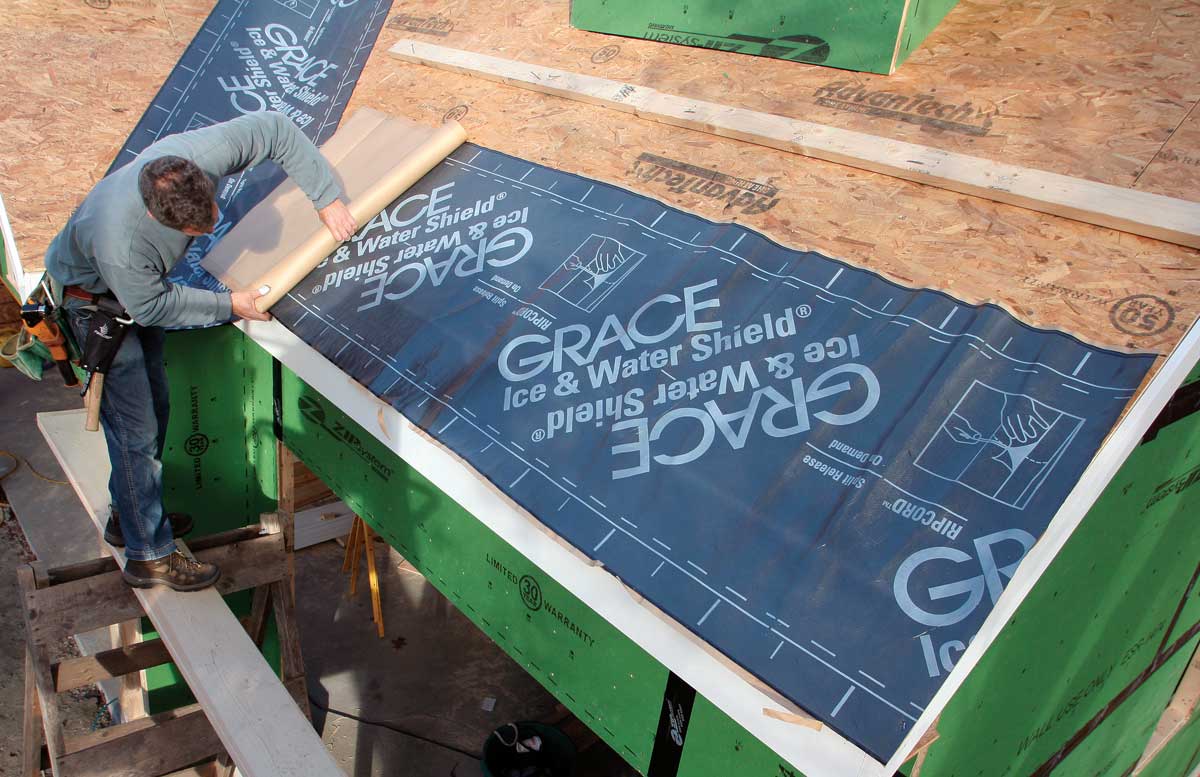 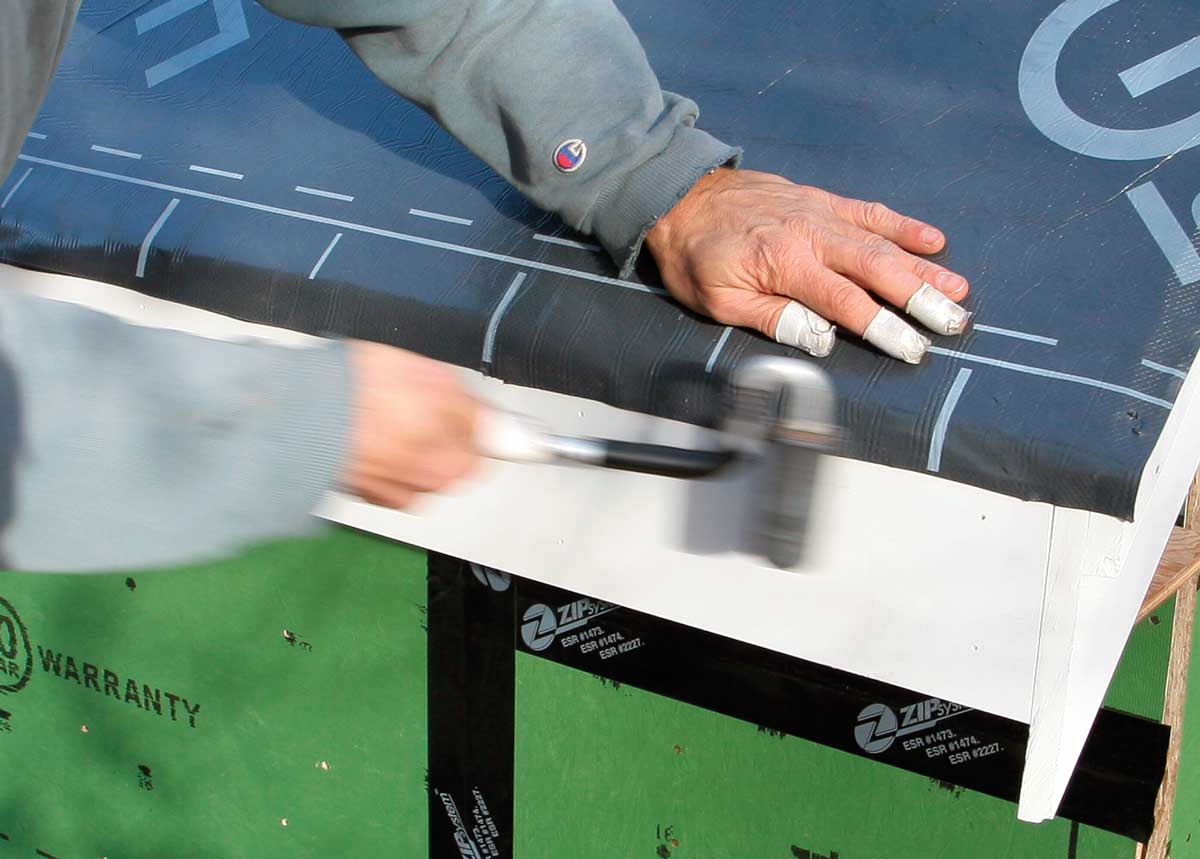 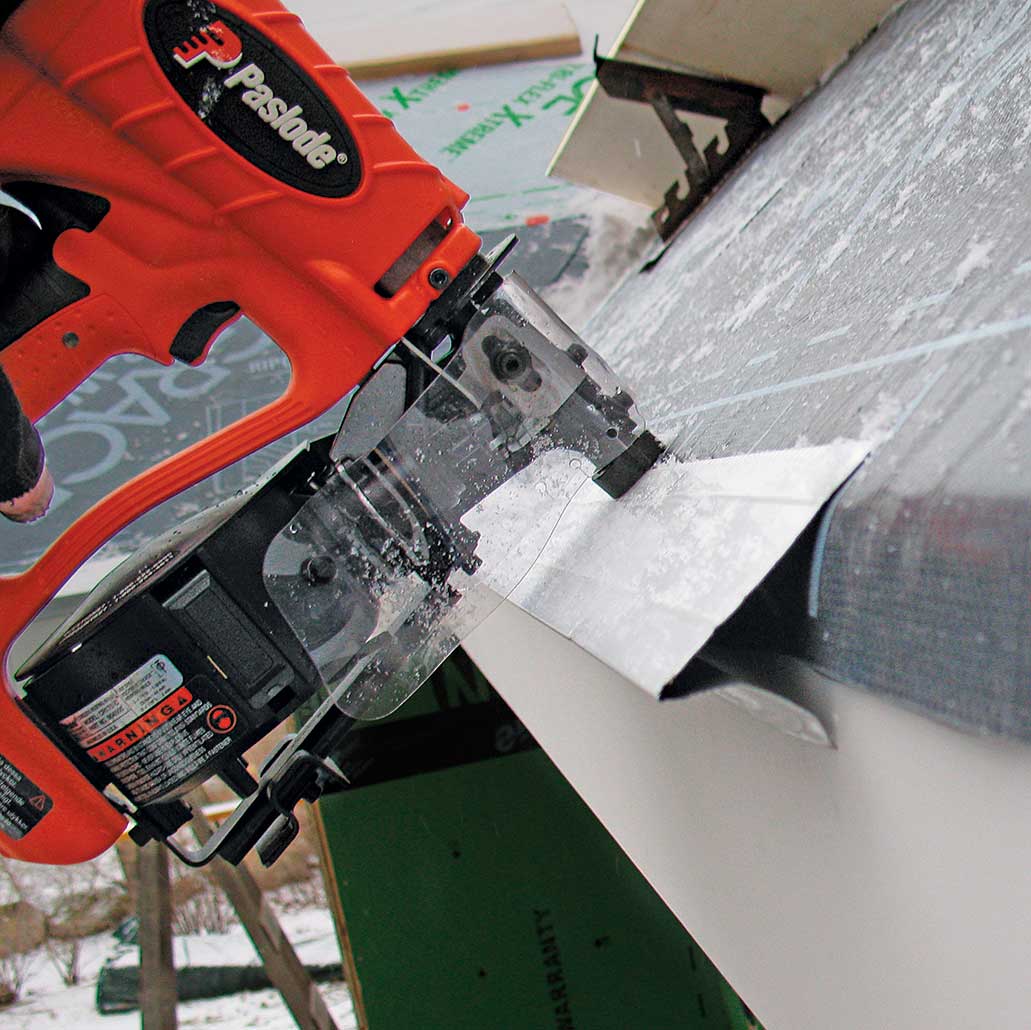 |
Change with the seasons
Your approach to working with these membranes should vary depending on the temperature. In general, the adhesive backing is less sticky and, therefore, more forgiving when it’s cold out. Long sheets can be lifted up and repositioned if necessary. Misplace a sheet or get it stuck to itself in hot weather, and you might as well kiss it goodbye. Rather than risk it, I work with 4-ft. to 6-ft. lengths in hot weather, and lap end joints by 3 in. to 4 in.
Rake edgesAlthough the rake edge isn’t terribly vulnerable to leaks when roofing is damaged, rake edges can leak when wind drives rain between the roofing and regular underlayment. From here, water can migrate to holes in the roof underlayment or down the wall between the siding and the sheathing. I use a length of membrane that extends from over the ridge all the way down the rake, lapping about 3 in. over the eave-edge membrane. I take the same approach with rakes as I do with eaves: Seal the rake edge to the face of the rake boards. Instead of using 3-ft.-wide membrane here, I use 9-in.-wide membrane and form a 3-in. reverse fold on the inside edge to help mechanically block water entry. 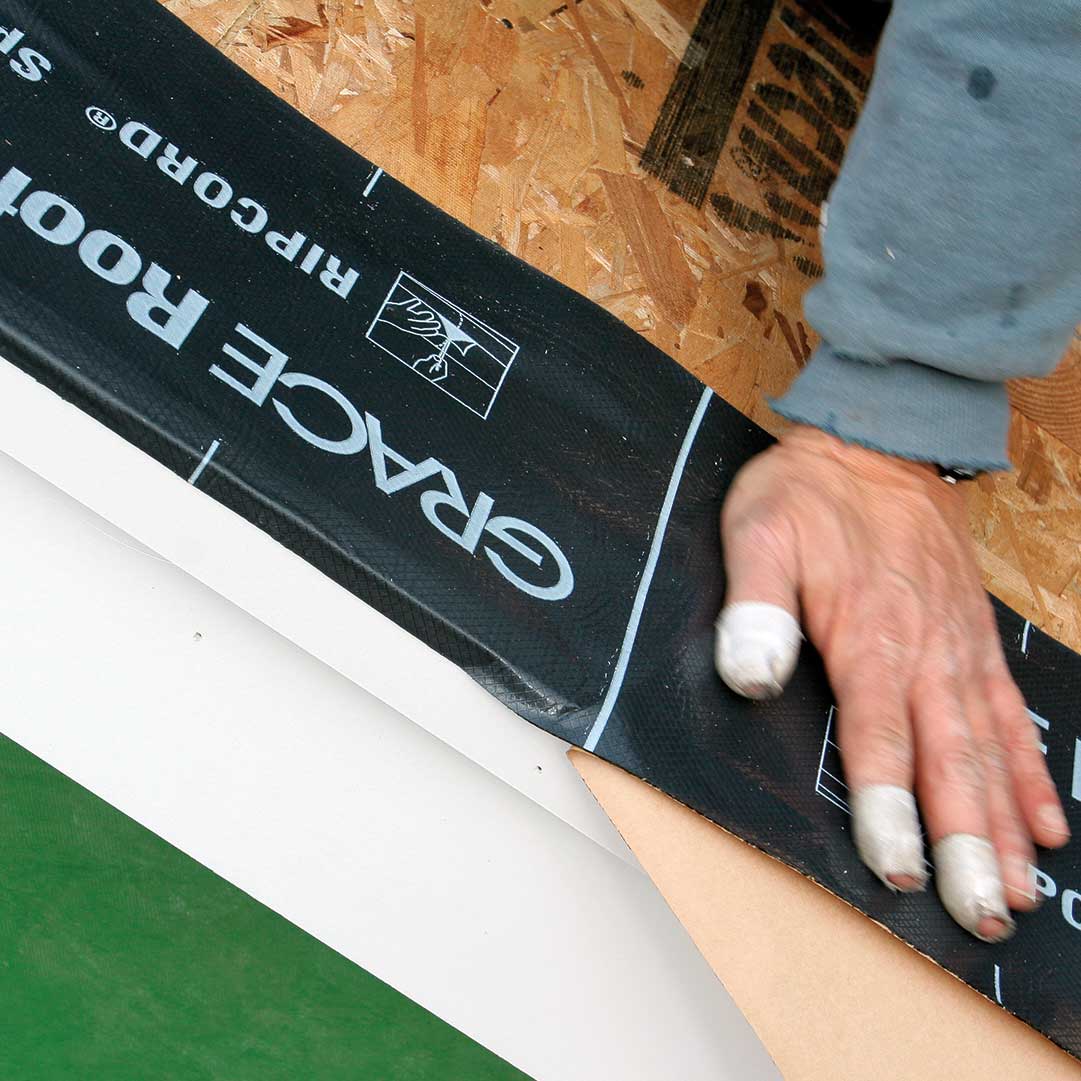 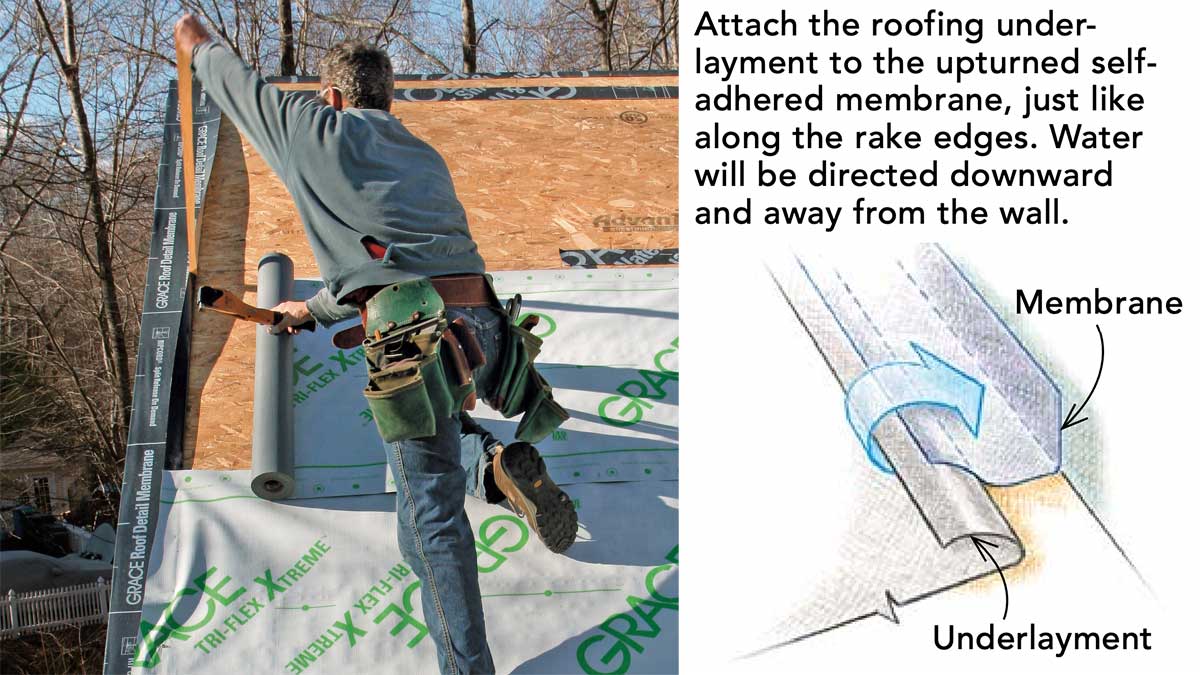 |
Size the membrane for the job
I use various widths of membrane, sized depending on the application. For example, W.R. Grace makes Roof Detail Membrane in 9-in. and 18-in. rolls, and York Manufacturing makes Home Seal in 4-in., 6-in., 9-in., and 12-in. rolls. I often just cut the strips to the width I want from regular 36-in.-wide rolls.
Roof to vertical wallsWhether it’s the front of a dormer or a shed roof intersecting with the main wall of a house, the vertical wall-to-roof joint is simple to seal. Sealing this joint not only keeps out water after storm damage, but it also backs up the metal flashing should it be damaged. Because the bottom edge of the membrane laps onto the shingles, any water that gets underneath can weep onto the roof surface. The minimum width of membrane I use here is 12 in.—6 in. to the roof and 6 in. to the wall—but 18-in.-wide material is even better. The membrane should be 12 in. to 16 in. longer than the face of the dormer. 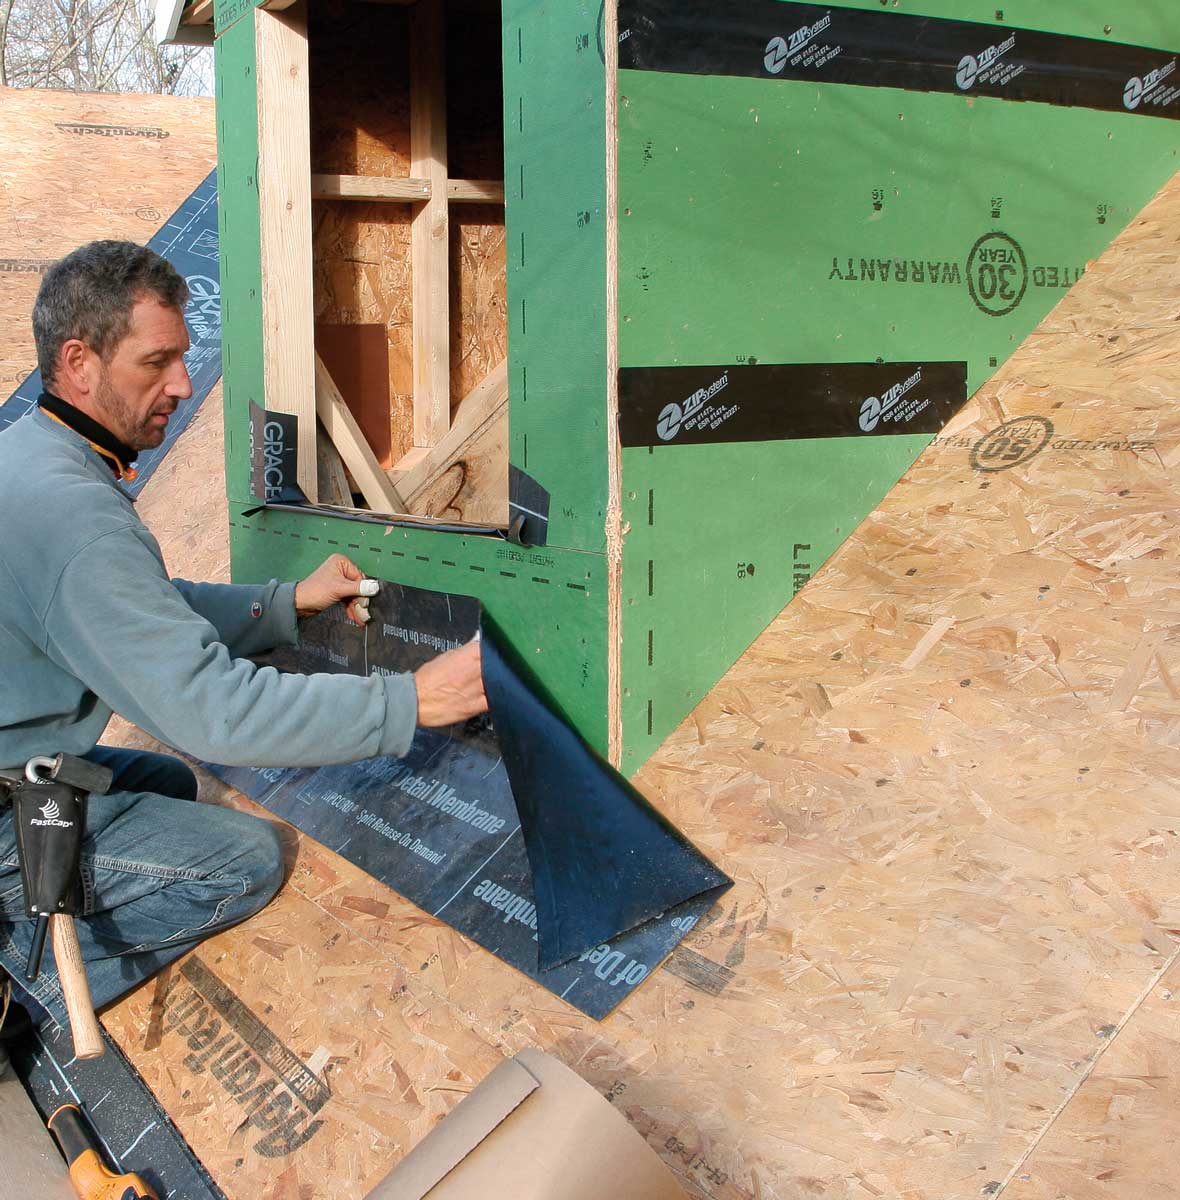 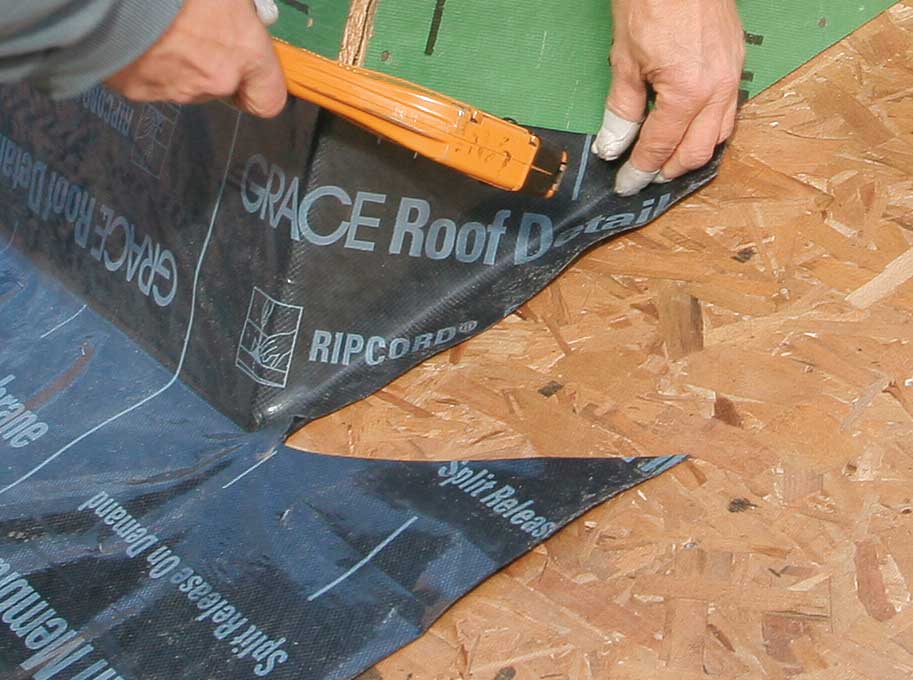 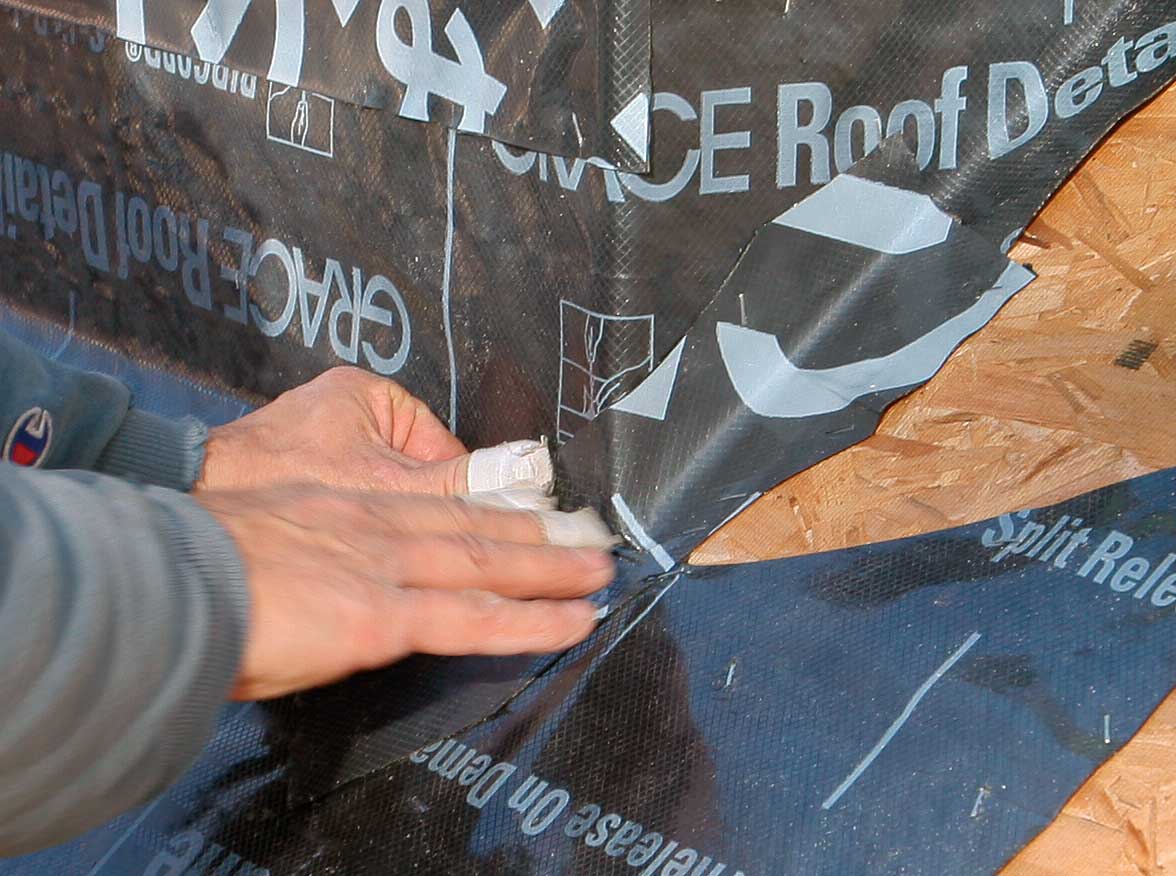 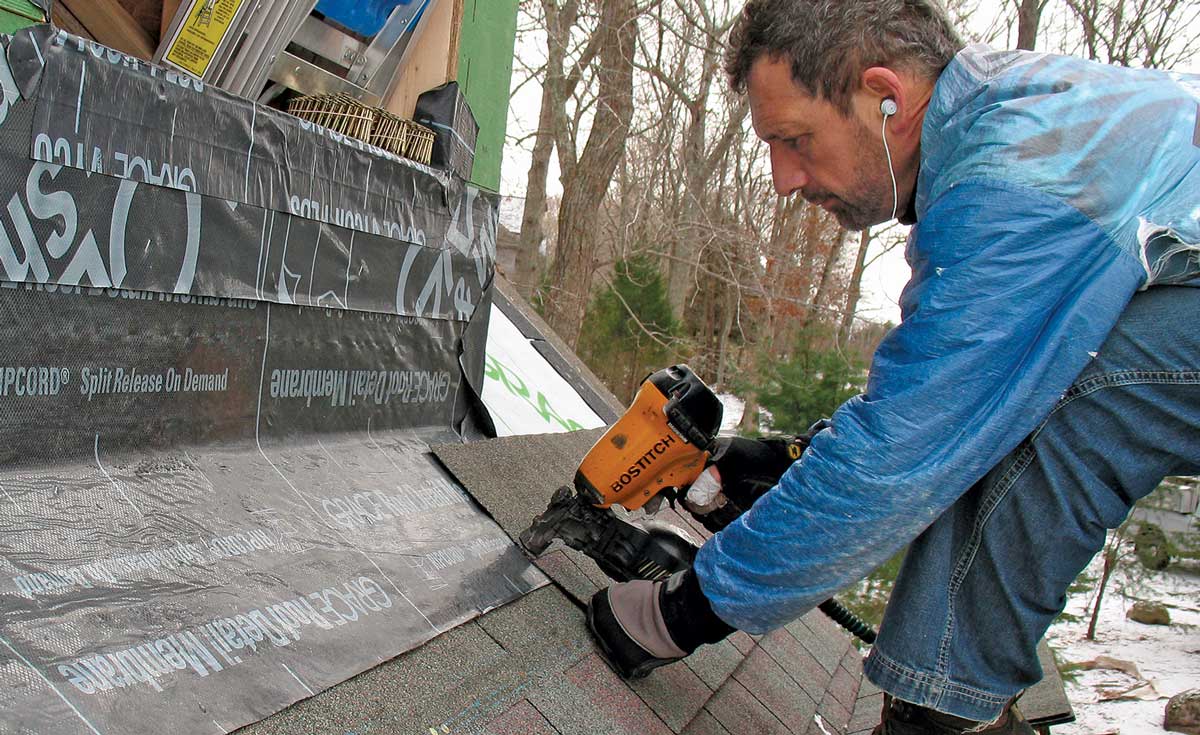 |
Divide and conquer
Several of the details require that a portion of the backing sheet be left on so that the membrane can be integrated later with the roof underlayment or roofing. Removing the backing sheet in stages also simplifies the installation process at wall-to-roof intersections and valleys. Grace embeds a thin wire, which it calls Ripcord, into its Roof Detail Membrane at strategic positions, making it easy to split the backing sheet into convenient sections. When I’m working with another brand of underlayment that doesn’t have embedded wires or when I want the backing sheet cut at a position where there is no wire, I score the backing sheet with a light pass from a sharp utility knife.
Sidewall protectionAreas where a wall meets the slope of a roof—on the side of a dormer, for instance—can be protected by a combination of roof-to-vertical-wall and rake-edge details. The top and bottom end details vary depending on whether you’re flashing a dormer in the middle of a large roof plane or at the junction of a single-story roof (like a garage) meeting a two-story wall. 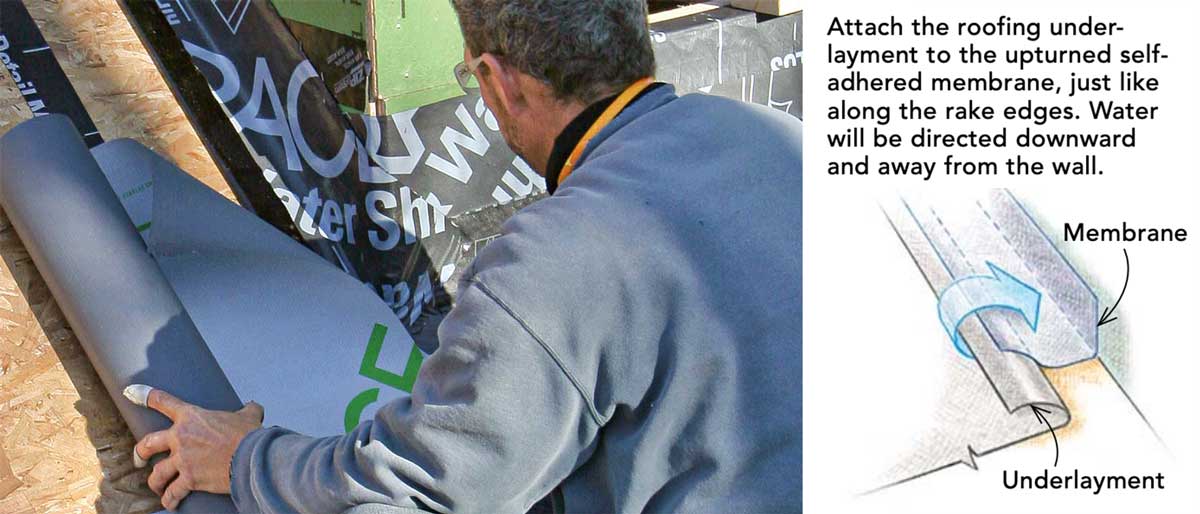 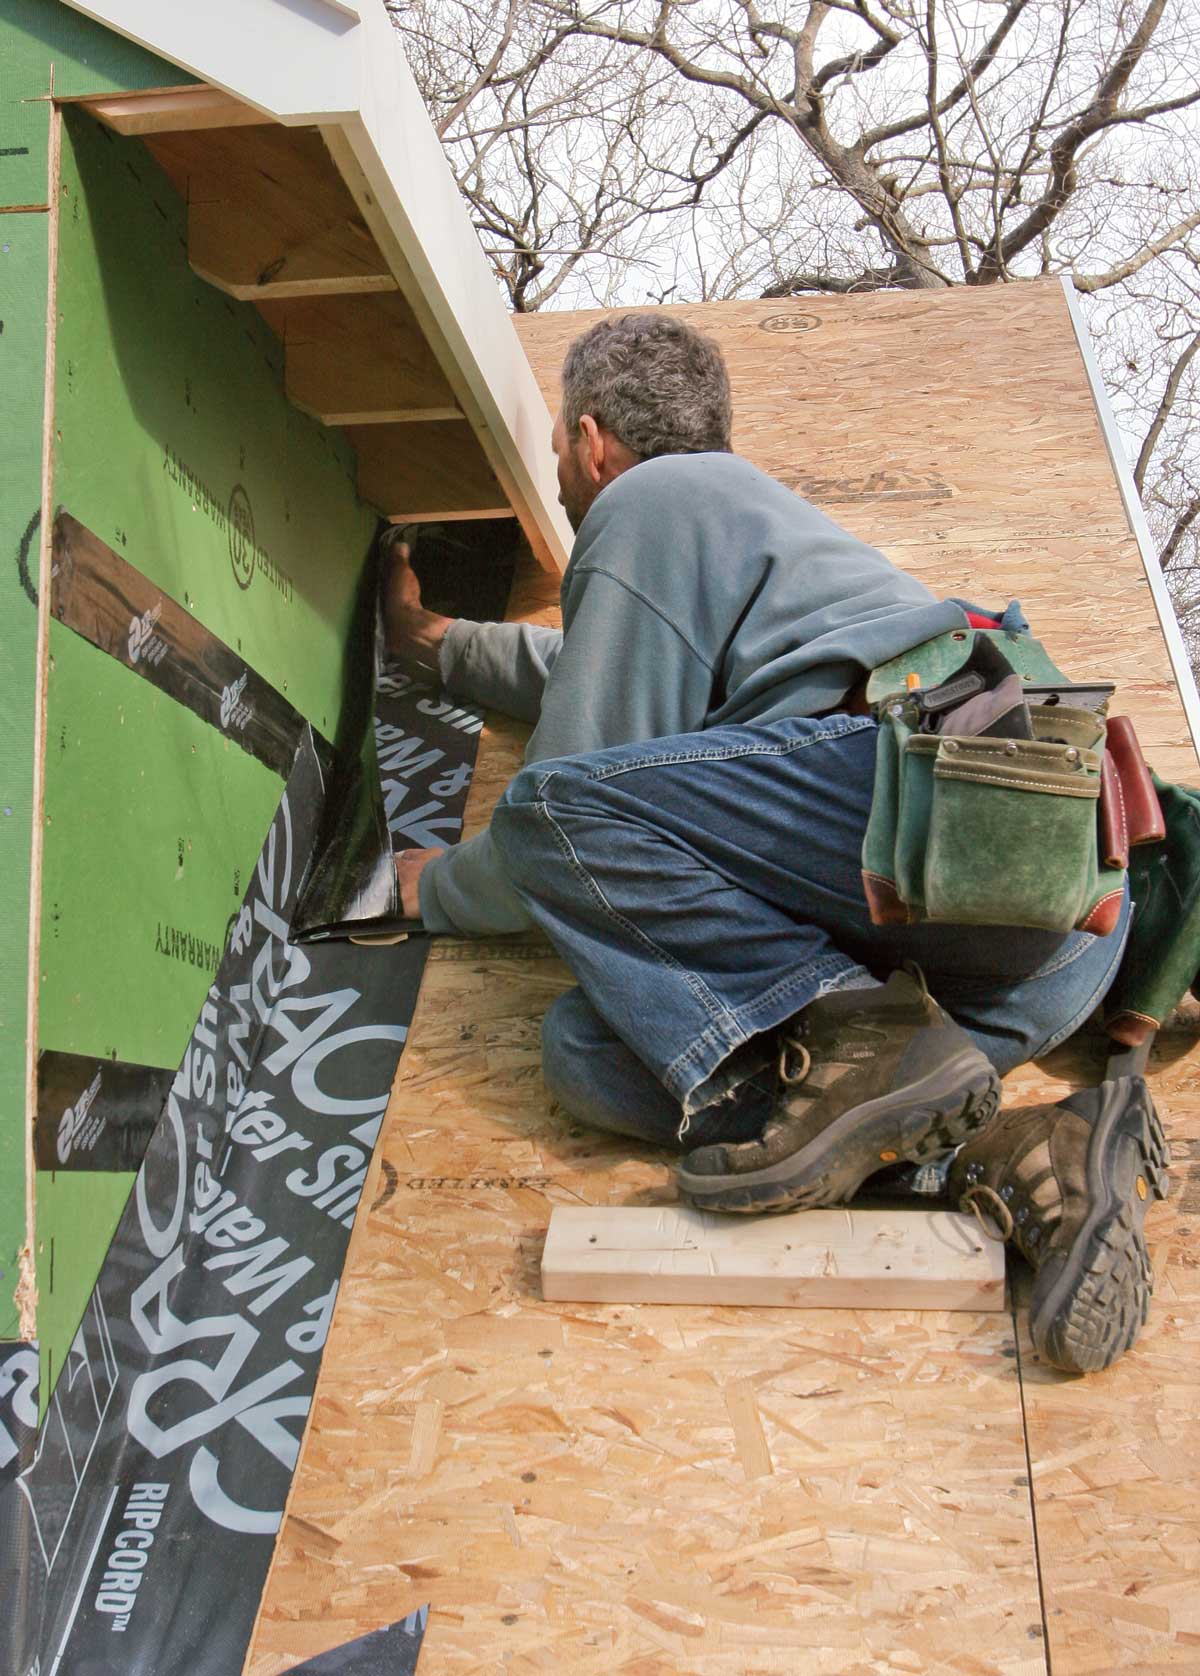 |
Get a good bond.
Concentrated pressure is crucial in getting solid adhesion with these membranes, especially in cold weather. I make sure the surface I’m bonding to is as clean as possible, and then I use a J-roller made for plastic-laminate work to apply even pressure to the membrane. You also can apply primer to the sheathing to ensure a strong seal.
Remember that whether you cover the entire roof or just seal vulnerable joints, the self-adhering membrane should be installed shingle-style up the roof slope whenever possible. Although the adhesive bond of these membranes is good, a water-draining overlap is better. Stormproofing a roof is cheap insurance and a backup to, but not a replacement for, properly lapped metal or plastic flashing.
Although the roof of the detached garage shown here illustrates many of the important stormproofing details—eave edges, rake
edges, valleys, vertical walls, dormer sidewalls, dormer valleys, and panel seams—it is not a complete list. Certain roof-to-wall connections, vents, tubular skylights, and traditional skylight curbs have their own best practices. Visit the Magazine Extras section of our website for videos and information on these topics.
Bottom of dormer valleysThe area where a dormer valley joins the main roof is full of intersecting parts: fascia trim, soffit, and the dormer wall. Despite the complicated joints, the protection for this area is pretty simple. In fact, you can address several of these vulnerabilities with just one piece of membrane. Cut a piece at least 18 in. wider than the soffit is deep, which allows 6 in. to lap onto the dormer wall and at least a foot to extend past the fascia and onto the main roof. The length of this membrane should be about equal to the length of the cut on the fascia board, plus an extra 4 in. Be sure that the soffit board is not in place. This will allow the membrane to slide up easily and protect the area that the soffit board will close off. If you are doing the framing, it’s easy to include an oversize piece to protect this vulnerable area before the dormer roof is attached. Alternatively, if the bottom sheet of dormer roof sheathing that meets at the valley can be removed or left off until this area is wrapped, the work will be much easier. 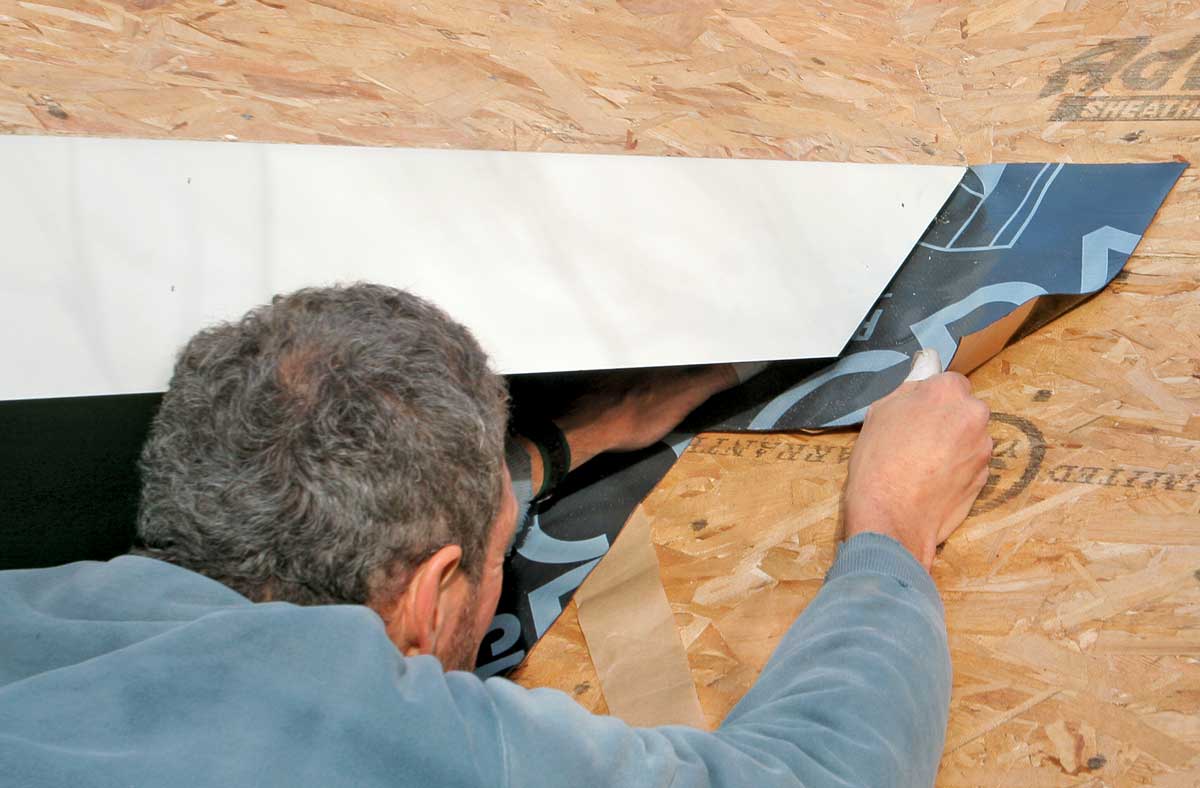 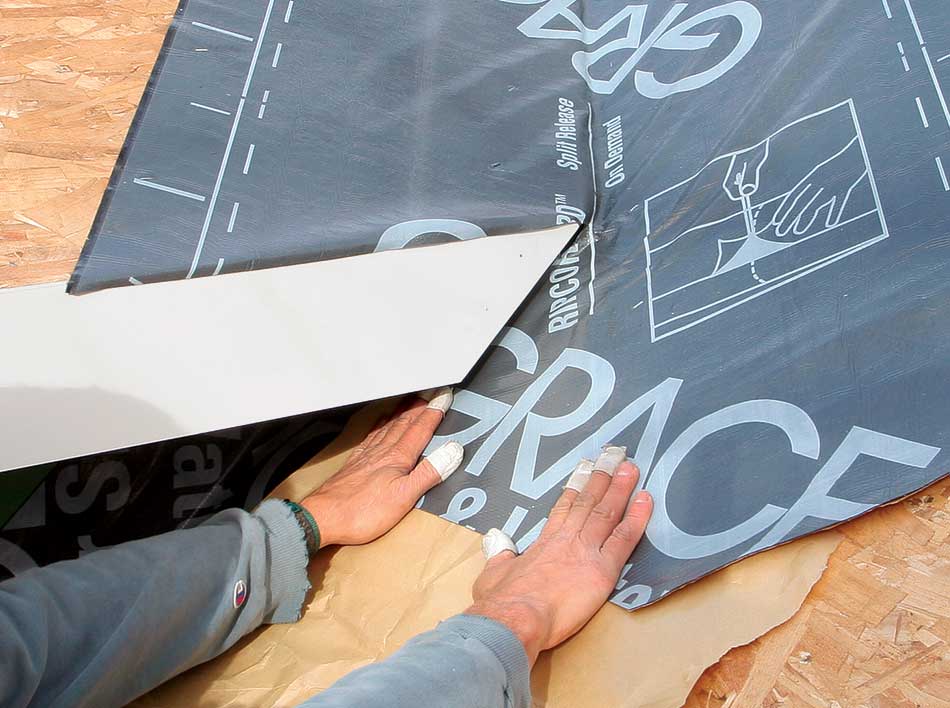 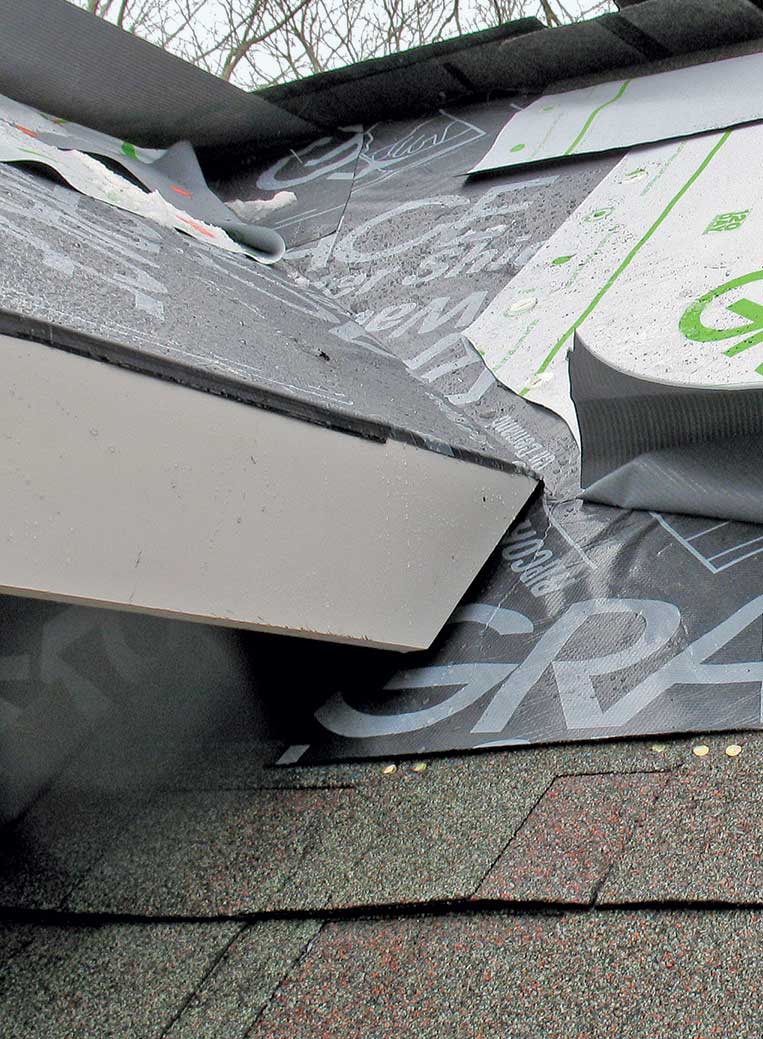 Joints in sheathingSevere storms can break or tear off roofing and mechanically attached underlayment, leaving a house vulnerable to water damage. Provided the sheathing remains intact, it will block water from entering the attic, except along panel edges. Seal the panel edges, and you effectively keep out storm water and minimize water damage to the interior. For this job, I cut 3-in.- to 4-in.-wide strips from leftover pieces of self-adhering membrane. As long as they are unvented, the hips and ridges can be covered the same way as other sheathing seams. For additional protection, apply a 9-in.-wide strip of membrane over the top of the shingles along hips and ridges before installing the cap shingles.
|
Mike Guertin is editorial adviser. Photos by Justin Fink, except where noted.
From Fine Homebuilding #224
Fine Homebuilding Recommended Products
Fine Homebuilding receives a commission for items purchased through links on this site, including Amazon Associates and other affiliate advertising programs.
Fall Protection

Ladder Stand Off
Flashing Boot

