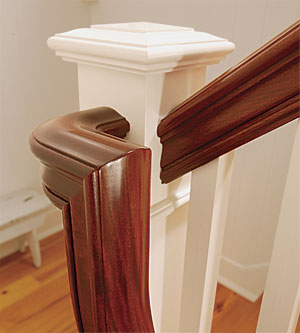
The owners of a newly restored home decided early on that they wanted their stairway and mahogany handrails to be special. After some deep research, they decided on a handrail profile from Hardwood Design in Exeter, R.I. After I showed them a variety of finish samples for the handrail, they picked one of the oldest finishes in the books, a spirit varnish that was French-polished. Although I didn’t use an authentic French polish (I didn’t use the traditional filler), the rest of my process was the same. I dyed, stained, and filled the grain, then brushed on varnish and padded the surface into a high gloss. The beauty in this type of finish is threefold: The finish is thin, it’s highly tactile, and it makes the wood grain glow with inner light. An unusual aspect of this project was that the rails were brought to my shop before installation. This made it much easier for me to do a great job, which in turn saved the clients money. Here’s how I created this classic finish.
Sand and seal to prep the wood
Although the rails were relatively smooth when they arrived, I sanded each segment with successively finer grits of sandpaper, from 150 to 180 to 220. For this type of sanding, I use Norton Champagne, a stearated paper that doesn’t clog easily and remains sharp for a long time. After the last sanding, I vacuumed the wood and wiped it down with a lint-free cloth.
Handrails such as these have many radii that expose a good deal of end grain. To ensure a controlled and even final color, I spot-sealed the end grain next so that it wouldn’t absorb more color than the flat grain. I brushed on a thin coat of Zinsser’s SealCoat, a dewaxed shellac that can be used under any finish. Once that coat was dry, I gave it a quick sanding with 320-grit paper.
Start the process with dye. A first coat of waterbased dye creates a ground, or base, color. In this instance, the dye used was a yellowbrown mahogany. Remember to coat the ends of single pieces so that no raw wood shows if the ends are misaligned.
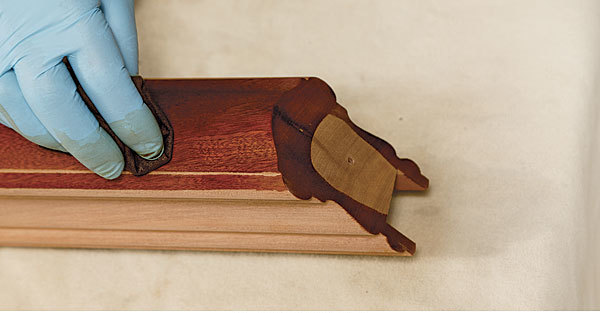
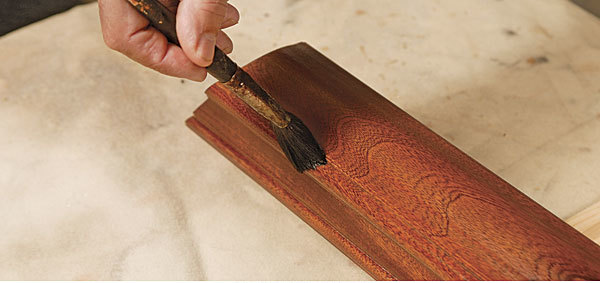
Stain adds depth. Once the dye is dry, a stain made from diluted Waterlox and a half-and-half mix of burnt-umber and raw-sienna oil pigments is applied with a lint-free cloth. Use a brush to spread the stain into tight areas of the profile.
 Start the process with dye.
 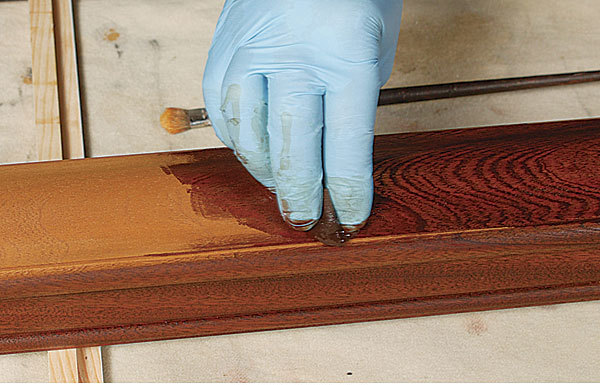 Stain adds depth.
Consider color carefully
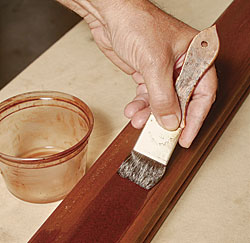 Seal with a wash coat. Brush on a thin coat of dewaxed shellac to seal the stain and to prep for the grain filler. When the coat is dry, sand with 320-grit paper.
While some may prefer a natural look, the clients on this job wanted more of an aged patina. To re-create the rich depth of antique mahogany, I used a combination of dyes and stains. The dye, or ground color, provides a transparent glow to the wood. This is augmented by a homemade oil stain to add depth and to protect the color from fading.
I used a powdered dye from W.D. Lockwood that’s mixed with water. I applied it with a soft cloth and an artist’s brush, working it into all the reveals. Once the dye was dry, I applied my oil stain and let it dry a full day before sealing the surface with a thin coat of shellac.
To make the stain, I used Waterlox diluted in half with mineral spirits as the binder. For the color, I used Windsor Newton artist oil pigments, roughly equal parts burnt umber (a warm brown) and raw sienna (a golden brown). I mixed them together in a separate container with a little of the binder. After straining the mix, I added it to the binder, testing the color on a paper plate as I went. When the strength of the color reached a rich golden brown, I applied the stain with a lint-free cloth and used a brush to be sure all the reveals were stained. After letting it sit for a minute or so, I wiped it down with a clean cloth. When the stain was dry, I brushed on a full coat of SealCoat.
Fill the pores for a smoother surface
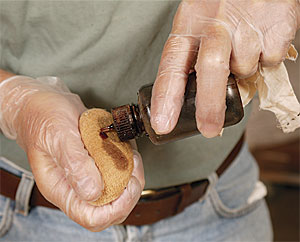
The classic French-polish process uses powdered pumice to fill the pores, but I use a commercial pore filler from Sherwin-Williams that contains a high percentage of silex (ground quartz). This makes the filler shrink less than others. I use the natural color so that I can tint it myself. Here, I tinted the filler with a higher concentration of the same colors I used earlier.
After applying it, I let the filler sit for at least two days so that the oil dries fully. If you rush this step, you run the risk of residual solvent popping through the finish later.
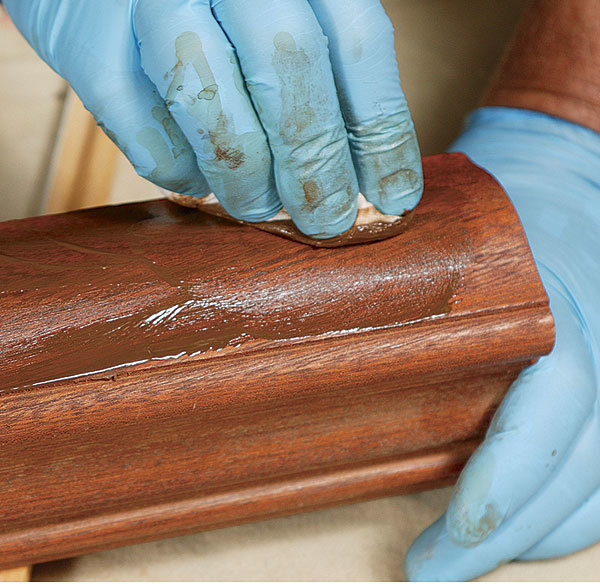
Grain filler, straight from the can. Although traditional grain filler consists of powdered pumice, the author prefers to use a ready-mixed filler that shrinks less. Tinted with the same colors as the stain, the filler is rubbed in across the grain. After a few minutes, any excess is removed with a fine nylon abrasive pad.
Top it off with a spirit finish
 Start with a brush. It’s faster to build up the first coats with a brush. A dome-shaped artist’s brush is supple enough to flow the shellac into the tight areas of the profile. Sand lightly with 320-grit paper when the shellac is dry.
This traditional spirit varnish consists of dewaxed blond and ruby shellac mixed with a small amount (about 5% of the total volume) of sandarac, an alcohol-soluble resin.
I applied the first couple of coats with a soft, dome-shaped brush. After a couple of hours, I sanded the surface lightly with 320-grit paper.
Next, I switched from a brush to a cheesecloth and linen pad. After charging the pad with alcohol and shellac, I brushed the pad lightly so as not to disturb the initial coat of shellac. I continued padding with increasing pressure as the shellac was discharged. This is known as “bodying up the finish.” Beginners usually make the mistake of recharging the pad too often. Be sure the pad is dry before recharging it.
After rubbing in a few coats, I let it dry overnight, gave it a light sanding with 320-grit paper, and started padding with a diluted shellac mix, rubbing harder as the pad dried. This pressure chemically reactivates the underlying shellac and burnishes the surface.
When the finish was even and glossy, I let it rest for a couple of days. If the situation called for an older look, I could rub the finish with a white scuff pad to reduce the sheen slightly.
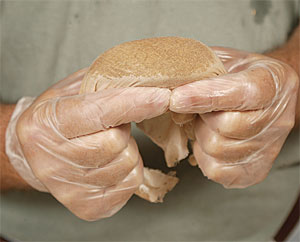
Build a pad. First, ball up a handful of cheesecloth, then wet it with alcohol and shellac. Cover it with a square of thin, tightly woven cloth. Gather the cover tautly at the back to create a smooth, wrinkle-free side on the front.
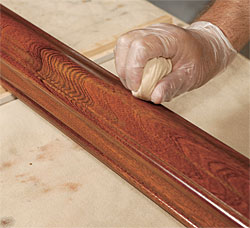
Finish with elbow grease. With a pad charged with shellac, begin to rub the brushed coat lightly, increasing the pressure as you go. Recharge the pad when it’s dry. After three or four sessions, let the finish sit overnight. Next, sand lightly with 320-grit paper, then polish. To recharge the pad, dilute the shellac with more alcohol, and add it in small increments to make the pad just damp, but not wet.
Trick of the trade: Mixing shellac
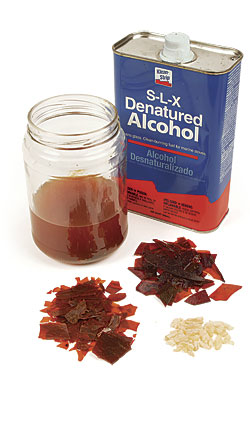
Derived from the resinous secretions of the Asian lac bug, shellac has been used as a finish for hundreds of years. In its most unrefined state, it contains a small amount of wax, which makes adhesion difficult for some finishes. It’s best to use dewaxed shellac instead. The flakes are mixed with alcohol, then strained. I make it about as thick as heavy cream and then thin it to a consistency similar to milk.
I use dewaxed ruby and orange to help create a “fire” to the finish, garnet to subdue a high-value ground color and deepen it, and button to create an older faded finish with sort of a caramel color to it. (For more information on shellac, see “Versatile Shellac” in Fine Woodworking #166.)
ShellacFinishes.com is a good online source for supplies. Good-quality cheesecloth and linen covers are available from Mohawk Finishing Products (www.mohawk-finishing.com). Sandarac, a plasticizer that improves sanding, can be ordered at www.kremerpigments.com.
Photos: Charles Bickford