
10 Tips to Paint Like a Pro
Professional painter Philip Hansell shares the products and methods he uses for tackling the toughest parts of the job.
As a professional painter with nearly 20 years of experience, I’ve developed a thriving business. Getting there hasn’t been easy, though, and I’ve made my share of mistakes. However, I’ve used these mistakes to improve my technique and to seek out high-quality, problem-solving products that I now rely on for almost every job. Here, I’ll share some of my favorite products and some tips for getting the best possible exterior paint job.
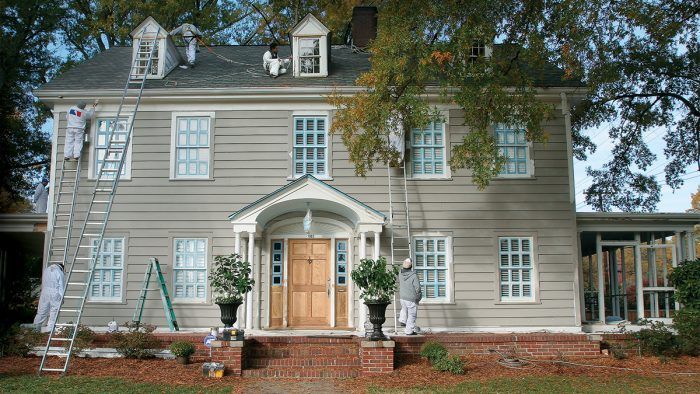
The 2200-sq.-ft. house featured here was in rough shape when we started, and it demonstrated that it’s best not to neglect exterior painting for too long. Regular maintenance could have prevented much of the prep work and saved thousands of dollars when it came time to repaint. Because of the home’s condition, we had between four and eight painters on the job for nearly two months, which pushed the clients’ bill to more than $30,000. The price included removing the existing vinyl shutters; pressure-washing the entire house; scraping, priming, and painting all the trim and overhangs; stripping much of the siding down to bare wood; and painting the porches, siding, and window sashes. Finally, we painted and hung new, historically accurate wooden shutters.
In April 2008, the EPA released new rules for painting and remodeling houses that have lead-based paint. If you’re a contractor and you’re caught ignoring the EPA’s RRP (renovation, repair, and painting) rule, you’re risking your livelihood. One Connecticut-based company was recently fined more than $30,000 for violations. Homeowners doing their own work are exempt, but that doesn’t mean they should disregard the requirements. If you’re a homeowner planning to repaint your own house, I suggest reading up or taking a class on handling lead-based paint.
Tip 1: Scrape and Sand Before Washing
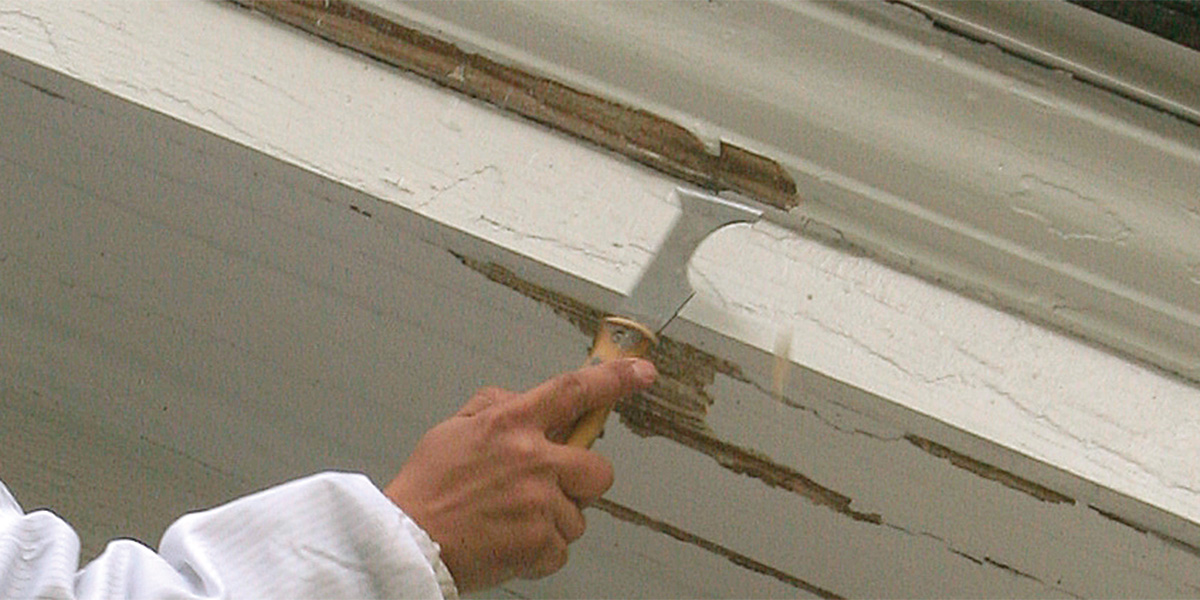
When there is a lot of scraping and sanding to do, as there was on the house featured here, we like to do it before the house is washed. Many painters make the mistake of washing first and then doing a lot of heavy sanding afterward. The dust left behind makes it hard for the paint to bond. After the scraping and sanding are done and the house has been washed, check all scraped areas to make sure the washing didn’t loosen any more paint.
Tip 2: Stick to Low Pressure When Washing
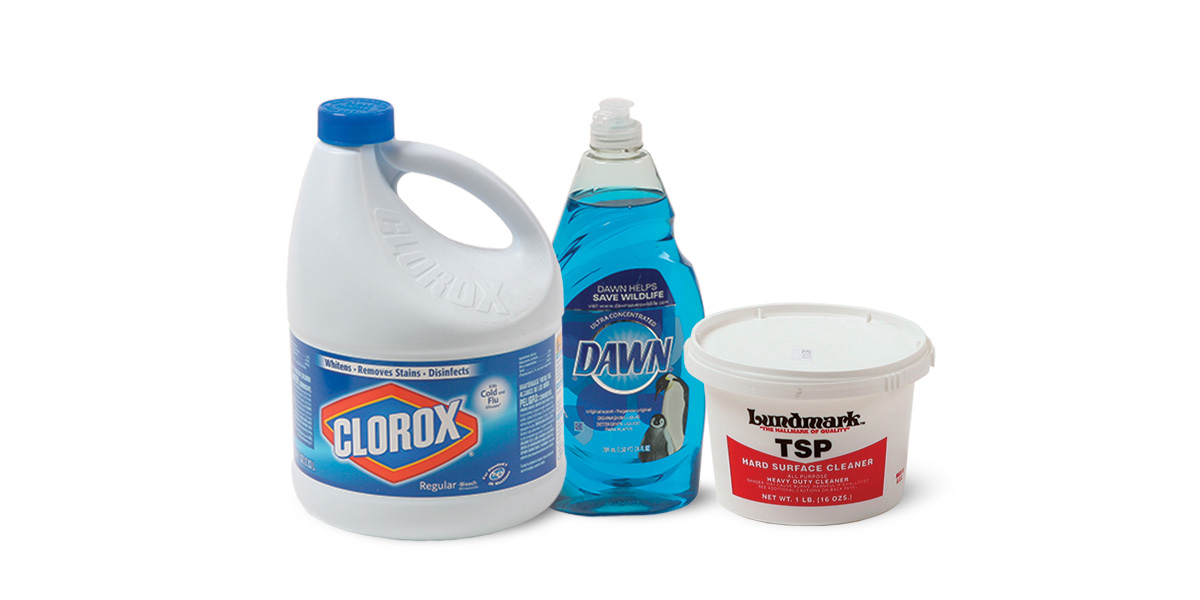
We add about a tablespoon of dish soap to our mix of TSP (trisodium phosphate) and bleach. Dish soap creates suds that help the solution to cling to the siding and trim instead of running off the house. Then we rinse the house with a pressure washer on a low setting. Never use high pressure, which can force water into the wood and damage siding and windows.
Tip 3: Cover Plants, Cars and Exterior Light Fixtures
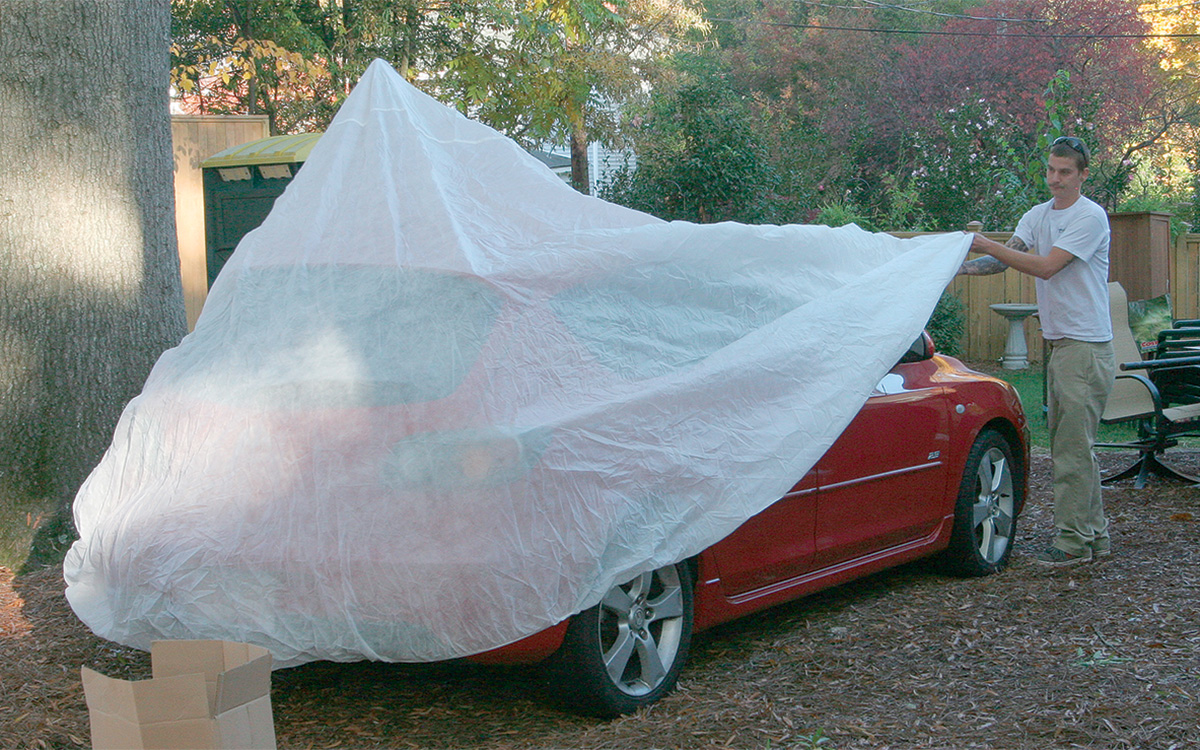
We use lightweight canvas drop cloths to cover plants. They don’t break branches, and they let the plants breathe. Plastic covers can heat up like a greenhouse and kill plants. We cover lights, windows, and doors with Cling Cover plastic. Unlike with traditional poly sheeting, tape sticks well to the lightly textured surface. This material comes in 9-ft. by 400-ft. rolls. Automobile covers are one of those touches that show our clients we do quality work and care about their possessions. We buy them from Sherwin-Williams, and they cost about $35.
Tip 4: Consider Special Primers Instead of Whole-House Paint Removal
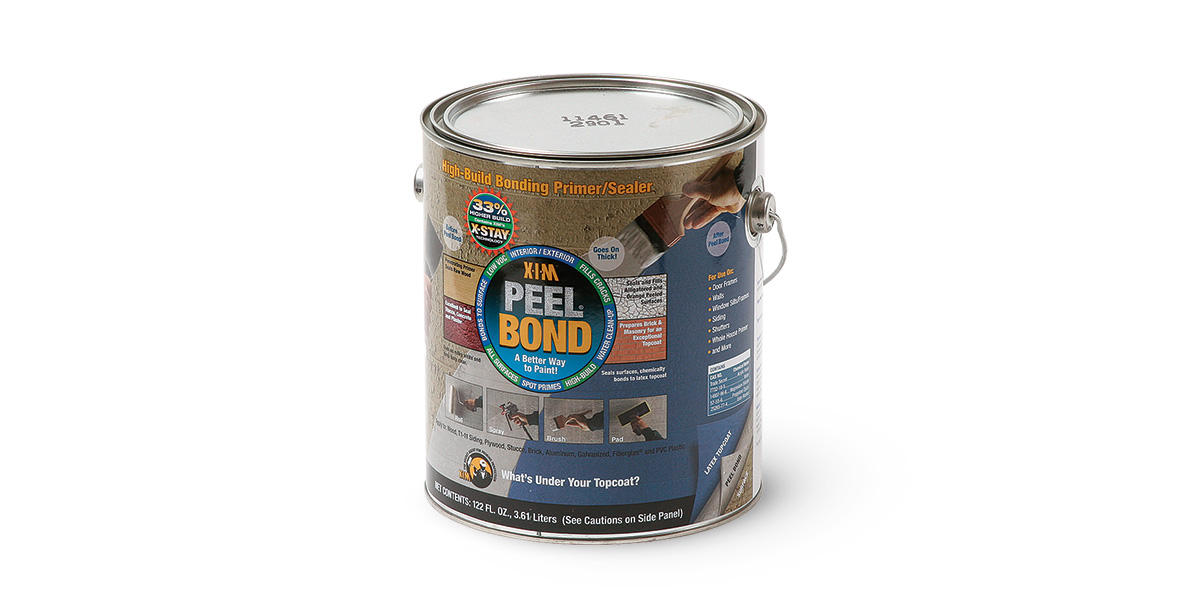
If we are working on a house that has old oil-based paint that is peeling and cracking badly and complete removal is not an option, we like to use XIM Peel Bond primer. It’s a high-build, clear acrylic primer that can be applied up to 30 mils thick. It’s great at leveling cracked surfaces, and it costs two-thirds less than stripping down to bare wood. We used this product on the porch ceilings and on the second story of the house shown here as a way to make the project more affordable. We stripped the lower part of the house down to bare wood so that it would have a flawless finish at eye level.
Tip 5: The Right Tool Makes All the Difference
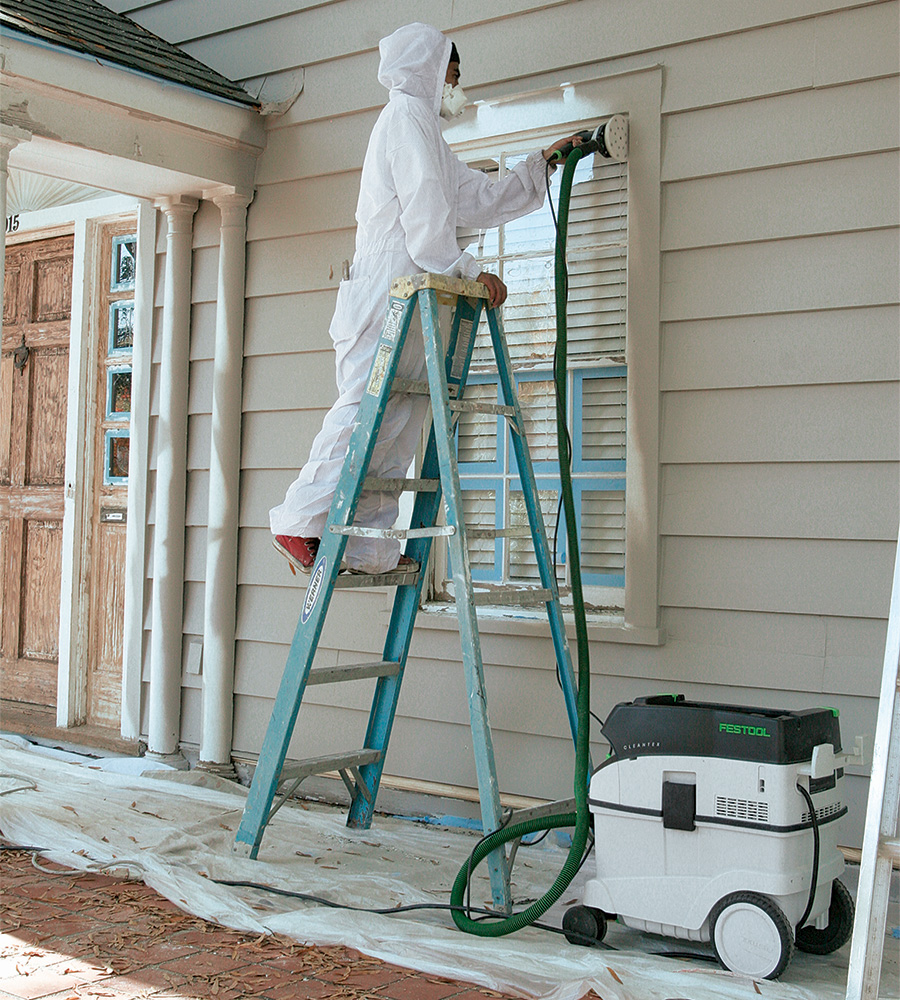
With the EPA’s new RRP rule for dealing with lead-based paint in effect, we had to rethink how to prepare surfaces that test positive for lead. When we were introduced to the Festool sander/vacuum combo by a local cabinet builder, I was really impressed, but I was hesitant to buy one because of the price (nearly $1200). The tool works so effectively, though, that after we bit the bullet on the first one, we ordered two more soon after. Now we use all three every day on lead jobs. The vac’s EPA-approved HEPA filter captures 99.97% of particles down to 0.3 microns. We love that these vacuums protect our employees from lead exposure and reduce our cleanup time. In fact, we like them so much that we plan to buy six more this year.
Tip 6: Pick the Right Primer
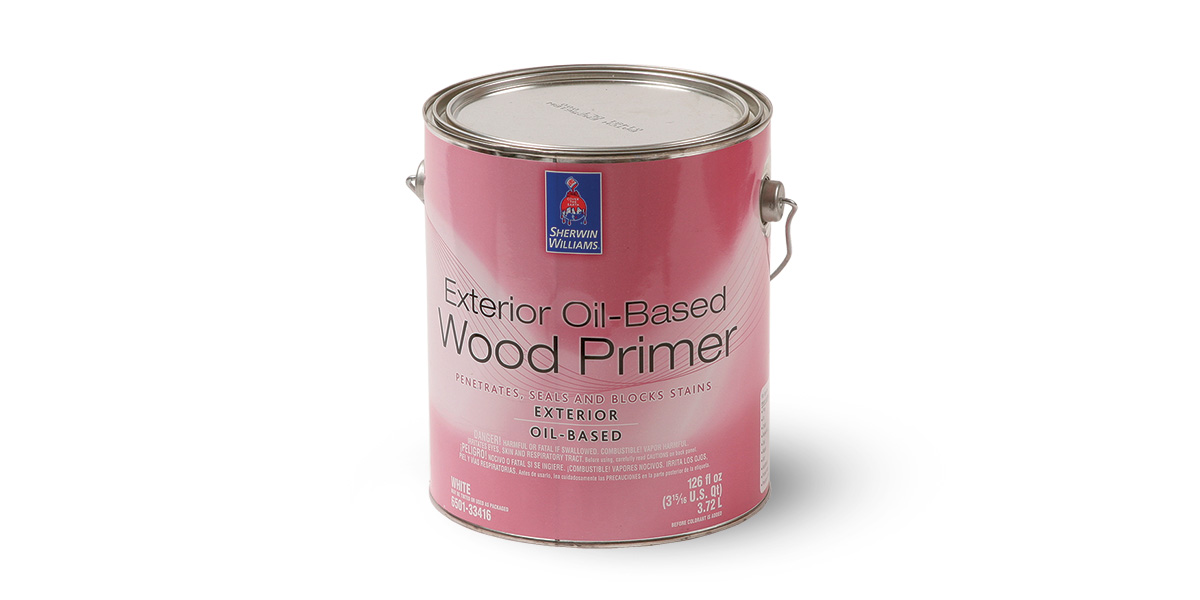
With so many primers out there, it’s easy to get confused about which one to use. We almost always use a slow-drying oil-based primer for exterior wood, such as Sherwin-Williams’ Exterior Oil-Based Wood Primer. Because it dries slowly, it has time to penetrate the wood and provides the best base for all types of paint. Many people think that if they are going to use latex paint, then they must use latex primer, which is incorrect. As long as the primer has time to dry, it’s perfectly fine to topcoat with latex paint. For fiberglass and PVC trim that needs to be painted, we’ve had good success with Sherwin-Williams’ Adhesion Primer. One often-overlooked step is to wipe these materials with denatured alcohol to remove any manufacturing oils before priming. When priming new wood, watch out for mill glaze. I’ve heard carpenters and painters say they don’t believe in mill glaze, but if the wood appears shiny or especially smooth or if it’s been in the sun for a few weeks, sand it lightly before priming. For more on primers, see “What’s the Difference?”from Fine Homebuilding #226.
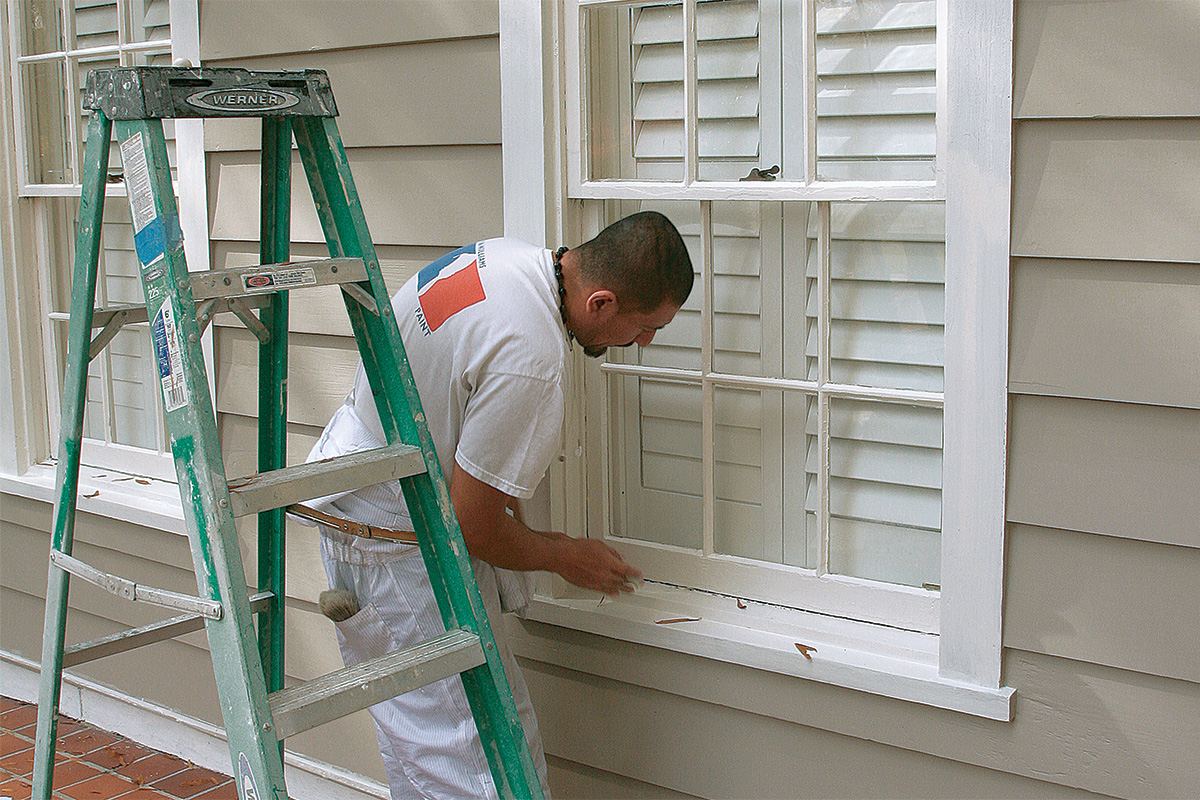
Tip 7: Allow Extra Time for Painting Windows
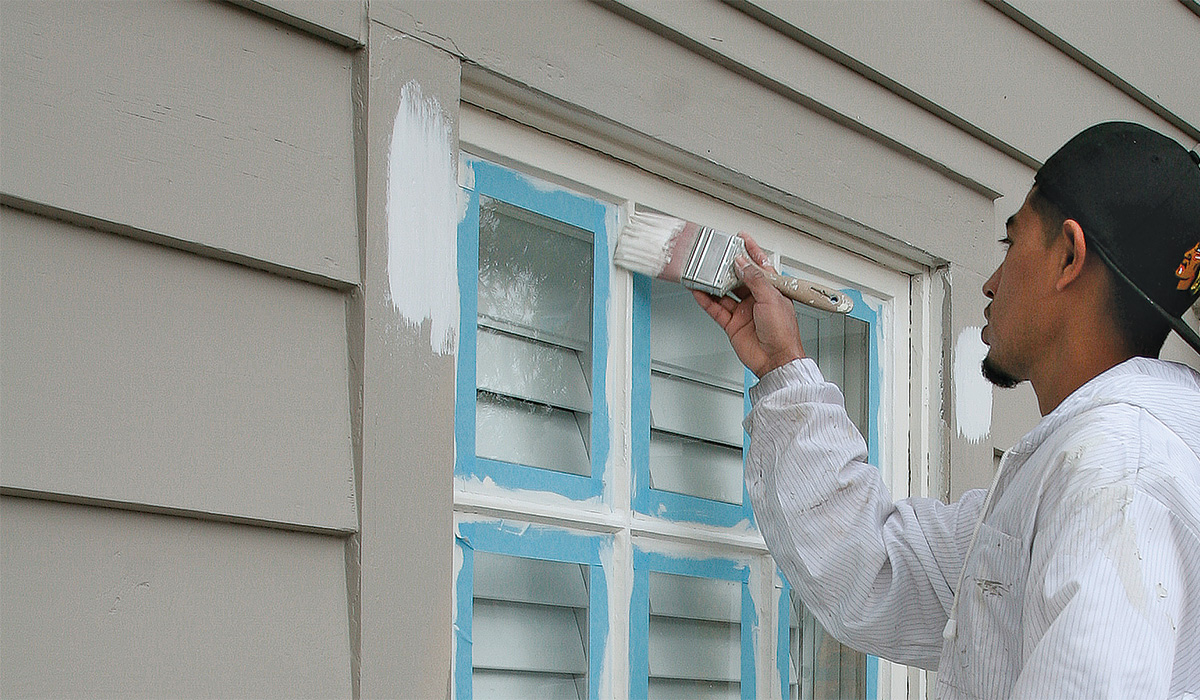
When painting old windows, it’s best to remove loose glazing putty and peeling paint and then re-glaze where needed. It’s OK to leave portions of old glazing putty if they’re well adhered. Once the glazing putty is dry (we like to wait two to three weeks), we mask the perimeter of the window with 1-1/2-in.-wide blue tape, which protects the glass from scratches and speeds up priming and painting. After masking, we sand all the wood and old glazing, then wash the window with a solution of TSP, bleach, and detergent. We let it sit for 10 to 15 minutes, then rinse the window with clear water. After the window is dry, we prime the sash and glazing putty with a slow-drying oil-based primer. Once the primer is dry, we sand the wood lightly, caulk where needed, and apply the first coat of paint. Then we pull off the tape and clean the glass with spray-on glass cleaner and paper towels. For the final coat, we lap the paint 1/16-in. onto the glass. This prevents water from getting behind the glazing putty, which is what causes the putty to fail. Before the paint dries, we open and close the window a few times to prevent it from becoming sealed shut with paint.
Tip 8: Wrap Up Painting by Early Afternoon in the Fall and Spring
Surfactant leaching is something that most people haven’t heard about but have probably seen. It occurs when ingredients in the paint leach to the surface as a result of moisture. It’s common in the fall and spring with their warm days and cool nights. At night, condensation forms on the paint film; then the water breaks down the water-soluble components in the paint and brings them to the surface. When the water evaporates, it leaves behind a waxy-looking area that usually wears off on its own, but it’s hard to convince a customer of this. To prevent surfactant leaching, we stop painting around 1 p.m. in the spring and fall. We do surface prep in the early morning, paint from late morning to shortly after lunch, and then resume prep work until the end of the day. This process takes longer, but it avoids problems.
Tip 9: There is a Quick Fix for Sticky Doors and Windows

Have you ever tried to open a cabinet door that feels like it is glued shut? This condition is known as blocking, and it is common on places where cured latex paint tries to stick to itself, such as on wood windows, painted doors without weatherstripping, and garage doors. Most exterior paints are not resistant to blocking, so we apply a thin coat of clear Briwax to window sashes, garage-door panels, and places where doors meet door stops.
Tip 10: Don’t Forget Home Maintenance
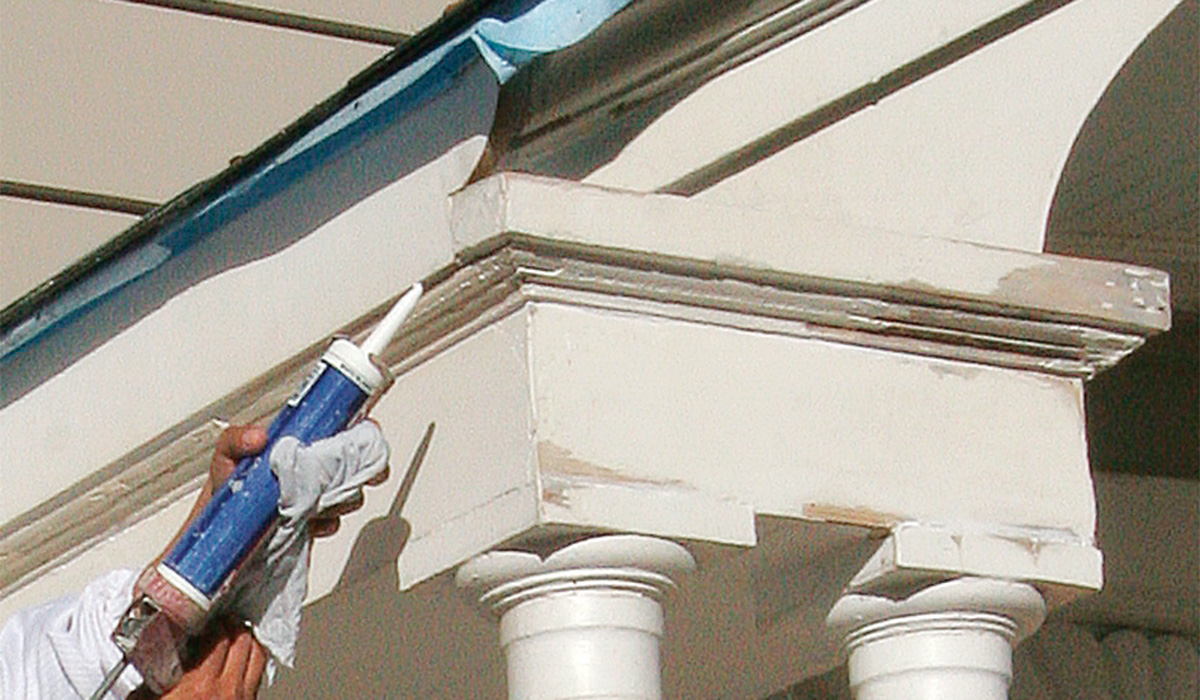
Most people think that if they clean their gutters twice a year, they’ve maintained their home. We recommend that our customers hire us to wash their homes every other year and to have us check the caulking and touch up the paint where needed. We have customers who have 11-year-old paint jobs that look nearly new. The cost for this service is usually under $1000 and can add years to a paint job. I’ve seen something simple like cracked caulking between trim and a windowsill ruin many window frames. These costly repairs could have been avoided with a $10 tube of caulk and a few minutes of work.
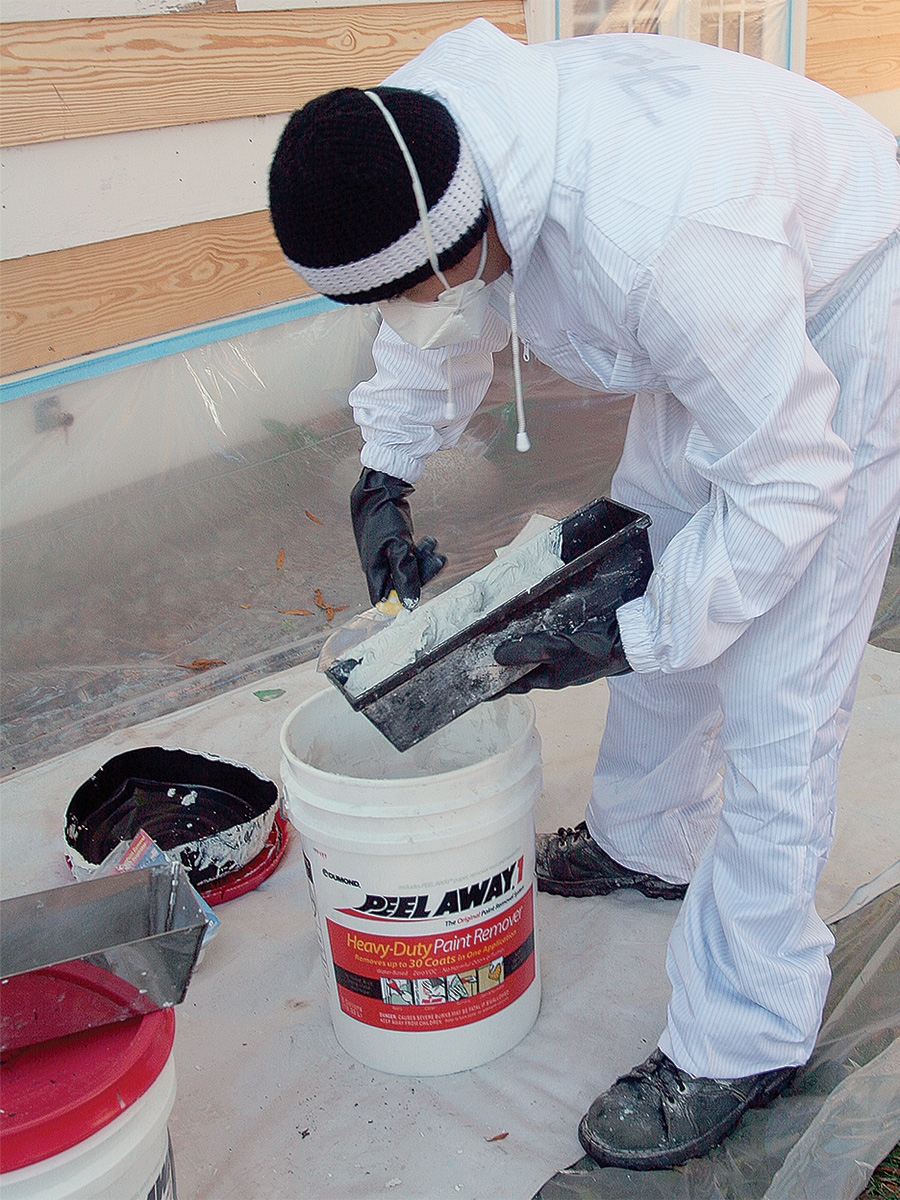
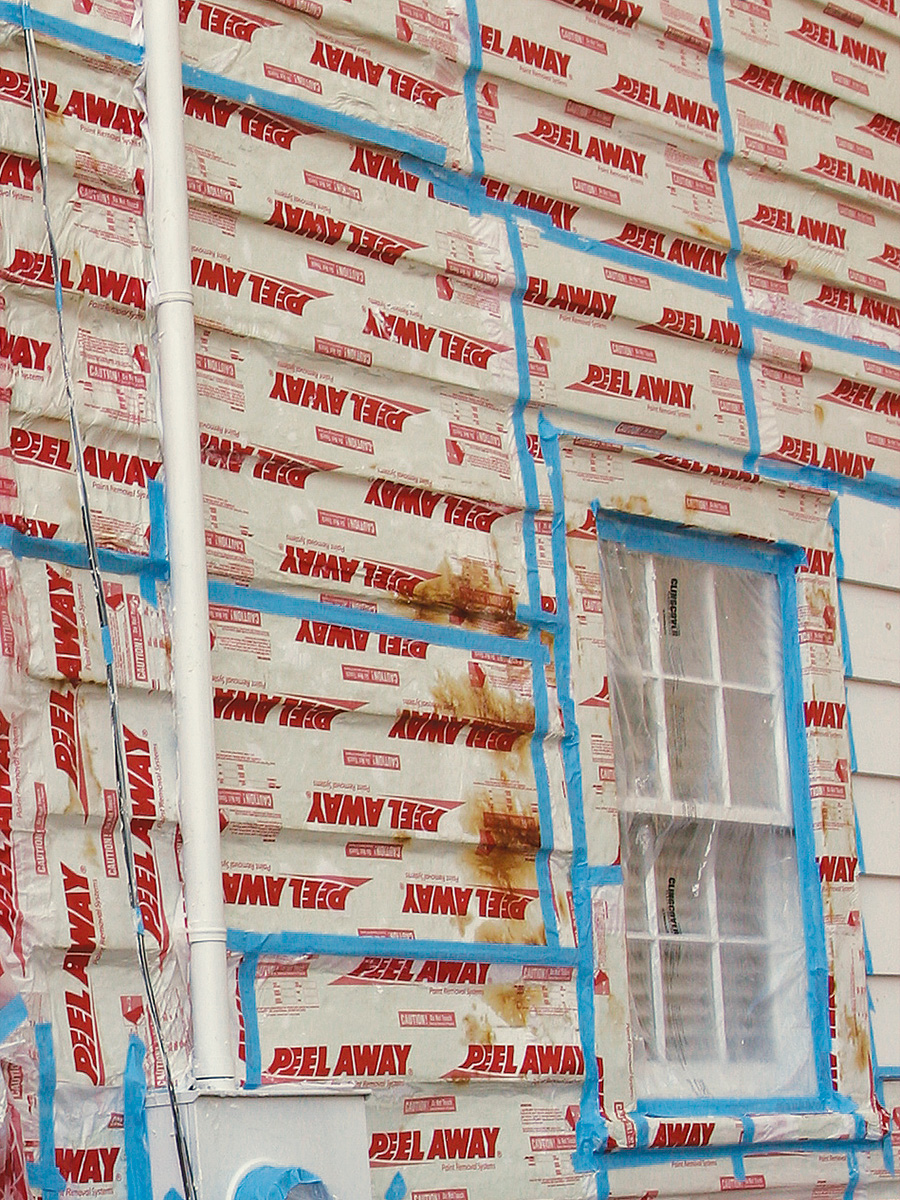
Sometimes, You Have to Start from Scratch
On old houses, paint can be in such rough shape that complete removal is the only way to go. We like a stripping product called Peel Away, which has the consistency of joint compound. We apply it with a mud knife in a 1/4-in.- to 5/8-in.-thick coat, then cover it with the waxy paper included with the product.
 |
 |
 |
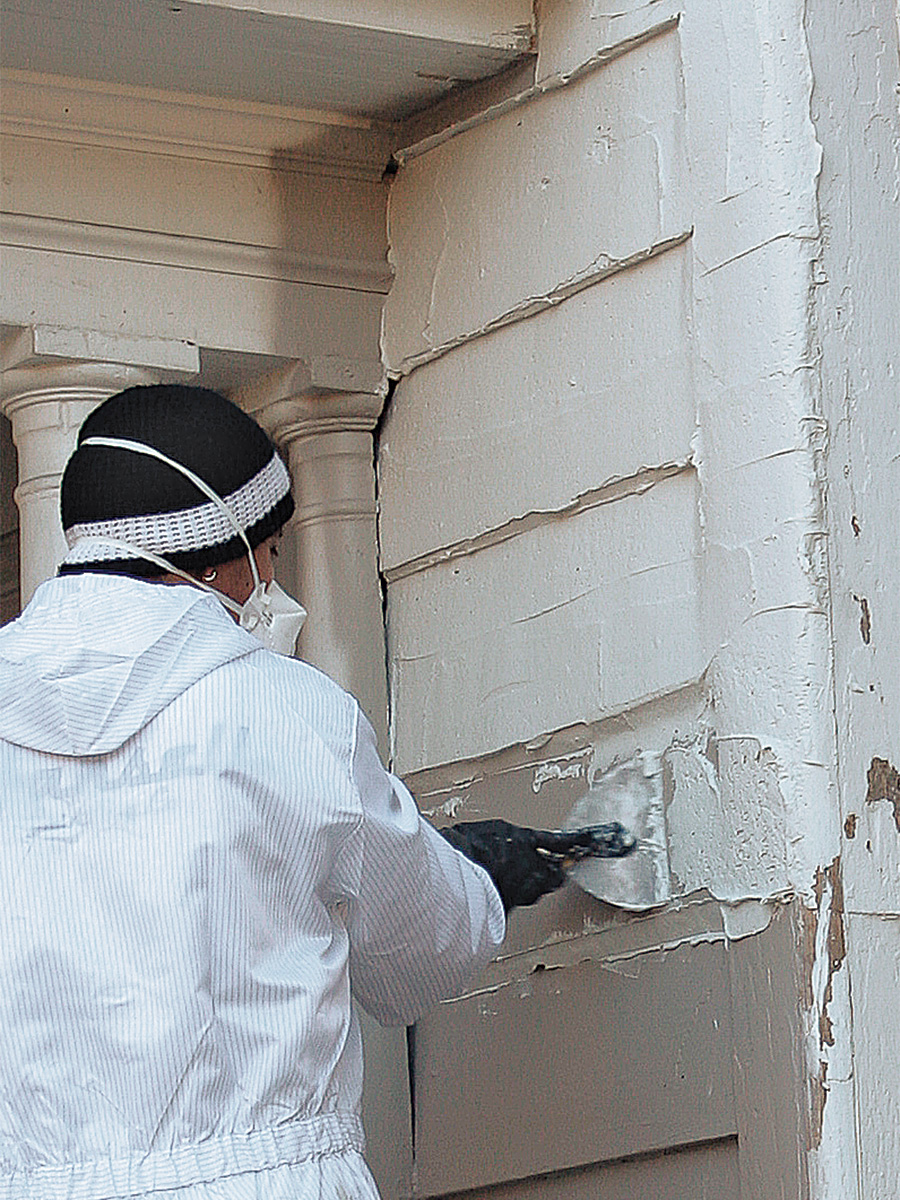
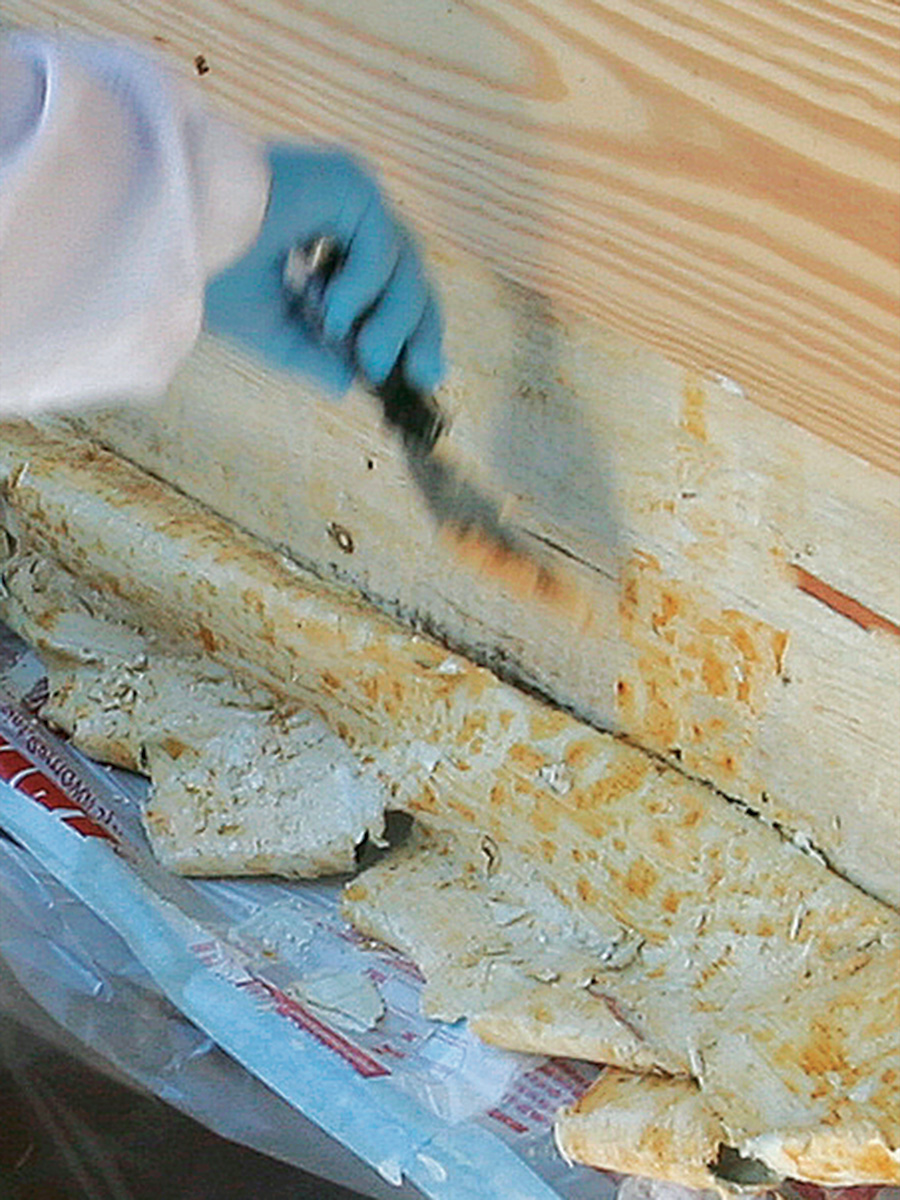
We leave it covered for 12 to 72 hours, checking it about three times a day until we see that it has worked its way through all the layers of paint. After scraping off the softened paint onto 6-mil plastic with a putty or taping knife, we apply with pump sprayers the neutralizer that comes with the product.
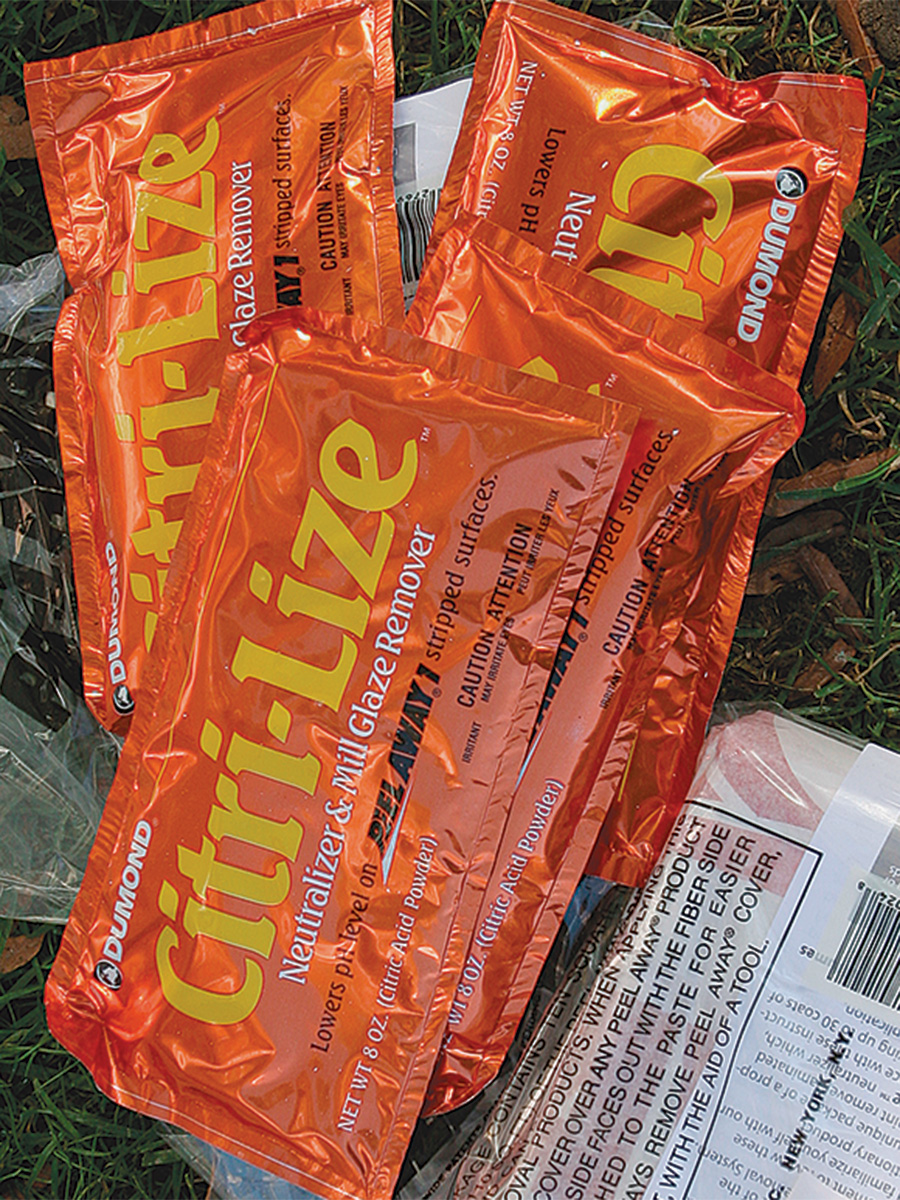
We work it in with stiff nylon brushes, let the wood dry for a couple of days, then neutralize and scrub again. The final step is a scrub and rinse with clear water. After the wood is dry, we check the pH with a test strip. If the pH is too high, we go through the neutralization process again. Once neutralization is complete, it’s important to check the wood’s moisture content before priming. Anything below 15% is acceptable. Peel Away is labor intensive, but when done correctly, it gives great results. On this house, we used it on the siding up to the bottom of the second-story windows.
NOTE: If you are going to try Peel Away, do a test spot first, because sometimes it works in hours and sometimes it takes days. Don’t apply more than you can remove in one day. Letting the wood sit bare for a couple of months isn’t a problem unless you live in an area with a lot of rainfall. If the wood is going to be bare for weeks or months, tack up some 6-mil plastic to protect it. When we need to protect bare siding from rain, we wrap the plastic around a 2×4 and screw it to the house. We keep the plastic rolled up as much as possible so that the wood under it can dry, and we let it down only when there is a good chance of rain.
 |
 |
Paint in the Right Order
Sometimes it’s hard to know where to start on an exterior paint job. Below are outlines that show how we paint homes in good condition and homes that have been neglected.
| Home with Minor Peeling | Home with Major Peeling | |
| 1. Remove the shutters and screens. | 1. Remove the shutters and screens. | |
| 2. Wash the exterior, shutters, and screens. | 2. Scrape all loose paint and glazing putty. | |
| 3. Scrape all loose paint and glazing putty. | 3. Sand where needed. | |
| 4. Replace any rotten wood. | 4. Wash the exterior, shutters, and screens. | |
| 5. Sand all scraped areas. | 5. Check the scraped areas, and sand where needed. | |
| 6. Spot-prime all bare wood. | 6. Replace any rotten wood. | |
| 7. Apply caulk and glazing putty where needed. | 7. Prime all wood. | |
| 8. Brush all overhangs and high trim. | 8. Apply caulk and glazing putty where needed. | |
| 9. Paint all siding. | 9. Paint all shutters. | |
| 10. Paint the windows, doors, and trim. | 10. Brush all overhangs and high trim. | |
| 11. Paint the porch floors. | 11. Paint all siding. | |
| 12. Hang the shutters and screens. | 12. Paint the windows, doors, and trim. | |
| 13. Paint the porch floors. | ||
| 14. Hang the shutters and screens. |
DIY One Side at a Time
If you are a homeowner trying to tackle a large exterior paint job yourself, my first advice is to set plenty of short-term goals. If you set out to paint the exterior of your house without a plan, you’re going to run out of steam or end up hating painting. I recommend working on one side of the house at a time, preferably starting on the least visible elevation. This will give you time to develop your technique and to perfect your painting skills. If you’re like me, there are probably a few projects around the house that you haven’t finished, so you don’t want to add exterior painting to the list. With such a long-term project, you’re likely to get rained out on occasion. I suggest keeping some work in reserve, such as prepping and painting shutters and sashes, that you can do in the garage or basement on rainy days. Make sure to protect yourself and your family from lead paint by avoiding any dry-sanding or scraping and by keeping a neat work area free of paint chips.
| How to Tackle a DIY Whole-House Paint Job | |
| 1. | Remove all shutters and storm windows or screens. |
| 2. | Remove all loose window glazing. |
| 3. | Glaze the windows where needed. |
| 4. | Scrape and sand the overhangs. |
| 5. | Wash and prime the overhangs. |
| 6. | Scrape and sand the siding. |
| 7. | Wash and prime the siding. |
| 8. | Scrape and sand the windows, doors, and trim. |
| 9. | Wash and prime the windows, doors, and trim. |
| 10. | Scrape and sand the shutters. |
| 11. | Wash the shutters. |
| 12. | Wash, prime, and paint the shutters. |
| 13. | Caulk. |
| 14. | Paint the overhangs. |
| 15. | Paint the siding. |
| 16. | Paint the windows, doors, and trim. |
| 17. | Clean the windows. |
| 18. | Hang the storm windows or screens. |
| 19. | Hang the shutters. |
Photos: Patrick McCombe except where noted

View Comments
FineHomebuilding published very favorable review of the Speedheater™1100 Infrared Paint Remover.
https://www.finehomebuilding.com/2019/04/10/283-infrared-paint-remover
In 2018, the Journal of Light Construction published another of the newest Speedheater™ Cobra Infrared Paint Remover.
https://www.jlconline.com/how-to/exteriors/safe-paint-removal_o
It is unfortunate that the painting contractor author of this article above recommended only 2 traditional methods: sanding and chemical paint strippers. He did not mention the new technology of infrared paint removers. Chemicals strippers require many days of extra labor and even more of waiting: 1-3 days of dwell time for the chemicals to release all the layers of paint from the wood; 2-4 days of manually scraping off the chemicals and paint waste; one day to spray neutralizer on the entire wood surface; and 2-5 days of waiting for the wood to dry to less than 15% moisture content. The chemical method takes 12-26 days.
With the UL Listed Speedheaters™, even lead-based paint can be heated safely in less than a minute, and the soft paint scraped off immediately and thoroughly in one pass of the heater. With the Speedheater™ Method, the bare wood is stripped clean and the wood is dried to the required moisture level for immediate priming. The time for stripping this entire house is only the one step heating and scraping.
Hi, I want to paint my house outside and I want the best Exterior Painting experts for my house. Can you suggest some of the pro painters. I have got some from https://summervillepainter.com/ but I need more of the suggestions.
I love content like this that helps DIYers become more knowledgeable about tips only previously known to experts. The Bri-wax tip is a perfect example of this, I've been using this product for years and I doubt many DIYers have ever heard of it! Thanks for putting this together.
Jake
https://www.valdostapainterpros.com/