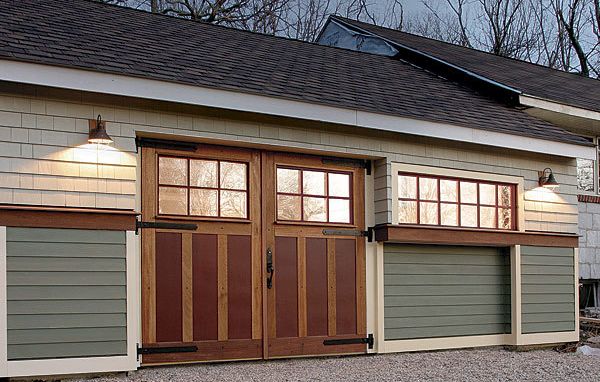
Dress Up a Garage Door with Insulated Carriage Doors
These custom doors add energy efficiency and style.

Synopsis: One of the first tasks at FHB’s Project House was to create a shop so that there would be an appropriate place to work. The garage provided the perfect location for a shop, but the old garage door needed to be replaced. Hence, a new garage door became an early Project House project. FHB editors decided to replace an overhead door with a stylish pair of insulated, energy-efficient carriage doors. The doors are built with materials commonly found at a local lumberyard, including TimberStrand LSL studs, birch plywood, meranti, CDX plywood, and polyiso rigid foam. The glazing came from bargain-bin insulated double-glazed units that were disassembled for their glass.
Like a lot of garages, the two-car garage at our Project House is used for storage and workshop space rather than for parking. The original overhead door was uninsulated and leaky. It was also a pain to open and close when entering or exiting the shop. Instead of installing a new overhead door, we built a set of carriage doors that improve the utility of the workshop, keep cold winter air at bay, and enhance the look of the house.
Here, we will show you how to build doors so that they won’t warp, how to insulate and air-seal them, and how to finish them with attractive, low-maintenance materials.
A frame that won’t warp
Wood doors are notoriously unstable. Solid wood rails and stiles can expand and contract considerably throughout the year and push a door out of alignment. A warped door looks bad and can be difficult to operate. Just as important, though, a warped door won’t seal properly against the weather stripping along the length of each door jamb, which will lead to air leakage and energy losses.
Senior editor Justin Fink suggested that we construct the door frames with Timber Strand LSL engineered 2×4 studs, which cost nearly twice as much as sawn lumber. However, engineered lumber is less likely to twist, bow, or shrink over time. It’s also dead straight, which makes door assembly easier.
Insulated and airtight
Because we plan to use the garage workshop year-round, we’re spending a lot of time insulating and air-sealing the space so that it’s warm in the winter and cool in the summer. We didn’t want our energy-conscious approach to fall down at the doors.
The 1-1 ⁄2-in. void between the plywood door skins is insulated with two layers of 3 ⁄4-in. polyiso rigid foam, which has an insulation value of about R-9. We covered the insulated 2×4 frames with 1/4-in. birch plywood on the interior surface and 1 ⁄2-in. CDX plywood on the front, which will help to increase the doors’ strength and stability. Before applying the plywood skins, we laid a continuous bead of construction adhesive around the frame to prevent airflow through the doors.
To minimize leaks around the doors when they’re closed, we weather stripped the new door jamb with a kerf-in, polyethylene covered foam product that is both durable and relatively cheap—about 18¢ a foot. The small gap between the doors is also weathers tripped, as is the threshold.
For photos and more information about the installation of the carriage doors, click the View PDF button below.


