Railing Retrofit
New posts, a cable-rail system, and an applied rim board breathe new life into a weathered deck.
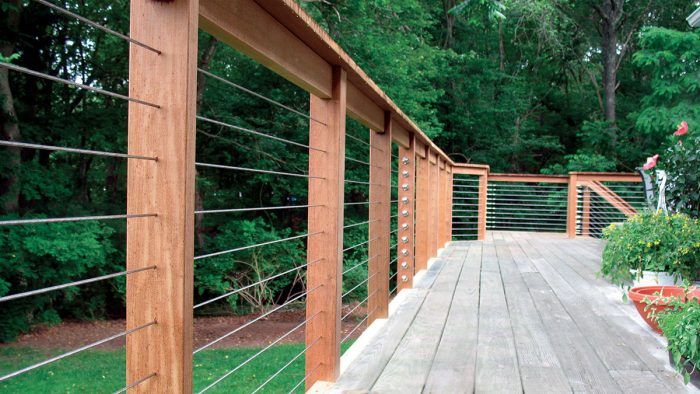
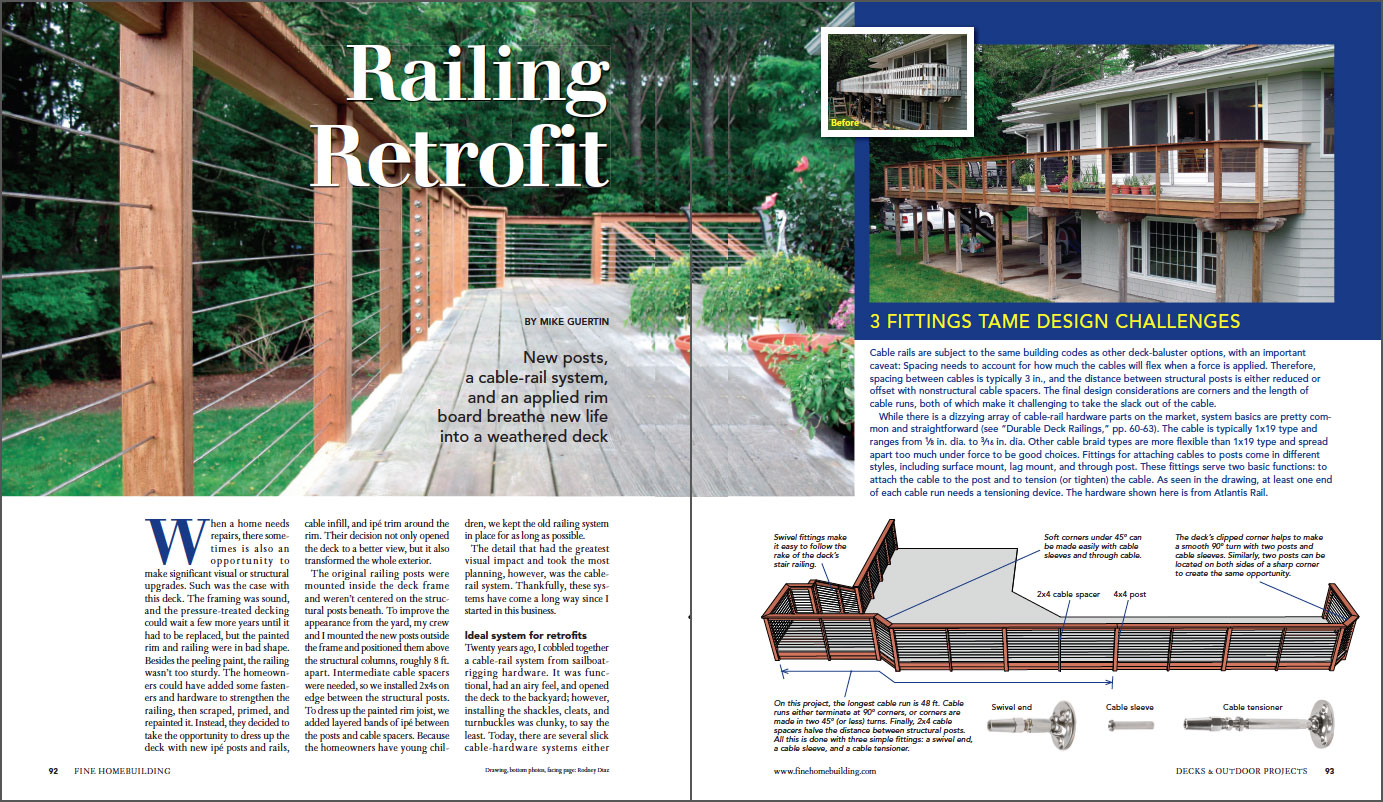
Synopsis: When veteran builder Mike Guertin was hired to rehab this deck, he discovered sound framing but a rim and railing in need of replacement. Instead of replacing all wood with more wood, Guertin used a cable-rail system. Cable rails have the same code requirements but because they can flex under force require special attention to tension and spacing support. Still, they are ideal systems for retrofits. The system basics usually involve 1×19 type cable and fittings, either surface-mount, lag-mount, or through-post. The first step in renovating this deck was replacing the posts and top rails; the posts were drilled with holes to accommodate the cable-rail hardware and the cable rail. After they were securely attached, the cable rail installation went quickly. First, the cable sleeves went in the posts, followed by the hardware. Then the cable was installed and anchored. As a finishing touch, ipé trim dressed up the deck railing.
When a home needs repairs, there sometimes is also an opportunity to make significant visual or structural upgrades. Such was the case with this deck. The framing was sound, and the pressure-treated decking could wait a few more years until it had to be replaced, but the painted rim and railing were in bad shape. Besides the peeling paint, the railing wasn’t too sturdy. The homeowners could have added some fasteners and hardware to strengthen the railing, then scraped, primed, and repainted it. Instead, they decided to take the opportunity to dress up the deck with new ipé posts and rails, cable infill, and ipé trim around the rim. Their decision not only opened the deck to a better view, but it also transformed the whole exterior.
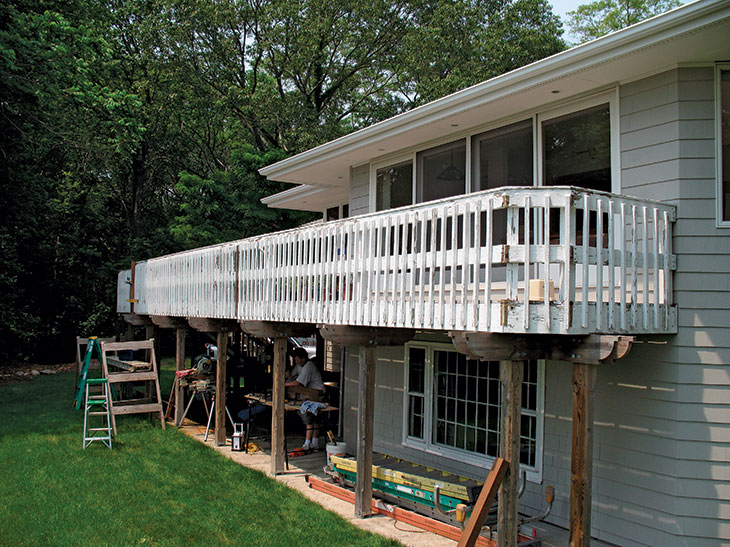
The original railing posts were mounted inside the deck frame and weren’t centered on the structural posts beneath. To improve the appearance from the yard, my crew and I mounted the new posts outside the frame and positioned them above the structural columns, roughly 8 ft. apart. Intermediate cable spacers were needed, so we installed 2x4s on edge between the structural posts. To dress up the painted rim joist, we added layered bands of ipé between the posts and cable spacers. Because the homeowners have young children, we kept the old railing system in place for as long as possible.
The detail that had the greatest visual impact and took the most planning, however, was the cable rail system. Thankfully, these systems have come a long way since I started in this business.
Ideal system for retrofits
Twenty years ago, I cobbled together a cable-rail system from sail boat rigging hardware. It was functional, had an airy feel, and opened the deck to the backyard; however, installing the shackles, cleats, and turnbuckles was clunky, to say the least. Today, there are several slick cable-hardware systems either adapted for or specifically designed for deck railings. Some cable systems are integrated with structural metal post-and-rail assemblies; others can be used with site-built wood posts and railings. In most cases, I’ve found that the material in cable railings costs less than nice wood or manufactured deck railings. Once you learn the basics, the labor to install cable systems is actually less than that for other types of guardrails.
I prefer the versatility of hybrid cable-rail systems — that is, systems that can be used with wood posts and top rails. These systems give you the freedom to design a guardrail suitable to each project, including deck remodels like this one, and to design custom details. These systems rely on sturdy 4x posts and a top rail that can resist the inward tension of the cables. On this project, I used the Rail Easy system from Atlantis Rail (www.atlantisrail.com). I usually include a subrail in my designs for extra strength. Here, the subrail is a 2×4 installed on edge, but you also can use 1x or 2x stock flat between posts. Sometimes it looks nice to add a bottom rail between structural posts and to position cable spacers between the top rail and bottom rail (more on cable spacers in a bit).
For more photos, drawings, and details, click the View PDF button below:
Fine Homebuilding Recommended Products
Fine Homebuilding receives a commission for items purchased through links on this site, including Amazon Associates and other affiliate advertising programs.

4-Gallon Piston Backpack Sprayer

Flashing and Joist Tape

Jigsaw


